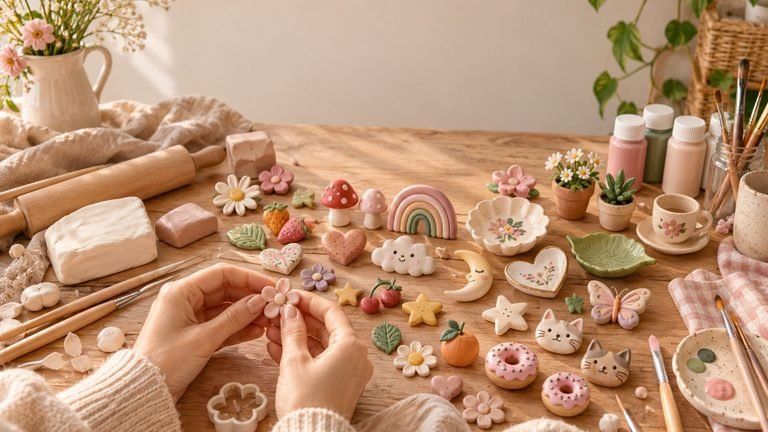
DIY Clay Gnome
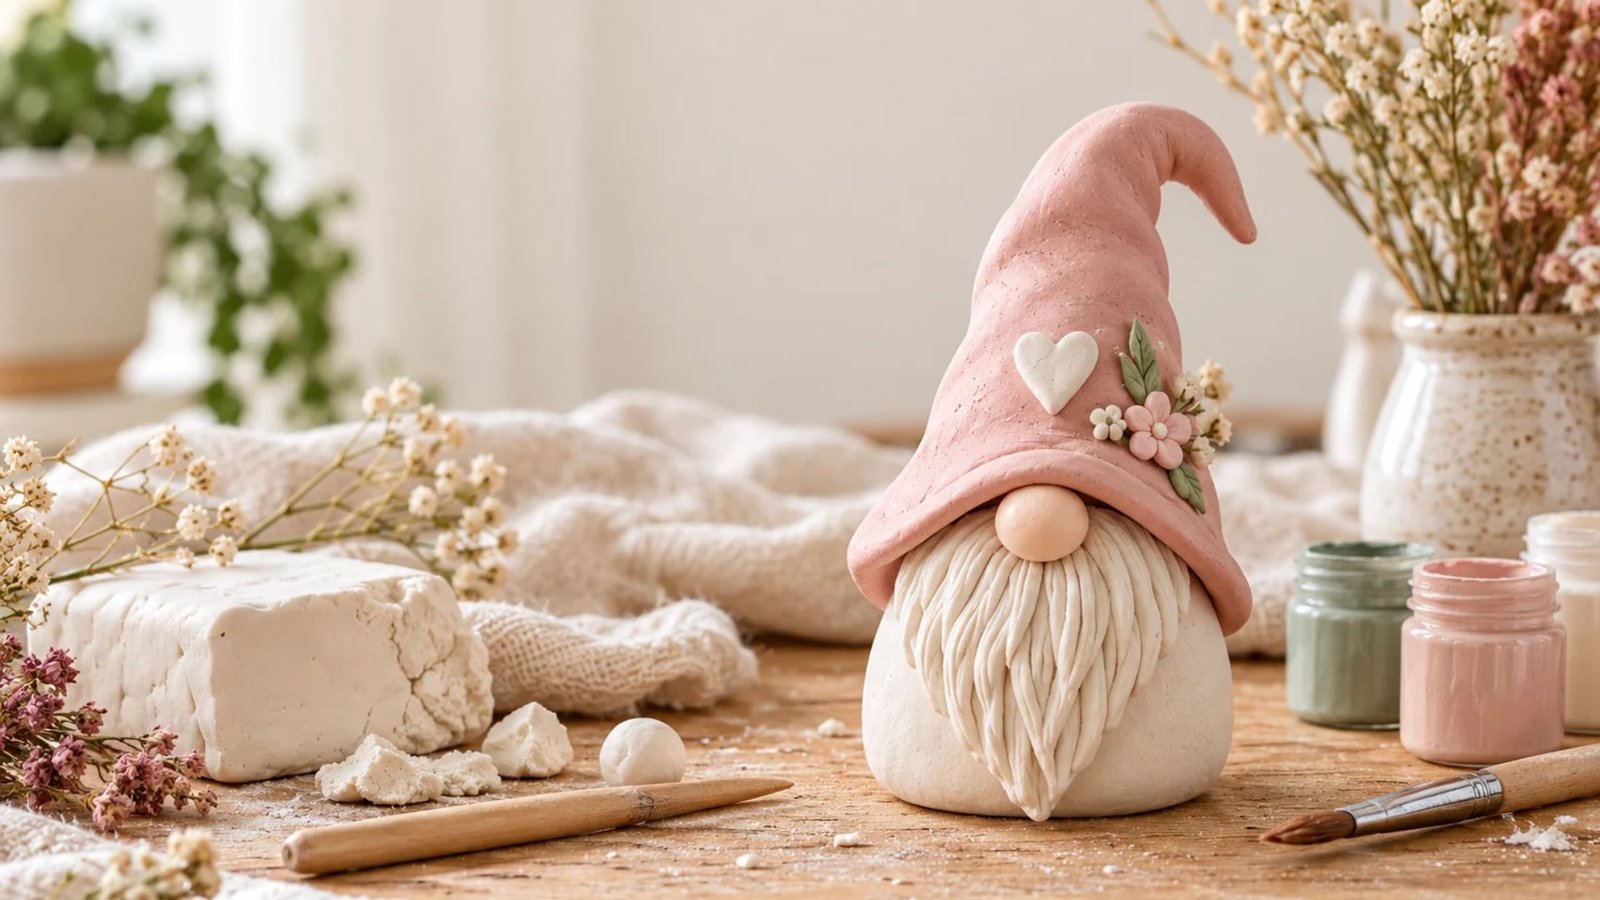
Have you ever started a craft project simply because you wanted to make something cute for your home? That is exactly how I feel about little handmade gnomes! I love how their oversized hats, tiny noses, and charming beards can make even the simplest shelf feel a little more special.
Making an air-dry clay gnome is such a lovely way to spend a relaxing afternoon, especially when you want something creative without complicated tools or expensive supplies.
In this tutorial, I’ll walk you through every step so you can create your own adorable gnome with confidence.
Why You’ll Love This DIY Air-Dry Clay Gnome
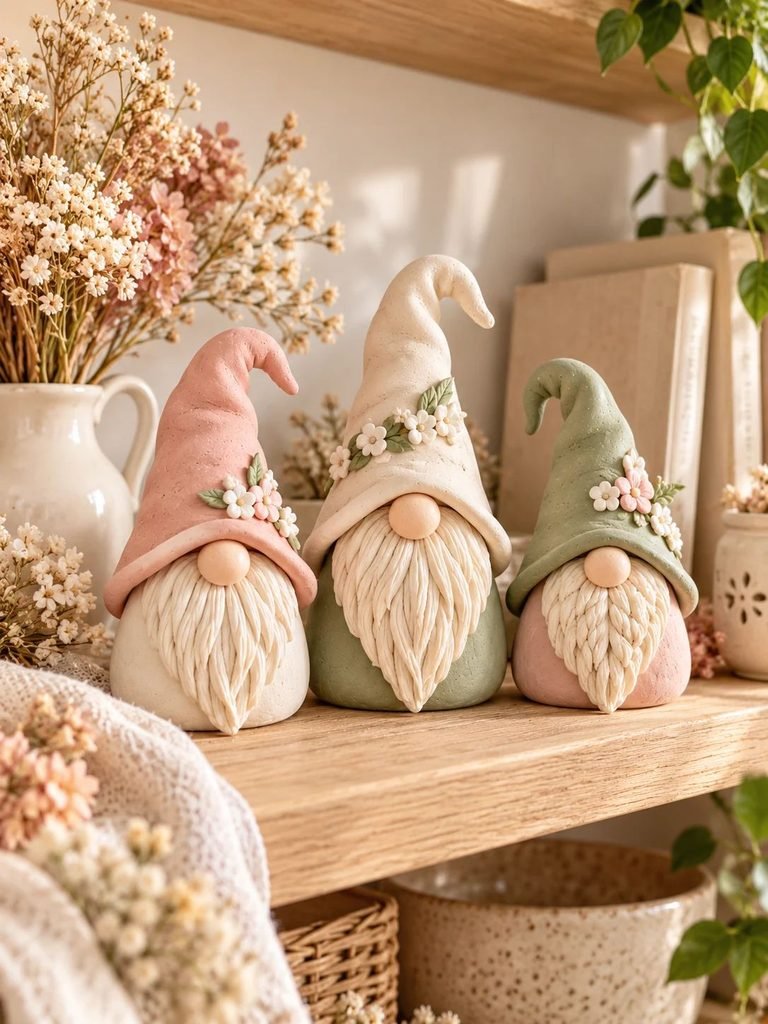
If you enjoy handmade home decorations, this little clay gnome is such a sweet project to add to your crafting list. It combines simple shapes with a few decorative details, making it suitable for beginners who are still learning how to work with air-dry clay.
Unlike crafts that require a kiln or specialized equipment, this project uses clay that hardens naturally as it dries. Once your gnome is completely dry, you can paint it in your favorite colors and display it as part of your seasonal or everyday home decor.
Here are a few reasons to try it:
- Beginner-friendly: You only need a few basic sculpting techniques.
- Customizable: Choose any colors, hat shapes, and decorative details you love.
- Budget-friendly: A small amount of clay can make one or several miniature gnomes.
- Perfect for seasonal decorating: Create Valentine’s Day, spring, autumn, or Christmas versions.
- A thoughtful handmade gift: A finished gnome makes a charming gift for friends, family, teachers, or craft-loving neighbors.
- A relaxing creative activity: Rolling, shaping, and painting clay can be a lovely way to unwind.
The best part is that your gnome does not have to look perfect. Slightly crooked hats, rounded noses, and handmade details are what give these little characters their personality.
What Is an Air-Dry Clay Gnome?
An air-dry clay gnome is a small decorative figure sculpted from clay that hardens naturally without oven baking or kiln firing. Most designs feature a rounded or cone-shaped body, a large hat, and a little nose peeking out from underneath the brim. You can add a sculpted beard, hair, tiny feet, or other decorative details to make the character your own.
For this tutorial, we’ll make a classic whimsical gnome with a rounded body, a floppy pointed hat, a small nose, and a textured beard. You can leave the clay in its natural color for a minimalist look or paint it with warm neutrals, soft blush pink, sage green, red, cream, or any shades that complement your home.
If you are following a Valentine-inspired theme, try a blush-pink hat with a tiny heart. For a cozy cottagecore look, cream, beige, muted green, and terracotta are beautiful choices.
Materials and Supplies You’ll Need
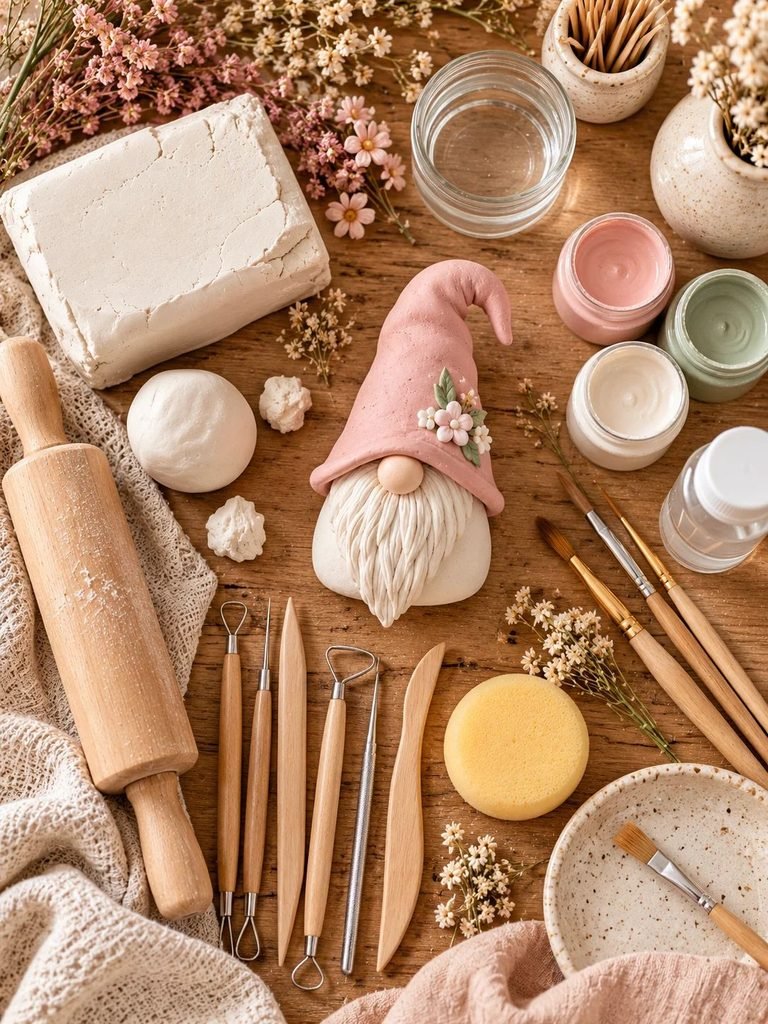
Before getting started, gather everything you need. Having your supplies ready makes sculpting much easier because air-dry clay can begin to lose moisture when it is left exposed for too long.
Essential materials
- Air-dry clay: White or natural-colored clay works beautifully.
- A small bowl of water: Use tiny amounts to smooth the clay and help join pieces.
- Clay sculpting tools: Helpful for shaping the hat, nose, beard, and other details.
- A toothpick or wooden skewer: Useful for adding texture and creating small marks.
- A small rolling pin: A craft roller or clean glass bottle works well.
- A smooth work surface: Use a washable mat, craft board, or another suitable surface.
- Acrylic craft paint: Choose your preferred colors for the hat, body, nose, and beard.
- Small paintbrushes: Use a medium brush for larger areas and a fine brush for details.
- A protective finish: An appropriate clear sealer can help protect the finished decoration from dust and light handling.
Optional supplies
- A garlic press or clay extruder for creating thin beard strands.
- Fine-grit sandpaper for gently smoothing dry imperfections.
- A soft cloth for wiping away dust.
- A small piece of scrap clay for testing texture and paint.
- A little extra clay for hearts, buttons, feet, or other embellishments.
You do not need to purchase a complete sculpting kit if you are just starting. Household items can work well, provided they are clean and safe for crafting. Keep tools used for clay separate from items used to prepare food.
Helpful tip: Check the instructions on your clay packaging before beginning. Different brands have different drying times and handling recommendations.
How to Make a DIY Air-Dry Clay Gnome
This tutorial breaks the process into manageable steps. Take your time with each stage, particularly when attaching small pieces and smoothing the seams.
Step 1: Prepare and Knead the Clay
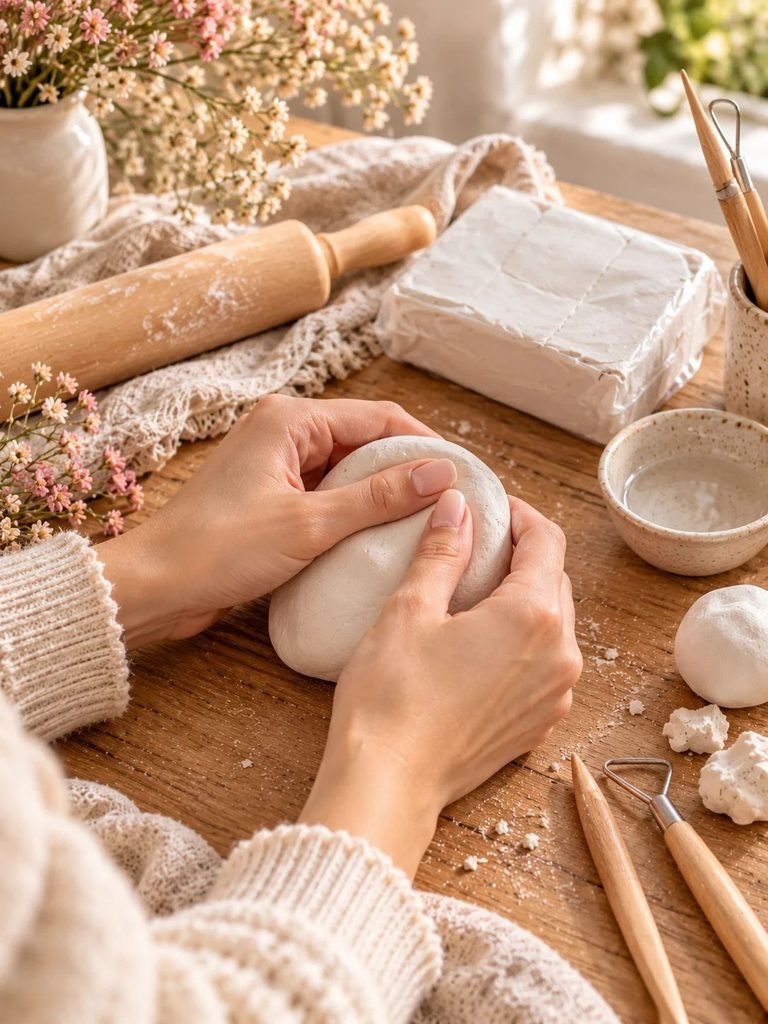
Start by cutting or pulling off enough clay to make the body, hat, nose, and beard. Keep the remaining clay wrapped in its original packaging or sealed in an airtight bag or container.
Gently knead your clay between your fingers until it feels smooth and pliable. This helps make the material easier to shape and reduces the appearance of small lumps.
If the clay feels slightly stiff, follow the manufacturer’s instructions for rehydrating it. For water-based clay that tolerates moisture, a few drops of water may help. Avoid adding too much because overly wet clay can become sticky and difficult to shape.
Place your prepared clay on your work surface and keep a small amount of spare clay nearby for adjustments.
Step 2: Shape the Gnome’s Body
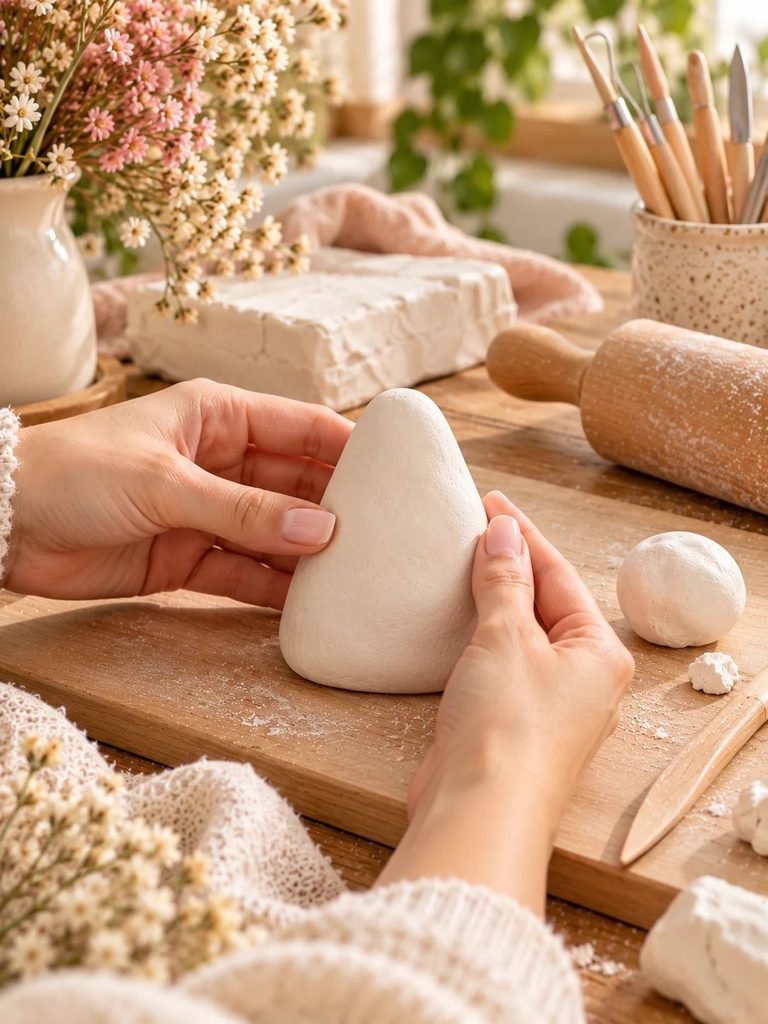
Take a portion of clay and roll it between your palms to form a smooth ball.
Next, gently shape the ball into a rounded cone or a plump pear shape. The bottom should be wider than the top, creating a stable base for your gnome.
Use your fingers to smooth the surface. If you want your gnome to stand upright, press the bottom lightly against your work surface to create a flat base.
Avoid making the body excessively thick or heavy. Thick clay takes longer to dry and may develop cracks if moisture leaves it unevenly.
For a small tabletop gnome, a body approximately 5–7 cm tall is a convenient starting point, although you can make yours larger or smaller.
Check that the figure stands steadily before moving on. Adjust the bottom while the clay is still soft if necessary.
Step 3: Create the Gnome’s Hat
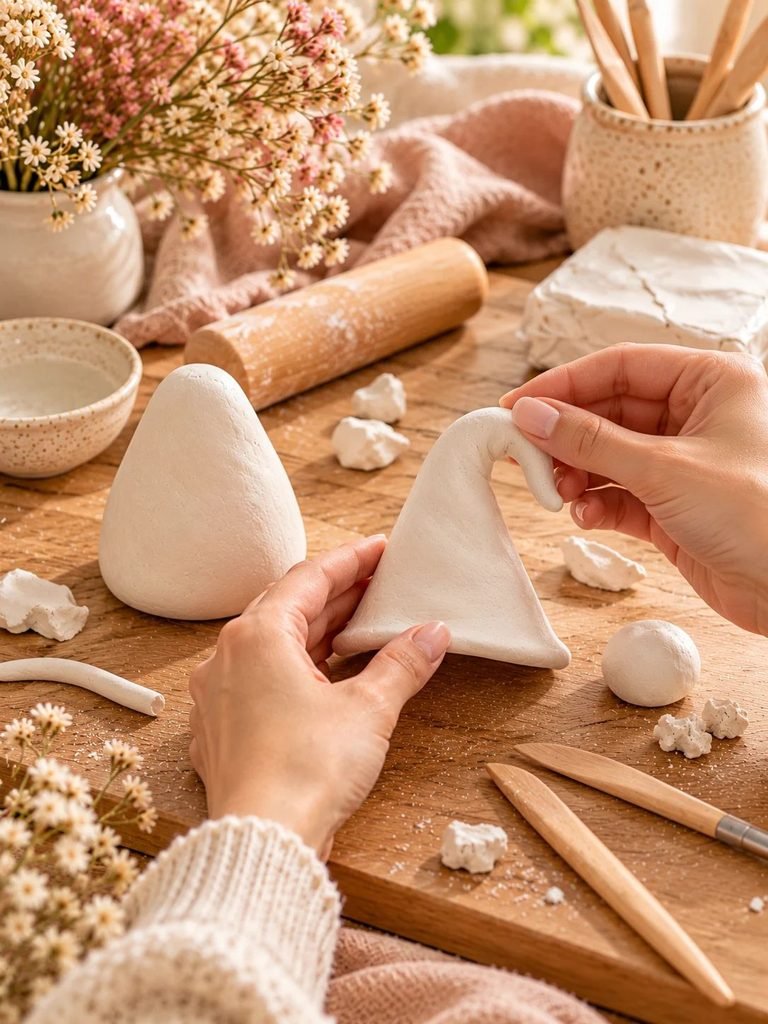
The hat is one of the most recognizable parts of a gnome, so this is a lovely place to add personality.
Take another piece of clay and roll it into a short cone. Make the bottom wider than the top, then gently pinch the upper end into a point.
Use your fingers to bend the tip slightly to one side. A curved, floppy hat gives the gnome a playful appearance.
Flatten the bottom of the hat just enough for it to sit securely over the upper part of the body. Position it so the brim comes down toward the area where you plan to place the nose.
If you prefer a softer look, make the hat rounded rather than sharply pointed. You can also add a tiny clay ball at the tip for a pom-pom.
Important: Do not attach the hat permanently just yet if you still need to add the nose or beard underneath. Test the fit first so you can arrange the features without damaging them.
Step 4: Make the Gnome’s Nose
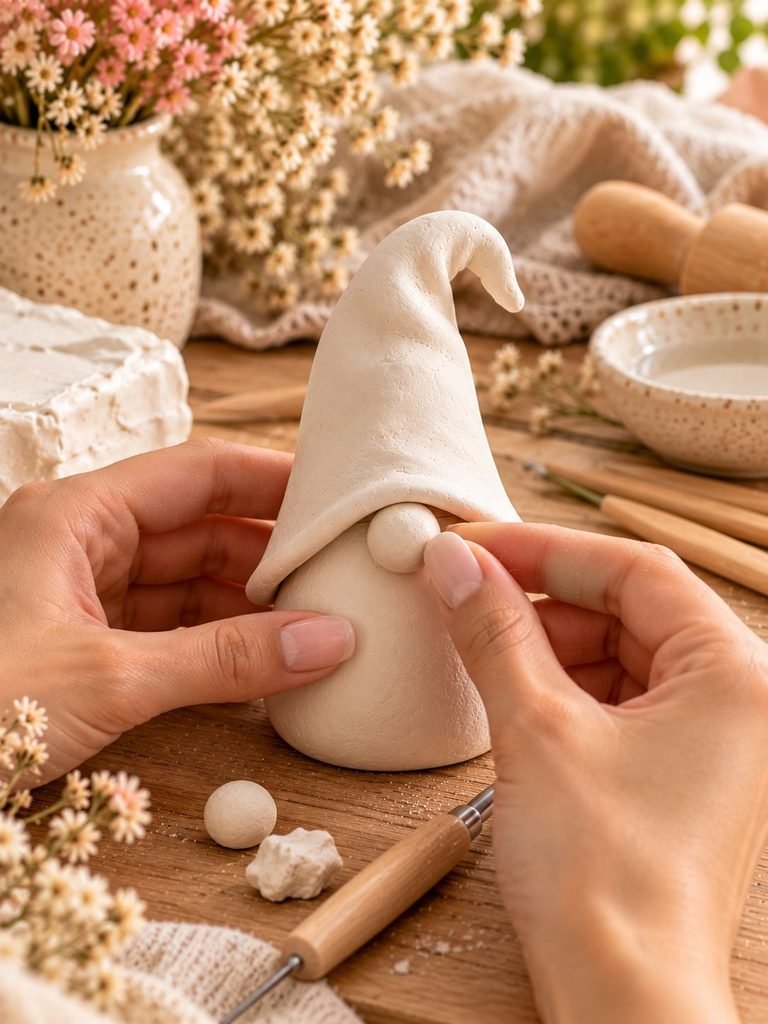
Roll a small piece of clay between your fingertips to create a smooth ball.
For a miniature gnome, the nose can be about the size of a pea. Adjust the size according to the proportions of your figure.
Position the nose near the upper front of the body, just beneath the hat brim. Press it gently into place.
To create a stronger attachment, lightly score the contact surfaces with a suitable sculpting tool. Add a tiny amount of clay slip, made from compatible clay mixed with water, if your clay type allows it. Press the pieces together gently and smooth the surrounding edges.
For additional support, you can use a small toothpick fragment embedded securely inside the joint if appropriate for your clay and figure size. Avoid leaving sharp or exposed ends, and do not rely on a loose piece of wood alone to hold the nose in place.
Take a moment to check the nose from the front and sides. A slightly protruding nose creates that classic gnome appearance.
Step 5: Add the Beard
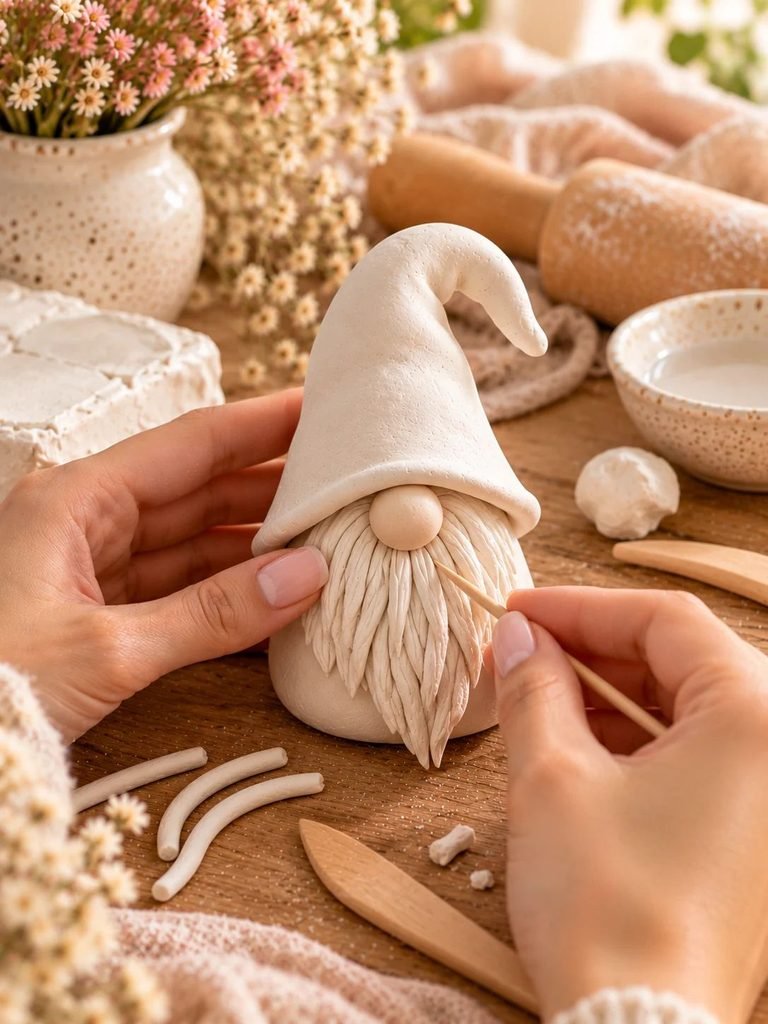
A beard is optional, but it gives a traditional gnome plenty of charm.
There are two easy ways to create one.
Option A: A simple sculpted beard
Take a small amount of clay and flatten it into a teardrop or triangular shape. Position the wider end beneath the nose and let the lower portion taper toward the bottom of the body.
Use a toothpick or sculpting tool to draw short, gently curved lines from the top of the beard toward the bottom. Vary the direction and length of the marks to create a natural, textured appearance.
Option B: A textured beard made from thin strands
If you have a clean clay extruder or garlic press dedicated to crafting, push a small amount of soft clay through it to form thin strands.
Arrange the strands beneath the nose, allowing them to overlap slightly. Add a few more layers until the beard looks full.
Use a tiny amount of clay slip or another compatible joining method to help the strands adhere. Press them gently into place without flattening their texture.
If you are making a lady gnome instead, you can substitute long sculpted hair, a braid, or a simple wavy hairstyle.
Step 6: Attach the Hat and Smooth the Seams
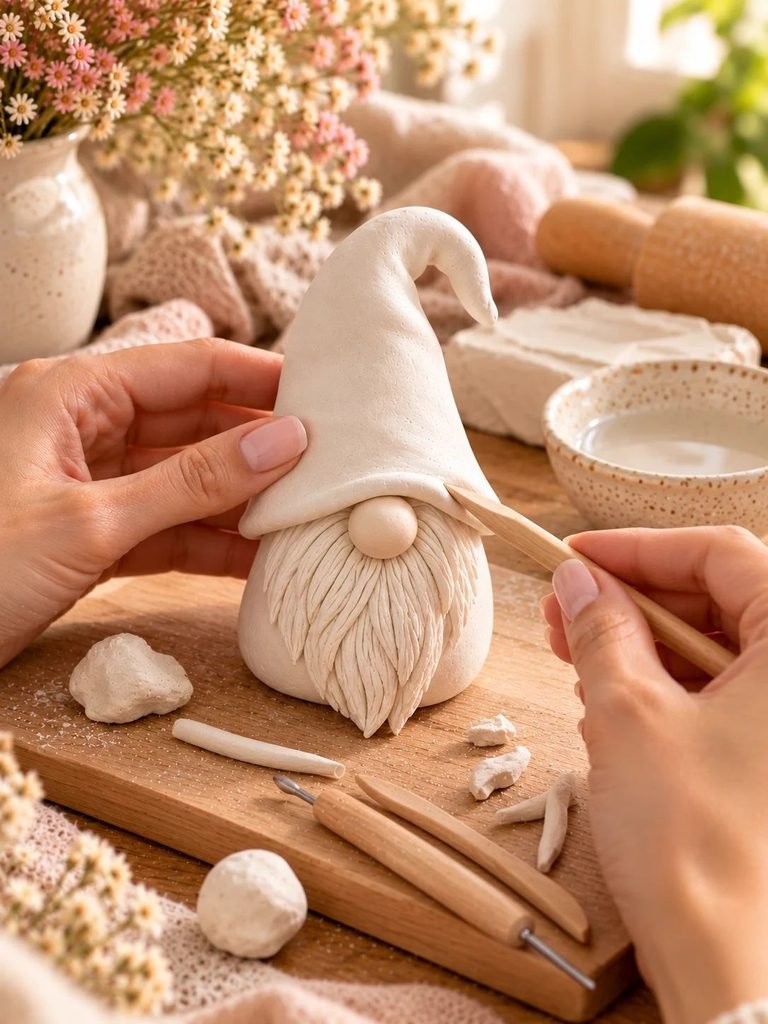
Once the facial features are in position, carefully place the hat over the upper body.
The brim should sit just above or slightly over the nose, depending on the look you want. Press the hat gently into place and check that it is balanced.
Use a damp fingertip or a suitable sculpting tool to blend the seam between the hat and body. Work slowly around the edges, being careful not to flatten the hat’s shape or cover the nose.
If the pieces are too dry to bond properly, do not simply press harder. Prepare the contact surfaces and use a compatible joining method recommended for your clay.
Look at your gnome from the front, back, and sides. Smooth any obvious fingerprints, repair small cracks while the clay is workable, and make sure the hat and nose feel secure.
Step 7: Add the Finishing Details
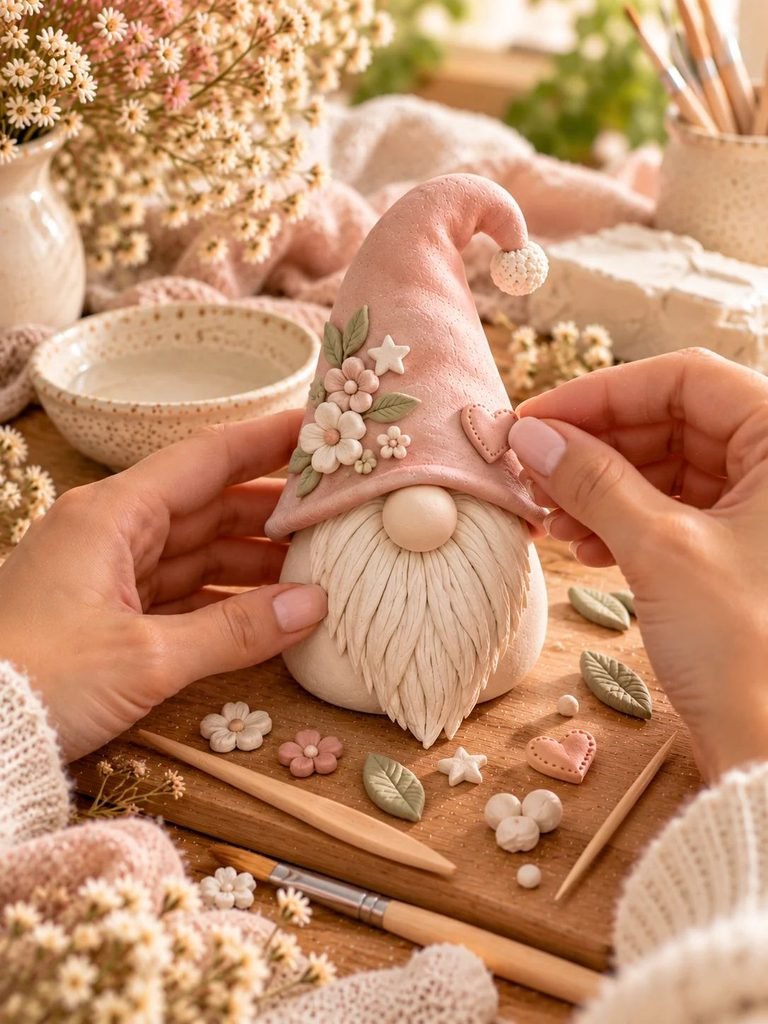
This is where you can make your gnome feel truly special.
Here are some simple details to try:
- Add a tiny heart to the front of the hat.
- Make a small pom-pom for the tip.
- Create miniature feet at the base.
- Add a rolled clay band around the hat.
- Use a toothpick to create knitted-looking lines or decorative dots.
- Make a small flower, star, or leaf for a seasonal theme.
Keep embellishments proportionate to the size of your figure. Large or heavy decorations may make a small gnome unstable or cause thin attachments to break.
If this is your first attempt, I recommend keeping the design simple. A charming hat, rounded nose, and textured beard are enough to create an adorable result.
How to Dry Air-Dry Clay Gnomes Properly
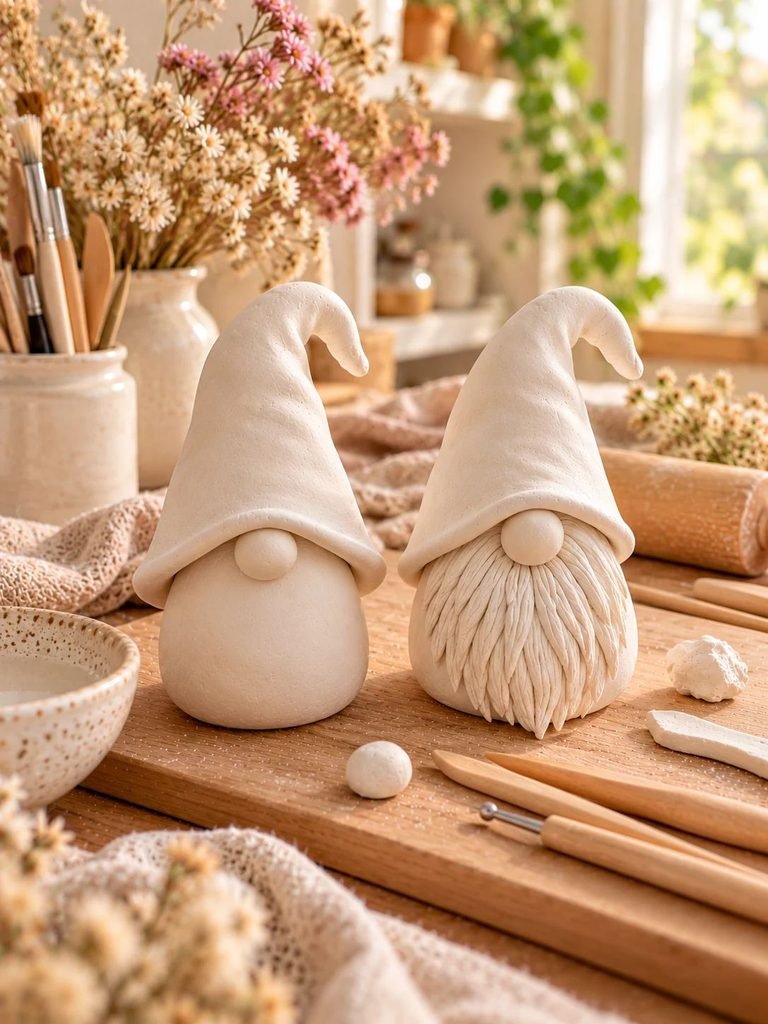
Drying is one of the most important parts of this project. Even a beautifully sculpted gnome can crack or become damaged if it is painted before the clay is fully dry.
Place your finished gnome on a clean, flat surface in a well-ventilated area away from direct sunlight, heaters, and excessive humidity.
Allow it to dry according to the clay manufacturer’s instructions. Small, thin pieces may dry within a day or two, while thicker figures can take several days or longer.
During drying:
- Keep the gnome away from areas where it may be knocked over.
- Avoid using a hair dryer or placing it near a heater to speed things up.
- If the base or underside needs additional airflow, carefully reposition the piece when it is firm enough to handle.
- Check the figure for damp areas, especially underneath and around thick attachments.
- Wait until the entire piece is completely dry before painting.
Some clays change color as they dry, but color alone is not a reliable test. Follow the packaging instructions and allow additional time if the figure is thick or the room is humid.
My best advice: Be patient. Allowing the clay to dry naturally is much better than rushing the process and risking cracks.
How to Paint Your Clay Gnome
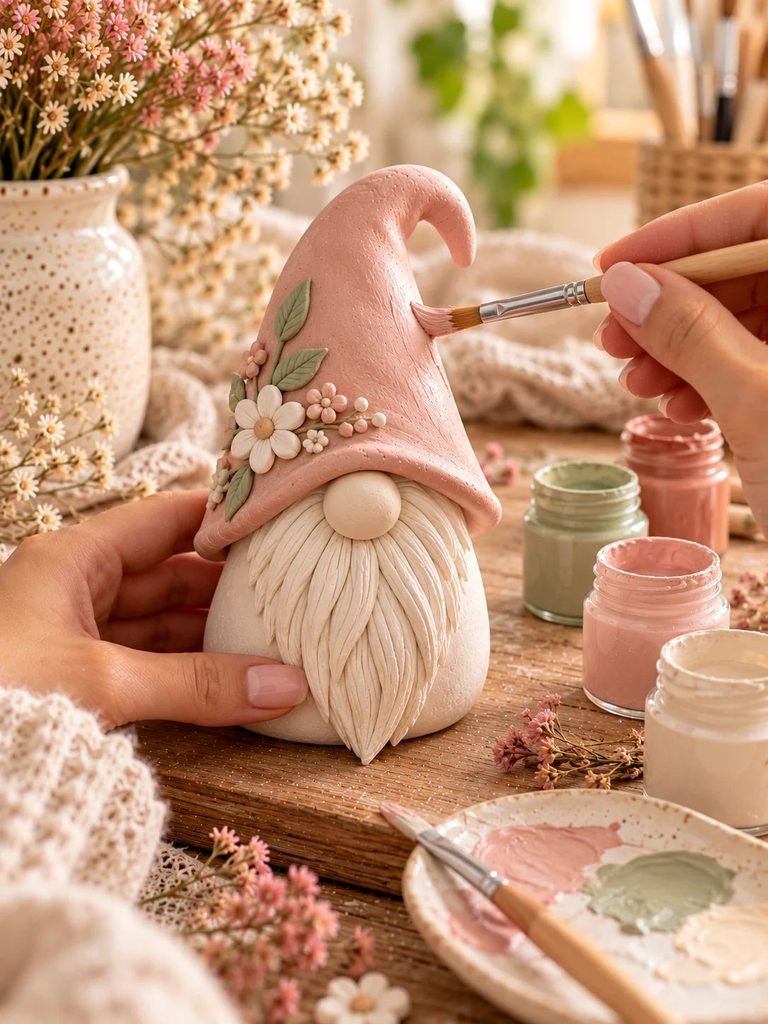
Once your gnome is fully dry, it is time to add color.
Acrylic craft paint is a convenient choice for decorative air-dry clay figures. Before painting the entire piece, test your paint on a spare clay scrap if you are unsure how the colors will look.
Step 1: Choose a Color Palette
For a cozy, feminine look, consider these combinations:
- Soft cottagecore: Cream hat, beige body, white beard, and a blush nose.
- Valentine’s Day: Blush-pink hat, ivory beard, and a tiny red or pink heart.
- Spring garden: Sage-green hat, cream body, and pale-yellow details.
- Autumn: Terracotta hat, warm brown accents, and an ivory beard.
- Christmas: Deep red or forest-green hat, white beard, and tiny gold details.
Step 2: Paint the Larger Areas
Use a small, soft brush to paint the hat and body. Apply thin, even coats instead of one thick layer.
Allow each coat to dry according to the paint manufacturer’s instructions before applying another. Thin layers generally produce a smoother finish and help prevent paint from collecting in the textured areas.
Step 3: Paint the Nose and Beard
Use a fine brush for the nose and other small details.
If you have sculpted a textured beard, lightly brush paint over the raised areas so the grooves remain visible. You can use white, ivory, or a soft gray for a traditional look.
Allow all the paint to dry completely before handling the gnome extensively.
Should You Seal an Air-Dry Clay Gnome?
A protective finish is optional, but it can be useful if you plan to handle or display your gnome regularly.
Choose a clear sealer that is compatible with both your clay and acrylic paint. Depending on your preferred look, you can use a matte, satin, or gloss finish.
A matte sealer creates a soft, natural appearance that works beautifully with cottagecore decor. A satin finish adds a gentle sheen, while gloss creates a shinier surface.
Before sealing, make sure the clay and paint are completely dry. Apply the product in thin coats and follow the manufacturer’s instructions for ventilation, drying time, and safe use.
Keep in mind that sealing does not automatically make air-dry clay waterproof. These figures are best used as indoor decorations unless the materials are specifically rated for the intended outdoor conditions.
Common Air-Dry Clay Gnome Problems and How to Fix Them
Even experienced crafters occasionally run into small problems. The good news is that many can be prevented with a few simple adjustments.
Problem 1: The Clay Is Cracking While I Sculpt
Why it happens: The clay may be losing moisture, or you may be stretching or shaping it too aggressively.
How to fix it: Keep unused clay covered and work with manageable pieces. If your clay is compatible with water, use a small amount of moisture to soften it according to the manufacturer’s instructions. Smooth minor cracks while the clay is still workable.
Problem 2: The Nose Keeps Falling Off
Why it happens: The attachment surfaces may be too dry, smooth, or poorly joined.
How to fix it: Gently score the contact surfaces, use a suitable clay slip if recommended, and press the pieces together carefully. Support the nose while the joint becomes firm.
Problem 3: The Hat Looks Uneven
Why it happens: The hat may be too heavy, or the base may not fit the body properly.
How to fix it: Shape the hat on its own first, then test the fit before attaching it. Make sure the base is broad enough to sit securely and gently curve the tip rather than forcing it into position.
Problem 4: My Gnome Cracks While Drying
Why it happens: Thick areas, uneven moisture, or rapid drying can contribute to cracking.
How to fix it: Keep the figure reasonably compact, avoid sudden heat, and let it dry gradually. Repair small cracks using a compatible clay method while possible. If a major crack develops after the piece has hardened, follow the clay manufacturer’s repair guidance rather than assuming ordinary glue will restore its original strength.
Problem 5: The Paint Looks Patchy
Why it happens: The clay may not be fully dry, or the paint has been applied too thickly or unevenly.
How to fix it: Let the piece dry completely, then apply thin coats of acrylic paint. Allow each layer to dry before adding another.
Problem 6: My Gnome Will Not Stand Upright
Why it happens: The bottom may be rounded, the hat may be too heavy, or the figure may be unbalanced.
How to fix it: Flatten the base gently before the clay dries and keep the heavier features close to the center. If the figure has already hardened, display it against a stable decorative object or use an appropriate display stand rather than forcing the base flat.
Creative Ways to Decorate Your DIY Clay Gnome
Once you have made your first gnome, you may find yourself wanting to create a whole little collection. Here are a few ideas to inspire your next project.
1. Valentine’s Day Gnome
Paint the hat blush pink or red and add a tiny heart to the front. A white beard and soft pink nose complete the look beautifully. Display it on a shelf with paper hearts or dried flowers.
2. Spring Garden Gnome
Use sage green, cream, and pale yellow. Add a small sculpted flower to the hat or create a miniature mushroom beside the figure for a whimsical garden-inspired display.
3. Rustic Cottagecore Gnome
Choose muted beige, ivory, terracotta, and warm brown. Keep the paint finish matte and add subtle texture to the hat for a handmade, earthy appearance.
4. Christmas Gnome
A red or forest-green hat paired with a white beard creates a classic festive look. You can add a tiny star, snowflake, or pom-pom to make the design feel extra special.
5. A Matching Gnome Family
Create several gnomes in different heights, changing the hat colors and beard styles while keeping the same general design. A group of three looks lovely on a mantel, bookshelf, or console table.
6. Personalized Gift Gnome
Choose colors that suit the recipient’s home or favorite season. You can add a small heart or flower to make the figure feel personal. If you want to include a name or date, write it on a separate decorative tag rather than crowding the clay surface.
How to Display and Care for Your Finished Gnome
Your finished gnome deserves a spot where its little details can be appreciated.
Here are a few ways to display it:
- Place it on a bookshelf alongside small books and ceramic decorations.
- Add it to a seasonal centerpiece or decorative tray.
- Display it on a desk or craft-room shelf.
- Arrange it beside a small vase of dried flowers.
- Create a miniature scene with other handmade clay ornaments.
Keep your gnome indoors, away from excessive moisture and direct sunlight. Dust it gently with a soft, dry brush or cloth, and avoid soaking it or cleaning it with harsh products.
Remember that air-dry clay is generally more fragile than fired ceramic. Handle small features, such as the nose and hat tip, carefully.
Frequently Asked Questions
Is air-dry clay good for making gnomes?
Yes! Air-dry clay is a convenient material for decorative gnomes because it can be shaped by hand and does not require a kiln. It is especially useful for small indoor figurines, ornaments, and seasonal crafts.
How long does an air-dry clay gnome take to dry?
Drying time depends on the clay brand, thickness of the figure, and the humidity of your room. Small pieces may dry in one or two days, while thicker designs may need several days or longer. Always follow the manufacturer’s guidance and make sure the entire figure is dry before painting.
Can beginners make an air-dry clay gnome?
Absolutely! The basic design uses simple shapes, including a rounded body, cone-shaped hat, and small nose. You can skip complicated details and still create a charming figure.
Do I need special sculpting tools?
No. A toothpick, clean glass bottle, and your fingertips can handle many basic shaping tasks. Dedicated sculpting tools are helpful but not essential.
Can I make an air-dry clay gnome without a beard?
Yes. A simple gnome with a large hat and rounded nose can look adorable without a beard. You can add sculpted hair, painted details, or a smooth body instead.
Can I put my clay gnome outside?
Ordinary air-dry clay is not reliably weatherproof. Rain, humidity, and temperature changes can damage it, even when it has been painted or sealed. Keep your gnome indoors unless you are using a product specifically designed and rated for the intended outdoor conditions.
Can I make air-dry clay gnomes with children?
Yes, with age-appropriate supervision. Younger children can help shape the body and decorate the hat, while an adult handles sharp tools, small parts, and any products that require special safety precautions. Follow the clay and paint labels, and keep materials away from children’s mouths.
What should I do with leftover clay?
Wrap unused clay tightly or store it in an airtight container, following the manufacturer’s instructions. You can use the leftovers for tiny hearts, stars, flowers, miniature mushrooms, or other small decorative details.
Final Thoughts
Making a DIY air-dry clay gnome is such a lovely way to explore your creativity while creating something sweet for your home. With a little clay, a few simple tools, and your favorite paint colors, you can turn basic shapes into a character with plenty of personality.
Remember to take your time, especially when attaching the nose and hat, and allow the clay to dry thoroughly before painting. Your first gnome may have a slightly crooked hat or an imperfect beard, but those little handmade details are part of what makes it special.
Once you have finished your first one, experiment with different colors, seasonal themes, and decorative touches. You might even enjoy making a whole collection to display together or give as thoughtful handmade gifts.
I hope this tutorial inspires you to gather your supplies, enjoy a relaxing afternoon of crafting, and create an adorable little gnome of your own. Happy crafting!