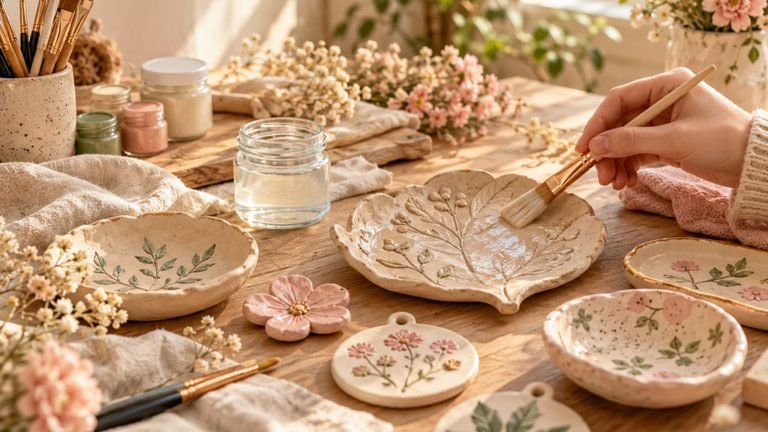
15 Functional Air Dry Clay Projects You’ll Actually Use
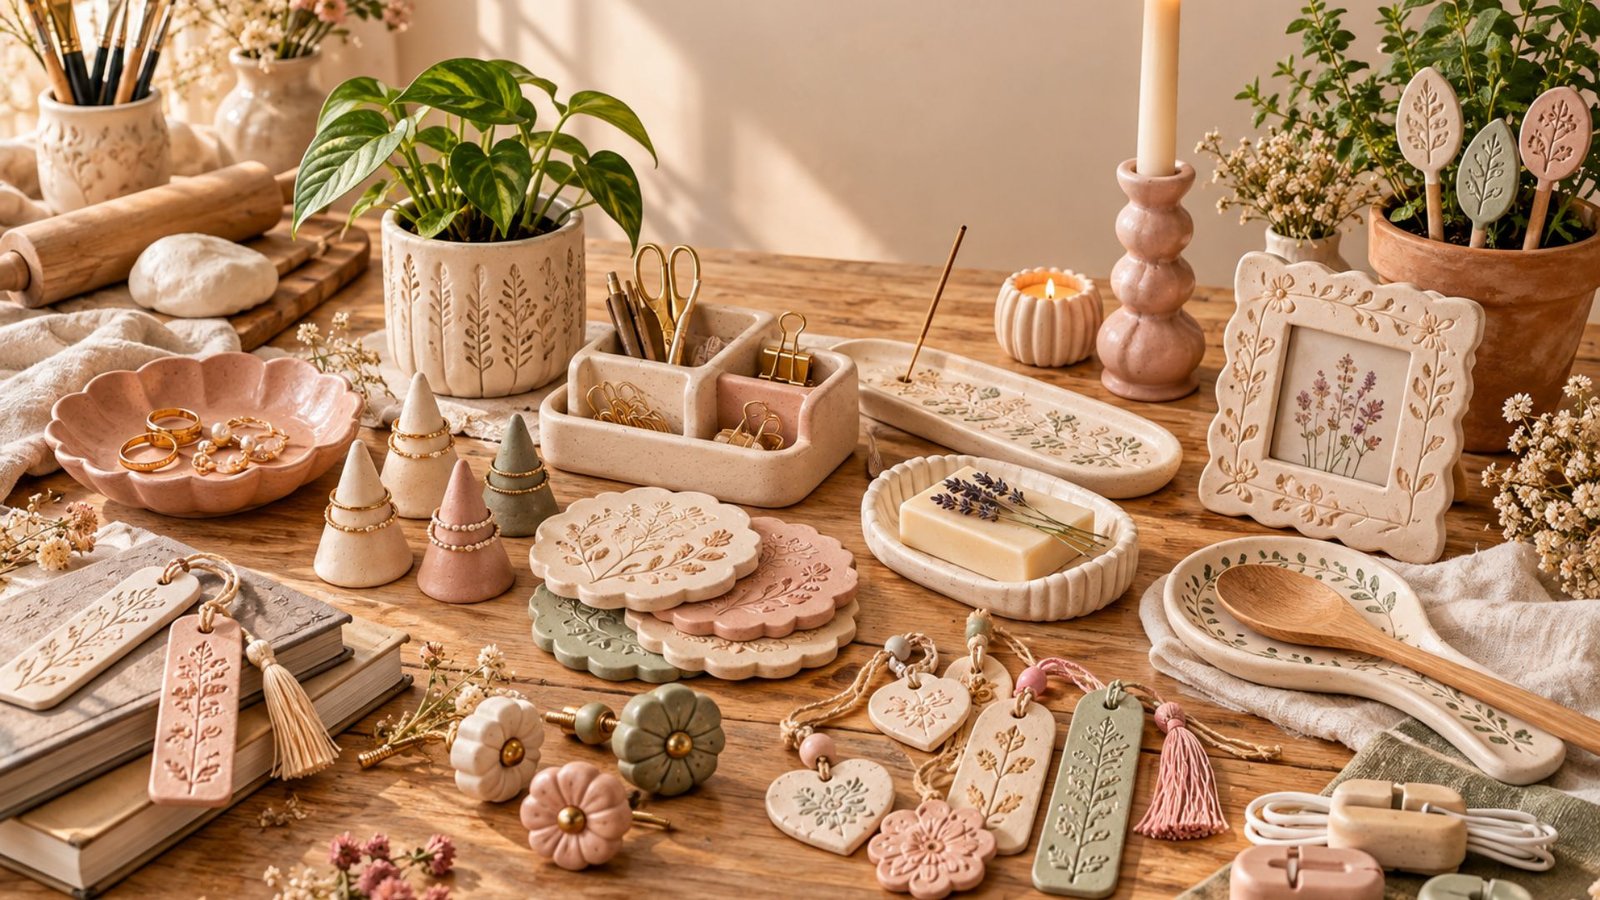
Air-dry clay has become one of my favorite materials for creating beautiful little things that make everyday life feel more special.
I love how a simple lump of clay can turn into a useful jewelry dish, a pretty spoon rest, or a handmade planter that adds charm to a room.
The best part is that you don’t need a pottery wheel or a kiln to get started. With a few basic supplies and a little patience, you can make practical pieces right at home. Today, I’m sharing 15 functional air-dry clay projects that are lovely, beginner-friendly, and genuinely useful.
Why Make Functional Air-Dry Clay Projects?
Decorative crafts are lovely, but I especially enjoy making things that have a purpose. Functional air-dry clay projects allow you to combine creativity with everyday usefulness, whether you want to organize your jewelry, decorate your desk, or create thoughtful handmade gifts.
Air-dry clay is easy to shape, relatively affordable, and suitable for many beginner-friendly crafts. It hardens naturally when exposed to air, so you don’t need a pottery kiln.
Keep in mind that ordinary air-dry clay is generally porous and can soften or deteriorate when exposed to moisture. Most finished pieces are best used for dry storage and decorative purposes unless the clay and finish are specifically rated for their intended use.
Amazon Supplies You’ll Need
Before getting started, gather a few basic materials:
- Air-dry clay
- A rolling pin or smooth bottle
- A craft knife or clay-cutting tool
- A small bowl for shaping
- Sandpaper with a fine grit
- A little water for smoothing the clay
- Acrylic paints
- A suitable clear sealer or varnish
- Parchment paper or a nonstick craft mat
- A ruler and pencil for measuring
You can also use household objects, such as leaves, lace, and textured fabric, to create interesting patterns.
Always follow the clay manufacturer’s instructions for drying, sanding, painting, and sealing. Allow projects to dry completely before applying paint or a finish.
1. Handmade Jewelry Dish
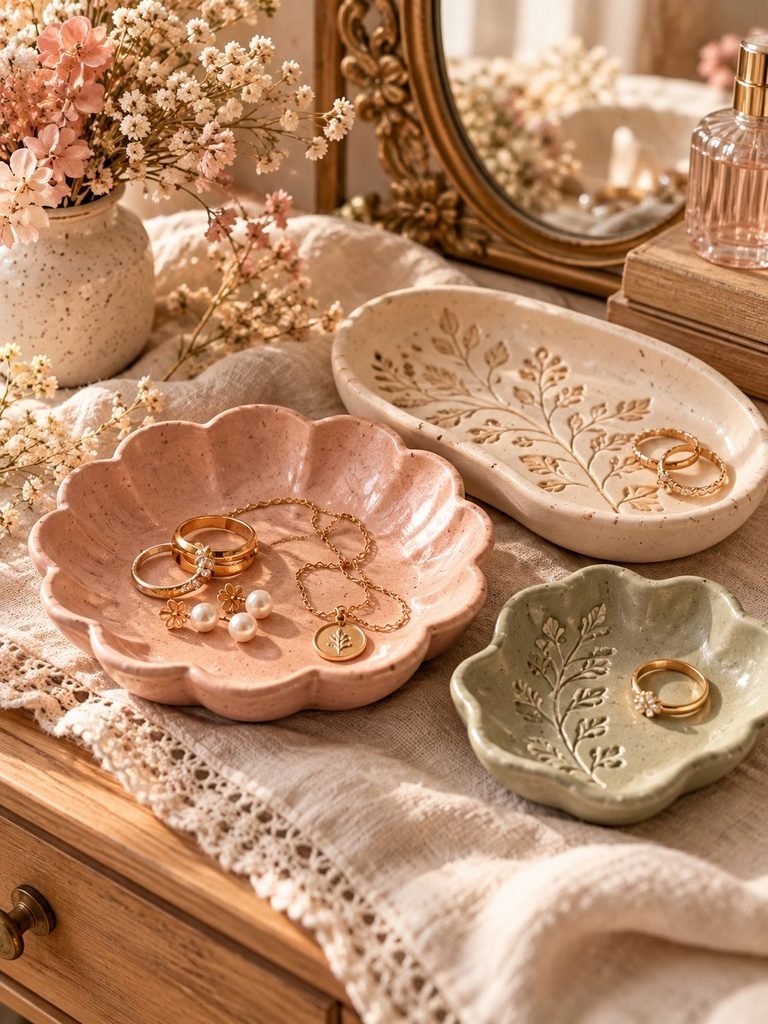
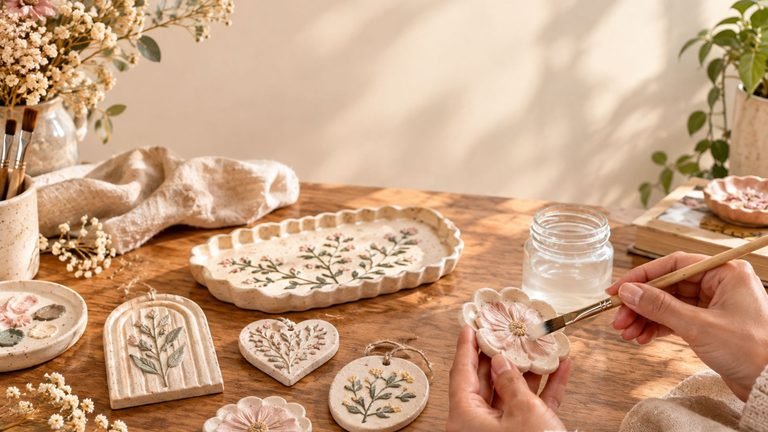
A handmade jewelry dish is one of the easiest and most useful air-dry clay projects to try. It gives you a pretty place to keep your rings, earrings, and necklaces instead of leaving them scattered across your bedside table.
What You’ll Need
- Air-dry clay
- Rolling pin
- Small bowl
- Fine-grit sandpaper
- Acrylic paint and suitable sealer
How to Make It
- Roll your clay into a ball and flatten it into a circle about 5–7 inches wide.
- Gently lift the edges to create a shallow dish.
- Place the clay inside a small bowl to help it hold its shape while drying, following the clay manufacturer’s guidance.
- Smooth any cracks or rough edges with slightly damp fingers.
- Allow the dish to dry completely, turning it carefully if needed.
- Sand the edges lightly, then paint it in your favorite colors.
Cream, blush pink, sage green, and soft beige are lovely choices for a cozy, feminine look.
Helpful tip: Keep the dish shallow and avoid making the base too thin. Use it for dry jewelry only, and never place valuable jewelry on a freshly painted or incompletely cured surface.
2. Decorative Clay Plant Markers

If you enjoy growing herbs, flowers, or small indoor plants, clay plant markers can help you keep everything organized. They are especially useful when several seedlings look almost identical.
What You’ll Need
- Air-dry clay
- Craft knife
- Ruler
- Wooden skewers or sturdy craft sticks
- Acrylic paint or paint pens
How to Make Them
- Roll the clay to an even thickness of approximately ¼ inch.
- Cut out small rectangles, rounded tags, or simple leaf shapes.
- Shape one end into a point if you want to push the marker gently into the soil.
- Make a small hole near the top if you plan to attach each tag to a separate support.
- Let the clay dry fully.
- Paint each marker and write the plant name after the paint has dried.
You can label basil, parsley, mint, rosemary, or your favorite flowers.
Helpful tip: Ordinary air-dry clay is not designed for prolonged contact with wet soil. Keep the clay label above the soil line or attach it to a wooden or plastic stake. This helps your markers last longer.
Read How to Glaze Air Dry Clay: A Beginner’s Guide to a Smooth, Beautiful Finish
3. Clay Spoon Rest
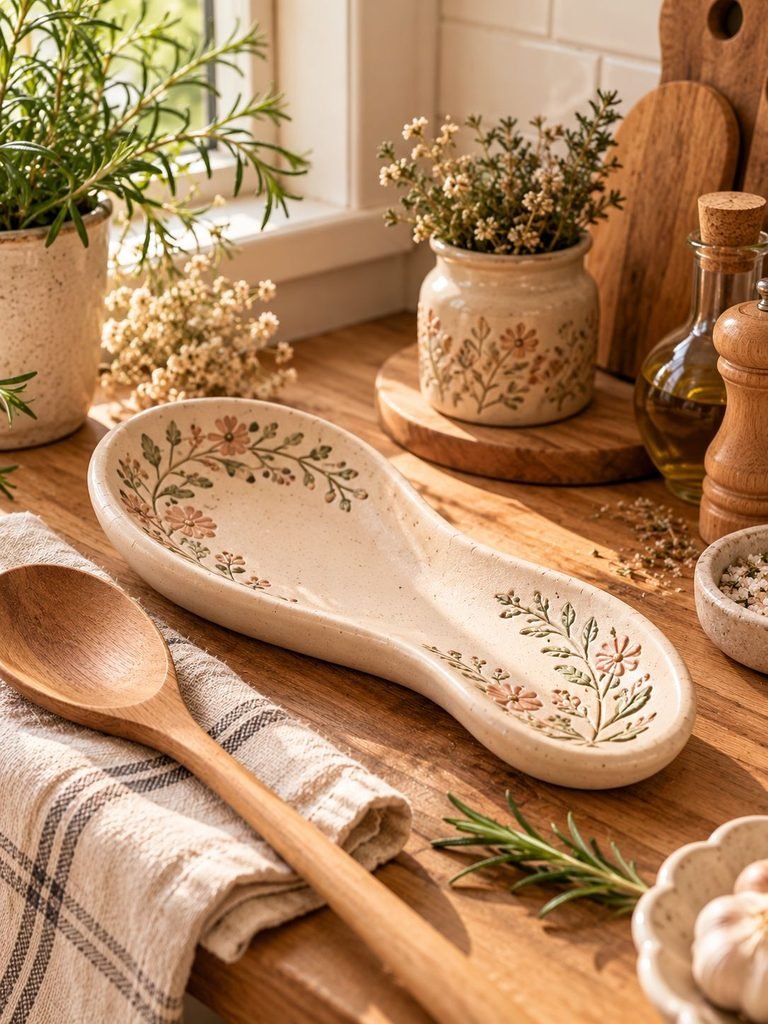
A handmade spoon rest is a charming addition to a kitchen counter. It gives you a designated spot for a cooking spoon while you prepare meals and helps keep your workspace more organized.
What You’ll Need
- Air-dry clay
- Rolling pin
- Craft knife
- A small bowl for shaping
- Acrylic paint and suitable sealer
How to Make It
- Roll the clay into a rounded oval or circle.
- Keep the center slightly thicker than the edges.
- Gently curve the sides upward to create a shallow resting area.
- Smooth the surface and remove any visible cracks.
- Allow the piece to dry completely before sanding and painting.
You can decorate the rim with tiny flowers, simple dots, or a pressed botanical pattern.
Important: Standard air-dry clay is not food-safe, heat-resistant, or waterproof simply because it has been sealed.
Use this project as a decorative countertop accessory or a holder for clean, dry utensils rather than a surface for hot or food-contact utensils. For an actual cooking spoon rest, choose a food-safe, heat-resistant ceramic or another material designed for that purpose.
4. Air-Dry Clay Candle Holder

A small clay candle holder can add a cozy handmade touch to a shelf, mantel, or dining table. You can make it simple and modern or decorate it with floral details for a softer appearance.
What You’ll Need
- Air-dry clay
- Rolling pin
- Craft knife
- A candle-sized object for measuring
- Acrylic paint
How to Make It
- Shape a thick, stable base from the clay.
- Create a shallow central indentation sized for your intended candle or insert.
- Smooth the edges carefully.
- Check that the base sits flat without wobbling.
- Allow the piece to dry thoroughly before decorating.
Paint it in a neutral color or leave it in its natural clay shade for a minimalist look.
Safety tip: Air-dry clay and ordinary craft sealers are not necessarily fire-resistant. Do not use a handmade clay holder for a burning candle unless the entire assembly has been specifically designed and tested for candle use. Instead, use it to display an unlit candle or pair it with a battery-operated LED candle.
5. Clay Ring Cone
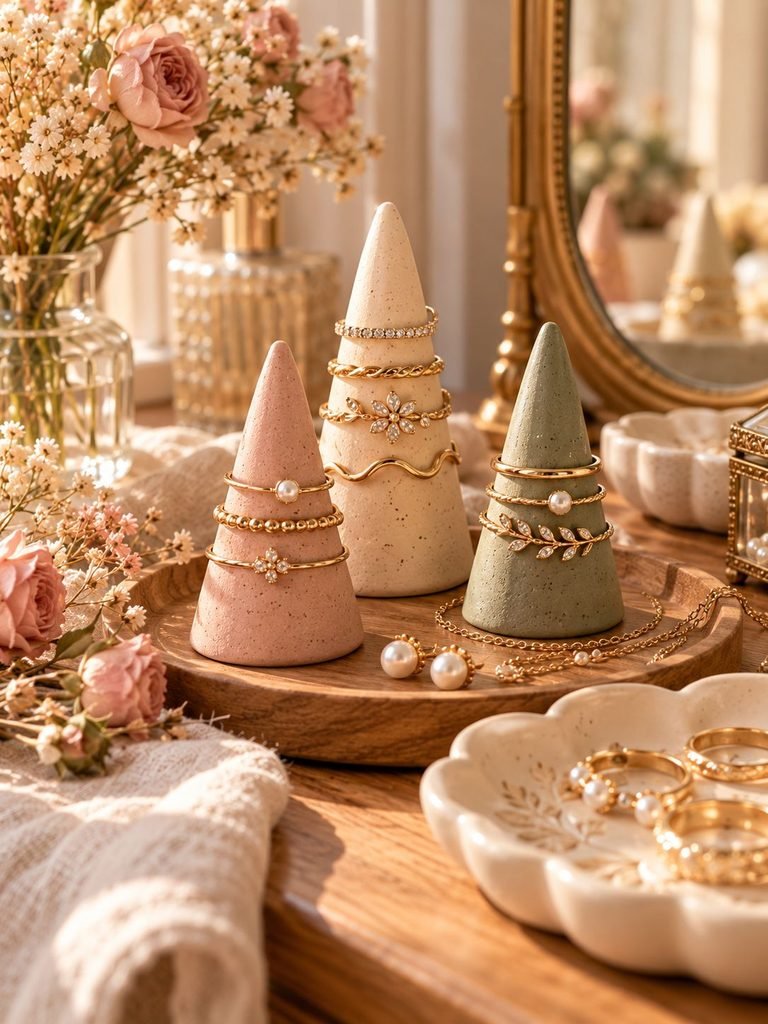
A ring cone is a simple way to organize your favorite rings while adding a little handmade charm to your dressing table.
What You’ll Need
- Air-dry clay
- A smooth work surface
- Fine-grit sandpaper
- Acrylic paint
- Suitable sealer
How to Make It
- Roll a piece of clay into a ball.
- Shape it into a cone with a broad, flat base.
- Gently flatten the bottom so the cone stands upright.
- Smooth the sides with your fingers.
- Let it dry completely before sanding and painting.
You can make several cones in different heights and arrange them together on a tray.
Helpful tip: Keep the top narrow enough for rings to slide on easily, but make the base wide enough to prevent the cone from tipping over.
6. Handmade Clay Coasters
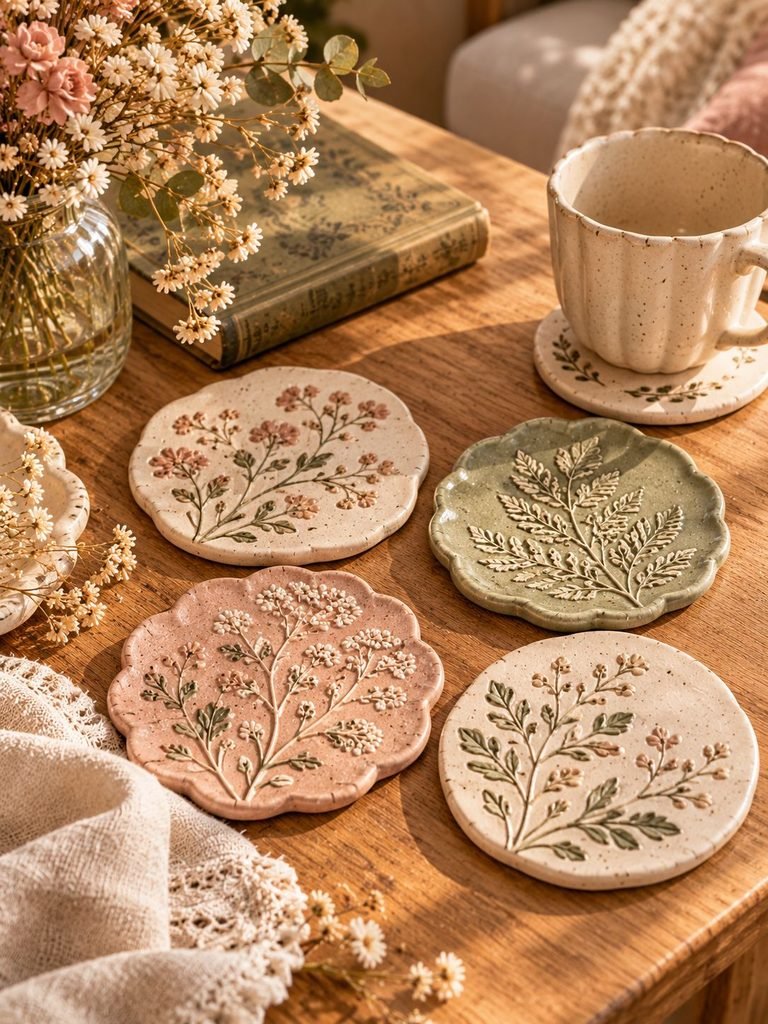
Clay coasters can add a lovely handmade touch to a coffee table, bedside table, or home office. Their simple shapes also make them easy to customize for different decorating styles.
What You’ll Need
- Air-dry clay
- Rolling pin
- Circular cutter or small plate
- Sandpaper
- Acrylic paint
- Felt pads
How to Make Them
- Roll the clay into an even sheet about ¼ inch thick.
- Cut out circles or squares of equal size.
- Add texture with lace, leaves, or a patterned fabric.
- Smooth the edges and allow the coasters to dry completely.
- Sand gently and paint as desired.
- Attach small felt pads to the underside to help protect your furniture.
Helpful tip: Ordinary air-dry clay can absorb condensation and may become damaged by wet cups. Treat these as decorative coasters or use them only with dry-bottomed containers. For everyday drinks, choose a genuinely water-resistant coaster material.
7. Clay Desk Organizer
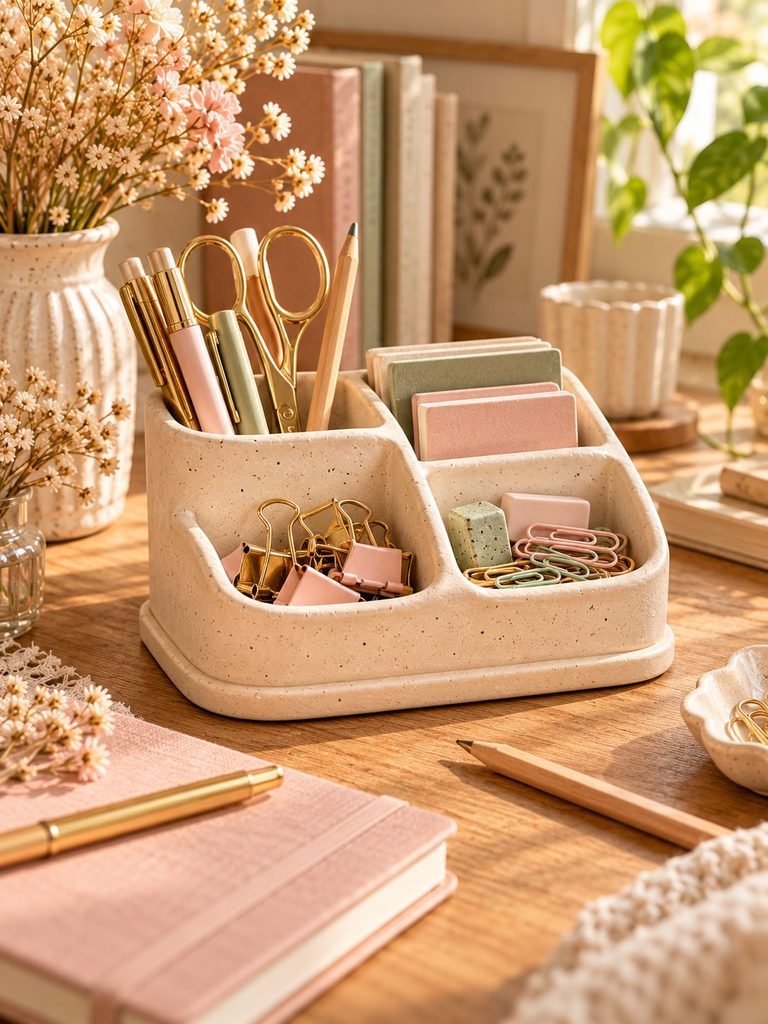
A small clay desk organizer can keep paper clips, erasers, pushpins, and other lightweight supplies in one convenient place. It is a practical project for a home office, study area, or craft room.
What You’ll Need
- Air-dry clay
- Rolling pin
- Craft knife
- A small container to use as a shaping guide
- Acrylic paint
How to Make It
- Roll the clay into a thick sheet.
- Cut a base into a square, circle, or rectangle.
- Create walls from additional clay strips and attach them carefully.
- Smooth the joins with your fingers and a little water.
- Check that the base is flat and the sides are even.
- Leave the organizer to dry fully before painting.
You can make one open compartment or divide the interior into smaller sections.
Helpful tip: Keep the walls relatively low and the base sturdy. Smaller, lightweight organizers are less likely to crack or become unstable.
8. Clay Incense Holder

An incense holder is a small decorative accessory that can help keep an incense stick in a designated place. Its shape can be simple, floral, or inspired by natural stones.
What You’ll Need
- Air-dry clay
- Rolling pin
- A suitable incense-stick measuring guide
- Craft knife
- Acrylic paint
How to Make It
- Flatten a piece of clay into an elongated oval.
- Make the base thick enough to remain stable.
- Form a small indentation or hole using an appropriate incense-stick guide.
- Check that the stick can sit at a secure angle without falling over.
- Smooth the edges and dry the piece completely.
- Paint and decorate only after the clay has fully dried.
Important safety note: Burning incense produces heat, ash, and embers. Ordinary air-dry clay may crack or scorch and is not automatically fire-safe. Use a properly rated, heat-resistant incense holder for burning incense. A handmade clay version is best used decoratively unless it has been specifically tested for safe use.
9. Clay Soap Dish
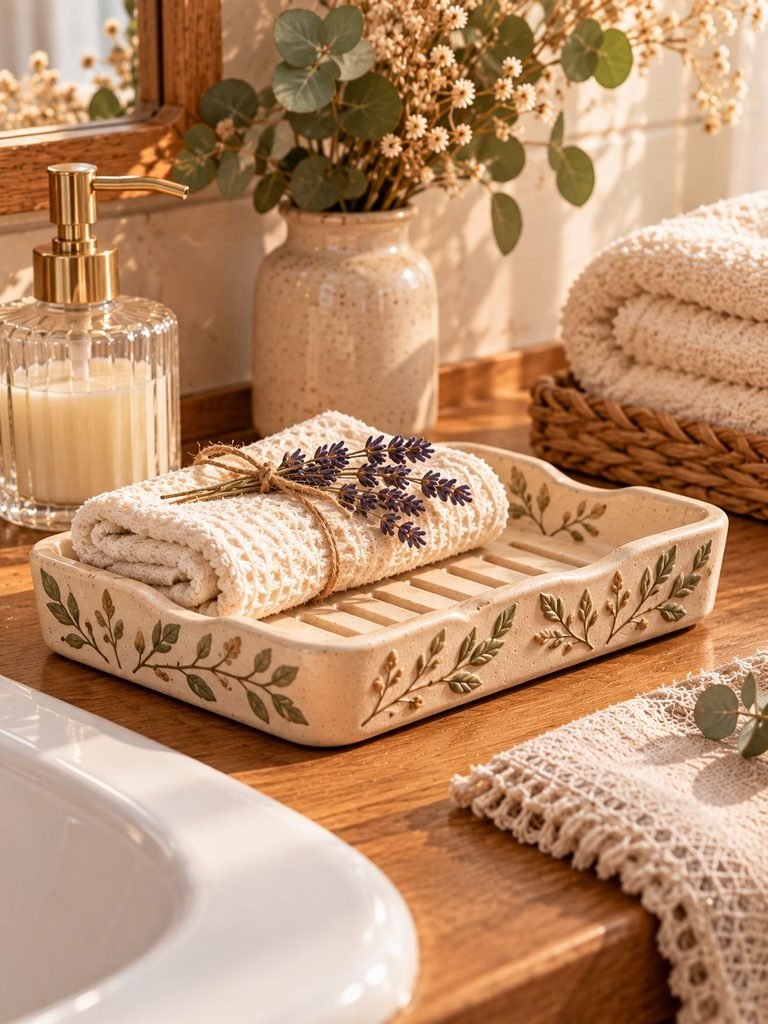
A clay soap dish can be a pretty accessory for a bathroom shelf or vanity. The easiest design is a shallow tray with raised edges and a few decorative grooves.
What You’ll Need
- Air-dry clay
- Rolling pin
- Craft knife
- A small bowl for shaping
- Acrylic paint
How to Make It
- Roll the clay into a small rectangle or oval.
- Raise the edges slightly to form a tray.
- Make several shallow grooves across the center.
- Smooth the edges and check that the dish sits evenly.
- Let it dry completely before painting.
Helpful tip: Standard air-dry clay is not suitable for continuous contact with wet soap or standing water. Use your handmade version as a decorative bathroom tray for dry items, or choose a waterproof ceramic or plastic dish for wet soap.
10. Clay Essential Oil Diffuser Pendant
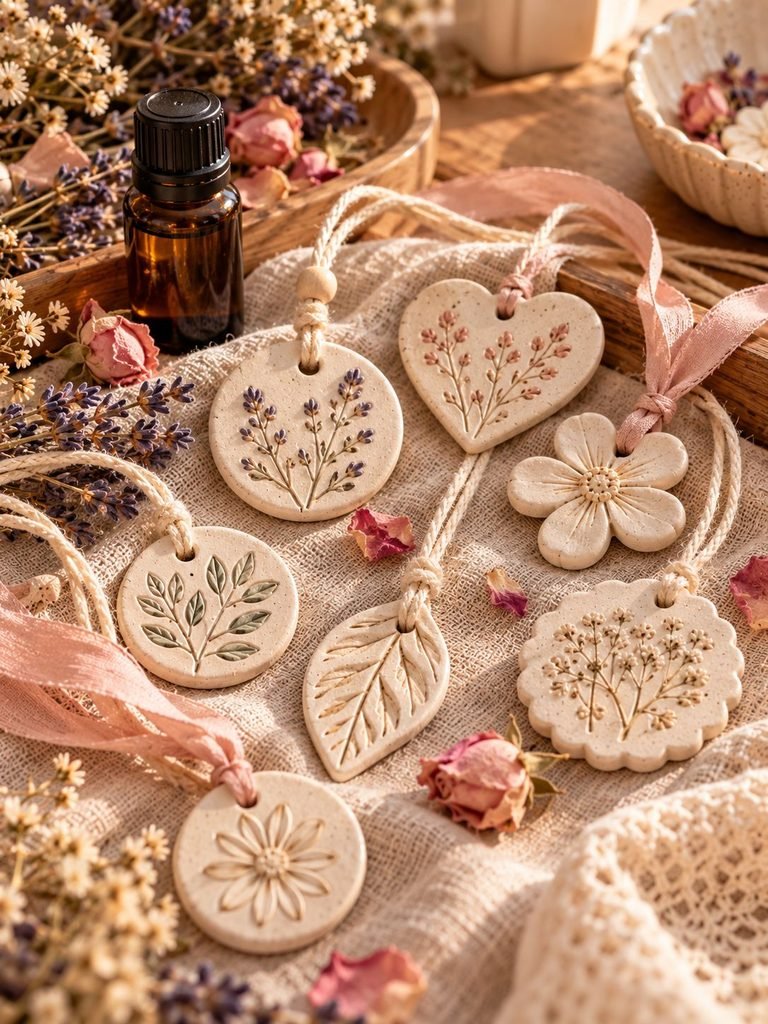
A small clay pendant can be a lovely handmade accessory for a wardrobe, drawer, or decorative display. Some unglazed porous clay materials can absorb a small amount of fragrance, although performance varies by clay type.
What You’ll Need
- Air-dry clay
- Rolling pin
- Small cutter
- Straw or skewer for making a hole
- Ribbon or cotton cord
How to Make It
- Roll the clay to an even thickness.
- Cut out a circle, heart, flower, or leaf shape.
- Make a small hole near the top for the cord.
- Add a textured pattern or a few simple stamped details.
- Leave the pendant to dry fully.
- Thread the cord through the hole once the pendant is firm and completely dry.
Keep the pendant unpainted if you want to experiment with its natural absorbency, and test a small amount of fragrance first.
Helpful tip: Do not assume a clay pendant will diffuse essential oils effectively. Some clay products absorb very little, while others may stain. Keep oils away from skin, painted surfaces, delicate fabrics, and finished furniture, and follow the oil manufacturer’s safety directions.
11. Clay Drawer Knobs
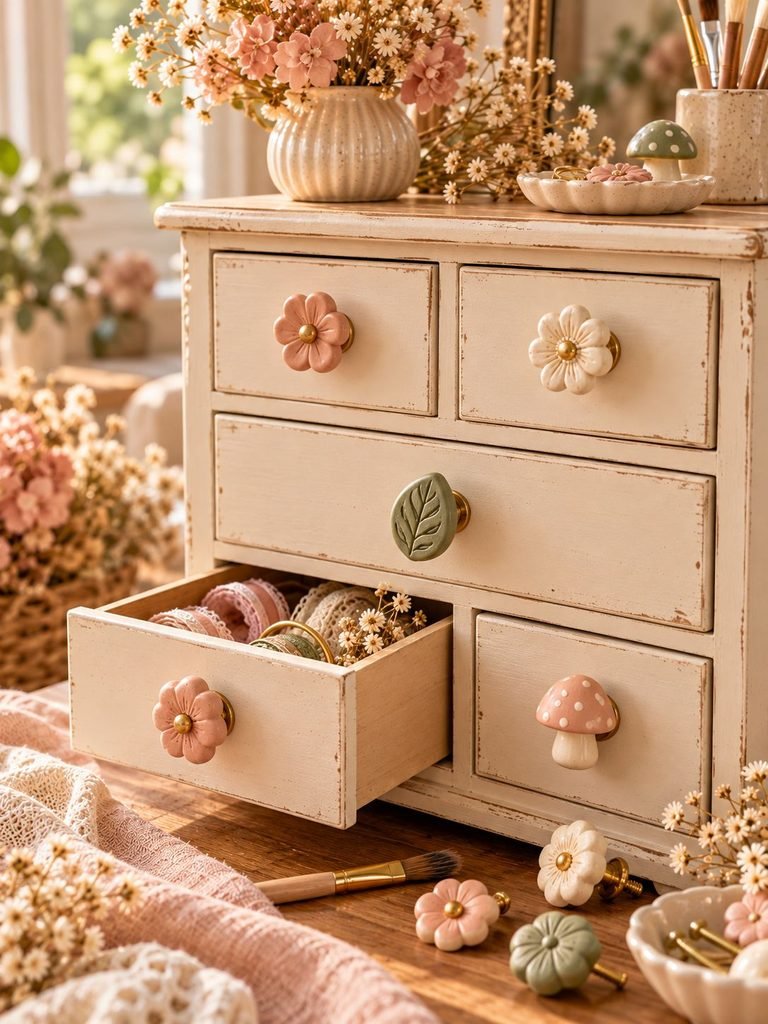
Handmade clay drawer knobs can give a plain storage box or small piece of furniture a fresh, personalized look. They are especially attractive on craft cabinets, decorative boxes, and lightweight drawers.
What You’ll Need
- Air-dry clay
- A small shaping tool
- Sandpaper
- Acrylic paint
- A suitable adhesive or mounting hardware
How to Make Them
- Shape small, rounded knobs using your fingers.
- Create a flat mounting surface at the back.
- Make sure the pieces are similar in size if you are creating a matching set.
- Dry them completely and sand away rough edges.
- Paint each knob and allow the finish to cure.
- Attach them using a mounting method appropriate for the item.
Helpful tip: Air-dry clay can chip or break under repeated pulling and twisting. Use handmade knobs on decorative boxes or lightly handled items, not heavy drawers, frequently used cabinets, or furniture where a broken knob could cause injury. For functional furniture hardware, use durable commercial knobs.
12. Clay Picture Frame
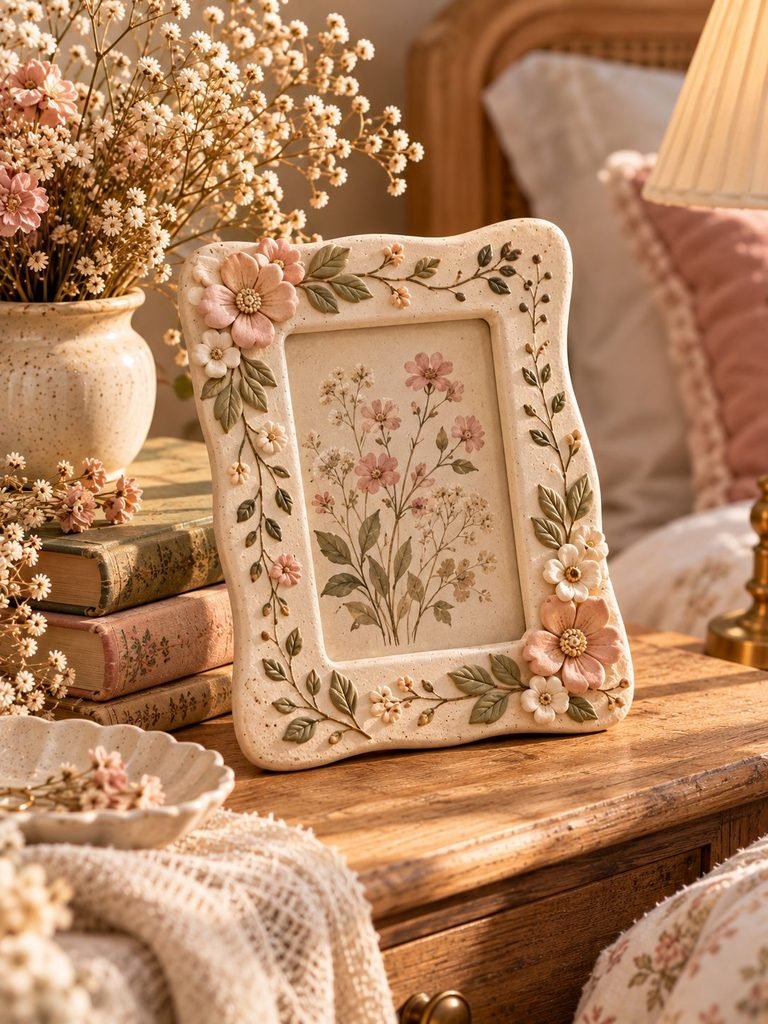
A handmade clay picture frame is a thoughtful way to display a favorite photograph, a small art print, or a treasured memory. You can keep the design simple or decorate it with tiny flowers and textured borders.
What You’ll Need
- Air-dry clay
- Rolling pin
- Craft knife
- Ruler
- A photograph or paper template
- Cardboard backing or a suitable frame support
How to Make It
- Roll the clay into a sheet of even thickness.
- Cut a rectangle or square for the frame.
- Cut a smaller opening in the center, leaving a sturdy border.
- Decorate the edges with pressed patterns or small clay shapes.
- Dry the frame completely on a flat surface.
- Sand and paint it before adding a photograph and backing.
Helpful tip: Keep the frame lightweight and avoid making the border too thin. Use a separate support or stand if you want it to sit upright on a desk.
13. Clay Plant Pot Cover
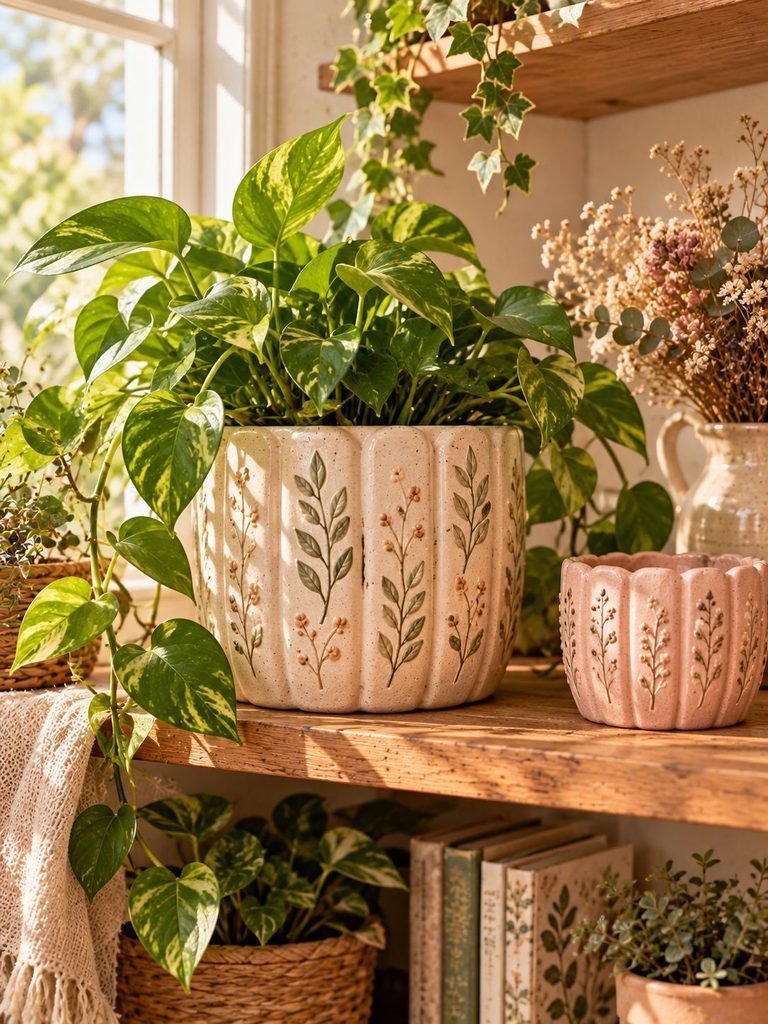
A small clay pot cover can give a basic indoor planter a more coordinated look. It works particularly well with artificial plants or as a decorative outer sleeve for a nursery pot.
What You’ll Need
- Air-dry clay
- Rolling pin
- Craft knife
- A small plant pot to measure
- Acrylic paint
How to Make It
- Measure the width and height of the pot you want to cover.
- Roll the clay into a sheet.
- Cut a rectangular strip for the sides and a circle for the base if your design requires one.
- Join the edges carefully, smoothing the seams.
- Make sure the finished cover is slightly larger than the pot.
- Let it dry completely before painting.
Helpful tip: Use this project as a decorative cover around a separate waterproof plant pot. Do not place wet soil directly inside ordinary air-dry clay, and remove the inner pot before watering to prevent moisture damage.
14. Clay Bookmarks

Clay bookmarks are a fun project for readers who love handmade accessories. A slim clay design can be personalized with stamped patterns, initials, or small decorative shapes.
What You’ll Need
- Air-dry clay
- Rolling pin
- Craft knife
- Ruler
- Fine sandpaper
- Ribbon, optional
How to Make Them
- Roll the clay into a thin, even sheet.
- Cut a long rectangle or a simple leaf shape.
- Round the corners so they are less likely to catch on pages.
- Add shallow stamped designs while the clay is still workable.
- Dry the bookmark completely on a flat surface.
- Sand any rough edges and decorate it with paint.
Helpful tip: Keep the bookmark very thin and lightweight. Thick clay can crack or damage book pages, so a paper, leather, or fabric bookmark is a better choice for everyday reading. A clay bookmark is best treated as a decorative keepsake.
15. Clay Cable Organizer

A clay cable organizer is a simple way to add a handmade touch to a desk while helping keep charging cables from slipping off the edge of a table.
What You’ll Need
- Air-dry clay
- Rolling pin
- Craft knife
- A cable to measure
- Sandpaper
- Acrylic paint
How to Make It
- Shape the clay into a small, thick rectangle.
- Create a shallow curved groove along one edge.
- Check that the groove is wide enough for the intended cable without pinching it.
- Smooth all the edges and flatten the underside.
- Allow the organizer to dry completely.
- Paint it and let the finish cure before use.
Helpful tip: A clay cable holder can be brittle, so make it compact and avoid narrow, delicate projections. Use it for lightweight cables and keep it away from places where it could fall onto a hard floor. Never use it to support heavy electrical cords or cables that become hot.
Tips for Making Air-Dry Clay Projects Last Longer
Air-dry clay is beginner-friendly, but a little extra care can make a big difference in the quality of your finished projects.
1. Keep the Thickness Even
Very thin areas dry quickly and can crack, while thicker sections may take much longer to dry. Try to maintain an even thickness throughout each piece, especially around corners and joins.
2. Smooth the Surface Carefully
Use your fingers or a suitable modeling tool to smooth rough edges while the clay is still workable. Use only a small amount of water because too much can weaken the clay or make the surface sticky.
3. Let Each Piece Dry Completely
Follow the manufacturer’s recommended drying time. Drying time varies with the project’s thickness, the clay formula, humidity, and room temperature. Turn pieces carefully if the instructions recommend it, and avoid placing them near direct heat.
4. Sand Gently
Once the clay is fully dry, fine-grit sandpaper can help smooth uneven edges and minor imperfections. Work slowly and avoid sanding away too much material from thin sections. Wear a dust mask and work in a well-ventilated area when sanding, especially if the product instructions recommend respiratory protection.
5. Choose the Right Paint and Sealer
Acrylic paint is commonly used to decorate dry air-dry clay. A compatible clear sealer may help protect the finish from light surface wear, but it does not automatically make the piece waterproof, food-safe, heat-resistant, or suitable for outdoor use.
Read the product label carefully and allow the finish to cure for the recommended time before handling the project.
6. Design Projects for Their Intended Use
The most successful air-dry clay projects are designed around the material’s limitations. Decorative trays, ring cones, picture frames, and desk organizers can work well when kept dry and handled gently. Items exposed to water, food, heat, or repeated force generally need a more suitable material.
Common Air-Dry Clay Mistakes to Avoid
Making pieces too thin: Thin edges and narrow projections are more likely to break. Give your projects enough thickness to support their shape.
Rushing the drying process: Using a hair dryer, placing clay on a radiator, or exposing it to intense heat may encourage uneven drying and cracking. Allow the clay to dry according to the package instructions.
Adding too much water: Excess water can make the clay difficult to handle and weaken some formulas. Use only enough to smooth the surface.
Painting before the clay is dry: Moisture trapped beneath paint or varnish can affect the finish. Make sure the piece is completely dry before decorating it.
Using the wrong project for the material: Ordinary air-dry clay is not a substitute for kiln-fired ceramic, heat-resistant materials, or waterproof containers. Choosing suitable projects helps prevent disappointment and makes your creations more practical.
Final Thoughts
Making functional air-dry clay projects is a lovely way to spend a creative afternoon while adding handmade details to your home. From a simple jewelry dish to a pretty desk organizer, these ideas offer plenty of opportunities to experiment with shapes, colors, and textures without needing complicated equipment.
My favorite approach is to start with one small project, learn how the clay behaves, and gradually try more detailed designs. Remember to let every piece dry properly and choose uses that suit the material. With a little patience and creativity, you can make charming handmade accessories that bring personality to your space or become thoughtful gifts for someone special.