How to Make a Clay Photo Ornament: An Easy DIY Keepsake
Some of my favorite decorations are the ones that hold special memories.
A little family picture, a favorite holiday moment, or a photo of someone you love can make even the simplest ornament feel meaningful.
That is why I love the idea of making clay photo ornaments at home. They are sweet, personal, and surprisingly easy to create with just a few basic craft supplies.
Whether you want to decorate your Christmas tree, make a thoughtful handmade gift, or preserve a precious memory, these DIY clay photo ornaments are a lovely project to try. Let’s make one together!
What Is a Clay Photo Ornament?

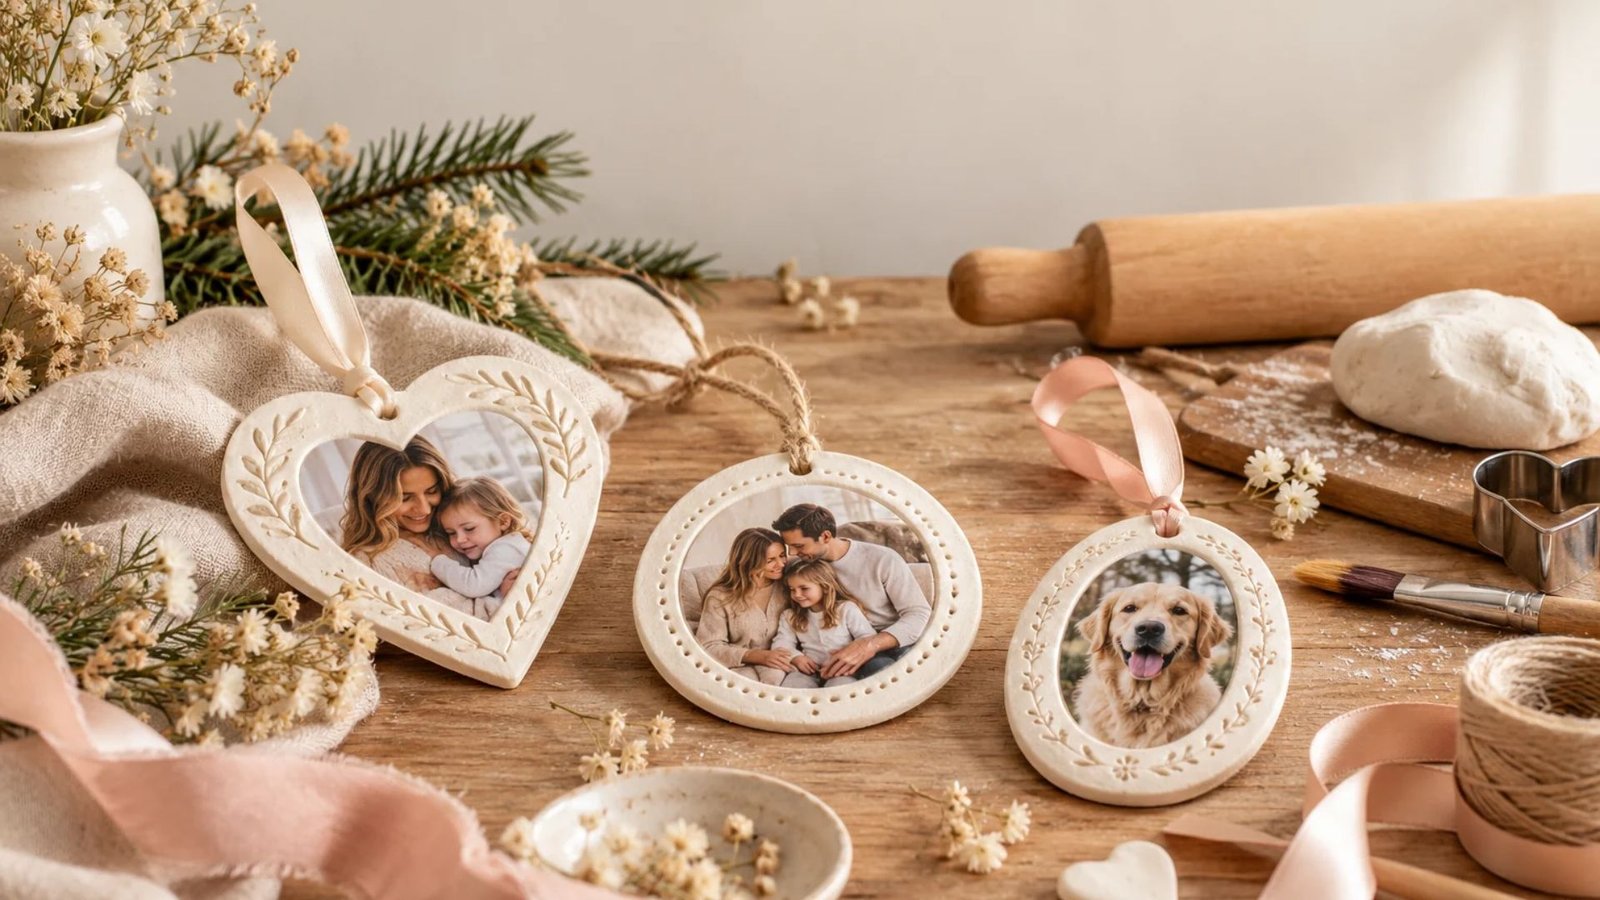
A clay photo ornament is a handmade decoration that features a photograph attached to or displayed inside a clay shape. It can be made into a heart, circle, star, oval, or even a little house.
These ornaments are especially popular during Christmas, but you can make them for birthdays, anniversaries, Mother’s Day, weddings, or other special occasions.
The best part is that you can personalize each ornament to suit the person receiving it. Add a name, a meaningful date, a small ribbon, or a simple decorative border to make it extra special.
For this tutorial, we will use air-dry clay because it is easy to work with and does not require an oven. You will also learn how to prepare your photograph and attach it neatly to your finished ornament.
Supplies You Will Need
Gather these simple supplies before you begin.
- Air-dry clay: White or natural-colored clay works beautifully for a soft, timeless finish.
- Rolling pin: A small craft rolling pin is ideal, but a clean, smooth cylindrical object can also work.
- Cookie cutter: Choose a heart, circle, star, or another shape you love.
- Craft knife or clay tool: Useful for trimming uneven edges.
- Drinking straw: For making a small hole for the hanging ribbon.
- Fine sandpaper: Helps smooth rough edges after the clay dries.
- Printed photograph: Choose a clear photo that will fit your ornament.
- Photo adhesive: Use a suitable archival photo adhesive or acid-free glue that is compatible with your printed photograph and finished clay surface.
- Clear protective finish: Optional, depending on the clay and photo materials you use.
- Ribbon, twine, or thin cord: For hanging your ornament.
- Pencil and ruler: Helpful for measuring and trimming the photo.
- A little water and a soft cloth: For cleaning your hands and tools.
You may also want acrylic paint, a small paintbrush, letter stamps, or a toothpick for adding decorative details.
Important: Air-dry clay is not waterproof by itself. Keep the finished ornament away from moisture, and test your chosen adhesive and finish on spare materials first.
Step 1: Choose Your Photograph
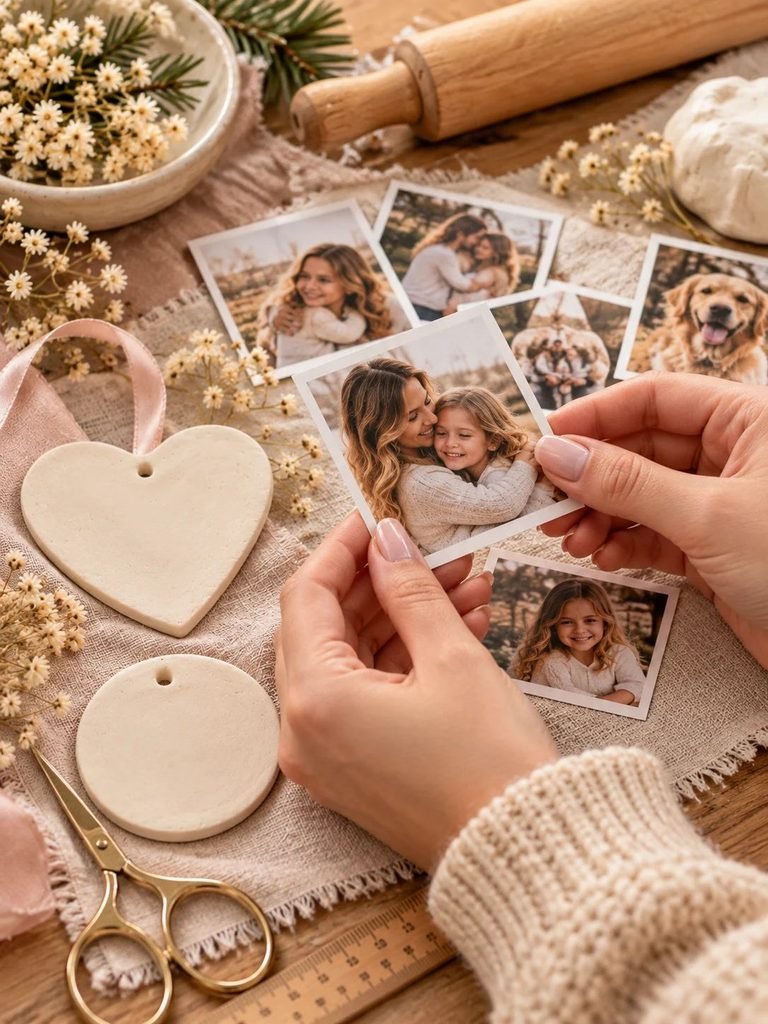
Start by choosing the photograph you want to feature on your ornament.
A family portrait, a picture of your children, a wedding photograph, or a favorite vacation memory can all work beautifully. If you are making several ornaments as gifts, you could choose a different photo for each person.
For the best result, look for a photograph with good lighting and a clear subject. Pictures with a simple background often look especially lovely on small ornaments because the important details remain easy to see.
Print your photo in the size you need. You can use a home printer or have the image printed at a photo shop.
Before cutting the picture, measure the area where it will sit on the ornament. Leave a little room around the edges if you want to add a decorative clay border.
My tip: Print a few extra copies if possible. Having a spare photograph gives you room to experiment with sizing and trimming without worrying about ruining your favorite picture.
Read How to Make Air-Dry Clay Christmas Ornaments by Embossing Them
Step 2: Prepare Your Clay

Place a piece of air-dry clay on a clean, flat work surface.
Knead it gently with your hands until it feels smooth and workable. This helps make the clay easier to roll and shape.
If your clay feels slightly stiff, follow the manufacturer’s instructions for conditioning it. Avoid adding too much water, as excess moisture can make the clay sticky and may increase drying time.
Keep the remaining clay covered while you work so it does not begin drying before you are ready to use it.
Step 3: Roll Out the Clay
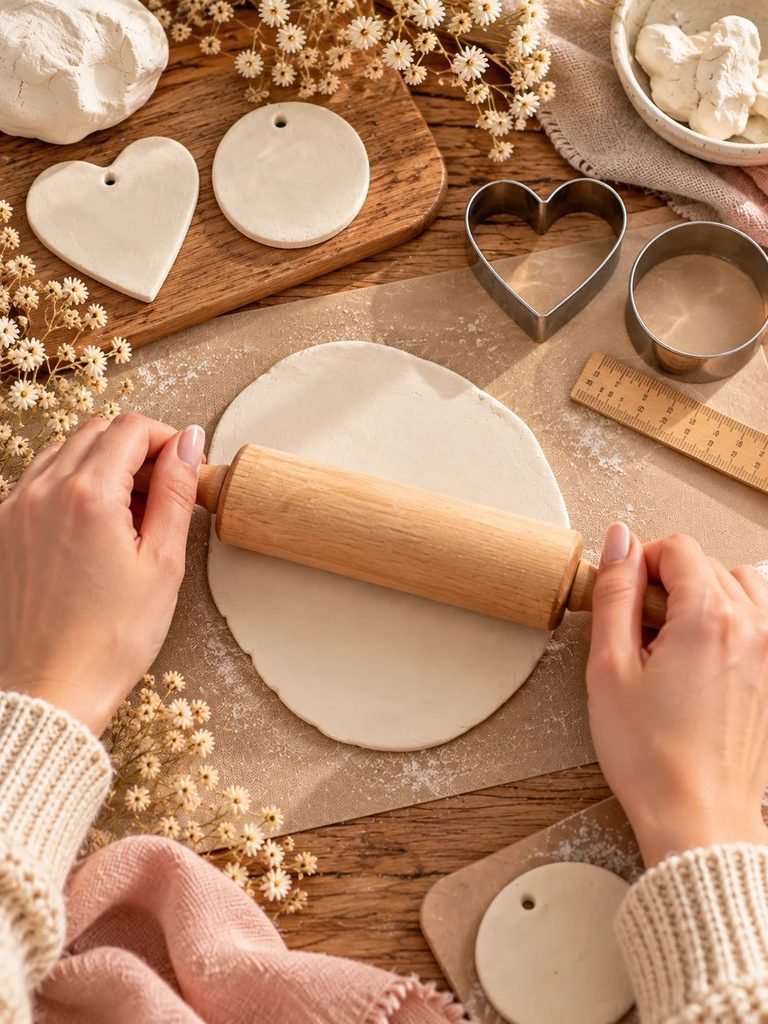
Use your rolling pin to roll the clay into an even sheet.
Aim for a thickness of approximately 5–7 mm. This is generally thick enough to create a sturdy ornament without making it unnecessarily heavy.
Try to keep the surface level from one side to the other. Uneven thickness can cause the clay to dry at different rates, increasing the chance of warping or cracking.
If the clay sticks to your work surface, gently lift it and reposition it. A clean craft mat can make this step easier.
Avoid rolling the clay too thin. Very thin ornaments may become fragile, especially around the hanging hole.
Read 16 Elegant Clay Candle Holder Ideas for a Handmade Luxury Look
Step 4: Cut Out Your Ornament Shape
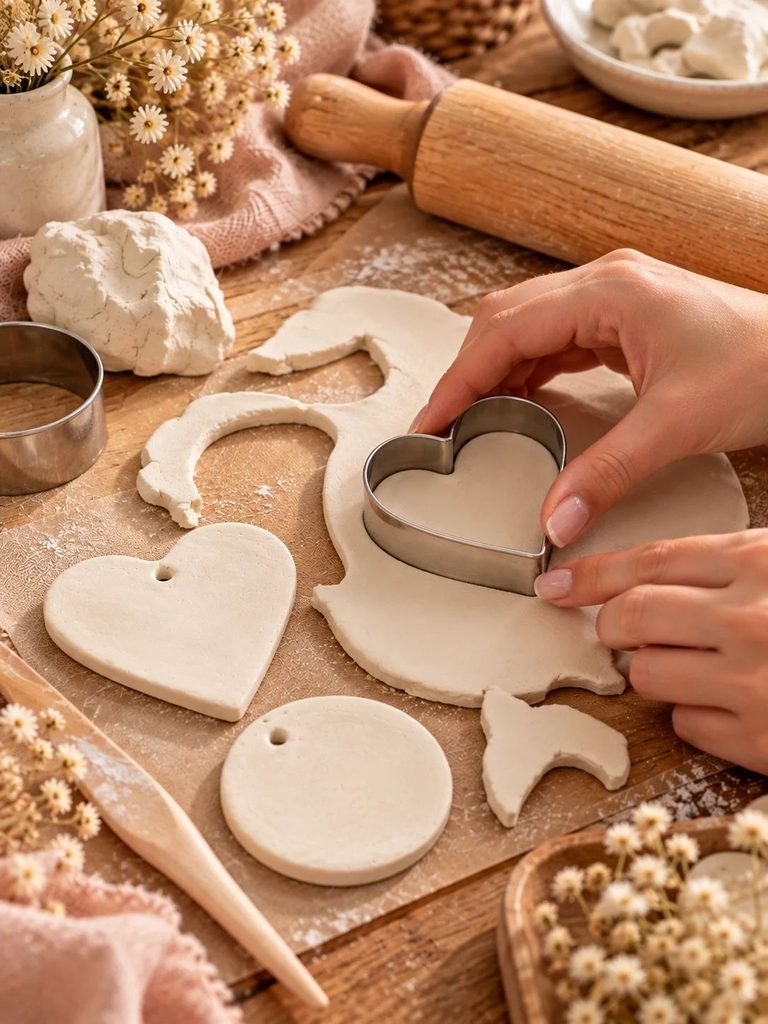
Choose your favorite cookie cutter and press it firmly into the rolled clay.
For a classic Christmas decoration, a circle or heart is a lovely choice. Stars and ovals also work well, especially if you want something a little different.
Remove the excess clay around the shape. Use a craft tool to neaten any uneven edges, and smooth them gently with your fingertips.
If you prefer a handmade look, you can shape the ornament by hand instead of using a cutter. Just try to keep the outline balanced and the thickness consistent.
You can also make a slightly larger shape than your photograph and leave a narrow clay border around the picture. This creates a simple frame that makes the photo stand out.
Step 5: Make the Hanging Hole
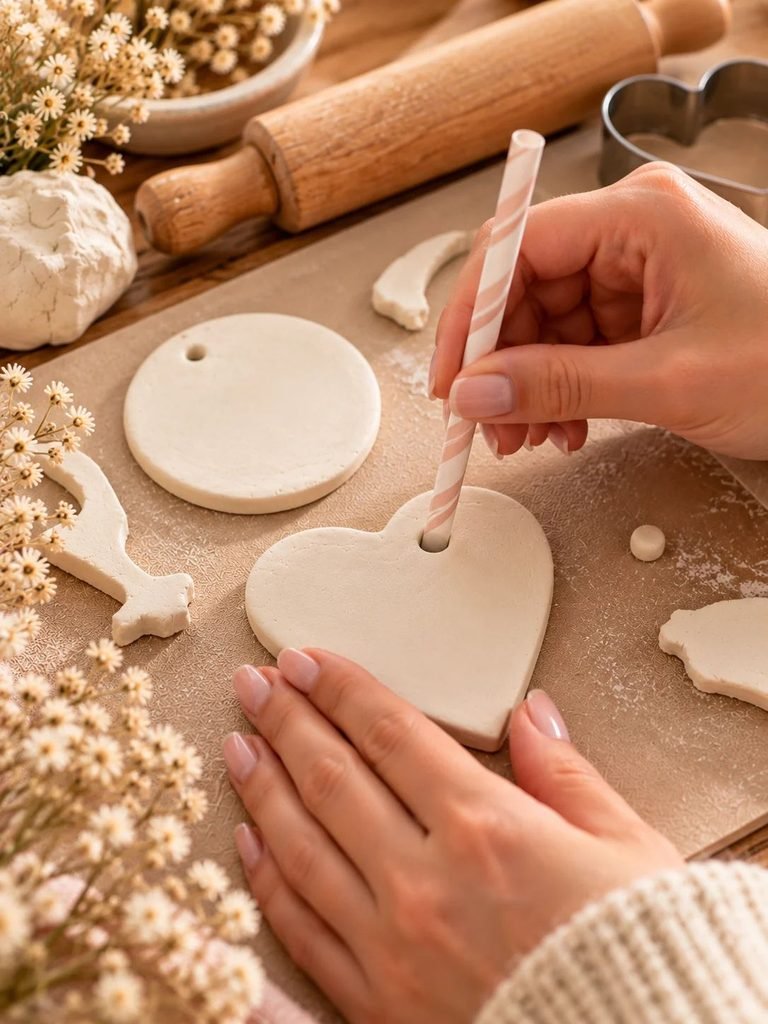
Before the clay dries, make a small hole near the top of your ornament using a drinking straw or suitable clay tool.
Position the hole far enough from the edge that the clay will not split when you thread the ribbon through it.
Make sure the hole is large enough for your chosen cord. A hole that is too small can be difficult to use after the clay has dried.
Gently remove the small piece of clay from the hole and smooth the surrounding area.
This step is important because making a hole after the ornament has fully dried can cause the clay to crack or break.
Step 6: Add Decorative Details
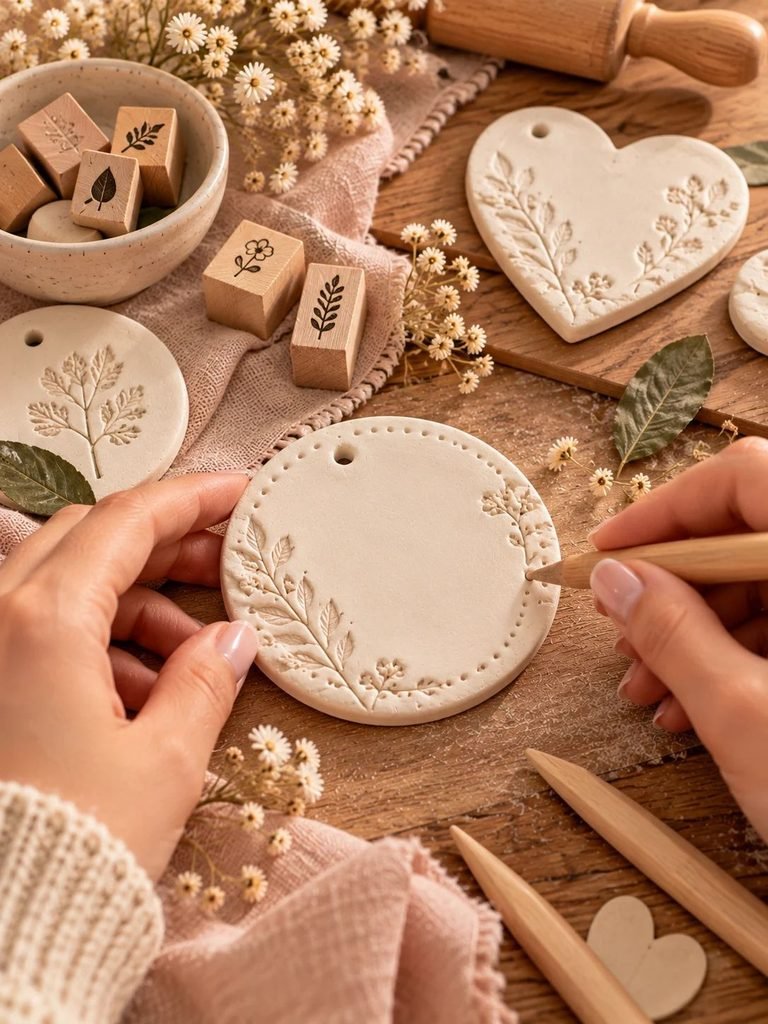
This is where you can give your ornament a personal touch.
You can leave the clay plain for a clean, minimalist finish or decorate it before drying.
Here are a few simple ideas:
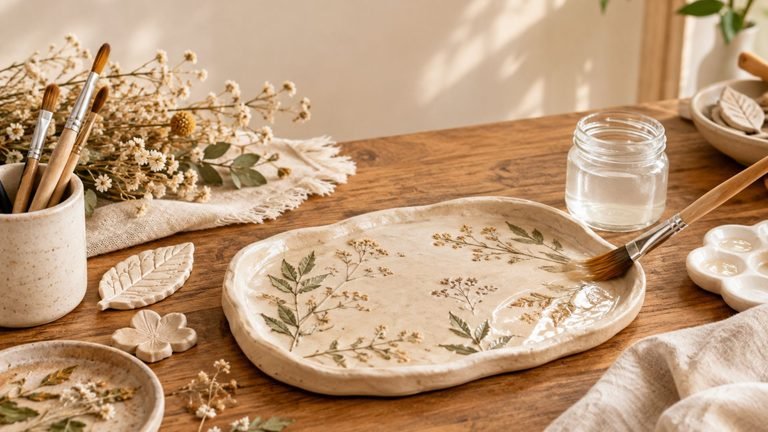
- Press small leaves or flowers gently into the clay to create a botanical impression.
- Use letter stamps to add a family name or a meaningful word.
- Write a year or short date with a toothpick.
- Create tiny dots around the edge for a simple framed effect.
- Add a small heart or star impression near the photo area.
Keep your decorations fairly shallow if you plan to attach the photograph directly to the front.
If you want the photo to sit on a flat surface, leave that area smooth. Avoid adding paint, water, or other materials to the part where the photo will be attached.
Step 7: Let the Clay Dry Completely
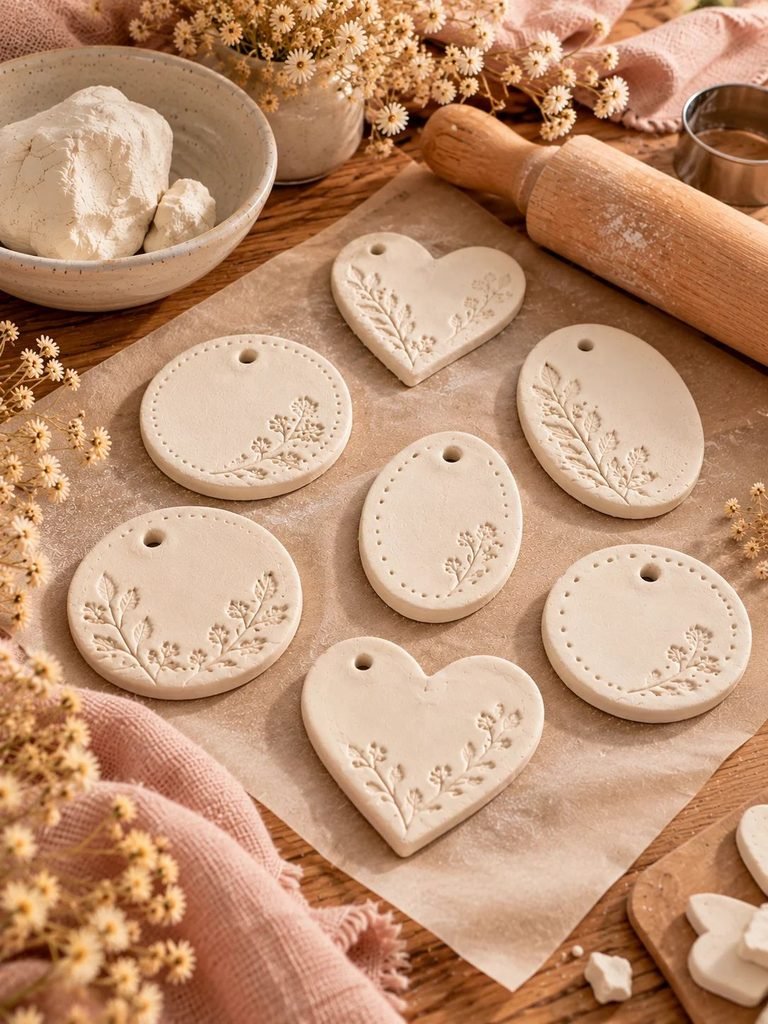
Place the ornament on a flat surface covered with parchment paper or another suitable nonstick material.
Allow it to dry according to the clay manufacturer’s instructions. Drying time depends on the thickness of the ornament, the room temperature, humidity, and the specific clay you use.
Many air-dry clay projects need at least 24–72 hours, and thicker pieces may take longer.
Turn the ornament over carefully when the surface is firm enough to handle, following the manufacturer’s recommendations. This helps both sides dry more evenly.
Avoid placing the ornament directly on a radiator, using a hair dryer, or leaving it in strong sunlight to speed up the process. Rapid drying can lead to cracks or warping.
Before moving on, make sure the ornament is completely dry throughout. It should not feel cool or damp in the center, and the clay should have reached the firmness expected for your chosen product.
Remember: Do not attach your photograph while the clay is still damp. Moisture can interfere with the adhesive and damage the printed image.
Step 8: Smooth the Edges

Once the clay has dried completely, inspect the ornament for rough spots or uneven edges.
Use fine sandpaper to smooth any areas that need attention. Work gently and avoid sanding too aggressively, as thin sections can break.
Wipe away the dust with a clean, dry, soft cloth.
If you notice a small crack, assess whether it affects the ornament’s strength. A very minor surface imperfection may be manageable, but a deep crack near the hanging hole can make the ornament fragile.
For future ornaments, remember to keep the clay thickness even and allow it to dry slowly.
Step 9: Paint and Finish the Clay
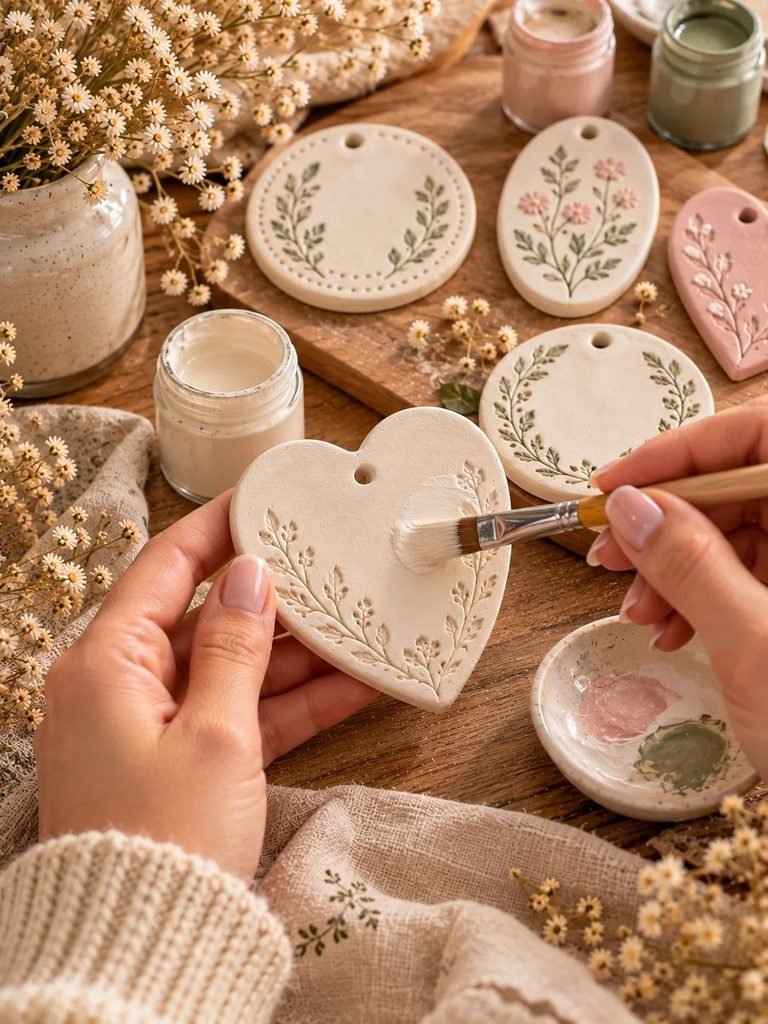
You can leave the ornament in its natural clay color or paint it to match your home or holiday decorations.
Soft white, cream, beige, blush pink, and muted sage green are lovely choices for a cozy, feminine look. Metallic details can also add a festive touch.
If you choose to paint the ornament, apply thin coats of suitable acrylic paint and allow each coat to dry fully.
Keep the area where the photograph will be attached clean, smooth, and compatible with your adhesive.
A clear protective coating is optional. If you use one, choose a product specifically suitable for your clay and paint, and follow its instructions carefully. Let the finish cure fully before attaching the photograph.
Do not assume that a clear coating will make air-dry clay waterproof. The ornament should still be treated as a decorative item that needs protection from moisture.
Step 10: Prepare the Photograph
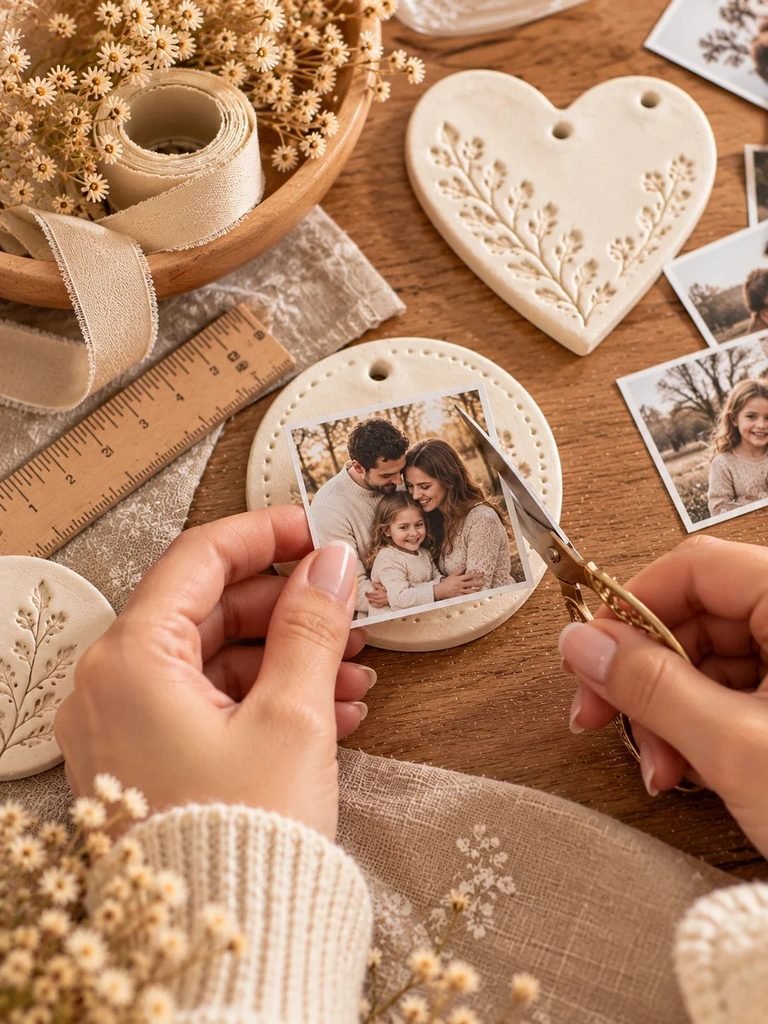
Now it is time to prepare the picture.
Place the photograph over the ornament to check its size and position. Trim it carefully with scissors or a craft knife, leaving a neat outline.
For a circular ornament, you can cut the photograph into a circle. For a heart-shaped ornament, you might prefer a smaller circular photo in the center, surrounded by the clay border.
You do not have to cover the entire front of the ornament. Leaving some clay visible around the photo can make the finished piece look more polished.
Before applying any adhesive, make sure the photo is dry, clean, and free of fingerprints.
If you are using an inkjet print, check that the ink is fully dry and that the adhesive will not cause smudging. Some photo papers and printer inks react poorly to wet glue or coatings, so testing a spare print is worthwhile.
Step 11: Attach the Photograph
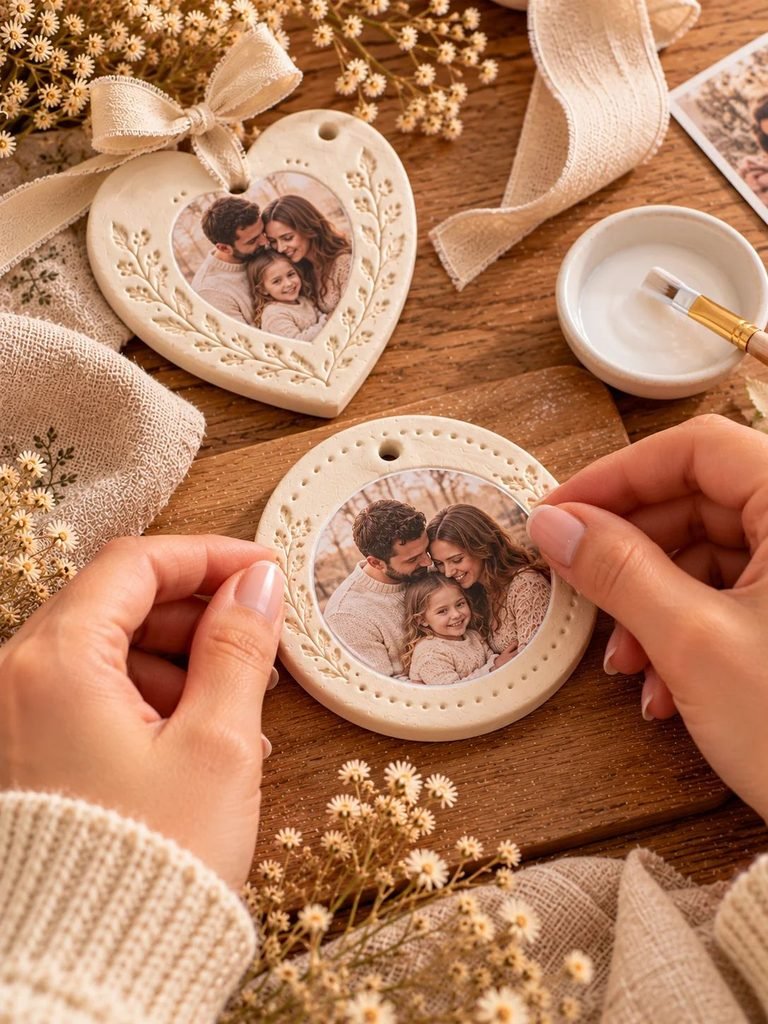
Apply a thin, even layer of suitable photo adhesive to the back of the photograph or to the prepared surface, following the adhesive manufacturer’s directions.
Avoid using too much glue. Excess adhesive may seep out around the edges, create bumps, or damage the print.
Carefully position the photograph on the ornament. Start at one edge and lower it gently onto the surface to reduce the chance of trapping air bubbles.
Use clean fingertips or a soft, dry cloth to smooth the picture gently from the center outward.
Check the edges and make sure the photo lies flat. Wipe away any excess adhesive immediately if the product’s instructions allow it.
Leave the ornament flat while the adhesive dries. Avoid lifting or hanging it until the bond has fully set.
A helpful alternative: If you do not want to glue a photograph directly onto the clay, you can make a separate photo insert or small paper frame attached to the ornament. This can make it easier to replace the picture later.
Step 12: Add the Ribbon
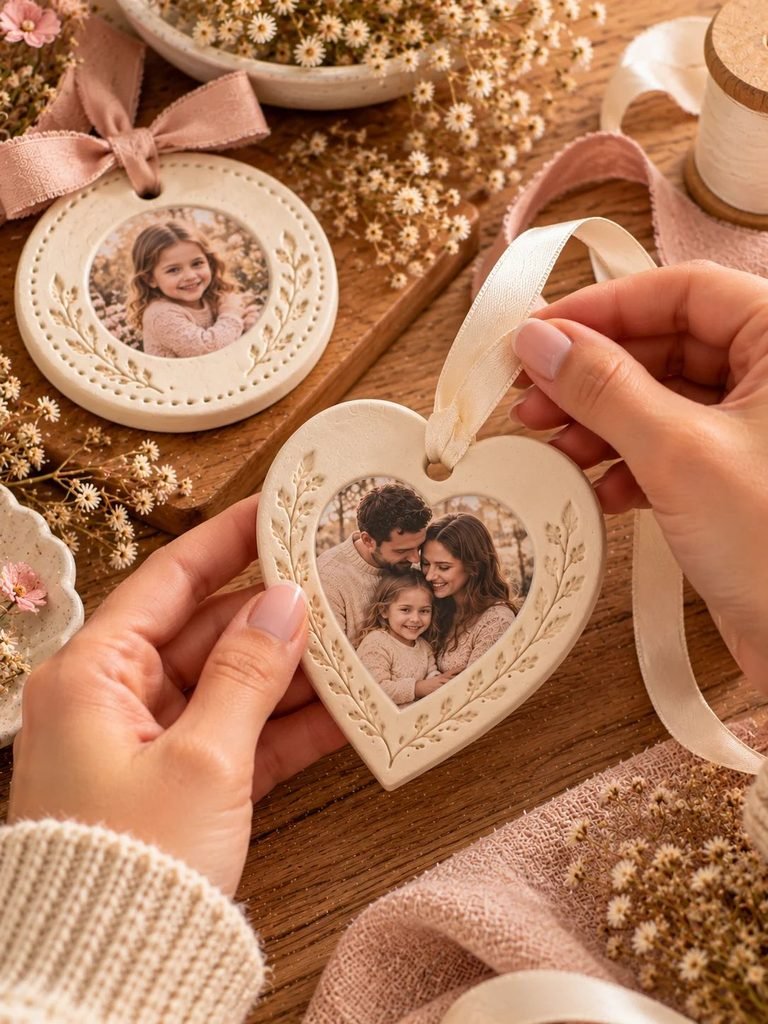
Once the adhesive has dried completely, thread a ribbon, twine, or thin cord through the hole at the top.
Tie the ends into a secure knot or loop.
For a soft, feminine finish, choose cream satin ribbon, natural twine, blush ribbon, or a simple velvet cord. You can also coordinate the ribbon with the colors in the photograph.
Make sure the knot is secure and that the hole has not cracked. If the clay around the hole looks weak, avoid hanging the ornament where it could fall and break.
Your handmade clay photo ornament is now ready to display or give as a gift!
Tips for Making Beautiful Clay Photo Ornaments
A few simple details can make a big difference in how your finished ornaments look.
Keep the clay thickness consistent
Uneven clay can dry unevenly, which may cause warping or cracking. Roll it slowly and check the thickness before cutting.
Choose a photograph that suits the shape
A close-up portrait usually works better than a busy photograph with lots of tiny details. Remember that the image may be quite small once printed.
Allow enough drying time
Patience is important when working with air-dry clay. If the ornament is still damp, painting or gluing too soon can cause problems.
Use a compatible adhesive
Not every glue works well on clay, paint, and photo paper. Read the product instructions and test it on spare materials first.
Keep decorations simple
A little texture, a small painted border, or a tiny stamped date is often enough. Too many decorative details can make the photograph harder to see.
Make a few extras
Once you have the basic technique down, making several ornaments at once can save time. You can prepare a small batch for family members, friends, teachers, or neighbors.
Common Mistakes to Avoid
Even an easy craft project can have a few challenges. Here are some mistakes to watch for.
Attaching the photo too early: Damp clay can affect the adhesive and the print. Wait until the ornament is completely dry and any paint or protective finish has cured.
Making the ornament too thin: Thin clay is more likely to break, especially around the hanging hole. Aim for a sturdy, even thickness.
Placing the hole too close to the edge: Leave enough clay around the hole to support the ribbon.
Using too much glue: Excess adhesive can create wrinkles, wet spots, or visible residue around the photograph.
Drying the clay too quickly: High heat and direct sunlight may cause cracking or warping. Follow the manufacturer’s drying instructions.
Hanging the ornament before everything is secure: Make sure the clay is dry, the adhesive has set, and the ribbon is firmly attached before displaying it.
How to Care for Your Clay Photo Ornament
Air-dry clay ornaments are best used as indoor decorations.
Keep yours in a dry place, away from water, steam, and excessive humidity. Avoid leaving it outdoors or placing it somewhere it could get wet.
When the holiday season is over, wrap the ornament in soft tissue paper and store it in a sturdy box. Place it somewhere safe where heavier decorations will not press against it.
Try not to bend the ribbon or put pressure on the clay around the hanging hole.
If the photograph becomes damaged over time, replacing it may be difficult if it was permanently glued to the clay. For future projects, consider using a removable photo insert if you want to update the picture later.
With gentle handling and proper storage, your ornament can remain a treasured keepsake for many seasons.
Creative Ways to Personalize Your Ornament
Once you have made your first clay photo ornament, you can experiment with different designs.
Christmas family ornaments: Add a family photograph, the year, and a simple ribbon for a meaningful Christmas tree decoration.
Baby’s first Christmas: Use a favorite baby photograph and add the baby’s name or birth year around the border.
Pet photo ornaments: Create a keepsake featuring your favorite picture of your dog or cat.
Wedding photo ornaments: Use a wedding photograph and add the wedding date for a thoughtful anniversary gift.
Grandparent gifts: Make individual ornaments featuring the grandchildren. These can become especially meaningful gifts for birthdays or the holidays.
Memorial keepsakes: Use a cherished photograph to create a personal remembrance ornament for someone special.
Handmade gift tags: Make a smaller version with a photo and a name. It can be attached to a gift as a keepsake, provided the ornament is sturdy enough to handle.
You can also experiment with different clay shapes, painted finishes, and ribbon styles to create a coordinated collection.
Frequently Asked Questions
Can I use air-dry clay to make photo ornaments?
Yes. Air-dry clay is a convenient option because it hardens without baking. Follow the product’s instructions for shaping and drying, and remember that the finished clay is not automatically waterproof.
How long does a clay photo ornament take to make?
The hands-on work may take around 30–60 minutes, depending on the design and your experience. However, the clay needs additional drying time, and paint, adhesive, and protective finishes may need their own drying or curing periods. Plan for at least a few days from start to finish.
Can I use a regular printed photograph?
Yes, but the result depends on the paper, printer ink, and adhesive. Test your materials first, especially if you are using glossy photo paper or an inkjet print.
Do I need to seal my clay ornament?
A protective finish is optional, depending on the clay, paint, and intended use. If you decide to seal it, choose a compatible product and follow its instructions. A finish does not necessarily make the ornament waterproof.
Can I make these ornaments with children?
Yes, with age-appropriate supervision. Children can help choose the photograph, select the shape, and decorate the clay. An adult should handle sharp cutting tools and any materials that require special precautions.
Can I make a clay photo ornament without a cookie cutter?
Absolutely. You can shape the clay by hand or use a paper template to guide your cutting. Simple circles, hearts, and ovals are easy to create without special tools.
How do I prevent my ornament from cracking?
Roll the clay to an even thickness, avoid adding too much water, make the hanging hole before drying, and allow the ornament to dry slowly according to the manufacturer’s instructions. Keep it away from direct heat while it dries.
Final Thoughts
Making a clay photo ornament is a lovely way to turn a favorite photograph into something you can treasure for years. With a little clay, a printed picture, and a few simple supplies, you can create a meaningful decoration that feels much more personal than something bought from a store.
I love how easy it is to change the shape, colors, and details to suit different occasions. Whether you make one for your Christmas tree, create a set for your family, or give one as a thoughtful handmade gift, each ornament can hold a special memory.
Take your time, enjoy the creative process, and do not worry if your first ornament is not perfectly smooth. Those little handmade details are part of what makes it special. Most importantly, choose a photograph that makes you smile, and create a keepsake you will be happy to bring out year after year.