The Cutest DIY Gift: Sew This Mini Trinket Folder in Minutes!
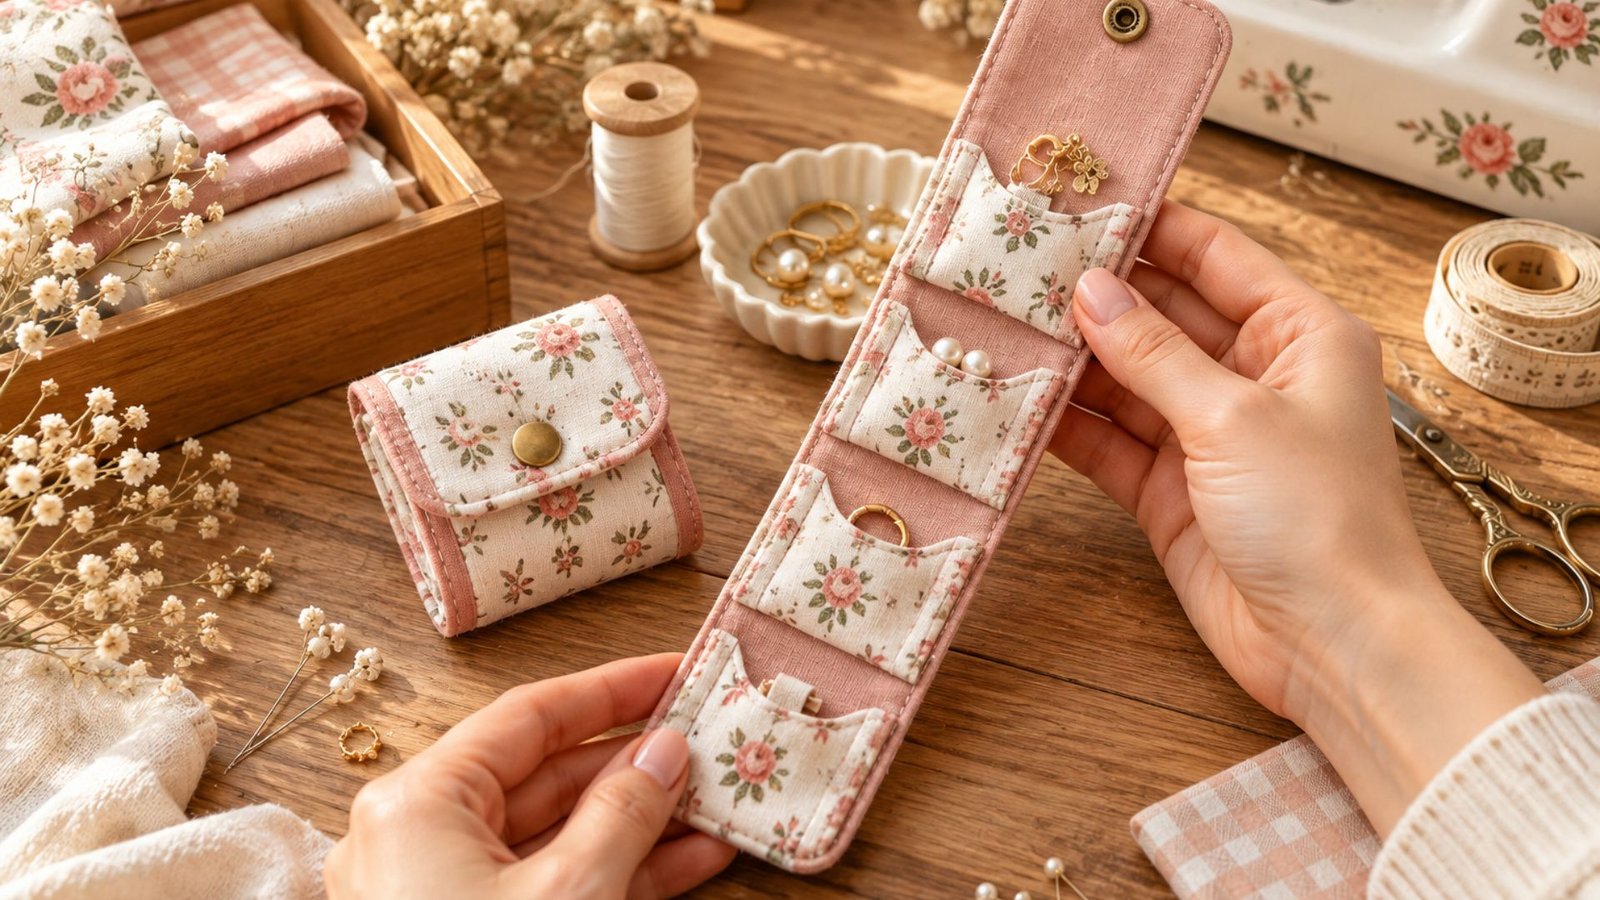
I have always loved little handmade gifts that feel thoughtful without requiring days of work, and this mini trinket folder is one of my favorite ideas.
It is small, pretty, practical, and perfect for keeping tiny treasures organized. Whether you are looking for a sweet birthday present, a handmade gift for a friend, or a charming way to use up fabric scraps, this project is such a lovely choice.
With a few simple sewing supplies and a little creativity, you can make a beautiful fabric folder that looks adorable, feels personal, and is easy enough for beginners to try.
What Is a Mini Trinket Folder?
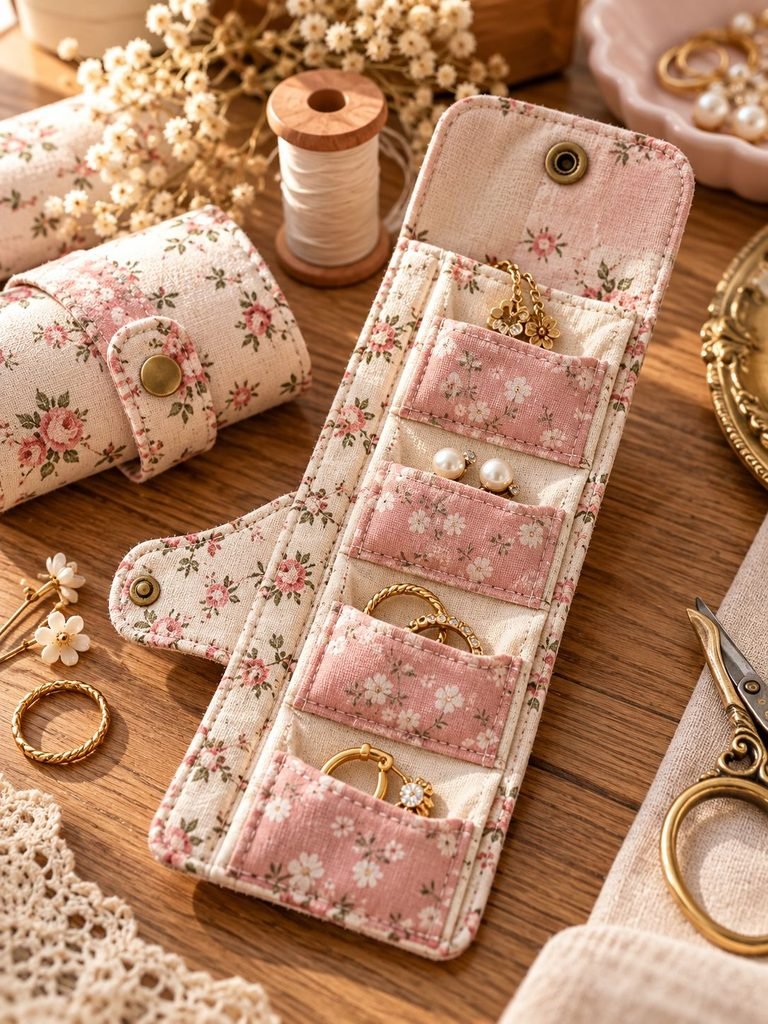
A mini trinket folder is a small, fabric-covered organizer designed to hold little everyday treasures. Think of it as a tiny fabric book that opens to reveal pockets or compartments for storing jewelry, rings, earrings, charms, buttons, hair clips, or other small keepsakes.
Unlike a traditional jewelry box, this folder is lightweight, flexible, and easy to slip into a handbag, suitcase, or bedside drawer. You can customize the size, choose your favorite fabrics, and add charming details such as ribbons, tiny buttons, lace, or embroidered initials.
The best part is that you do not need expensive materials to make one. A few fabric scraps, some interfacing, basic sewing tools, and a little patience are enough to create something special.
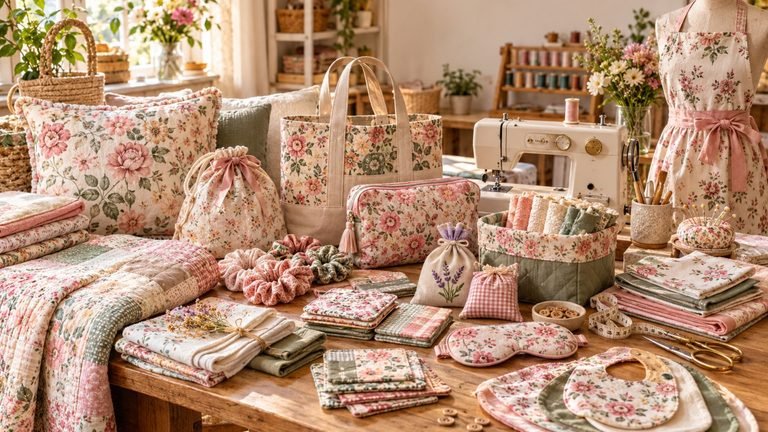
This project is especially wonderful if you enjoy handmade gifts with a personal touch. You can make one in a floral print for someone who loves cottagecore style, choose soft neutral fabrics for a minimalist friend, or use bright colors for a cheerful birthday surprise.
Shop my amazon essentials
- Cotton fabric
- Lining fabric
- Fusible interfacing
- Fabric scissors
- Sewing thread
- Sewing clips
- Measuring ruler
- Fabric marking pen
- Snap fasteners
- Sewing machine needles
Why You’ll Love This Mini Trinket Folder
There are so many reasons to add this sweet sewing project to your handmade gift list.
- Beginner-friendly: The construction uses simple sewing techniques that are easy to practice.
- Quick to make: Once your fabric is cut, you can often finish a basic version in about 30–60 minutes, depending on your experience and design.
- Budget-friendly: It is an excellent way to use leftover cotton fabric and small pieces of interfacing.
- Easy to personalize: Choose fabrics, closures, and decorative details that reflect the recipient’s personality.
- Portable and practical: Its compact design makes it useful for travel, handbags, and everyday storage.
- Perfect for gifting: It is a thoughtful handmade present for birthdays, holidays, bridesmaids, teachers, and friends.
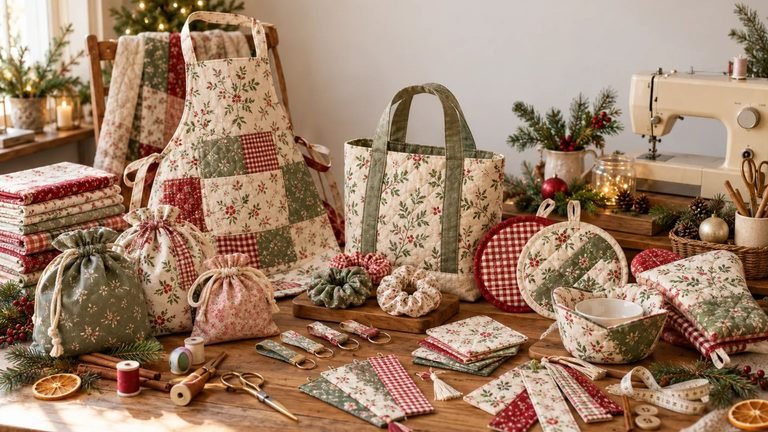
You can even make several at once using coordinating fabrics. A small stack of handmade trinket folders would look beautiful in a gift basket or at a craft fair.
Materials You’ll Need

Before you start sewing, gather everything you need. Having your supplies ready makes the process smoother and helps you avoid unnecessary interruptions.
Essential sewing supplies
- Two coordinating cotton fabric pieces for the outer cover and lining
- Small pieces of lightweight or medium-weight fusible interfacing
- Matching sewing thread
- Fabric scissors or a rotary cutter
- Sewing machine or hand-sewing needle
- Pins or sewing clips
- Measuring tape or ruler
- Fabric marking pen or tailor’s chalk
- Iron and ironing board
- Small ribbon, snap fastener, or button for the closure
Optional decorative supplies
- Lace trim
- Small fabric bows
- Embroidery thread
- Decorative buttons
- A tiny label or fabric tag
- Contrasting fabric for the pockets
Helpful tip: Quilting cotton is an excellent choice because it is easy to sew, comes in countless beautiful prints, and holds its shape well when paired with interfacing. Avoid very thick fabrics for your first project, as they can make the tiny corners and seams more difficult to manage.
Choosing the Best Fabric
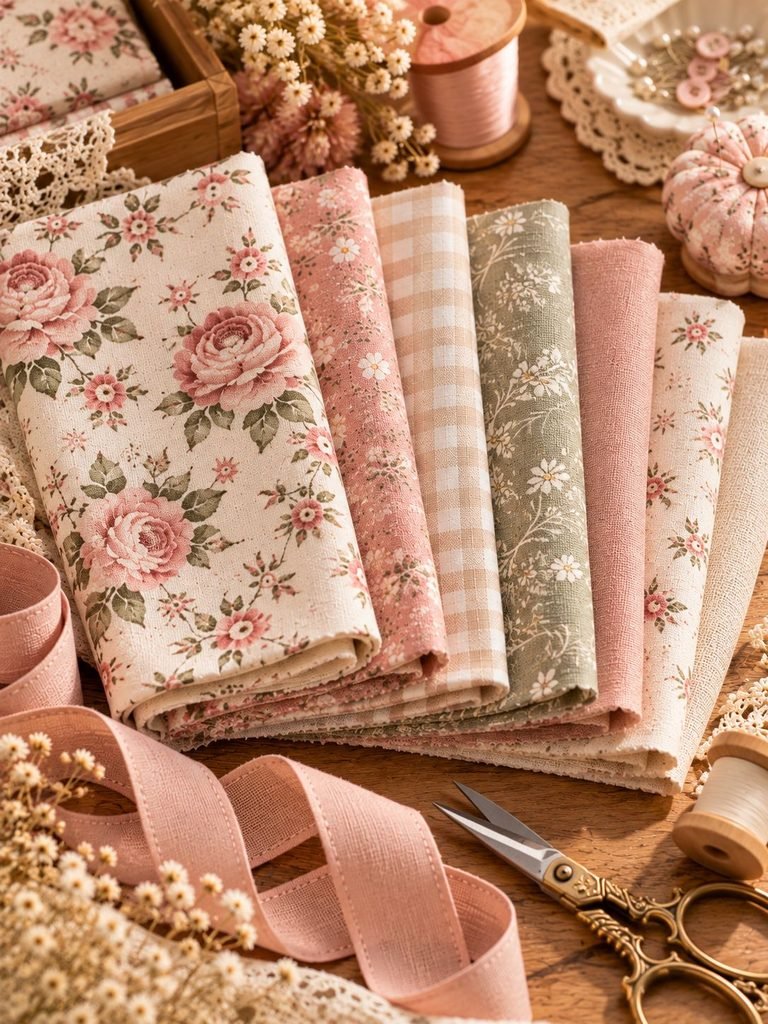
Fabric selection is one of the most enjoyable parts of this project. Since the folder is small, even a little piece of pretty fabric can make it feel special.
For a soft, feminine look, try tiny floral prints, blush pink cotton, cream fabric with delicate leaves, or warm beige gingham. If you prefer something more modern, consider muted sage green, dusty blue, or a simple linen-look cotton.
You can also combine two coordinating prints. For example, use a floral fabric for the outside and a solid cream fabric for the lining. When the folder opens, the contrast creates a lovely finished appearance.
Lightweight cotton is usually the easiest option for beginners. If your fabric is very thin, interfacing will help it feel sturdier. If you are using a heavier fabric, choose a lighter interfacing so the finished folder does not become too bulky.
Wash and press your fabric before cutting if it is washable and you expect the finished item to be cleaned in the future. This helps minimize shrinkage and gives you a smoother surface to work with.
How to Sew a Mini Trinket Folder Step by Step
This basic design creates a small fabric book with an outer cover, a lining, and simple interior pockets. You can adjust the measurements to suit the items you want to store.
Step 1: Decide on the Finished Size

For a cute, portable folder, a finished size of approximately 4 × 5 inches is a good starting point.
You can make it slightly larger if you want room for more pockets or small jewelry pieces. Remember that the folder needs enough space to close comfortably without squeezing its contents.
For this tutorial, use the following suggested measurements:
- Outer fabric: one rectangle measuring 10 × 6 inches
- Lining fabric: one rectangle measuring 10 × 6 inches
- Interfacing: one rectangle measuring approximately 10 × 6 inches
- Pocket fabric: two rectangles measuring 5 × 5 inches each
- Optional closure ribbon: one piece measuring approximately 8 inches
These measurements are a starting point rather than a fixed pattern. The final dimensions will vary slightly depending on seam allowances and pocket placement.
Step 2: Cut Your Fabric Pieces
Lay your fabric flat on a clean cutting surface. Use a ruler and fabric marker to measure your rectangles carefully.
Cut the outer fabric, lining, interfacing, and pocket pieces according to the measurements above.
Try to keep your edges straight. Accurate cutting makes a noticeable difference when sewing small projects because even a slight mismatch can affect how the finished pieces line up.
If you are making multiple folders, you can cut several sets at once. This is a useful time-saving trick when preparing handmade gifts for a group of friends.
Step 3: Apply the Interfacing
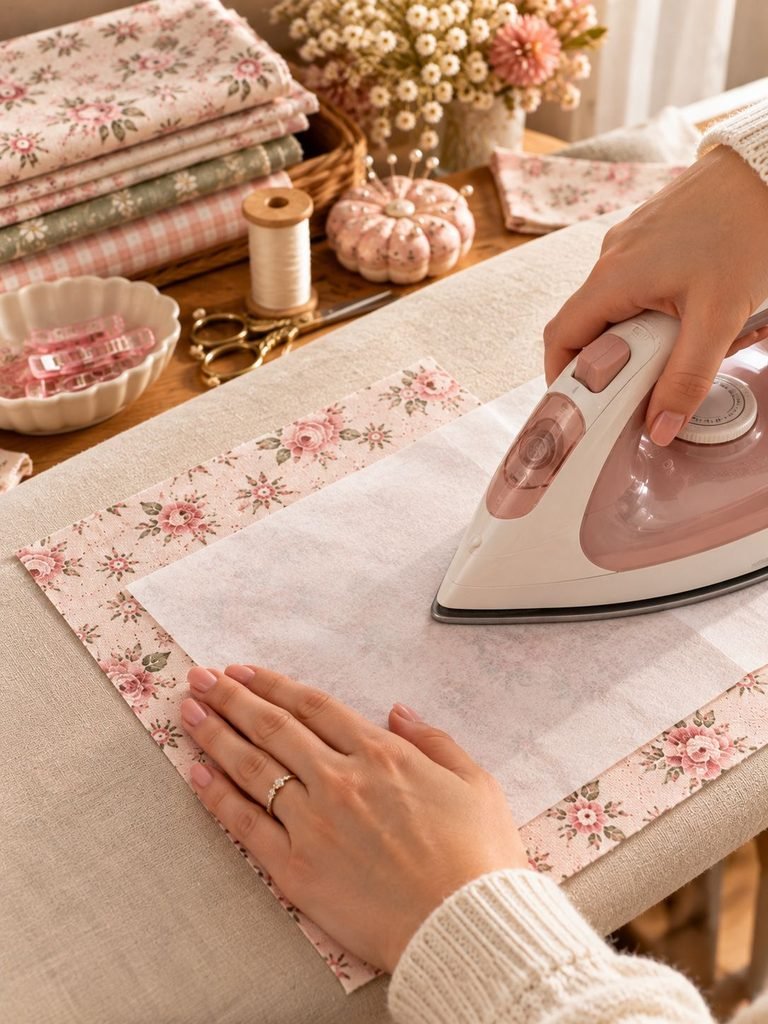
Interfacing gives the folder its structure and prevents it from feeling too floppy.
Place the fusible side of the interfacing against the wrong side of the outer fabric. Follow the manufacturer’s instructions for the correct iron temperature, pressing time, and use of steam.
Press rather than drag the iron across the fabric, and allow the piece to cool before moving it. This helps the interfacing bond evenly.
If your fabric is already quite firm, you may prefer a lighter interfacing. The goal is to create a soft, flexible cover that holds its shape without becoming stiff.
Step 4: Make the Interior Pockets
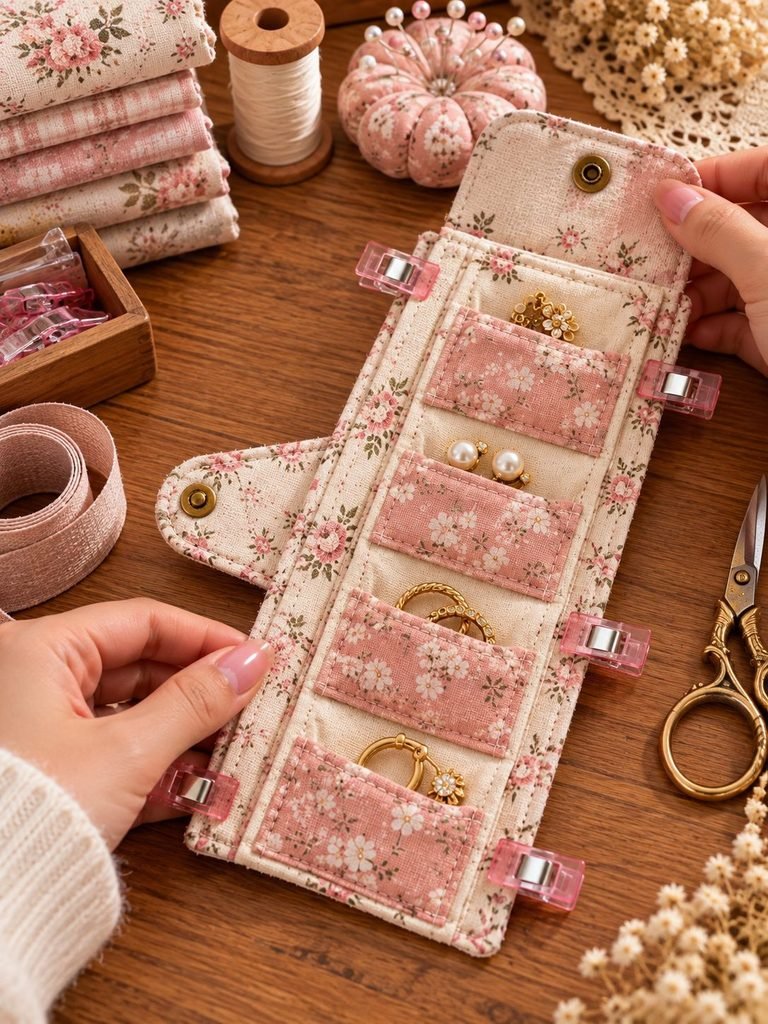
Take your two pocket fabric rectangles and fold each one in half with the right sides facing outward. Press the folded edge neatly.
You should now have two smaller rectangles with a finished folded edge at the top.
Sew a line of stitching close to each folded edge to keep it tidy. You can use a straight stitch, or add a small decorative stitch if your sewing machine has one.
Place the pockets on the right side of the lining fabric. Position them so that one sits toward the left half and the other toward the right half, leaving enough room between them for the center fold.
Adjust the pocket placement to suit your needs. One side could hold rings and earrings, while the other could store small charms, buttons, or sentimental keepsakes.
Pin or clip the pockets in place. Stitch along the sides and bottom edges of each pocket, leaving the top edges open.
If you want smaller compartments, sew one or two vertical lines through a pocket to divide it into narrow sections.
Helpful tip: Reinforce the top corners of the pockets with a few extra stitches. These areas experience more pulling when you slide items in and out.
Step 5: Add the Closure
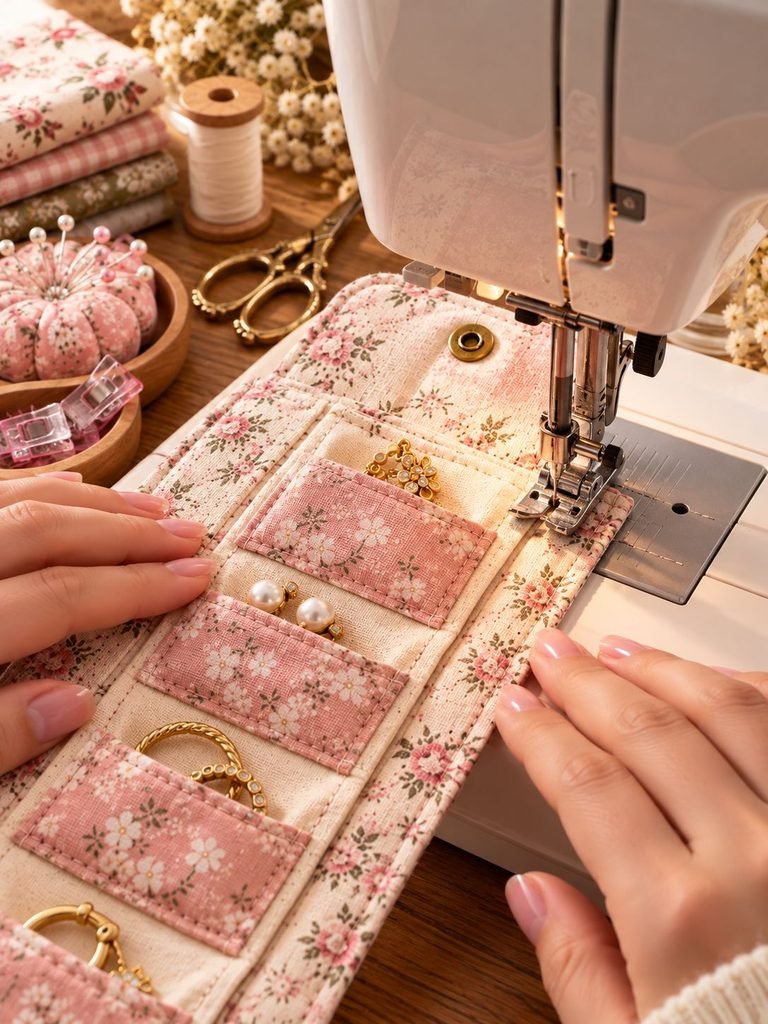
A little closure keeps your trinket folder neatly folded and makes it feel more polished.
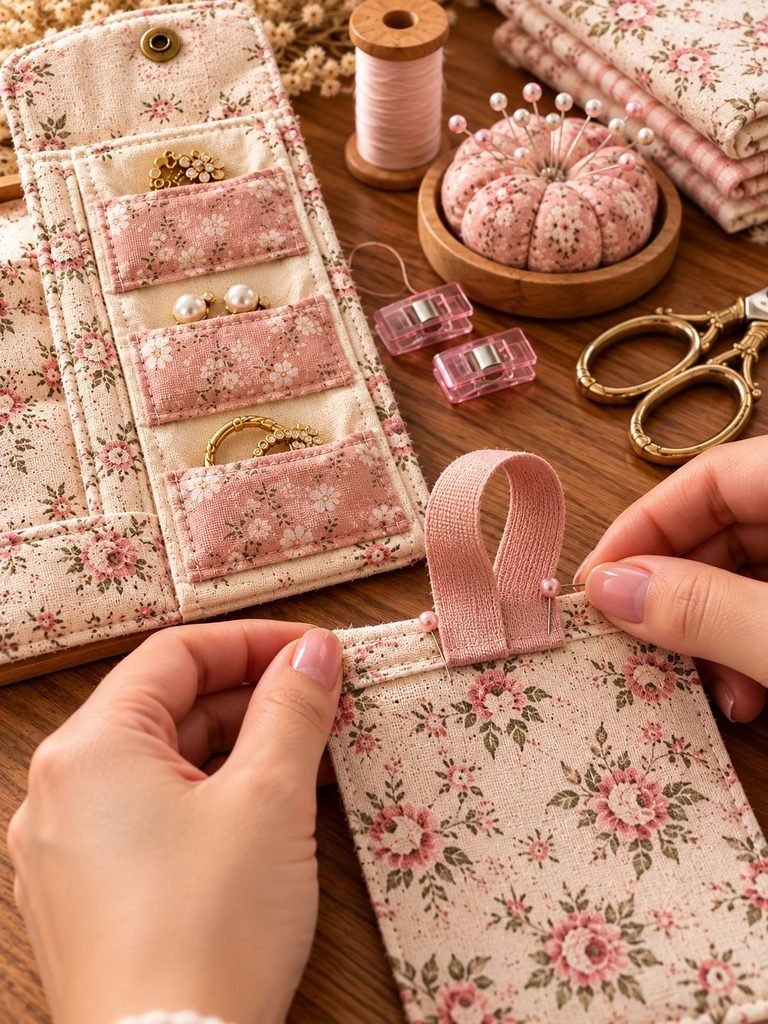
For a simple ribbon closure, fold your ribbon in half and position the folded end along one short edge of the outer fabric. The two loose ends should point inward toward the center of the fabric.
Pin the ribbon securely so that the folded loop extends beyond the fabric edge.
If you prefer a button closure, you can attach a small button to the outside after the folder is assembled and create a coordinating fabric or elastic loop. A sew-on snap is another neat option.
For beginners, ribbon is often the easiest choice because it requires very little extra work.
Make sure the closure does not interfere with the pockets or sit too close to the seam allowance.
Step 6: Assemble the Outer Cover and Lining
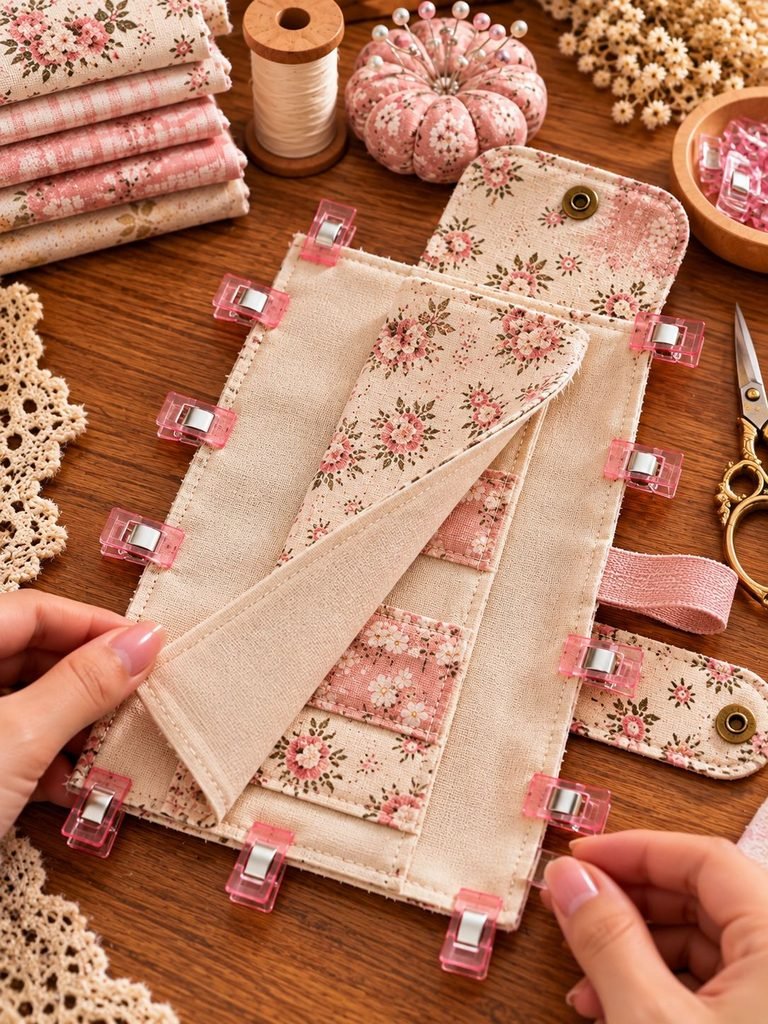
Place the outer fabric and lining fabric together with their right sides facing each other. The pockets should be sandwiched inside, facing the lining.
Check that the edges align neatly and that the ribbon or closure is secured between the layers.
Pin or clip around the edges, leaving an opening of approximately 2 inches along one side for turning the folder right side out.
Sew around the perimeter using a consistent seam allowance of approximately ¼ inch. Take your time around the corners, and make sure you do not accidentally catch the pocket openings in the outer seam.
Backstitch at the beginning and end of your stitching to help secure the seam.
Before turning the folder, trim the corners diagonally without cutting through the stitching. This removes excess bulk and helps the corners look neater.
Step 7: Turn and Press the Folder
Carefully turn the folder right side out through the opening you left.
Use your fingers or a blunt turning tool to gently shape the corners. Avoid using anything sharp that could pierce the fabric.
Fold the raw edges of the opening inward so they align with the surrounding seam. Press the entire piece flat, taking care to use a temperature suitable for your fabric and ribbon.
This step is worth a little extra attention. A neatly pressed folder looks much more professional, even when it is made from inexpensive fabric scraps.
Step 8: Close the Opening and Finish the Edges

Sew the opening closed with a neat slip stitch by hand, or use a narrow line of machine stitching close to the edge.
If you choose machine stitching, sew around the entire perimeter for a consistent finish. A line of topstitching also helps the folder hold its shape and keeps the layers lying flat.
Use matching thread for an understated finish, or choose a contrasting thread if you want the stitching to become part of the design.
Give the folder one final press. Fold it gently in half to create the book-like shape, then check that the closure wraps comfortably around it.
Step 9: Add Your Finishing Touches

Now comes the fun part: decorating your little creation.
You could add a tiny bow to the front cover, embroider a flower in one corner, sew on a decorative label, or add a narrow strip of lace.
If you are making the folder as a gift, consider embroidering the recipient’s initial on the outside. Even a simple letter can make the piece feel thoughtful and personal.
Keep embellishments securely attached, particularly if the folder will be used by a child or carried in a handbag.
Avoid bulky decorations that might catch on jewelry or prevent the folder from closing neatly.
What Can You Store Inside a Mini Trinket Folder?
Although this project is small, it can be surprisingly useful. Here are a few lovely ways to use it:
- Rings and earrings: Store a few favorite pieces separately to help prevent them from rubbing against one another.
- Jewelry charms: Keep small pendants, charms, and beads together.
- Sewing notions: Use the pockets for buttons, needles stored in a secure holder, or small embroidery accessories.
- Hair accessories: Store bobby pins, tiny clips, or hair ties.
- Keepsakes: Tuck in a special charm, a meaningful note, or another small memento.
- Travel essentials: Keep a few small accessories organized inside your handbag or suitcase.
The folder is best suited to lightweight, small items. It is not designed to protect delicate jewelry from heavy pressure, water, or impact, so valuable pieces should be stored in a more protective case.
If you plan to use it for earrings or rings, you can add a small piece of soft felt inside one of the pockets for an extra layer of protection.
Five Beautiful Ways to Customize Your Trinket Folder
One of the things I love most about handmade gifts is how easily you can adapt them to different people and occasions.
1. The Cottagecore Floral Folder
Choose a tiny rose print, cream lining, and a blush ribbon closure. Add a little lace along the outside edge for a romantic, vintage-inspired look.
2. The Minimalist Neutral Folder
Use oatmeal, ivory, taupe, or soft sage cotton. Keep the decorations simple and finish the edges with matching thread. This design works beautifully for someone who prefers understated accessories.
3. The Personalized Birthday Gift
Select the recipient’s favorite color and embroider their initial on the front. Pair the folder with a pretty card and a small piece of jewelry for a complete handmade present.
4. The Bridesmaid Keepsake Folder
Make matching folders in coordinating fabrics for a bridal party. You could personalize each one with an initial or use the same floral print with different ribbon colors.
5. The Scrap-Fabric Patchwork Folder
Combine small fabric scraps to create a patchwork outer cover. This is a wonderful way to use leftover pieces from previous sewing projects while making each folder completely unique.
Common Mistakes to Avoid
Even simple sewing projects can present a few challenges. Here are some easy ways to get a better result.
Using fabric that is too thick: Heavy fabric can make the center fold bulky. Choose lightweight cotton and an appropriate interfacing for easier sewing.
Forgetting the turning opening: Leave enough space to turn the folder right side out. An opening that is too small can make the process frustrating.
Sewing the pockets too close to the edge: Make sure the pockets sit inside the seam allowance so their edges are not accidentally caught in the perimeter seam.
Skipping the pressing steps: Pressing helps the fabric lie flat and gives the finished folder a clean, professional appearance.
Making the pockets too deep: Very deep pockets can make small items difficult to reach. Test the pocket placement with a ring or charm before sewing everything permanently.
Adding too many decorations: Tiny embellishments are charming, but excessive trim and bulky buttons can interfere with the folder’s ability to close.
How to Make Your Mini Trinket Folder Look Professionally Finished
You do not need advanced sewing skills to create a beautiful result. A few small details can make a big difference.
First, take your time when cutting the fabric. Straight edges and accurate measurements help the pieces fit together neatly.
Second, use a consistent seam allowance. If your sewing machine has a quarter-inch guide, it can be especially helpful for this project.
Third, press the fabric at every stage. Pressing the interfacing, folded pocket edges, seams, and finished cover helps everything sit properly.
Finally, choose coordinating materials. A matching ribbon, complementary lining, and neatly finished edges make the folder look intentional rather than improvised.
Before gifting it, check that all loose threads are trimmed, the pockets are secure, and the closure works comfortably.
How to Gift Your Handmade Trinket Folder
A mini trinket folder is already a lovely gift, but simple presentation can make it feel even more special.
Fold the folder neatly and wrap it in cream tissue paper. Place it inside a small kraft gift box, then finish with a satin or cotton ribbon.
You could also include a handwritten note explaining that the folder was made by hand, especially for the recipient. If you are giving it to someone who loves jewelry, add a pair of simple earrings or a small charm.
For a more sustainable option, wrap the folder in a reusable fabric square or place it inside a small cotton drawstring bag.
These little details turn a quick sewing project into a thoughtful gift that feels personal and memorable.
Frequently Asked Questions
Is this mini trinket folder suitable for beginners?
Yes! This project is suitable for beginners who are comfortable with basic straight stitching. You will practice cutting fabric, sewing simple pockets, joining two fabric layers, turning corners, and topstitching.
If you are new to sewing, make a simple version first and add decorative details once you feel comfortable with the construction.
Can I sew the trinket folder by hand?
Absolutely. A sewing machine makes the project faster, but you can sew it by hand using small, even backstitches. It may take longer, so focus on keeping your stitches consistent and securing the pocket corners carefully.
How long does it take to make one?
Allow approximately 30–60 minutes for a basic folder once you have gathered your supplies and chosen your fabric. Beginners may need a little longer, especially if they are learning how to apply interfacing or sew neat corners.
Can I use felt instead of cotton fabric?
Yes, felt can work for a simple version because it does not fray easily. However, thick felt can create bulky seams, and the construction may need adjusting. Lightweight felt is usually easier to manage.
How can I make the folder more durable?
Use good-quality cotton, apply suitable interfacing, reinforce the pocket corners, and secure the closure firmly. Keep the seam allowance consistent and avoid overfilling the pockets.
Can I sell handmade mini trinket folders?
Yes. They can be appealing items for craft fairs, handmade gift shops, and online craft stores. Before selling, make a few samples, calculate your material and labor costs, and test the durability of your design.
Final Thoughts
Making a mini trinket folder is such a sweet way to turn a few fabric scraps into something useful and beautiful. I love that this little project gives you plenty of room to express your creativity without requiring complicated sewing techniques or expensive supplies.
Whether you choose delicate florals, soft neutrals, or colorful patchwork, your finished folder can become a thoughtful gift that someone will be happy to carry and use. You can personalize it for birthdays, holidays, bridesmaids, or simply as a little surprise for someone special.
So gather your favorite fabric, thread your needle, and give this charming sewing project a try. You might enjoy making one so much that you end up creating a whole collection of these tiny handmade treasures!