How to Make a Marbled Air-Dry Clay Pot: An Easy DIY Tutorial
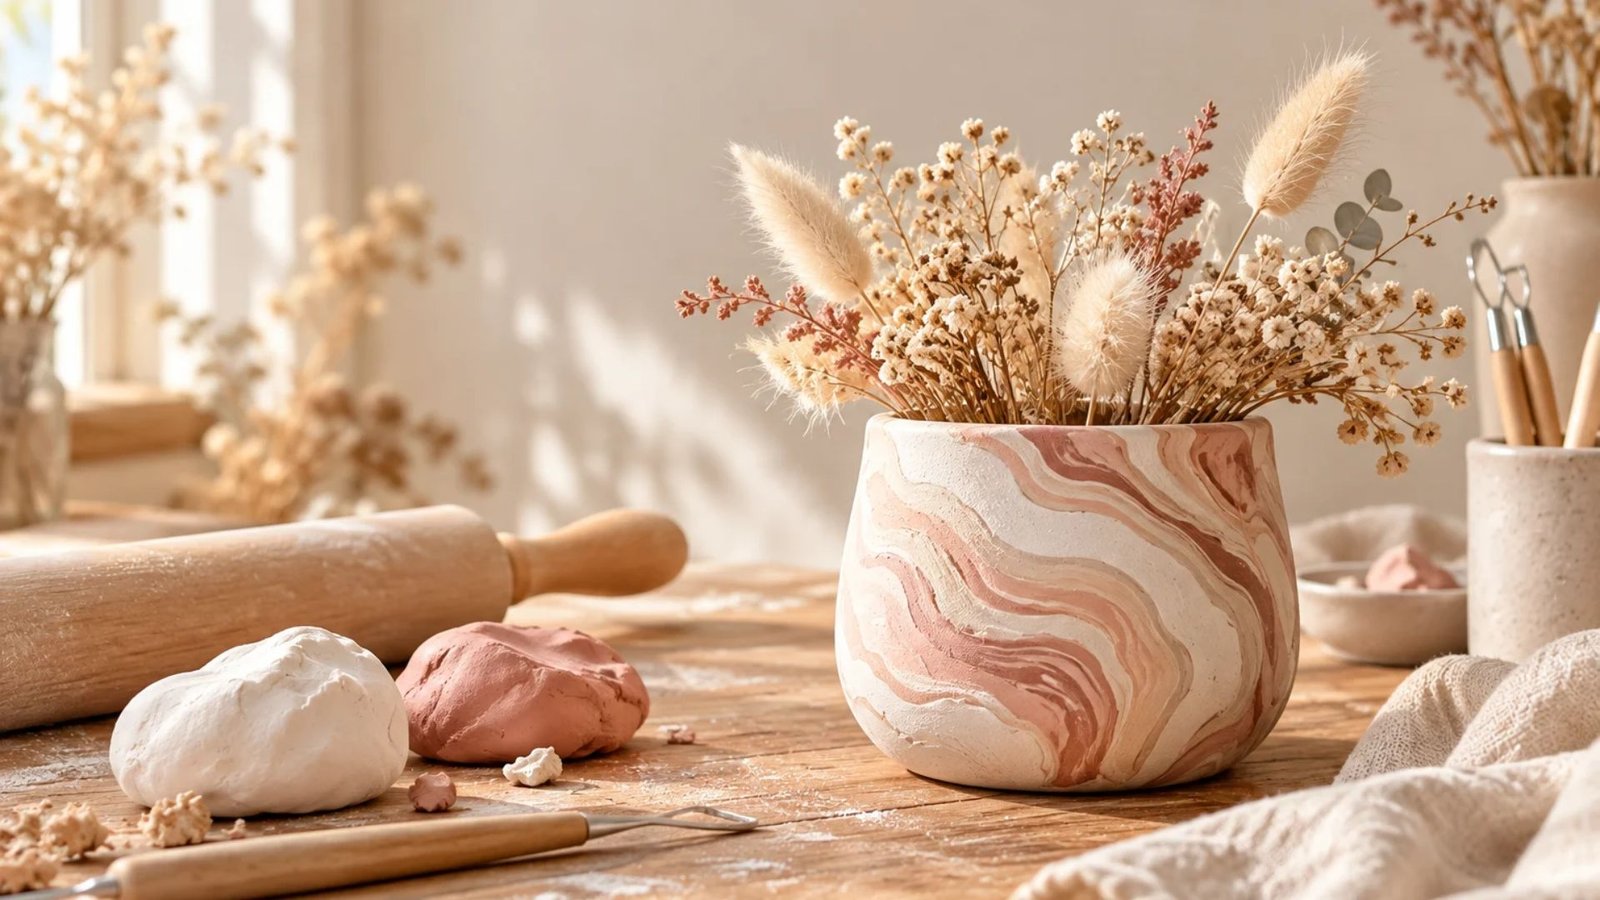
I have always loved the little details that make a home feel warm, personal, and beautiful, and handmade decor is one of my favorite ways to add that special touch.
A marbled air-dry clay pot is such a lovely project because it combines simple materials with a beautiful, natural-looking finish.
I especially love how the soft swirls of color make every pot look unique, almost like a tiny piece of marble.
The best part is that you do not need a kiln or expensive equipment to create one. With a little patience, you can make a charming decorative pot right at home.
What Is a Marbled Air-Dry Clay Pot?
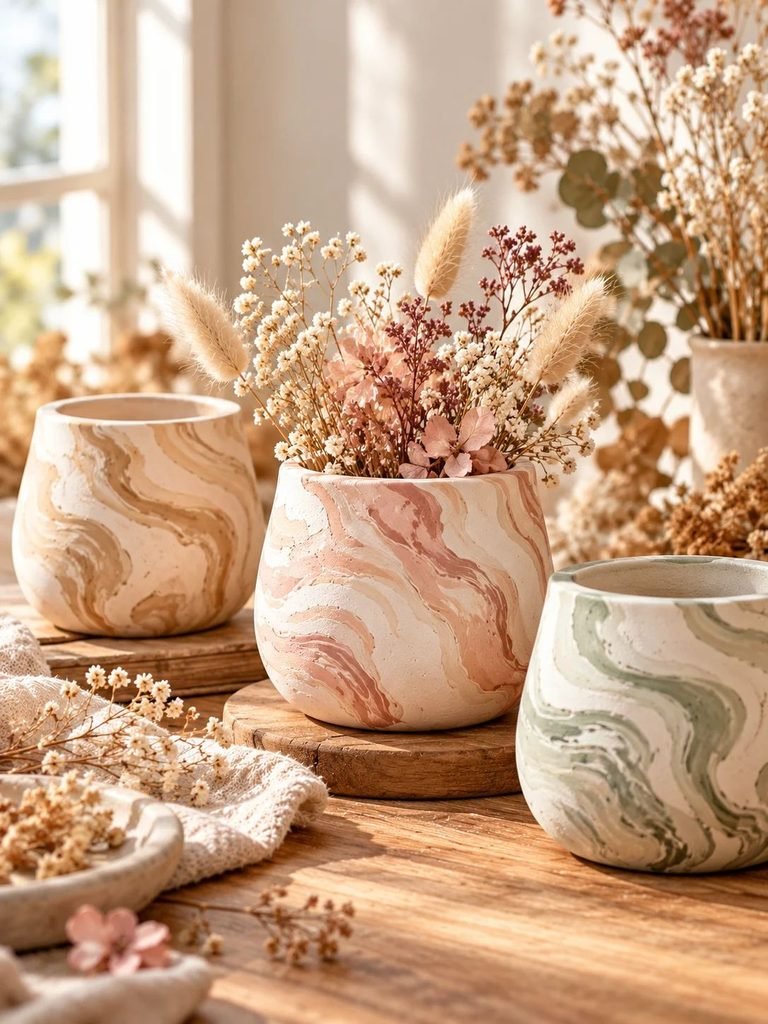
A marbled air-dry clay pot is a small decorative pot made by blending two or more colors of clay to create a swirling, marble-like pattern. Instead of painting a pattern onto the surface, you mix the colors directly into the clay, allowing the natural variations to create the design.
The finished pot can look elegant, modern, rustic, or cottagecore, depending on the colors you choose. White and beige create a soft, natural appearance, while blush pink and cream give the pot a feminine touch. You can also experiment with sage green, terracotta, gray, or black for a more dramatic design.
Air-dry clay is ideal for this project because it hardens naturally when exposed to air. You do not need a pottery kiln, making it a convenient option for beginners and anyone who enjoys simple DIY crafts.
However, it is important to remember that most air-dry clay is not waterproof. These pots are best used for holding artificial flowers, dried arrangements, paintbrushes, pens, makeup brushes, or other dry items. If you want to display a living plant, use a separate waterproof nursery pot inside your decorative clay pot.
Why You Will Love This DIY Clay Pot
There are plenty of reasons to try this project, especially if you enjoy handmade home decor.
- Beginner-friendly: You do not need advanced pottery skills or special equipment.
- Affordable: A small amount of clay can be enough to make a decorative pot.
- Completely customizable: Choose colors that match your bedroom, living room, office, or craft space.
- Beautifully unique: Every marble pattern is different, so no two pots need to look exactly alike.
- A thoughtful handmade gift: These pots can make lovely gifts for birthdays, housewarmings, Mother’s Day, or other special occasions.
- Easy to style: The finished pot looks beautiful on shelves, desks, bedside tables, and craft-room workspaces.
It is also a wonderful way to use leftover air-dry clay from other projects.
Materials You Will Need
Before you begin, gather the following supplies.
Essential Supplies
- Air-dry clay, preferably white or a natural neutral color
- Small amounts of colored air-dry clay or acrylic paint for tinting
- Rolling pin or smooth clay roller
- Craft knife or clay-cutting tool
- Small bowl or cylindrical object to use as a mold
- Ruler
- Water and a small paintbrush
- Fine-grit sandpaper
- Plastic wrap, parchment paper, or a nonstick craft mat
- Small container of water for smoothing the clay
- Clear water-based acrylic sealer or varnish suitable for air-dry clay
- Soft cloth or brush for removing sanding dust
You may also want a small sponge, a wooden modeling tool, and a piece of scrap clay for testing your color combinations.
Helpful tip: Choose a smooth-sided mold if you want a clean, rounded pot. A small bowl, drinking glass, or cylindrical container can work well, provided the clay will not stick to it.
If you use a household container as a mold, cover it with plastic wrap or another suitable release layer so you can remove the clay easily.
Choosing the Best Colors for Your Marble Pattern
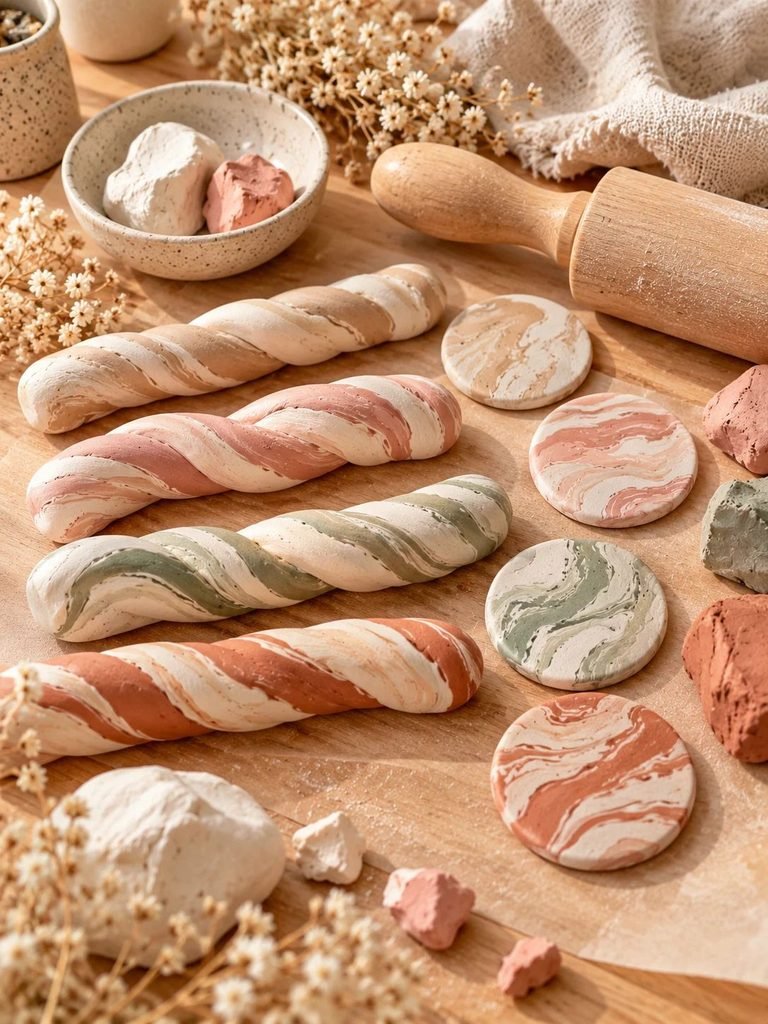
Color selection makes a big difference in the final appearance of your pot. For the prettiest results, begin with two colors and add a third only if you want a more detailed pattern.
Here are some combinations to try:
1. White and Beige
This combination creates a soft stone-like appearance that works beautifully with neutral interiors, wooden furniture, and linen accessories.
2. Cream and Blush Pink
For a feminine, romantic look, combine ivory or cream clay with muted blush pink. The result is delicate without feeling overly bright.
3. White and Sage Green
Sage green adds a gentle botanical feel and looks lovely beside houseplants, dried flowers, and natural wood.
4. White and Terracotta
This warm combination creates an earthy, Mediterranean-inspired look that pairs well with rustic or bohemian decor.
5. White, Gray, and Black
If you prefer a more modern style, combine white with small amounts of gray and black. Keep the dark color limited so the marble pattern does not become muddy.
My recommendation: If this is your first time making a marbled pot, start with white and one contrasting color. It is easier to control the pattern and see how the clay behaves.
Step 1: Prepare Your Work Surface and Clay
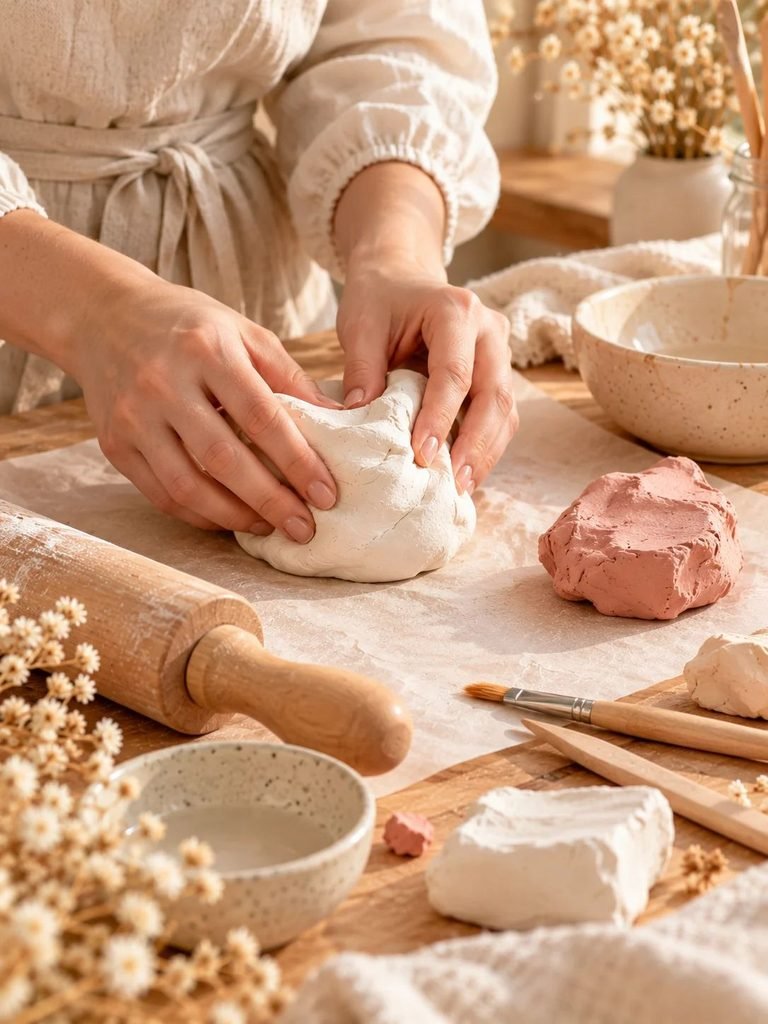
Begin by covering your work surface with a nonstick craft mat, parchment paper, or another suitable protective layer.
Take your main clay color and knead it gently until it becomes smooth and pliable. If the clay feels stiff, follow the manufacturer’s instructions for conditioning it. Avoid adding too much water, as excessive moisture can make the clay sticky and increase drying time.
Next, prepare your second color. You can use pre-colored air-dry clay or tint white clay with a small amount of compatible pigment or acrylic paint.
If you use acrylic paint, add it gradually and knead thoroughly. Too much paint can change the clay’s consistency, so test a small piece before coloring a larger amount.
Divide the clay into manageable portions. Having everything ready before you begin marbling makes the process easier and helps prevent the clay from drying out while you work.
Step 2: Create the Marble Effect

This is the most enjoyable part of the project because you get to create your own pattern.
Take small pieces of your two clay colors and roll them into short ropes. Lay the ropes beside one another, then gently twist them together.
Fold the twisted clay in half and twist it again. Repeat this process only a few times until you see attractive streaks running through the clay.
You can also create a marbled pattern by pressing small pieces of one color into a larger piece of another color and gently folding them together.
How to Get Beautiful Marble Veins
The secret is to stop mixing before the colors become completely blended.
If you knead the clay for too long, the separate colors will gradually merge into one uniform shade. That may still look attractive, but it will not produce the distinct marble veins you want.
For a natural appearance:
- Use uneven streaks rather than perfectly symmetrical lines.
- Keep the contrasting color visible.
- Fold gently instead of kneading continuously.
- Rotate the clay as you work so the pattern develops in different directions.
- Stop as soon as you are happy with the swirls.
Do not worry about making the pattern perfect. Natural marble has variations, and those irregular details are part of its charm.
Step 3: Roll Out the Marbled Clay
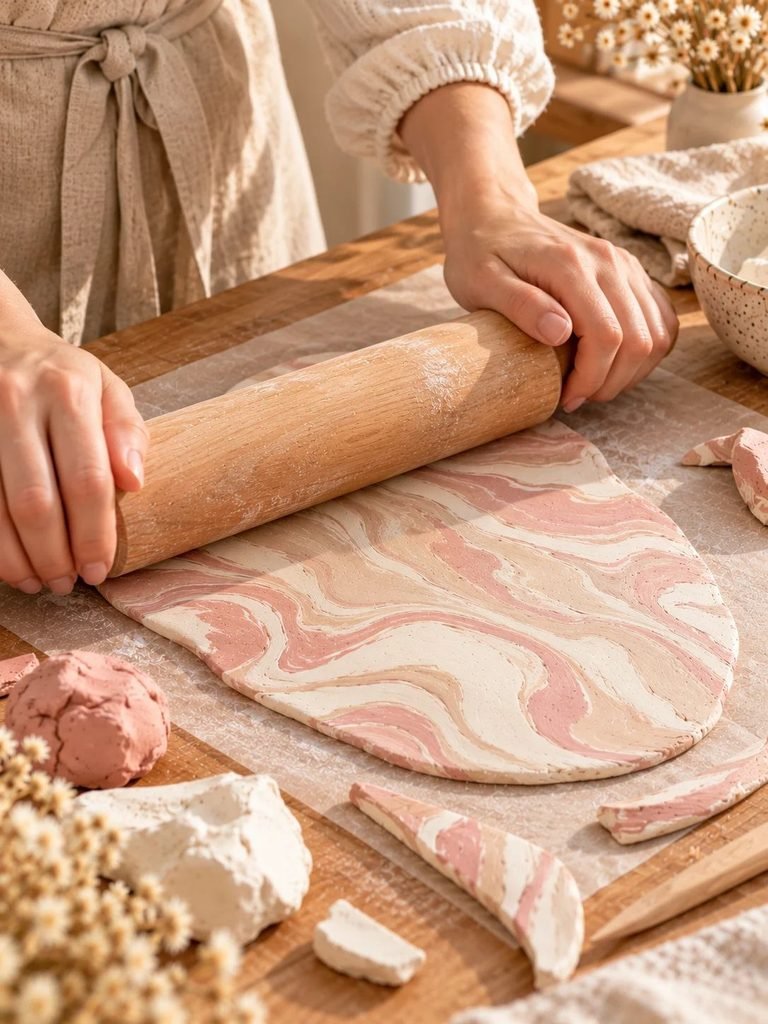
Place the marbled clay on your protected work surface and use a rolling pin to flatten it into a sheet.
Aim for an even thickness of approximately 5–7 mm for a small decorative pot. You may need to adjust this depending on the size of the pot and the instructions for your particular clay.
Try to keep the thickness consistent from the center to the edges. Thin areas may dry unevenly or become fragile, while excessively thick sections may take much longer to dry.
As you roll, you will notice that the marble pattern stretches across the surface. This is what gives the finished pot its beautiful stone-like appearance.
If the clay sticks to your rolling pin, lift it carefully and reposition it. Avoid pulling or stretching the sheet because this can distort the pattern and create uneven sections.
For a more natural look, roll in different directions rather than repeatedly moving the rolling pin along a single line.
Step 4: Cut the Pieces for Your Pot
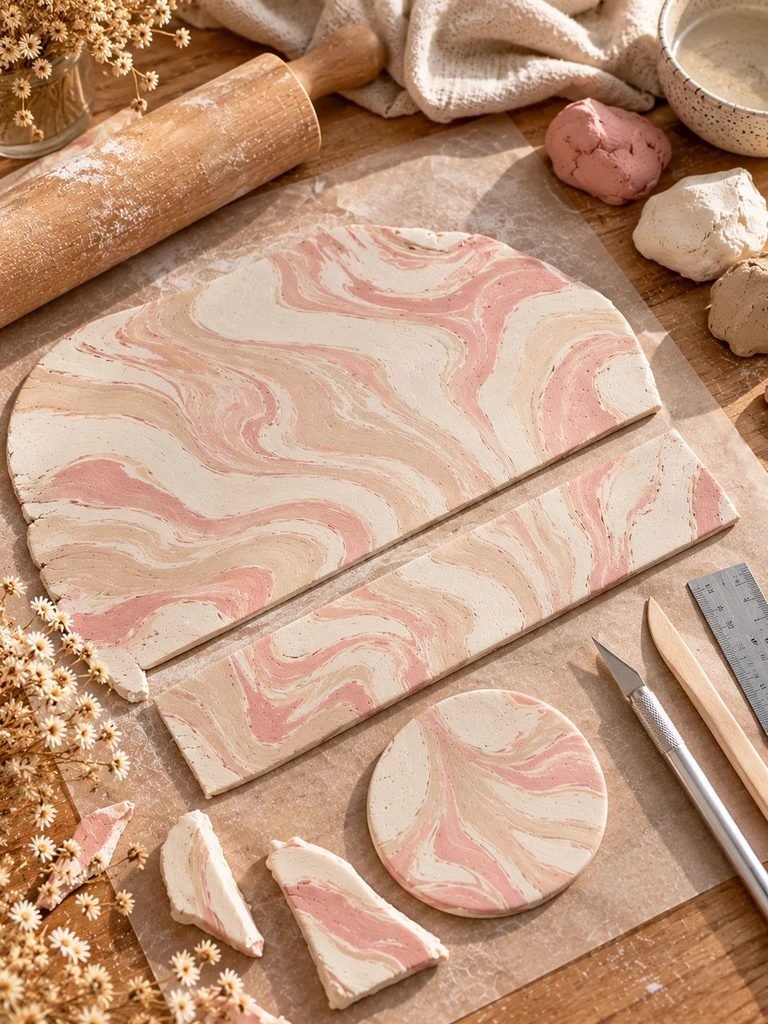
For a simple cylindrical pot, you will need one rectangular piece for the sides and one circular piece for the base.
First, measure the circumference of your mold. If you are using a cylindrical mold, you can wrap a strip of paper around it to estimate the required length.
Cut a rectangular clay sheet long enough to wrap around the mold, allowing a little extra material for joining the edges.
Next, cut a circular piece for the base. Make it approximately the same diameter as the bottom of your mold.
Use a ruler and a craft knife to create clean edges. Work slowly, and avoid pressing so hard that you flatten or distort the clay around the cuts.
If you prefer a softer, handmade appearance, you can leave the rim slightly irregular. For a modern minimalist pot, smooth and even edges may look better.
Before assembling the pot, check that the side piece fits around the mold without excessive stretching.
Step 5: Shape the Pot Around Your Mold
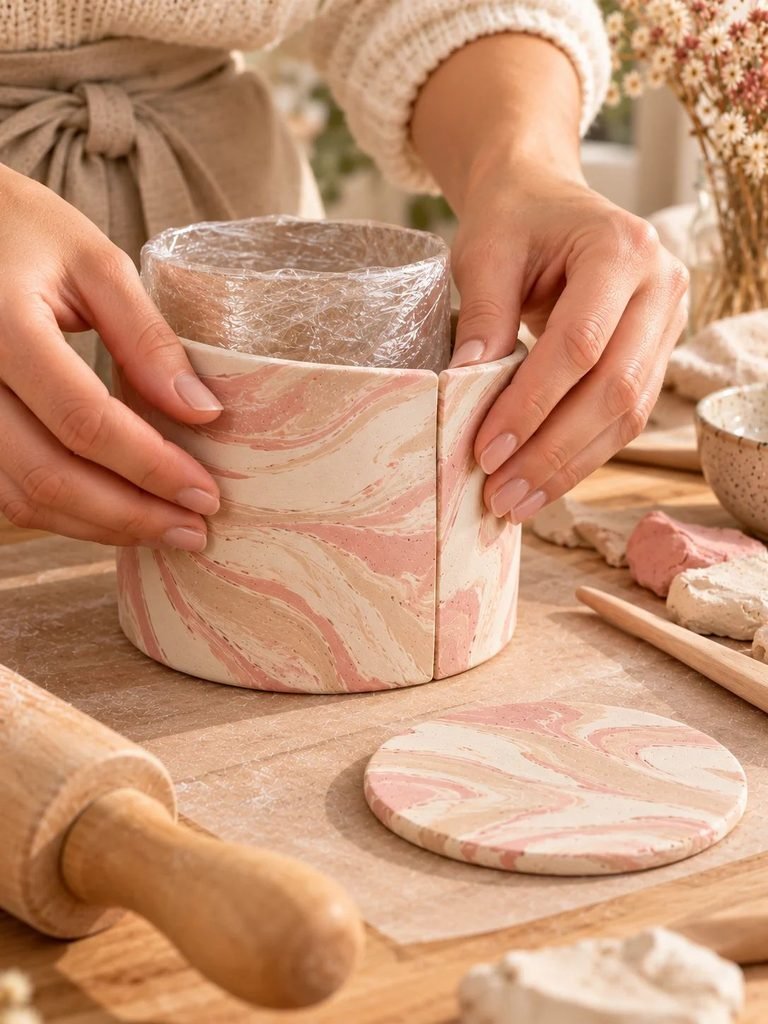
Cover your mold with plastic wrap or another suitable release layer.
Carefully lift the rectangular clay sheet and wrap it around the mold. Bring the two vertical edges together and press them gently to form a seam.
Use a little water on your fingertip or a suitable clay-smoothing tool to blend the seam. Do not use too much water, because excess moisture can weaken the clay or make the surface sticky.
Once the sides are secure, position the circular base underneath the pot.
Press the bottom edge of the side wall gently onto the base, working around the entire circumference. Smooth the joint from both the inside and outside where accessible.
The goal is to create a secure connection without leaving a thick, bulky line around the bottom.
If you notice gaps, fill them with a small amount of fresh clay and blend it carefully into the surrounding surface.
Take your time with this step. A well-joined base and side wall help the pot maintain its shape as it dries.
Step 6: Smooth and Refine the Shape
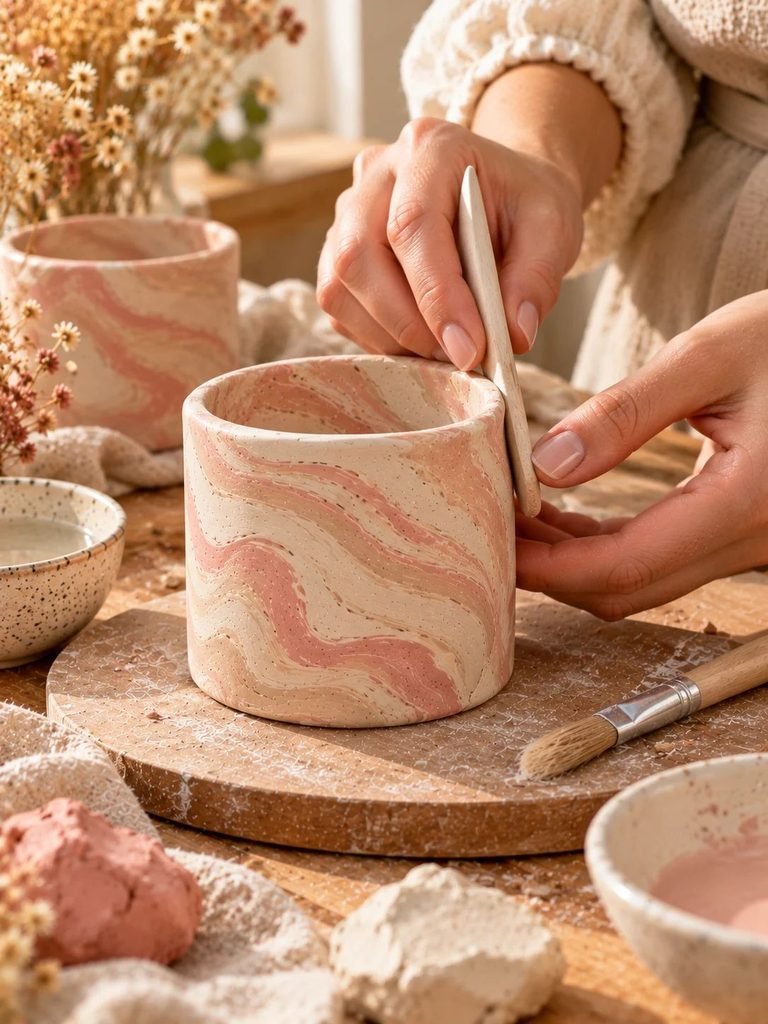
After assembling the pot, inspect the surface and edges.
Use a slightly damp fingertip or a soft modeling tool to smooth rough areas. If the rim is uneven, carefully trim it with a craft knife.
Avoid rubbing the entire surface too aggressively. You want to preserve the marbled pattern rather than blur the color variations.
For a clean, professional finish, pay particular attention to the rim and the bottom edge. These areas are easy to overlook, but they make a noticeable difference once the pot is displayed.
If you want a rounded, organic shape, gently adjust the sides with your hands. If you prefer a straight-sided pot, keep the clay supported by the mold while refining it.
Remove any loose clay crumbs before moving on to the drying stage.
Step 7: Remove the Mold and Dry the Pot
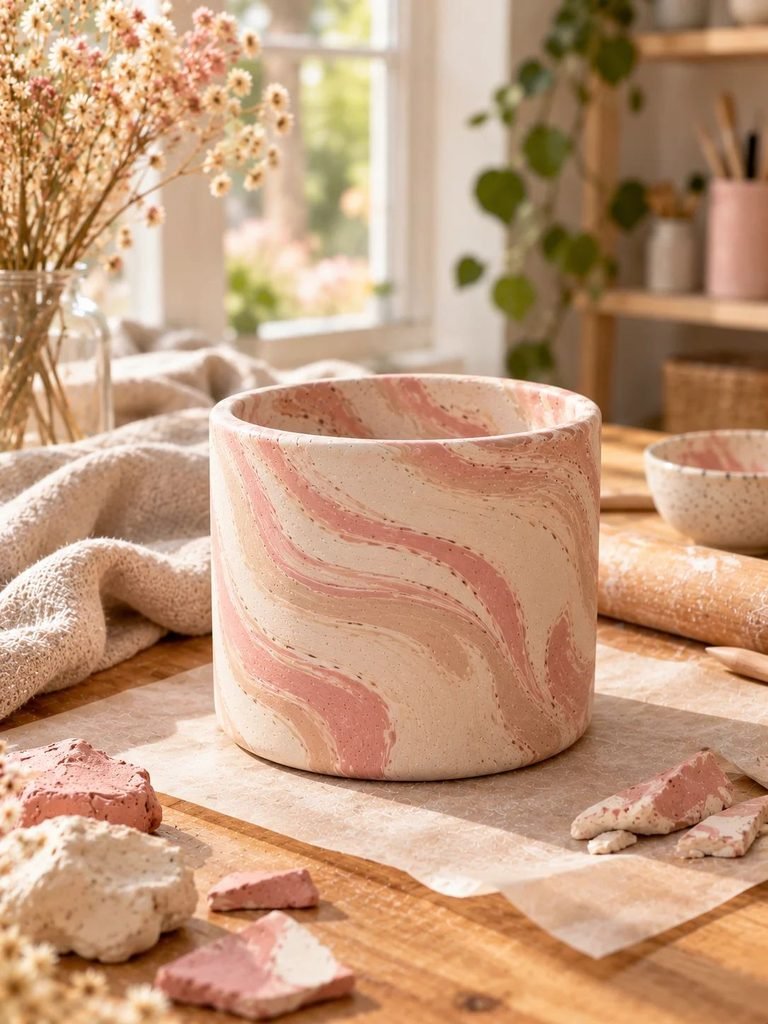
Follow the instructions for your air-dry clay to determine when and how to remove the mold.
Some projects can be released while the clay is still workable, while others benefit from partial drying first. Avoid forcing the pot off the mold if it feels fragile or begins to bend.
Place the pot on a flat, protected surface in a well-ventilated area. Keep it away from direct heat, strong sunlight, radiators, or other sources of rapid drying.
Allow the pot to dry gradually. Depending on the clay brand, wall thickness, size, and humidity, this may take 24–72 hours or longer.
Thicker pieces may require several additional days.
If possible, rotate the pot carefully as it dries so that moisture can escape more evenly. Do not handle it unnecessarily while it is soft.
How to Tell When the Pot Is Dry
The outside may feel firm before the inside has completely dried. Check the manufacturer’s recommended drying time and inspect the piece for remaining dampness.
A fully dry pot should feel firm and should not have visibly damp areas. Do not seal the clay until it has dried thoroughly.
Important: Never speed up drying by placing ordinary air-dry clay in an oven unless the product manufacturer explicitly states that this is safe.
Step 8: Sand the Surface for a Smooth Finish
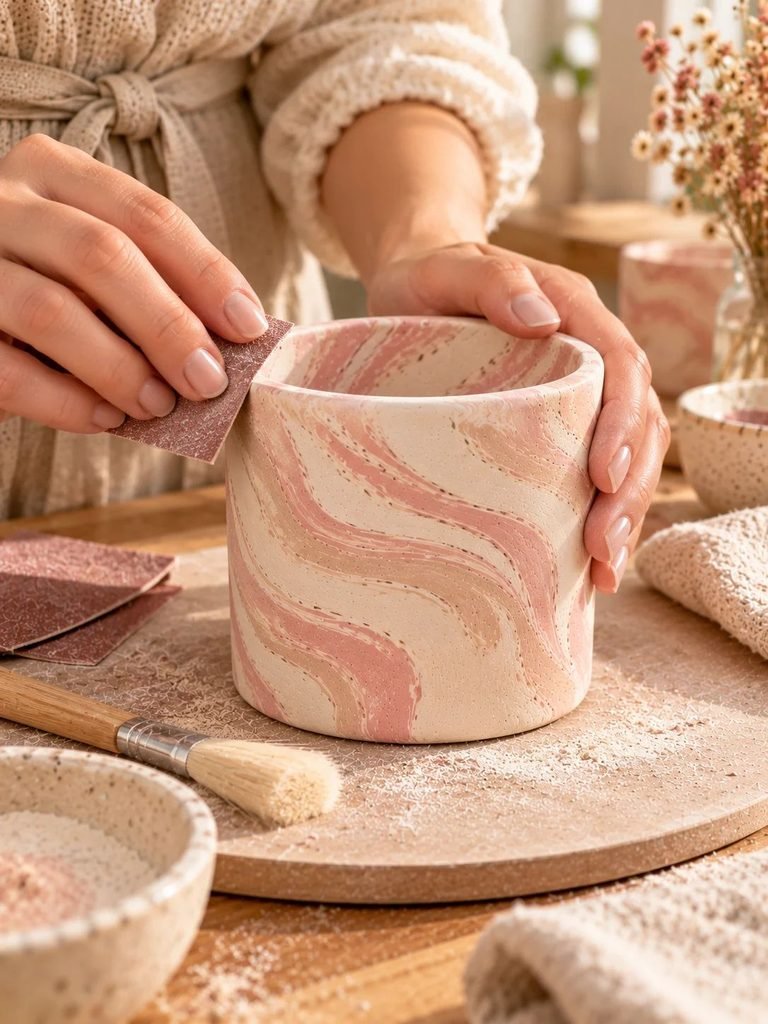
Once the pot is completely dry, examine it for rough edges, small bumps, or uneven seams.
Use fine-grit sandpaper to smooth these areas gently. Begin with a light touch, as aggressive sanding may remove the surface pattern or weaken thin sections.
You can smooth the rim, tidy the base, and soften any sharp corners.
After sanding, remove all dust with a soft brush or cloth. If the clay manufacturer’s instructions recommend a particular cleaning method, follow that guidance.
Avoid soaking the pot or rinsing it under running water. Unsealed air-dry clay can absorb moisture and become damaged.
For a more rustic appearance, you can skip extensive sanding and preserve the natural handmade texture.
Step 9: Seal the Marbled Clay Pot
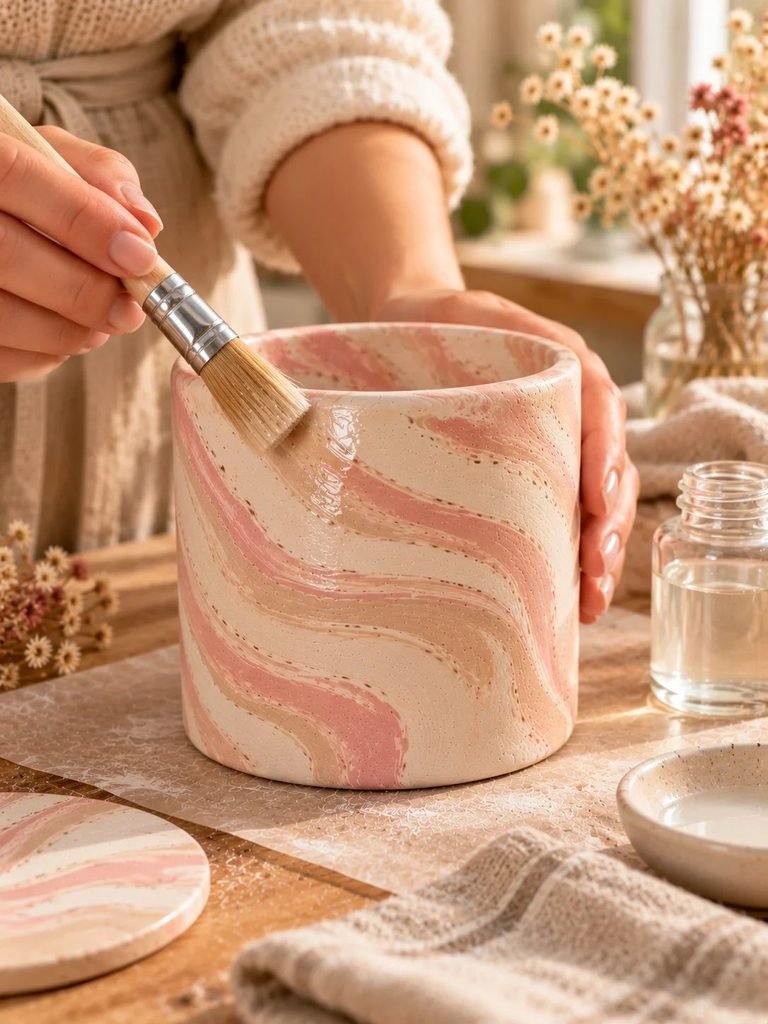
Sealing is an optional finishing step, but it can help reduce surface dust, improve the appearance, and provide some protection against everyday handling.
Choose a clear sealer or varnish specifically described as suitable for your type of air-dry clay. Depending on the product, you can choose a matte, satin, or glossy finish.
- Matte sealer: Keeps the pot looking soft and natural.
- Satin sealer: Adds a gentle sheen without appearing too shiny.
- Glossy varnish: Enhances the contrast between the marble colors and creates a polished appearance.
Before applying the sealer, make sure the pot is completely dry.
Use a soft brush to apply a thin, even coat, following the product instructions. Avoid leaving thick puddles around the rim or base.
Allow the first coat to dry fully before applying another coat if recommended by the manufacturer.
Do not assume that a clear varnish makes air-dry clay waterproof. Many sealers provide only limited moisture resistance, and the finished pot should generally be kept away from standing water.
If you plan to use the pot with a living plant, place the plant in a separate waterproof nursery pot and remove it for watering. Make sure excess water cannot collect inside the decorative clay pot.
Step 10: Style Your Finished Marbled Clay Pot
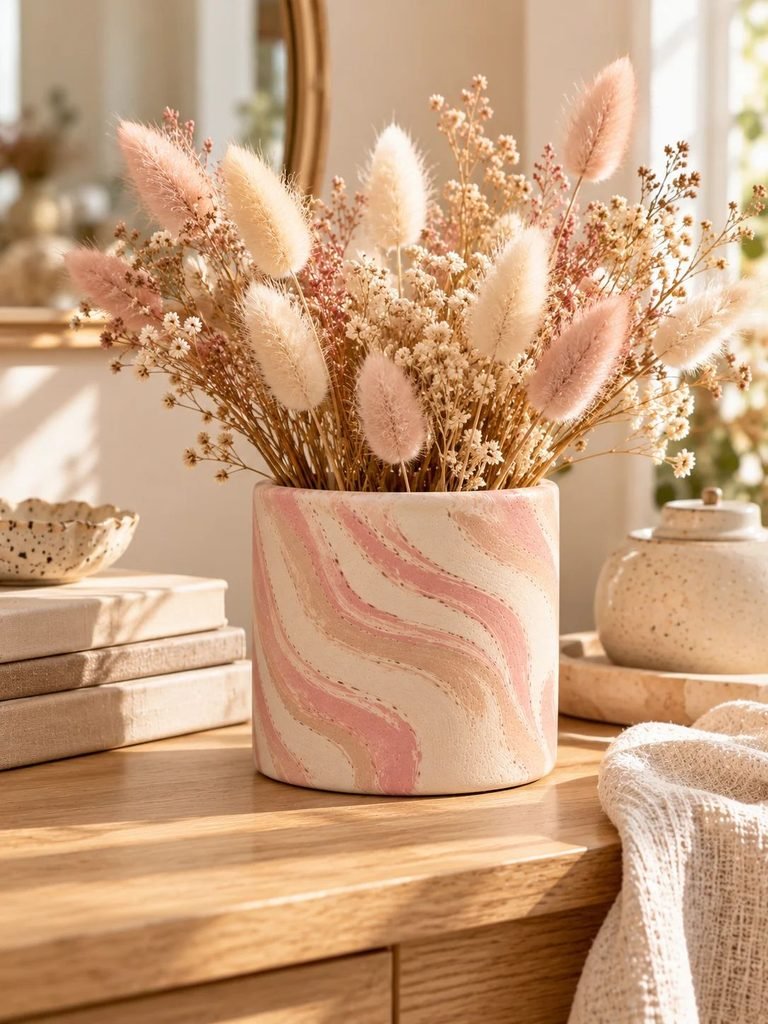
Once the sealer has cured according to its instructions, your pot is ready to display.
Here are a few simple ideas for using it around your home.
Display Dried Flowers
Fill the pot with dried lavender, bunny tails, baby’s breath, or other small dried flowers. Cream and blush marbling works particularly well with soft neutral arrangements.
Make a Desk Organizer
Use the pot to hold pens, pencils, paintbrushes, or other small craft supplies. This is a practical way to enjoy your handmade creation every day.
Create a Makeup Brush Holder
A marbled pot can look beautiful on a vanity or dressing table. Choose colors that coordinate with your other accessories for a cohesive look.
Style a Decorative Shelf
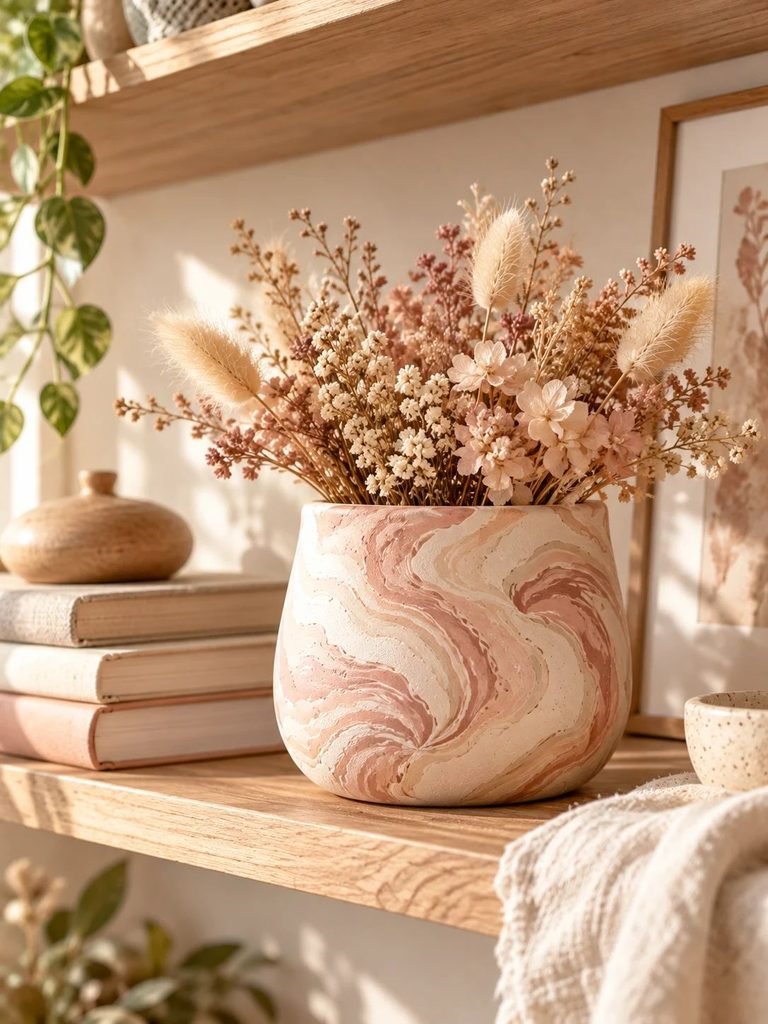
Place the pot beside a stack of books, a small framed print, or a wooden candle holder. Varying the heights and textures creates an interesting display.
Use It as a Handmade Gift
Arrange the pot in a small gift box with tissue paper and a handwritten note. You could pair it with dried flowers or a few craft supplies to make the gift feel extra special.
Remember that the pot is decorative rather than food-safe, so do not use it to store food or liquids.
Common Mistakes to Avoid When Making a Marbled Air-Dry Clay Pot
Even a simple clay project can have a few challenges. Fortunately, most are easy to prevent.
Mistake 1: Overmixing the Colors
Mixing too much causes the colors to blend into a single shade.
How to avoid it: Twist and fold the clay only a few times, then stop when you can clearly see the marble pattern.
Mistake 2: Making the Walls Too Thin
Thin walls can bend, crack, or become fragile during drying.
How to avoid it: Roll the clay to a reasonably even thickness and check the sides before wrapping them around your mold.
Mistake 3: Using Too Much Water
Excess water can make the clay sticky and interfere with drying.
How to avoid it: Use only a small amount when smoothing seams and follow the clay manufacturer’s guidance.
Mistake 4: Drying the Pot Too Quickly
Rapid drying can contribute to cracking or warping.
How to avoid it: Let the pot dry gradually in a well-ventilated area away from direct heat and sunlight.
Mistake 5: Sealing the Pot Too Early
Applying varnish while moisture remains in the clay can affect the finish and may trap moisture.
How to avoid it: Allow the pot to dry completely before applying a compatible sealer.
Mistake 6: Expecting the Pot to Hold Water
Ordinary air-dry clay is porous and may soften or deteriorate when exposed to moisture.
How to avoid it: Use the pot for dry decorative purposes or as an outer cover for a separate waterproof container.
How to Fix Common Problems
Sometimes a project does not turn out exactly as planned. Here is how to handle a few common issues.
If your marble pattern looks muddy: You may have mixed the colors too much. For your next attempt, use stronger contrasting colors and fewer folds. If the current clay is still workable, try incorporating a small fresh piece of the lighter color and folding it gently.
If the pot begins to crack: Small cracks sometimes appear during drying, particularly around seams or thicker sections. If the clay is still workable, follow the manufacturer’s repair recommendations and blend in a little fresh clay. If the pot is already completely dry, repairs may be possible with a compatible clay repair material, but the finished piece may remain fragile.
If the pot becomes uneven: Support it with the mold while it is still soft, provided the clay can be removed safely according to the manufacturer’s instructions. Let it dry on a flat surface and avoid moving it unnecessarily.
If the surface feels rough: Sand the fully dry pot gently with fine-grit sandpaper, then remove the dust before sealing.
If the colors lose their definition: A heavy layer of glossy sealer may make the surface look different from what you expected. Test the finish on a spare clay piece first so you can see how the varnish affects the colors and sheen.
Tips for Getting a More Professional Finish
If you want your marbled clay pot to look polished enough for a gift or a decorative display, a few small details can make a big difference.
- Keep the color palette simple. Two or three coordinated colors usually look more natural than many competing shades.
- Plan the pattern before cutting. Look at the rolled sheet and choose the most attractive section for the front of the pot.
- Make the seams neat. Smooth the vertical joint and the base carefully.
- Keep the wall thickness consistent. This helps the pot maintain its shape while drying.
- Choose the right finish. Matte and satin finishes complement neutral, natural decor, while gloss gives a more polished look.
- Be patient with drying. A completely dry piece is easier to sand and seal successfully.
- Practice with a small sample. Test your color combination, rolling technique, and sealer before making the final pot.
One of the nicest things about handmade clay decor is that tiny imperfections can add character. Your pot does not have to look factory-made to be beautiful.
Frequently Asked Questions
Can beginners make a marbled air-dry clay pot?
Yes. This project is suitable for beginners because it uses simple tools and does not require a kiln. Start with a small pot, use two colors, and work slowly through the shaping and drying stages.
How long does a marbled air-dry clay pot take to dry?
Many small projects need approximately 24–72 hours, but the actual time depends on the clay brand, thickness, size, and humidity. Larger or thicker pieces may need longer. Always follow the manufacturer’s instructions and make sure the pot is completely dry before sealing.
Can I paint the clay instead of using colored clay?
Yes. You can paint the finished pot after it has dried, but this creates a different effect from marbling the clay itself. For a true marble appearance, blend two clay colors before rolling. If you want painted marble veins, use fine brushes and acrylic paints after drying.
Do I need to seal my air-dry clay pot?
Sealing is not always necessary for dry decorative use, but it can improve the finish and provide some surface protection. Choose a compatible sealer and follow its application and curing instructions.
Can I put a real plant in my clay pot?
You can use it as an outer decorative cover for a plant, but do not rely on ordinary air-dry clay to hold water. Place the plant in a separate waterproof nursery pot, remove it for watering, and make sure moisture does not accumulate inside the decorative pot.
Can I use polymer clay instead?
Polymer clay is another option, but it requires a different process and is typically hardened according to the manufacturer’s baking instructions. Do not treat polymer clay and air-dry clay as interchangeable materials.
What should I do if my pot cracks while drying?
Allow the piece to dry safely and assess the crack. If the clay is still workable, repair it according to the manufacturer’s recommendations. For a completely dry pot, use a compatible repair material if appropriate. Deep cracks may make the pot unsuitable for handling or display.
Can I make a marbled clay pot without a mold?
Yes. You can shape the clay by hand, although using a mold makes it easier to achieve even walls and a consistent shape. A mold is particularly helpful for your first project.
Final Thoughts
Making a marbled air-dry clay pot is a lovely way to explore a new craft while creating something beautiful for your home. With a little clay, a few simple tools, and your favorite color combination, you can make a decorative piece that feels personal and special.
The most important thing is to enjoy the process. Do not worry if your first marble pattern is imperfect or your pot has a slightly handmade shape. Those little differences are what make each piece unique.
Once you have tried this simple design, experiment with different colors, shapes, and finishes to create a collection that suits your style. Whether you display your pot with dried flowers, use it to organize craft supplies, or wrap it up as a thoughtful handmade gift, it is a satisfying little project to add to your DIY list.
Happy crafting!