6 DIY Cottage Pen Holder Ideas to Make Your Desk Feel Cozy and Beautiful
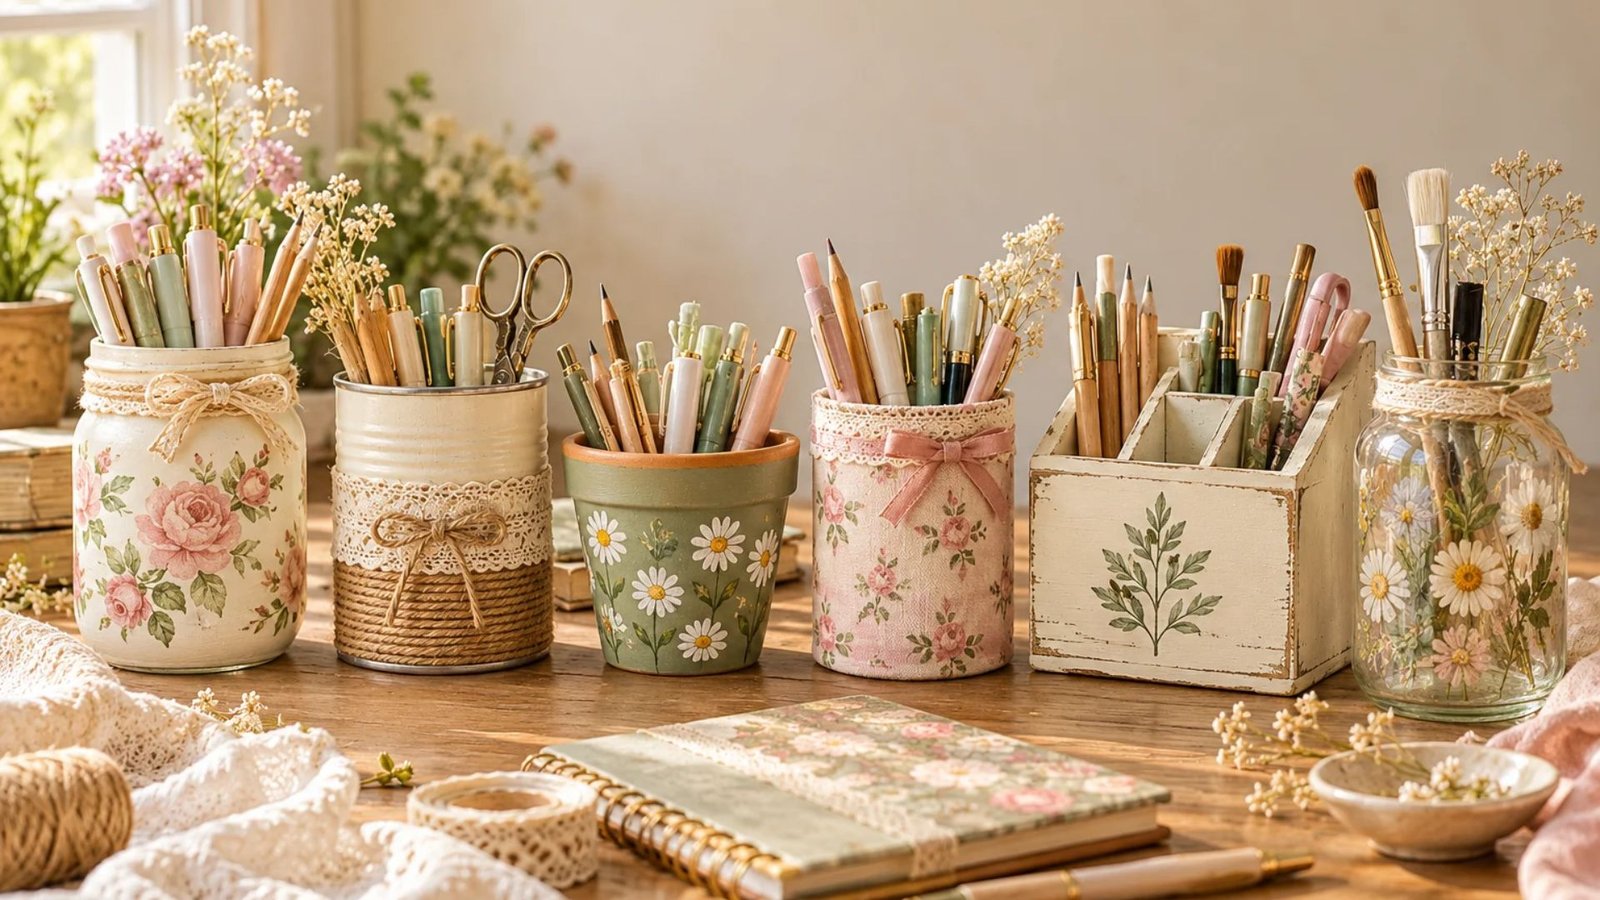
I’ve always loved the little things that make a workspace feel warm, personal, and inviting.
A pretty pen holder might seem like a small detail, but I think it can make such a difference when you’re sitting down to write, plan your week, or work on a creative project.
Cottage-inspired decor is especially lovely because it celebrates natural textures, delicate florals, vintage treasures, and simple handmade touches.
If you’re looking for an easy way to bring that cozy charm to your desk, these six DIY cottage pen holder ideas are just what you need. They’re beautiful, practical, and wonderfully fun to make at home.
Why Make Your Own Cottage Pen Holder?
A cottage-style pen holder is more than just a place to store your pens and pencils. It’s an opportunity to bring a little personality to your desk while keeping your everyday essentials organized.
The cottagecore aesthetic takes inspiration from country cottages, vintage interiors, handmade decorations, natural materials, and the simple beauty of everyday life. Think soft floral patterns, distressed wood, creamy whites, muted greens, delicate lace, and warm, earthy textures.
The lovely thing about making your own pen holder is that you don’t need expensive supplies or advanced crafting skills. You can transform an empty jar, a leftover tin can, or a simple cardboard container into something that looks beautiful enough to display on your desk.
These projects are perfect for:
- Decorating a home office or study area.
- Organizing pens, pencils, paintbrushes, and crochet hooks.
- Adding a handmade touch to a bedroom desk or craft room.
- Creating thoughtful gifts for friends, teachers, and stationery lovers.
- Reusing everyday items instead of throwing them away.
You can also customize each design to match your favorite colors, fabrics, flowers, and decorative details.
1. Vintage Floral Mason Jar Pen Holder
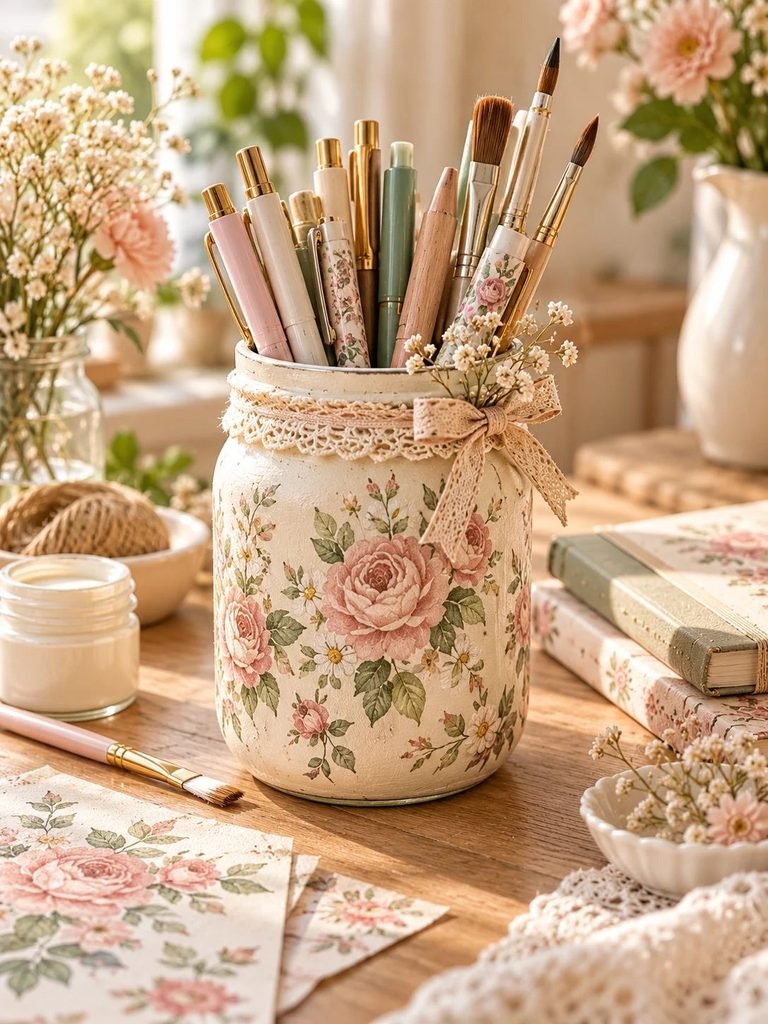
A vintage floral mason jar pen holder is one of the easiest ways to bring cottage charm to your workspace. The combination of a glass jar, delicate floral details, and soft pastel colors creates a pretty accessory that looks lovely on a writing desk or craft table.
This project is especially suitable if you enjoy romantic, feminine decor with a slightly vintage feel.
Materials You’ll Need
- One clean, wide-mouth mason jar or glass jar.
- Acrylic paint in cream, blush pink, or sage green.
- A small paintbrush or sponge.
- Floral decoupage paper or decorative napkins.
- Decoupage glue or suitable craft glue.
- Clear water-based sealer suitable for your chosen paint and surface.
- Fine sandpaper, optional.
- Ribbon, lace, or jute twine, optional.
Step-by-Step Instructions
Step 1: Clean the jar.
Wash the jar thoroughly and remove any labels or sticky residue. Allow it to dry completely before decorating. A clean surface helps paint and adhesive adhere more evenly.
Step 2: Choose your base color.
For a classic cottage look, choose warm ivory, soft cream, or muted sage green. Apply a thin coat of acrylic paint to the outside of the jar.
If the glass is very smooth, use a primer designed for glass before painting. Allow each coat to dry according to the product instructions, adding another coat if necessary.
Step 3: Add delicate floral details.
Cut out small flowers, leaves, or botanical patterns from your chosen decoupage paper. Position them around the jar, leaving a little space between the designs so the decoration feels light and balanced.
Apply the paper with decoupage glue, smoothing it gently to reduce wrinkles and air bubbles. Follow the adhesive manufacturer’s instructions for drying.
Step 4: Finish the rim.
Wrap a narrow piece of lace or soft ribbon around the neck of the jar. You could also use natural jute twine for a more rustic country-cottage appearance.
Secure the trim with a small amount of suitable glue, keeping it away from areas where it might interfere with using the jar.
Step 5: Seal and dry.
If your paint and decorative materials require protection, apply a compatible clear sealer. Make sure it is suitable for glass and the products underneath it. Allow the jar to cure fully before adding your stationery.
Step 6: Arrange your stationery.
Fill the jar with pens, pencils, markers, or paintbrushes. Place it beside a notebook, a small vase of dried flowers, or a pretty desk organizer to complete the look.
Styling Tip
Use two or three jars in different sizes to create a matching stationery set. One can hold pens, another can store scissors, and a third can keep paintbrushes within easy reach.
Because the jars are made of glass, place them on a stable surface and avoid overloading them with heavy tools.
Read 15 Plastic-Free DIY Christmas Gifts for a Sustainable Holiday
2. Rustic Tin Can Pen Holder With Lace and Twine
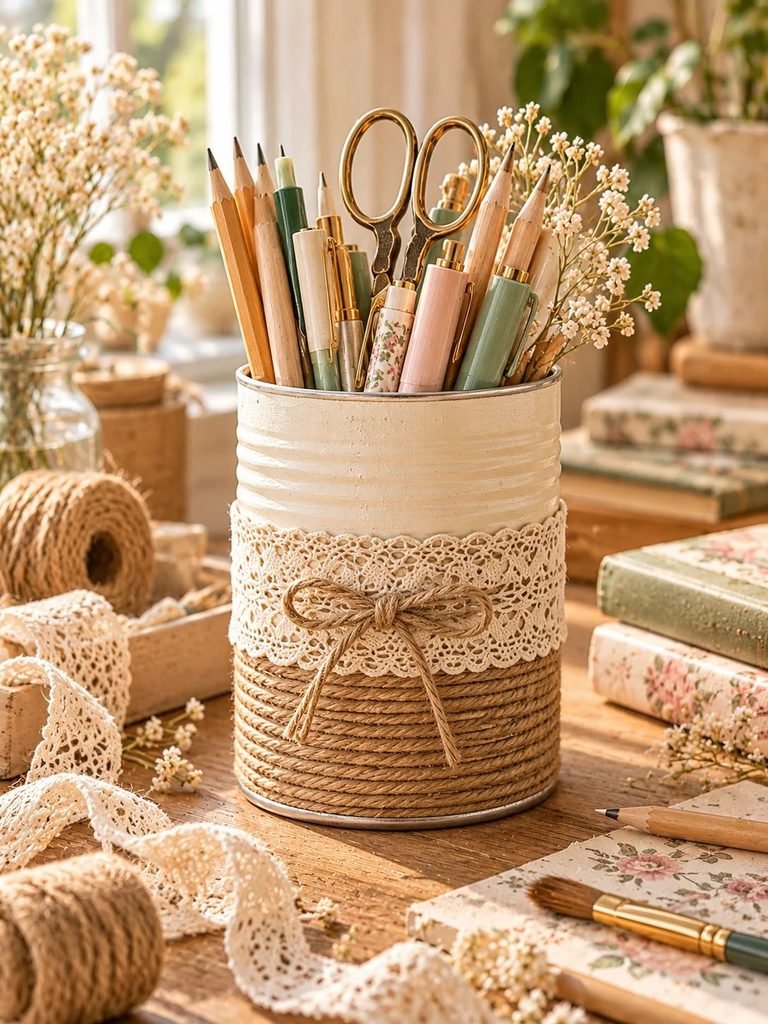
If you love simple crafts that reuse everyday materials, this rustic tin can pen holder is a wonderful project to try. An empty food can can become a charming cottage accessory with just a little paint, fabric, and decorative trim.
The finished holder has a relaxed farmhouse feel that works beautifully with wooden desks, neutral stationery, and natural decorations.
Materials You’ll Need
- One empty tin can.
- Warm white or beige acrylic paint.
- A paintbrush.
- Natural jute twine.
- Cream lace or cotton ribbon.
- Craft glue suitable for metal and fabric.
- Fine sandpaper, if needed.
- A piece of felt or cork for the bottom, optional.
Step-by-Step Instructions
Step 1: Prepare the can safely.
Remove the label and wash the can thoroughly. Check the rim carefully. If there are sharp edges, use a can with a smooth, safe rim or have it properly fitted with a protective edge. Never leave a sharp metal edge exposed.
Allow the can to dry completely.
Step 2: Paint the outside.
Apply a thin coat of warm white or beige acrylic paint. If the metal is smooth, use an appropriate metal primer first.
Let the paint dry before applying another coat. Two thin coats usually create a more even finish than one thick coat.
Step 3: Wrap the lower section with twine.
Apply a small amount of craft glue near the bottom of the can. Press the end of the twine into place and wrap it carefully around the can, keeping each row close to the previous one.
Continue until you have covered roughly the lower third of the can. Secure the end neatly with glue.
Step 4: Add a strip of lace.
Wrap a narrow strip of cream lace around the middle or upper part of the can. This creates a pretty contrast between the rough twine and the delicate fabric.
Choose a simple lace pattern if you prefer an understated look, or use a slightly wider trim for a romantic vintage style.
Step 5: Add a small finishing detail.
Tie a little bow from cotton ribbon or attach a small fabric flower. Keep the embellishments modest so they don’t interfere with reaching for your pens.
Step 6: Protect the bottom.
If you want to prevent scratches on your desk, attach a piece of felt or cork to the underside of the can.
Allow all the glue and paint to dry fully before filling the holder.
Styling Tip
This design looks particularly pretty alongside a wooden pencil tray, a cream notebook, and a small potted plant. You can also make several holders in different heights to organize markers, rulers, scissors, and craft tools.
For a coordinated finish, keep the colors consistent while changing the amount of twine or lace on each can.
Read 15 DIY Christmas Ornament Ideas That Look Beautifully Handmade and Cozy
3. Cottagecore Pen Holder Made From a Small Terracotta Pot
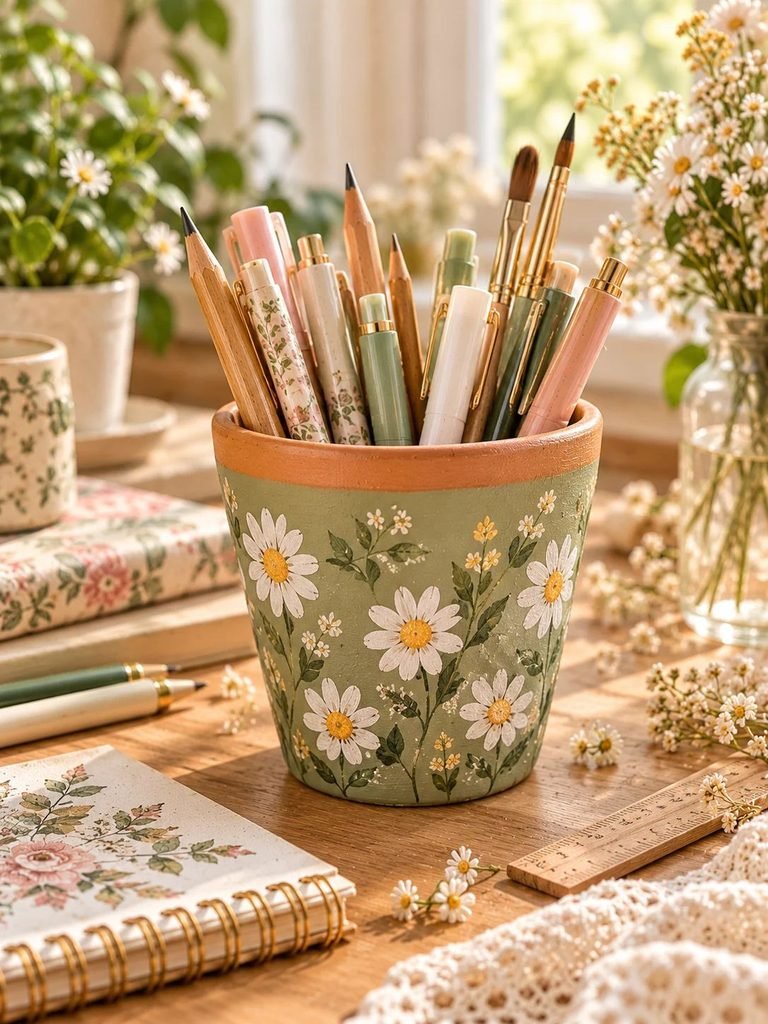
A small terracotta pot makes a lovely pen holder because its natural earthy color already fits beautifully into cottage-inspired decor. With a little paint and a few botanical details, you can turn a simple garden pot into a charming desktop accessory.
This idea is perfect if you prefer natural materials and a slightly rustic style rather than a glossy, polished finish.
Materials You’ll Need
- One small, clean terracotta flowerpot.
- Acrylic craft paint in cream, sage green, or dusty pink.
- A small paintbrush.
- A fine brush for details.
- A pencil for sketching.
- A clear compatible sealer, optional.
- Felt for the base, optional.
Step-by-Step Instructions
Step 1: Clean the pot.
Brush away any loose dust and make sure the pot is completely dry. If it has been used for planting, remove any soil residue before bringing it into your workspace.
Step 2: Paint the base.
Apply a thin coat of cream or soft pastel acrylic paint to the outside of the pot. You can paint the entire pot or leave the upper rim in its natural terracotta color for a more rustic appearance.
Let the first coat dry before adding another.
Step 3: Sketch a simple botanical design.
Use a pencil to lightly plan your decoration. Tiny daisies, delicate leaves, little sprigs, and small scattered flowers all suit the cottagecore look.
If you are new to painting, start with simple shapes. A few small flowers spaced around the pot can look just as beautiful as an elaborate design.
Step 4: Paint the flowers and leaves.
Use a fine brush to add your floral details. White petals with soft yellow centers look lovely on a sage-green background, while blush flowers stand out beautifully against cream.
Allow each color to dry before painting overlapping details.
Step 5: Seal the design if needed.
Once the paint has dried, apply a compatible clear sealer if you want extra protection against handling and light dusting. Follow the product’s directions for drying and curing.
Step 6: Finish the base.
Attach a small felt circle to the underside of the pot if you want to protect your desk. Then add your favorite pens and pencils.
Styling Tip
Pair this pen holder with a tiny matching terracotta pot containing a faux plant or a dried-flower arrangement. The repeated natural texture makes the two pieces look like a coordinated set.
A painted pot can also hold crochet hooks, colored pencils, or makeup brushes, making it useful beyond your desk.
4. Shabby Chic Fabric-Wrapped Pen Holder
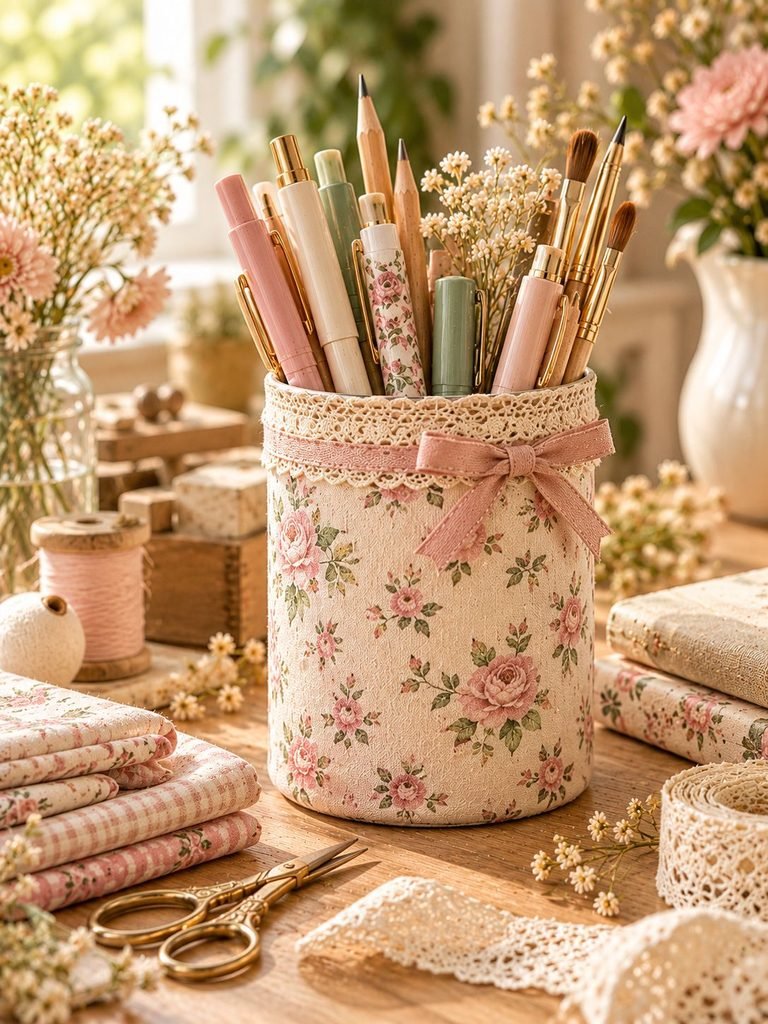
A fabric-wrapped pen holder is ideal if you love soft textures, pretty patterns, and the gentle charm of vintage cottage interiors. Floral cotton, tiny gingham checks, and delicate rose prints all work beautifully for this design.
It is also a great way to use small fabric scraps left over from sewing projects.
Materials You’ll Need
- A clean, sturdy cardboard container or smooth-sided can with a safe rim.
- Cotton fabric in a floral or gingham pattern.
- Fabric scissors.
- A ruler and pencil.
- Craft glue suitable for your container and fabric.
- Cream lace or ribbon, optional.
- A small piece of felt or cardboard for finishing the base.
Step-by-Step Instructions
Step 1: Choose your container.
Select a container that is sturdy enough to stand upright when filled with pens. A thick cardboard tube with a flat base or a smooth-sided stationery can works well.
Avoid flimsy cardboard that might bend under the weight of your stationery.
Step 2: Measure the fabric.
Measure the height and circumference of your container. Cut a rectangle of fabric slightly taller than the container and wide enough to wrap around it, allowing a small overlap at the seam.
Test the fit before applying any glue.
Step 3: Prepare the fabric edges.
If the fabric frays easily, fold the top and bottom edges inward slightly and press them flat. This creates a neater finish.
You can also choose a fabric with a finished selvage along one edge to simplify the project.
Step 4: Attach the fabric.
Apply a thin, even layer of suitable craft glue to the outside of the container. Position the fabric carefully and smooth it down as you wrap it around.
Work slowly, pressing out wrinkles as you go. Avoid using too much glue, as it can soak through lightweight fabric and leave visible marks.
Step 5: Finish the seam.
Fold the overlapping edge neatly and glue it down. Add a narrow strip of lace or ribbon over the seam if you want a more decorative finish.
Step 6: Neaten the top and bottom.
Fold any excess fabric over the top edge only if it can be finished safely and won’t interfere with using the holder. For an open cardboard container, make sure the inner edge is neat and secure.
Cover the bottom with felt or a fitted piece of cardboard if necessary.
Allow the glue to dry completely before using the holder.
Styling Tip
Choose fabric that complements your room rather than matching everything exactly. A small rose print can look lovely beside plain cream stationery, while sage gingham works beautifully with natural wood.
If you have leftover fabric, use it to make a matching notebook cover, pin cushion, or small storage basket.
5. Distressed Wooden Cottage Pen Holder
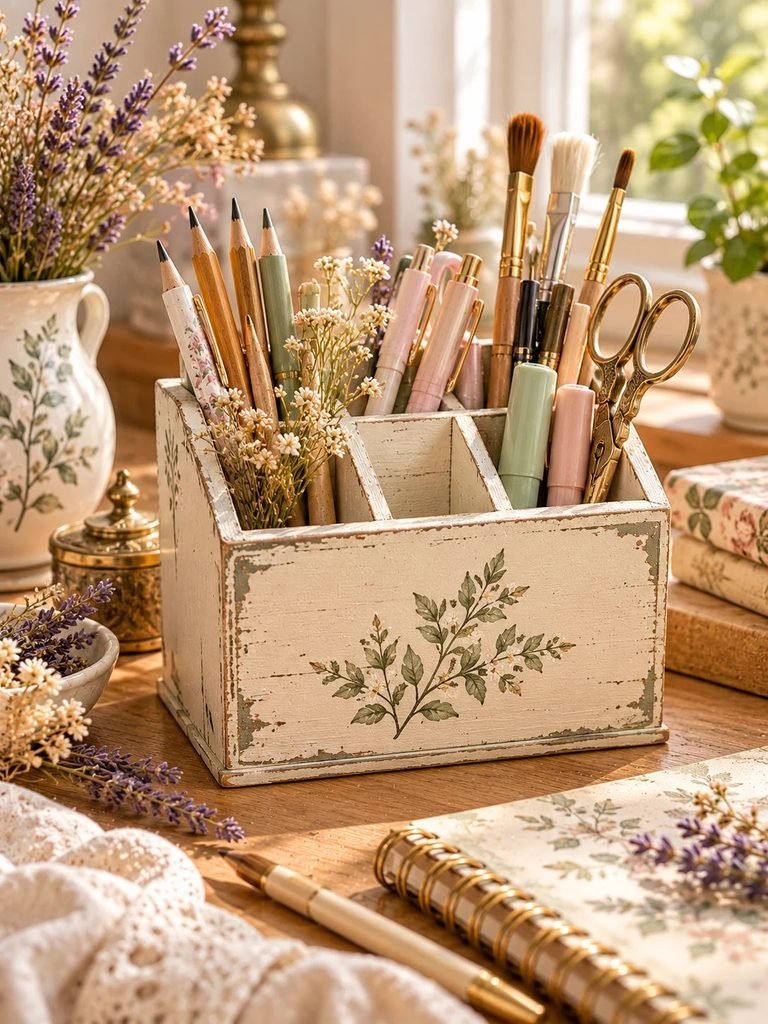
If you prefer vintage farmhouse decor, a distressed wooden pen holder may be your favorite project from this list. The slightly weathered finish gives it the appearance of a treasured accessory found in an old country cottage.
You can make this design using a ready-made wooden pencil box or a small wooden organizer with separate compartments.
Materials You’ll Need
- A small unfinished wooden pencil holder or compartment organizer.
- Acrylic paint in cream or soft white.
- A second muted color, such as sage green or dusty blue, optional.
- Fine sandpaper.
- A paintbrush.
- A clean cloth.
- A compatible clear protective finish, optional.
Step-by-Step Instructions
Step 1: Prepare the wood.
Wipe the wooden holder with a clean, dry cloth to remove dust. Lightly sand any rough areas, following the grain of the wood.
If the holder has splinters or uneven edges, smooth them before painting.
Step 2: Apply your base coat.
For a layered vintage finish, begin with a muted color such as sage green or dusty blue. Let it dry according to the paint manufacturer’s directions.
If you prefer a simple distressed cream finish, you can skip the contrasting undercoat.
Step 3: Add the top coat.
Brush a thin layer of cream or warm white paint over the holder. Allow a little of the lower color to show through if you want a layered effect.
For a more natural appearance, use light brushstrokes and avoid building up too much paint around the corners.
Step 4: Create a gentle distressed effect.
Once the paint is fully dry, use fine sandpaper to lightly rub a few edges and corners. The goal is to reveal small hints of the underlying paint or wood rather than remove large sections.
Start gently and stop when you are happy with the finish. Sand outdoors or in a well-ventilated area, and avoid breathing in wood dust or paint particles.
Step 5: Add a botanical detail.
For a subtle decorative touch, paint a small sprig of leaves on the front. Alternatively, use a suitable decorative transfer designed for painted wood.
Keep the design simple so the distressed finish remains the main feature.
Step 6: Protect the finished holder.
If you want to make the painted surface easier to wipe clean, apply a compatible protective finish. Let it dry and cure fully before arranging your stationery.
Styling Tip
A wooden holder looks beautiful on a desk with a linen-covered notebook, a neutral desk mat, and a small vintage-style clock.
Use the separate compartments for pens, pencils, highlighters, and scissors. If your organizer has deeper sections, you can also store paintbrushes or longer crafting tools.
6. Upcycled Glass Jar Pen Holder With Pressed-Flower Style Decorations
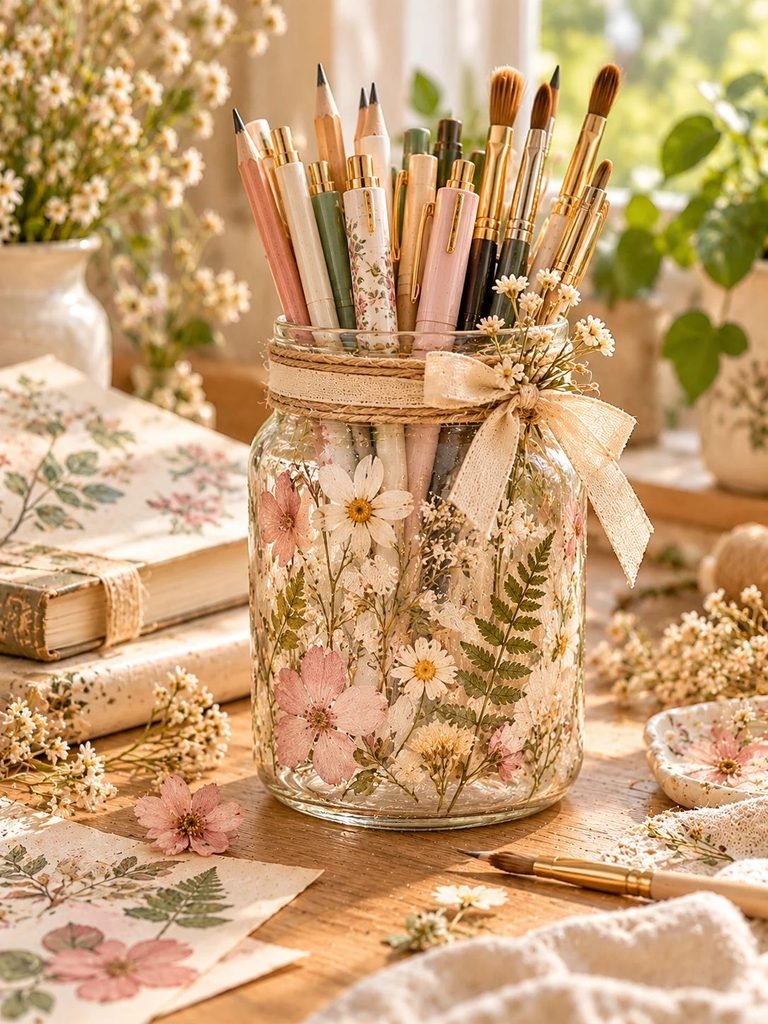
For a delicate, nature-inspired design, try decorating a glass jar with pressed-flower-style details. This pen holder brings together the beauty of botanical decorations and the simplicity of everyday storage.
You can use real pressed flowers under a suitable clear craft medium or choose printed botanical paper for a more durable and beginner-friendly finish.
Materials You’ll Need
- One clean, sturdy glass jar.
- Pressed flowers and leaves, or botanical decoupage paper.
- Clear-drying decoupage medium suitable for glass.
- A small soft brush.
- Cream cotton ribbon or jute twine.
- A compatible clear sealer, if required.
- A soft cloth.
Step-by-Step Instructions
Step 1: Clean the glass.
Remove the label, wash the jar, and allow it to dry completely. Wipe the outside with a clean cloth so that dust doesn’t become trapped beneath the decorations.
Step 2: Plan the arrangement.
Before gluing anything, arrange your flowers or botanical paper around the jar. Delicate fern leaves, small white flowers, and tiny sprigs create a natural cottage-garden appearance.
Leave some areas of clear glass visible to keep the finished design light and airy.
Step 3: Attach your decorations.
For a beginner-friendly option, use botanical decoupage paper and a compatible medium. Position each piece carefully, smoothing it gently with a soft brush.
If you prefer real pressed flowers, make sure they are completely dry and choose a craft medium specifically suitable for attaching and protecting them on glass. Real flowers can be fragile, and their color may change over time.
Step 4: Let the design dry.
Allow the adhesive to dry fully according to the manufacturer’s instructions. Avoid handling the decorated areas while they are still wet.
Step 5: Add a simple finishing touch.
Tie a narrow cream ribbon or piece of jute twine around the neck of the jar. Keep the trim simple so the botanical decoration remains the focal point.
Step 6: Apply a compatible protective layer if necessary.
If the materials you used call for a sealer, choose one that is compatible with the glass, adhesive, and decorative elements. Follow the product instructions carefully.
Allow the holder to cure fully before using it.
Step 7: Fill and display.
Arrange your favorite pens, pencils, or fine-tip markers inside. Place the jar near a window where natural light can highlight the delicate botanical details.
Styling Tip
This design works beautifully with a nature-inspired workspace. Pair it with a leafy houseplant, a small stack of books, and a cream notebook for a calm, garden-inspired desk.
For a coordinated collection, decorate a second jar to hold paintbrushes or craft scissors.
Tips for Making Your DIY Cottage Pen Holders Look Beautiful
Although each of these projects has a different style, a few simple design choices can help your finished pen holders look more polished.
Stick to a Gentle Color Palette
Cottage decor often looks lovely in warm, understated colors. Try combining cream, beige, sage green, dusty blue, blush pink, and soft butter yellow.
You don’t need to use every color in one project. Two or three complementary shades are usually enough to create a cohesive look.
Mix Textures Carefully
One of the easiest ways to create a cottage-inspired finish is to combine different textures.
For example, pair smooth glass with delicate lace, rough twine with painted metal, or distressed wood with soft floral fabric. These contrasts add character without requiring complicated decorations.
Keep the Decorations Balanced
It can be tempting to add lots of bows, flowers, lace, and embellishments. However, a little restraint often makes a handmade accessory look more elegant.
Choose one main decorative feature and use smaller details to support it.
Think About Practicality
A pen holder should be beautiful, but it should also work well.
Choose a container with a wide enough opening for your stationery and a stable base that won’t tip over easily. Taller containers are helpful for long pencils and paintbrushes, while shorter, wider ones are convenient for everyday pens.
If you store scissors or other sharp tools in the holder, make sure they sit securely and cannot easily fall out.
Protect Your Work Surface
Place felt or cork underneath your finished holder if you are worried about scratches. This is particularly useful for glass jars, terracotta pots, and metal containers.
Always allow paint, glue, and protective finishes to dry and cure fully before placing your new accessory on your desk.
Common Mistakes to Avoid
Using a dirty container: Dust, grease, and leftover adhesive can prevent paint and glue from sticking properly. Clean and dry your materials before decorating.
Applying thick coats of paint: Heavy coats can become uneven, leave brush marks, or take longer to dry. Several thin coats generally produce a better finish.
Choosing incompatible materials: Not every glue, paint, or sealer works on every surface. Check the manufacturer’s instructions before combining products.
Overdecorating the holder: Too many decorative details can make the design feel cluttered. Start with a simple color palette and add embellishments gradually.
Ignoring sharp edges: Tin cans must have safe, smooth rims. Never leave exposed sharp metal around the opening.
Filling the holder before it is ready: Even if a surface feels dry, some paints and adhesives need additional time to cure. Follow the recommended drying and curing times.
Forgetting stability: A narrow or lightweight holder may tip over when filled with tall stationery. Test the balance before placing it in a busy workspace.
How to Choose the Best DIY Cottage Pen Holder for Your Desk
If you’re unsure which project to try first, think about the materials you already have and the style you want to create.
- For a romantic, feminine desk: Choose the vintage floral mason jar.
- For a rustic farmhouse look: Try the lace-and-twine tin can.
- For an earthy, garden-inspired workspace: Make the painted terracotta pot.
- For a soft, fabric-focused aesthetic: Create the shabby chic fabric-wrapped holder.
- For a vintage country-cottage finish: Decorate a wooden pencil organizer.
- For delicate botanical decor: Try the pressed-flower-style glass jar.
You can also make more than one design and display them together. A coordinated set of pen holders can make your desk feel more organized while adding personality to your workspace.
Final Thoughts
Making your own cottage pen holder is such a lovely way to bring a little handmade charm into your everyday routine. Whether you choose a floral mason jar, a rustic tin can, a painted terracotta pot, or a distressed wooden organizer, each project gives you the chance to create something that feels personal and useful.
What I love most about these ideas is that they don’t require a huge budget or a perfectly equipped craft room. With a few simple materials, a little patience, and some creativity, you can transform ordinary containers into beautiful desk accessories.
Start with the design that matches your style and the supplies you already have at home. Once you’ve finished your first holder, you may find yourself wanting to create a matching set for your pens, paintbrushes, and other stationery.
After all, even the smallest handmade details can make an ordinary workspace feel like a cozy little cottage of your own.