DIY Mini Acorn Fairy Houses: The Cutest Cottagecore Craft
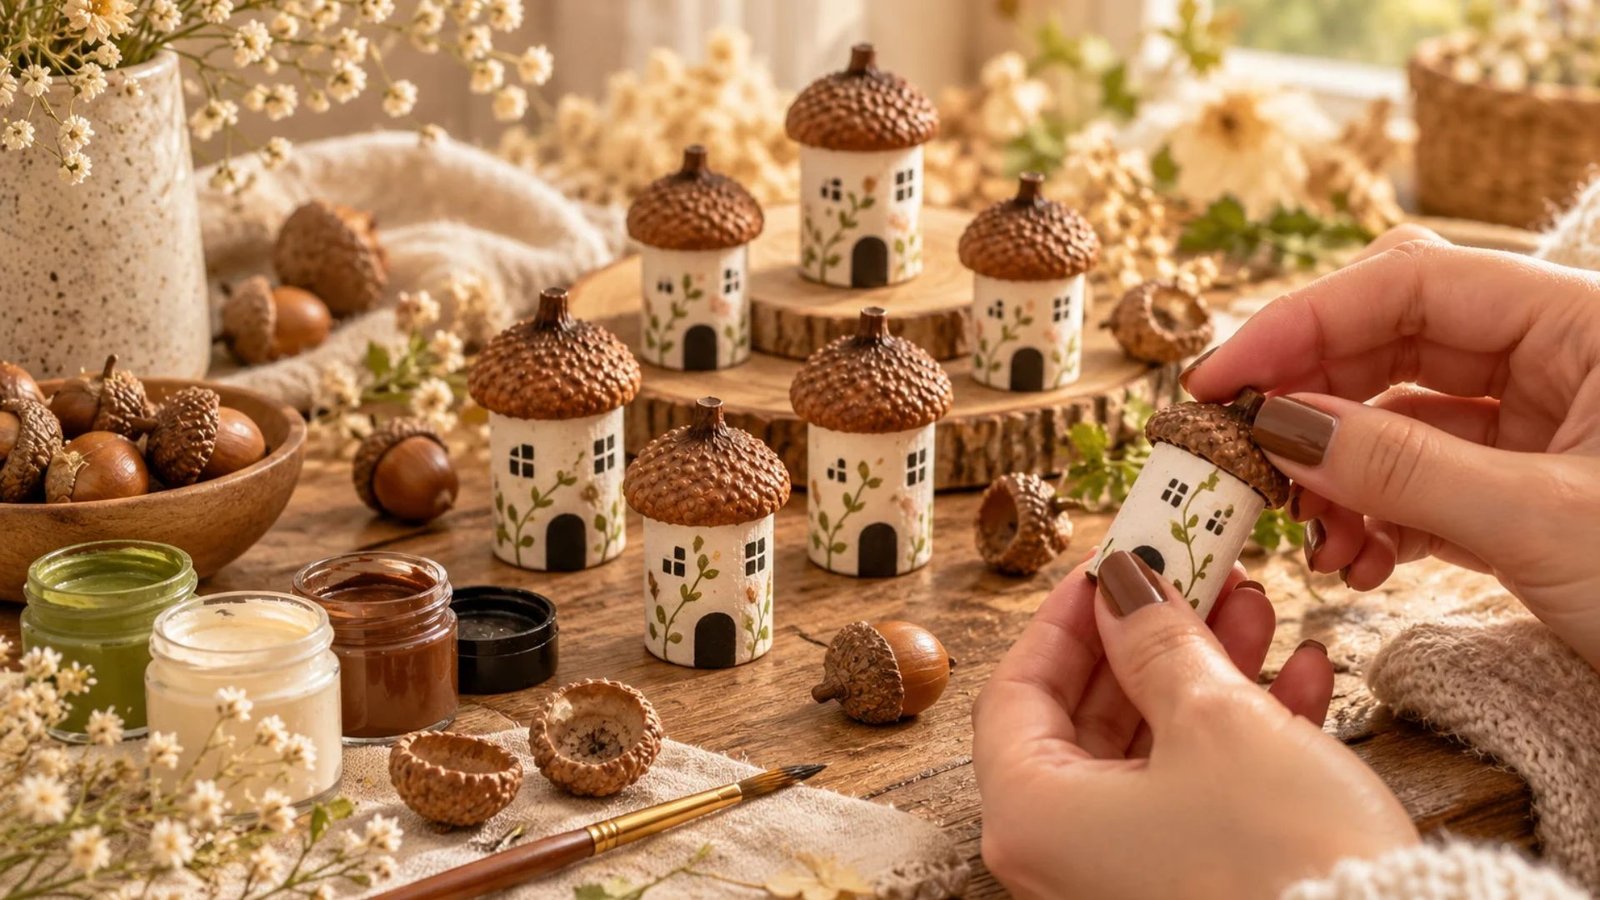
There is something so special about turning simple things from nature into tiny decorations that feel straight out of a fairy tale.
I absolutely adore the idea of creating miniature fairy houses with little acorn caps, creamy white walls, and delicate botanical details.
They have that charming woodland cottage look that makes any shelf, craft table, or autumn display feel a little more magical. If you love cozy cottagecore crafts as much as I do, these DIY mini acorn fairy houses are such a lovely project to try.
They are fun to personalize, budget-friendly, and wonderfully giftable.
What Are Mini Acorn Fairy Houses?
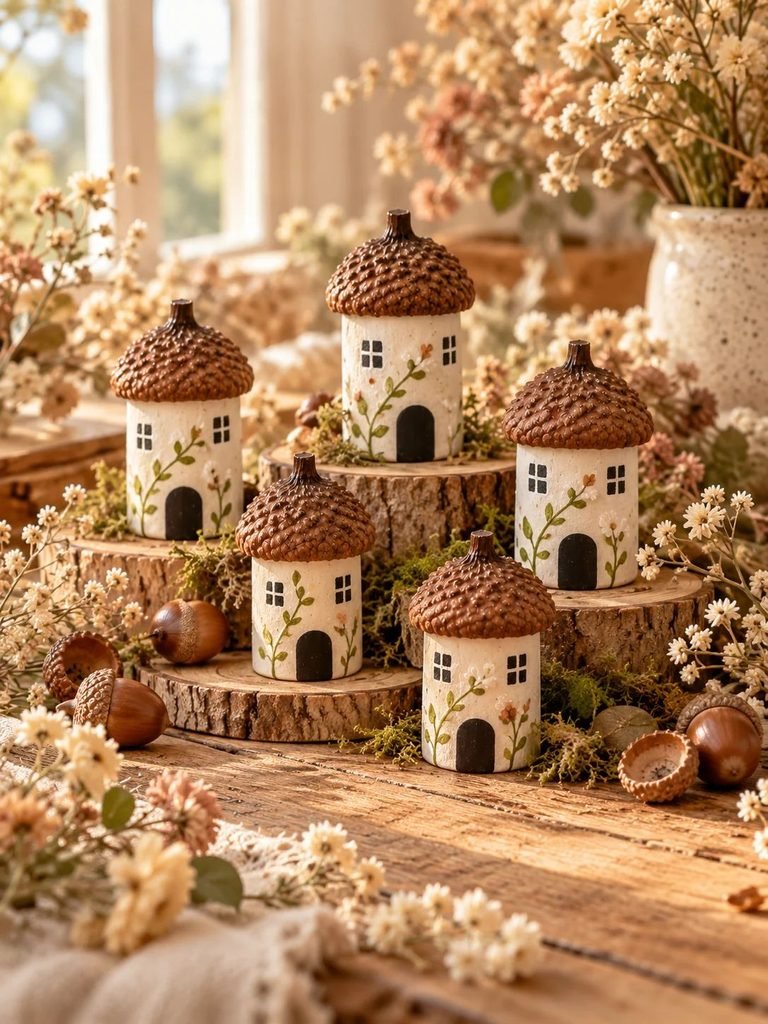
Mini acorn fairy houses are tiny decorative cottages made using small cylindrical bases and acorn caps or acorn-shaped pieces for the roofs.
The bodies can be created from air-dry clay, small wooden pieces, or other suitable craft materials. Once assembled, they are painted and decorated with miniature doors, little windows, and delicate vines to give each house its own personality.
For this tutorial, we are creating a cottagecore-inspired design with ivory walls, textured brown roofs, black windows, tiny arched doors, and soft green botanical details. The finished houses look beautiful grouped together on a wooden tray, tucked into an autumn display, or styled alongside dried flowers.
The best part is that you do not need advanced crafting skills to make them. With a few basic supplies, some patience, and a little creativity, you can make an entire collection of tiny woodland cottages that look charming and handmade.
Why You Will Love This DIY Acorn Fairy House Craft
If you enjoy small decorative crafts, this project is worth adding to your list.
- Beginner-friendly: The shapes and painted details are simple enough for beginners to try.
- Budget-friendly: You can use affordable craft supplies and suitable natural materials you already have.
- Easy to personalize: Change the roof colors, paint tiny flowers, or add different window shapes.
- Perfect for seasonal decorating: These little cottages look lovely in autumn displays and woodland-inspired Christmas arrangements.
- Wonderful handmade gifts: A small collection of fairy houses makes a thoughtful gift for someone who loves miniature crafts.
- Great for using leftover supplies: Small amounts of paint, clay, and glue can go a long way.
You can make one little cottage as a weekend project or create several in different sizes for a coordinated miniature village.
Materials You Will Need
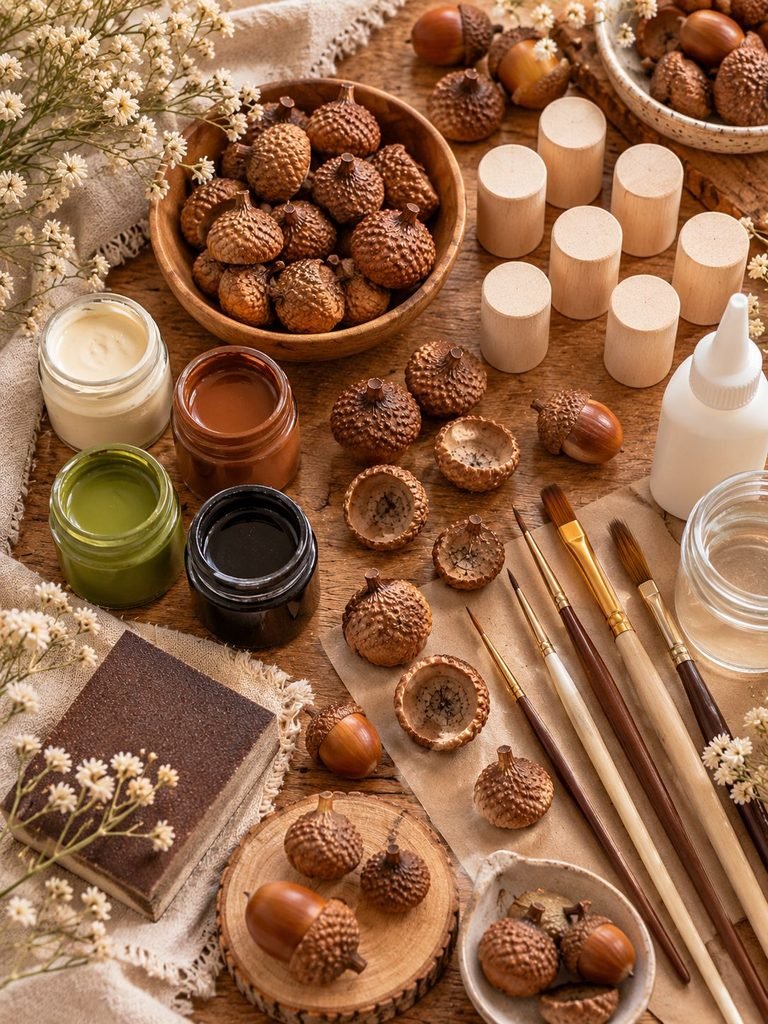
Before getting started, gather your materials and prepare a clean, comfortable workspace. Having everything within reach makes the process much easier.
Essential supplies
- Clean, completely dry acorn caps or suitable faux acorn caps
- Air-dry clay or small cylindrical wooden craft pieces
- Ivory or warm white acrylic paint
- Chocolate brown or chestnut acrylic paint
- Black acrylic paint
- Sage-green or olive-green acrylic paint
- Fine detail paintbrushes
- Small flat paintbrush
- Craft glue suitable for your chosen materials
- Fine-grit sandpaper, if needed for wooden bases
- Clear matte acrylic sealer
- Pencil and scrap paper for practicing your design
- Craft mat or protective table covering
Optional decorative supplies
- Tiny dried flowers
- Miniature artificial leaves
- Fine twine or natural-colored string
- Small wooden beads
- Gold acrylic paint for subtle accents
- A small wooden tray for displaying the finished houses
A quick material tip: If you are collecting real acorn caps, choose sturdy ones that are free from mold, insects, and damage. Clean them gently and let them dry thoroughly before crafting. Faux caps or textured clay roofs are useful alternatives if natural acorns are difficult to find.
For the house bodies, small wooden cylinders are convenient because they are sturdy and easy to paint. Air-dry clay is another lovely option if you want to make your own custom shapes.
Step 1: Prepare Your Acorn Caps and House Bases
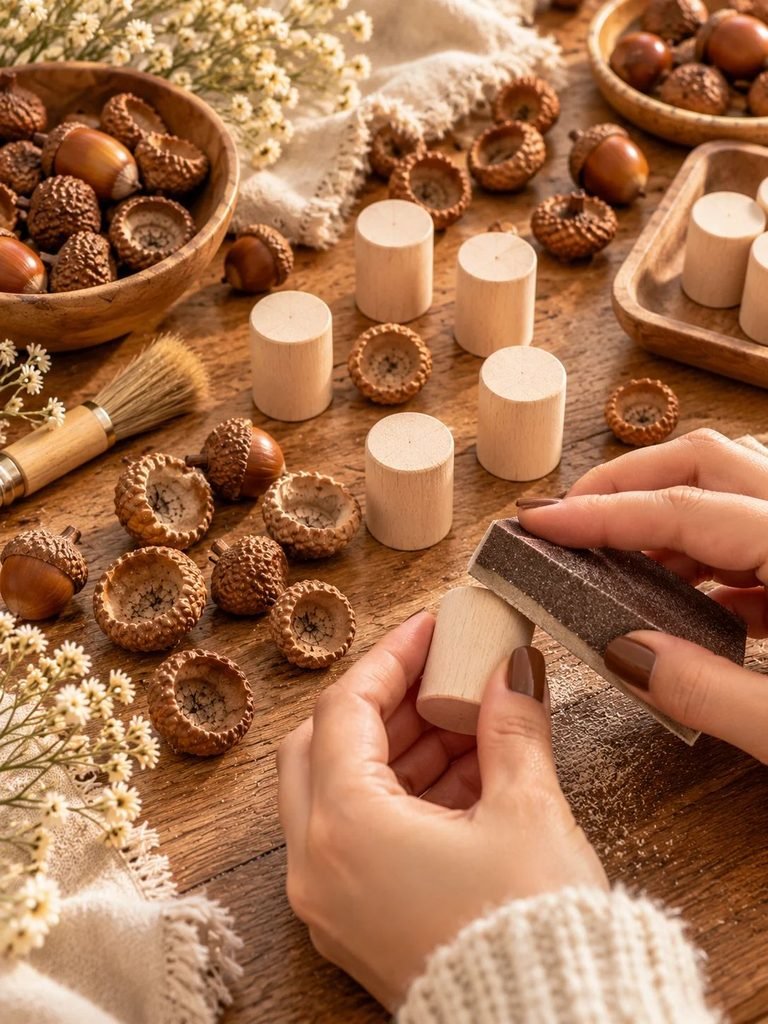
Start by preparing the materials that will form your miniature cottages.
If you are using small wooden cylinders, check that the surfaces are smooth and that the bases can stand upright without wobbling. Lightly sand any rough edges with fine-grit sandpaper, then wipe away the dust.
If you are using air-dry clay, shape it into small cylinders with relatively flat bottoms. Make the walls thick enough to hold their shape without becoming unnecessarily bulky. Gently smooth the surface with your fingers or a suitable clay tool.
Allow the clay to dry according to the manufacturer’s instructions before painting. Larger or thicker pieces may require additional drying time.
Next, inspect your acorn caps. Brush away loose dirt and discard any cracked or fragile pieces. Try placing each cap on a house base to see whether it sits securely.
The cap should look like a little cottage roof rather than an oversized hat. If you are making several houses, experiment with different cap sizes so your finished village looks natural and varied.
My tip: Arrange the caps and bases together before gluing anything. This gives you a chance to plan the proportions and choose the combinations that look best.
Read 15 DIY Christmas Ornament Ideas That Look Beautifully Handmade and Cozy
Step 2: Paint the House Bodies Ivory
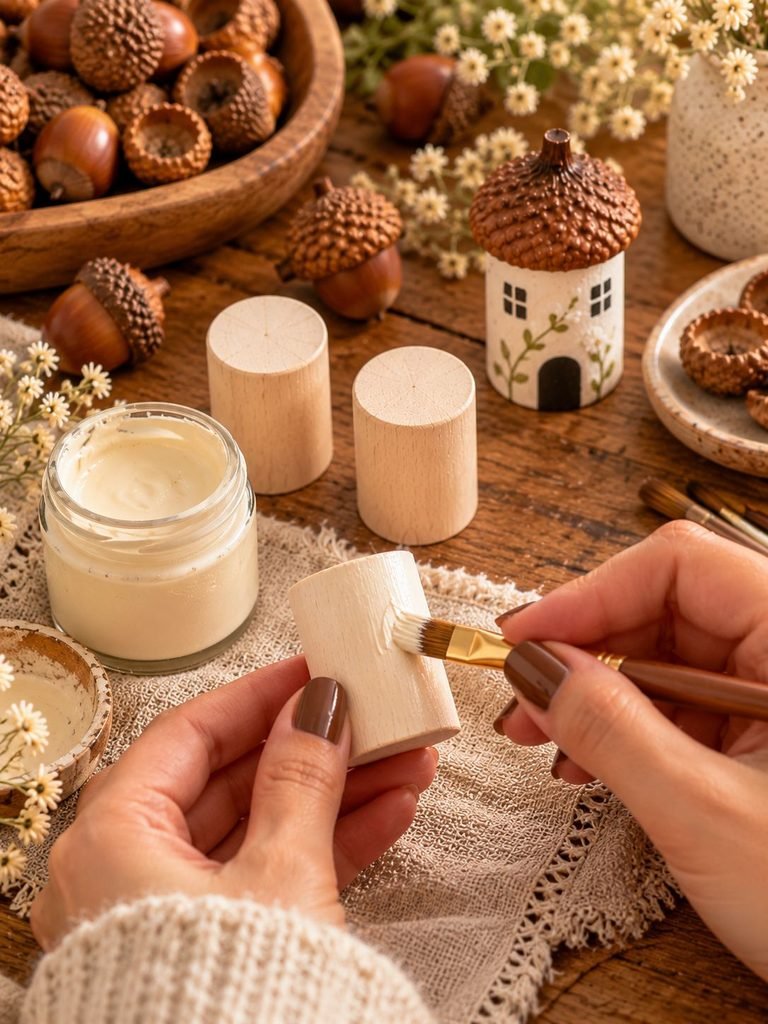
The soft ivory color is one of the details that makes these fairy houses look so cozy and elegant.
Using a small flat paintbrush, apply a thin coat of ivory or warm white acrylic paint to each house body. Work carefully around the top and bottom edges, keeping the paint as even as possible.
Allow the first coat to dry completely. If the original surface shows through, add a second thin coat rather than applying one thick layer.
Two thin coats generally produce a smoother finish and make it easier to paint the tiny decorative details later.
Once the bodies are fully dry, check for missed patches or uneven areas. Touch them up before moving on.
If you prefer a more rustic cottage appearance, choose a slightly warm cream rather than a bright, cool white. This creates a softer contrast with the brown acorn roofs and works beautifully with natural wood.
Helpful tip: Avoid painting the area where the roof will sit with an unnecessarily thick layer of paint. A thick, uneven edge can make the cap harder to attach neatly.
Read 15 Plastic-Free DIY Christmas Gifts for a Sustainable Holiday
Step 3: Prepare the Acorn Roofs
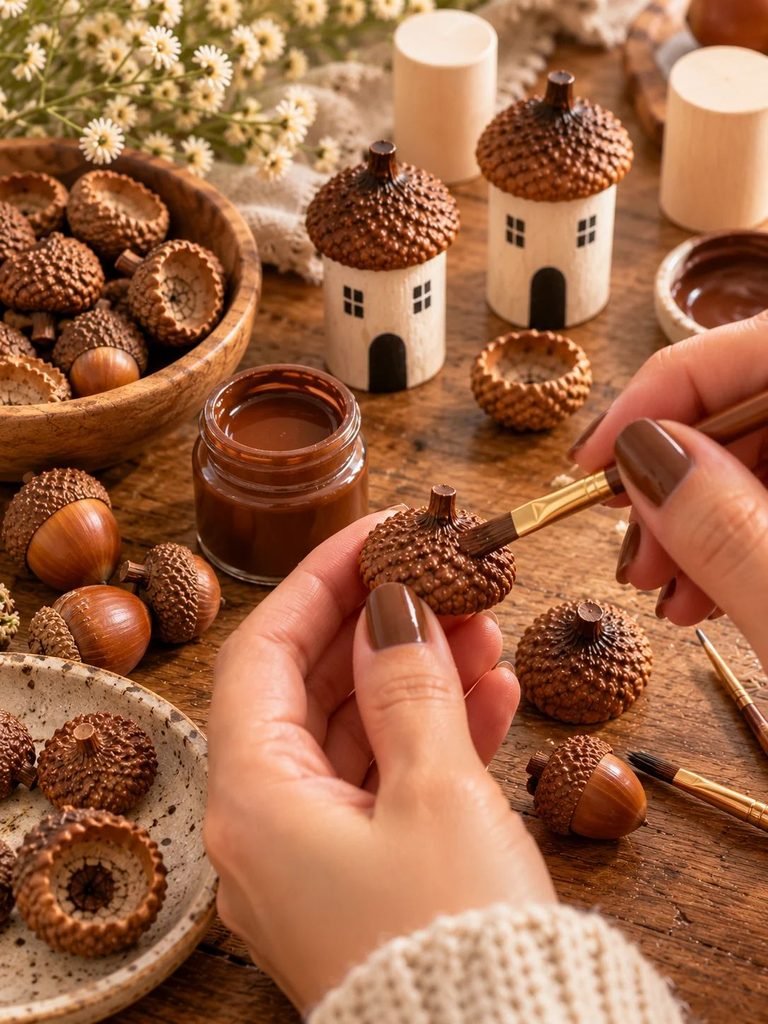
Now it is time to prepare the little roofs, which give these cottages their distinctive woodland appearance.
Natural acorn caps often have beautiful brown textures already, so you may not need to paint them at all. If the caps are pale, faded, or uneven in color, use a small brush to apply chestnut or chocolate-brown acrylic paint.
Follow the natural texture rather than trying to create a perfectly smooth surface. The tiny bumps and ridges are part of what makes the roofs look charming.
For a slightly more finished appearance, use a lighter brown shade to gently highlight the raised areas after the darker paint has dried. Apply the paint sparingly so the texture remains visible.
If you are making faux roofs from clay, press a textured tool lightly into the surface before the clay dries. You can also create small dots or irregular ridges to imitate the appearance of an acorn cap.
Let the roofs dry completely before assembly.
Design idea: Use slightly different shades of brown across your collection. A mixture of chestnut, cocoa, and warm walnut tones can make the miniature village look more natural and interesting.
Read 6 DIY Cottage Pen Holder Ideas to Make Your Desk Feel Cozy and Beautiful
Step 4: Attach the Roofs to the Houses
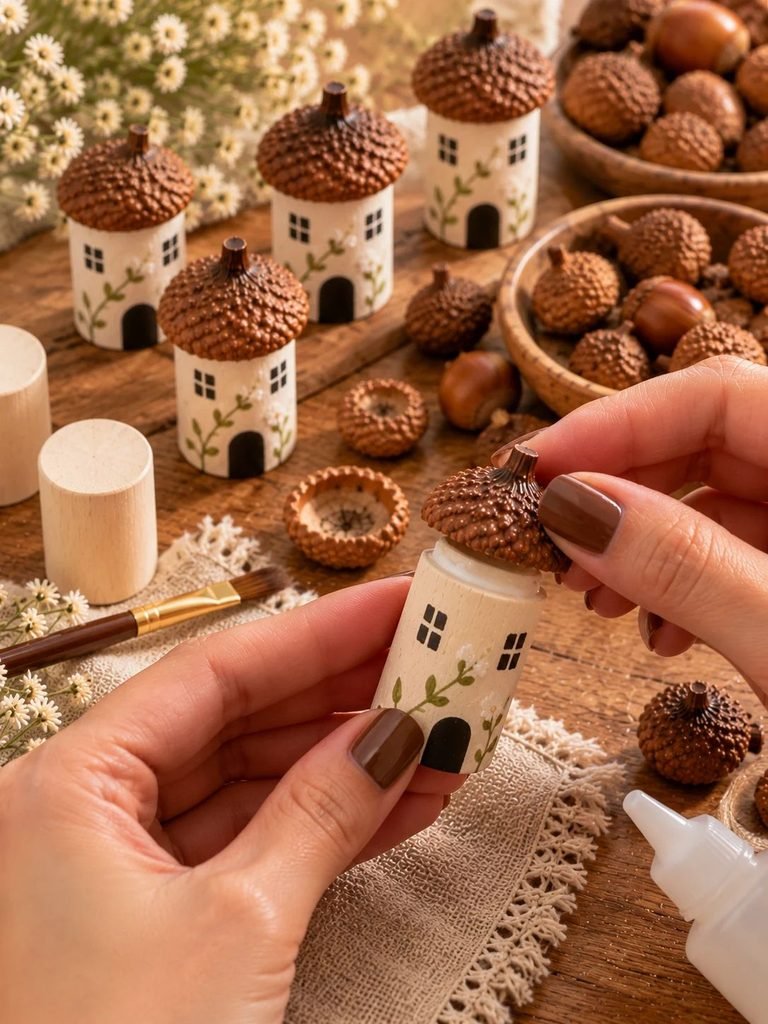
Once the paint is dry, it is time to bring the little cottages together.
Place a small amount of suitable craft glue around the upper edge of a house base. Position the acorn cap over the top and gently press it into place.
Check that the cap sits evenly and that the house remains upright. Adjust the position before the glue sets.
If the cap is slightly uneven, rotate it until you find the most attractive angle. A tiny amount of adhesive is usually better than a large blob, which can squeeze out around the edges and spoil the finish.
Follow the adhesive manufacturer’s directions for drying and curing. Some glues set quickly, while others need to remain undisturbed for several hours.
Repeat this process for the remaining houses.
If a roof does not fit securely, do not force it into position. Choose a better-fitting cap or make a small adjustment to the top of the base. A stable roof will help your finished decoration last longer.
Important: Do not assume every glue is suitable for every material. Check the label before using it on painted wood, air-dry clay, or natural acorn caps.
Step 5: Paint the Tiny Doors and Windows
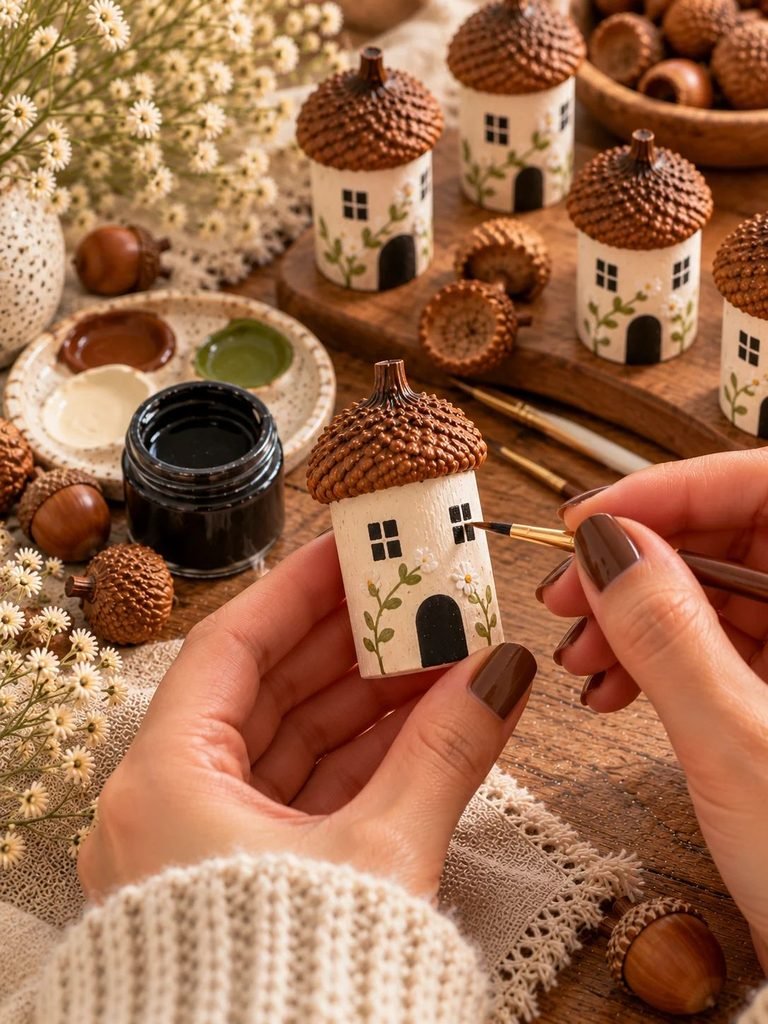
This is my favorite part of the project because it is where the cottages begin to develop their personalities.
Painting the doors
Use a fine detail brush and black acrylic paint to create a small arched doorway near the bottom of each house.
Start with a narrow vertical shape and round the top into a gentle arch. Keep the door relatively small so that the ivory walls remain the main feature.
If painting directly onto the house feels intimidating, practice the shape on scrap paper first. You can also lightly sketch the doorway with a pencil before applying the paint.
Allow the door to dry before adding any nearby botanical details.
Adding the windows
Paint two small windows on the front of each cottage, positioning them above the doorway. You can create simple square windows with four small black panes or use tiny rectangles for a more traditional cottage appearance.
A fine brush helps you maintain control over the lines. Dip only the tip into the paint and remove any excess before touching the house.
Do not worry if the windows are not perfectly identical. Handmade decorations often look more charming when each piece has its own subtle differences.
If you make a mistake, let the paint dry and carefully cover the unwanted mark with the original ivory color. Once that patch dries, try again.
My tip: Keep the windows and doors consistent in size across the collection, but vary the position of the vines and leaves. This gives your village a coordinated look without making every house identical.
Step 6: Add Delicate Botanical Vines
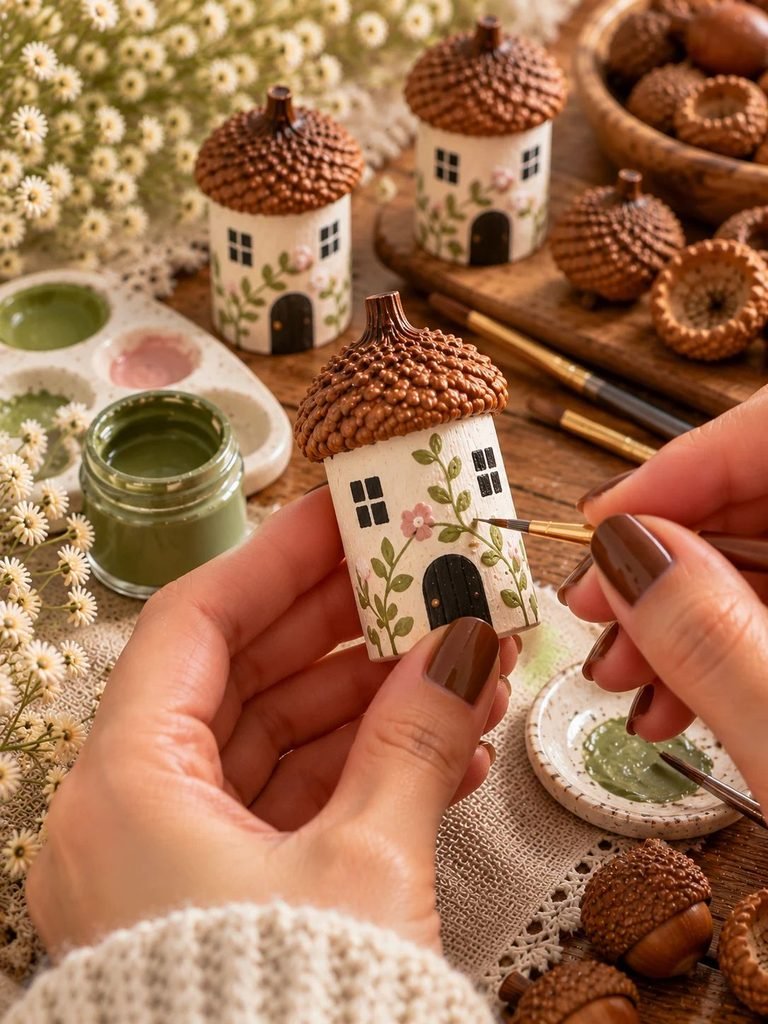
The painted vines are what give these little cottages their soft cottagecore style.
Using a very fine brush and sage-green or olive-green acrylic paint, draw a thin, gently curving line along one side of the house. Start near the bottom and allow the vine to travel upward toward the roof.
The line does not need to be perfectly straight. A slight curve makes it look more natural.
Next, add tiny leaves along both sides of the stem. Use light brushstrokes or small teardrop shapes, leaving enough space between the leaves so the design does not become crowded.
You can create different botanical patterns on each cottage:
- A single climbing vine beside the door.
- Two delicate vines growing upward from the bottom corners.
- A small leafy sprig beneath one window.
- A simple flowering vine with a few tiny white or blush-pink dots.
If you want to add flowers, use the smallest amount of paint possible. A few little blossoms are usually more effective than covering the entire wall.
Let the green paint dry before adding any additional colors.
For a softer finish, choose muted sage or olive rather than a very bright green. These shades complement the warm brown roofs and ivory walls beautifully.
Step 7: Add Finishing Details
Once the main painting is complete, take a moment to look at each house as a whole.
Some cottages may benefit from a tiny painted doorknob, a few extra leaves, or a delicate line around a window. Others may already look lovely just as they are.
If you want a slightly whimsical finish, consider these ideas:
- Paint a tiny gold star beside the doorway.
- Add a small blush-pink flower to the climbing vine.
- Use a warm gray shade to add a subtle windowsill.
- Paint a narrow brown line beneath the roof to suggest a wooden beam.
- Add a few tiny cream dots to the roof of a faux clay cottage.
Keep the details small and simple. The charm of these miniature houses comes from their delicate proportions and understated decorations.
Before applying a sealer, inspect the paint for smudges or uneven patches. Correct any imperfections and allow every painted detail to dry thoroughly.
Step 8: Seal and Protect Your Fairy Houses
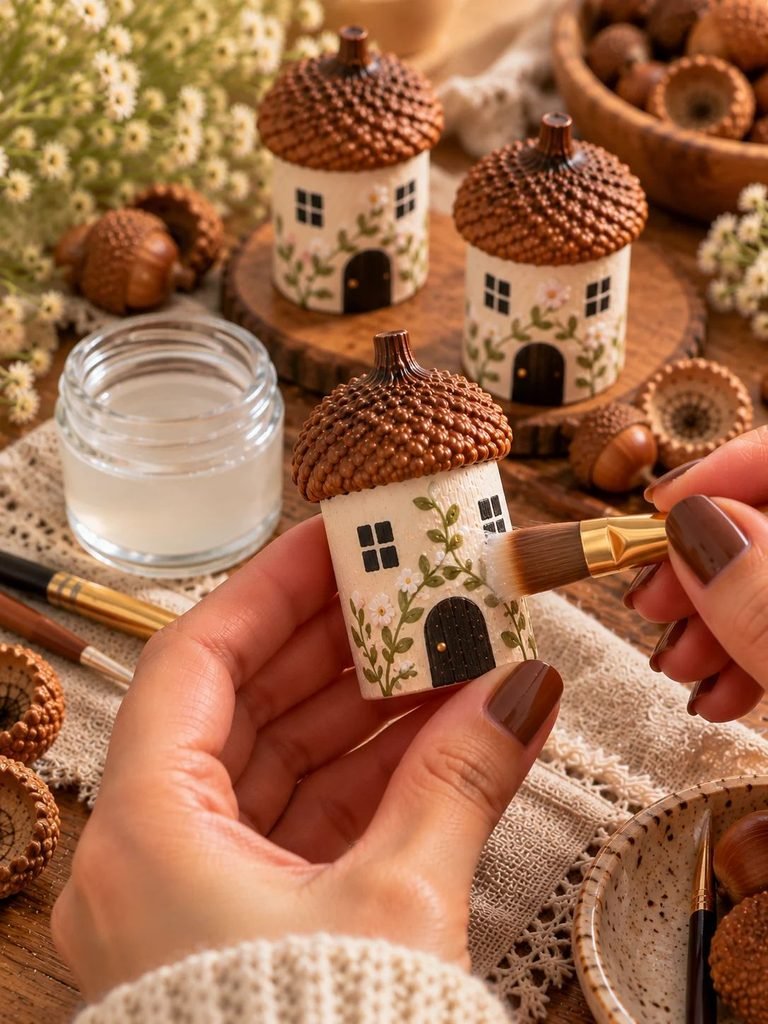
Sealing your finished cottages is an optional but useful final step, especially if you want to keep them looking attractive for several seasons.
Choose a clear sealer that is compatible with your paint, base material, and roof material. A water-based matte acrylic sealer can help preserve the painted design while maintaining a soft, natural finish.
Apply a thin, even coat according to the product instructions. Avoid allowing the sealer to pool around the windows, doors, or botanical details.
Let the first coat dry completely before deciding whether another is necessary.
If your acorn caps are natural, test the sealer on a spare cap first. Some finishes can change the color or appearance of natural materials.
Remember that sealing does not make an air-dry clay house or a natural acorn cap waterproof. These are decorative indoor crafts, so keep them away from prolonged moisture and damp locations.
Once the sealer has fully cured, your tiny cottages are ready to display.
Step 9: Style Your Mini Acorn Fairy Houses
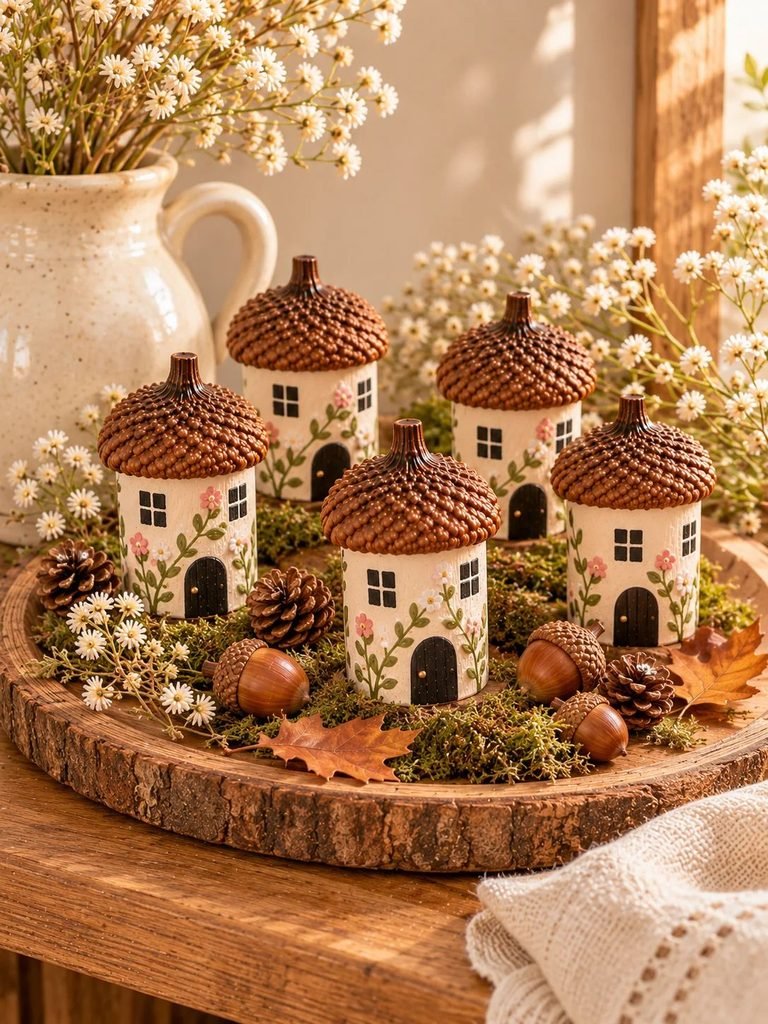
After putting so much care into the details, you will want to display your finished houses somewhere they can be appreciated.
Here are a few ways to style them around your home.
Create a woodland cottage display
Arrange three or five houses on a small wooden tray. Add a little dried moss, a few clean twigs, and miniature artificial leaves to create a woodland-inspired scene.
Keep the decorations subtle so that the houses remain the focal point.
Make a cozy autumn centerpiece
Place your cottages among small pumpkins, dried leaves, pinecones, and warm-toned flowers. A shallow wooden bowl or neutral ceramic tray makes a beautiful base.
Choose cream, brown, muted green, and soft rust tones for a coordinated seasonal look.
Decorate a bookshelf
Group the fairy houses beside a stack of books, a small vase of dried flowers, or a simple wooden ornament. Their small size makes them ideal for adding personality to a shelf without taking up much space.
Create a handmade gift set
Arrange two or three houses in a small gift box lined with paper shred or soft tissue paper. Add a handwritten note and a ribbon for a thoughtful handmade present.
If you are giving the houses to someone with young children or pets, remember that the small caps and decorative pieces can pose a choking hazard. Keep them out of reach.
Common Mistakes to Avoid
Even simple miniature crafts can have a few frustrating moments. Fortunately, most are easy to prevent.
1. Using wet or dirty acorn caps
Natural caps may contain dirt, insects, or moisture. Inspect and clean them carefully, then allow them to dry fully before using them.
2. Applying thick coats of paint
Thick paint can obscure small details, create visible brush marks, and take longer to dry. Use thin coats and allow each layer to dry before adding another.
3. Choosing roofs that are too large
An oversized roof can make the house look unbalanced. Test several caps against each base before attaching them.
4. Using too much glue
Excess adhesive can squeeze out around the roof and leave a messy edge. Start with a small amount and add more only if needed.
5. Rushing the fine details
Painting tiny windows and vines takes a steady hand. Work slowly, use a fine brush, and let one color dry before adding another.
6. Sealing before the paint is dry
Applying sealer too early may smear the design or leave an uneven finish. Follow the drying instructions for your paint and sealer.
7. Treating the houses as outdoor decorations
Natural acorn caps and air-dry clay can deteriorate when exposed to moisture. Display your finished houses indoors in a dry location.
How to Customize Your Mini Acorn Fairy Houses
Once you have mastered the basic design, you can experiment with different colors and decorative themes.
For a traditional woodland look: Use ivory walls, dark brown roofs, black windows, and olive-green vines.
For a soft feminine cottagecore style: Try warm cream walls, chestnut roofs, sage-green leaves, and tiny blush flowers.
For a Christmas village: Paint the walls creamy white, add small green wreaths, and decorate the roofs with subtle white accents. Faux acorn caps may be easier to customize for this version.
For a rustic natural finish: Use small wooden bases, leave the natural wood grain visible where possible, and add minimal painted details.
For a whimsical fairy village: Give each house a different door color, add tiny flower clusters, or paint miniature mushrooms beside the entrance.
You can also experiment with different house heights and roof shapes. A collection of varied cottages often looks more interesting than a group of perfectly identical pieces.
Frequently Asked Questions
Can beginners make mini acorn fairy houses?
Absolutely! The basic project requires only simple painting and assembly. Start with one house to practice the proportions and decorative details before making a larger collection.
What can I use instead of real acorn caps?
You can use faux acorn caps, small textured clay pieces, or other lightweight craft components shaped like miniature roofs. Choose a material that fits your base and can be attached securely.
Can I make the house bodies from air-dry clay?
Yes. Shape the clay into small cylinders, smooth the walls, and allow the pieces to dry according to the manufacturer’s instructions before painting. Keep the bases flat so the finished houses stand securely.
Do I need to seal the finished houses?
Sealing is optional, but it can help protect painted surfaces from light handling and dust. Choose a compatible clear finish and test it first if you are using natural acorn caps.
Can I use these fairy houses outdoors?
They are best suited to indoor decoration. Natural acorn caps, paint, glue, and air-dry clay may be affected by rain, humidity, and changing temperatures.
How do I make each cottage look different?
Change the vine pattern, window placement, roof shade, or small decorative accents. You can also vary the heights and proportions while keeping the main color palette consistent.
Are these suitable crafts for children?
Older children can enjoy painting the house bodies and adding simple details with adult supervision. Adults should handle small components, sharp tools, and any adhesives that require special precautions. The finished houses should be kept away from young children because small parts can present a choking risk.
Final Thoughts
Making DIY mini acorn fairy houses is such a lovely way to bring a little woodland charm into your home. With their textured brown roofs, creamy walls, tiny black windows, and delicate green vines, these miniature cottages feel special without requiring expensive materials or complicated techniques.
I love how easy it is to make each house a little different while keeping the entire collection coordinated. You can create a simple trio for a bookshelf, make a seasonal centerpiece, or put together a handmade gift for someone who appreciates thoughtful little details.
Gather your supplies, take your time with the painting, and enjoy the process of creating something with your own hands. Sometimes the smallest crafts bring the biggest smiles, and these sweet little fairy houses are a perfect example.
Happy crafting!