How to Transfer Images onto Polymer Clay (Step-by-Step DIY Guide)
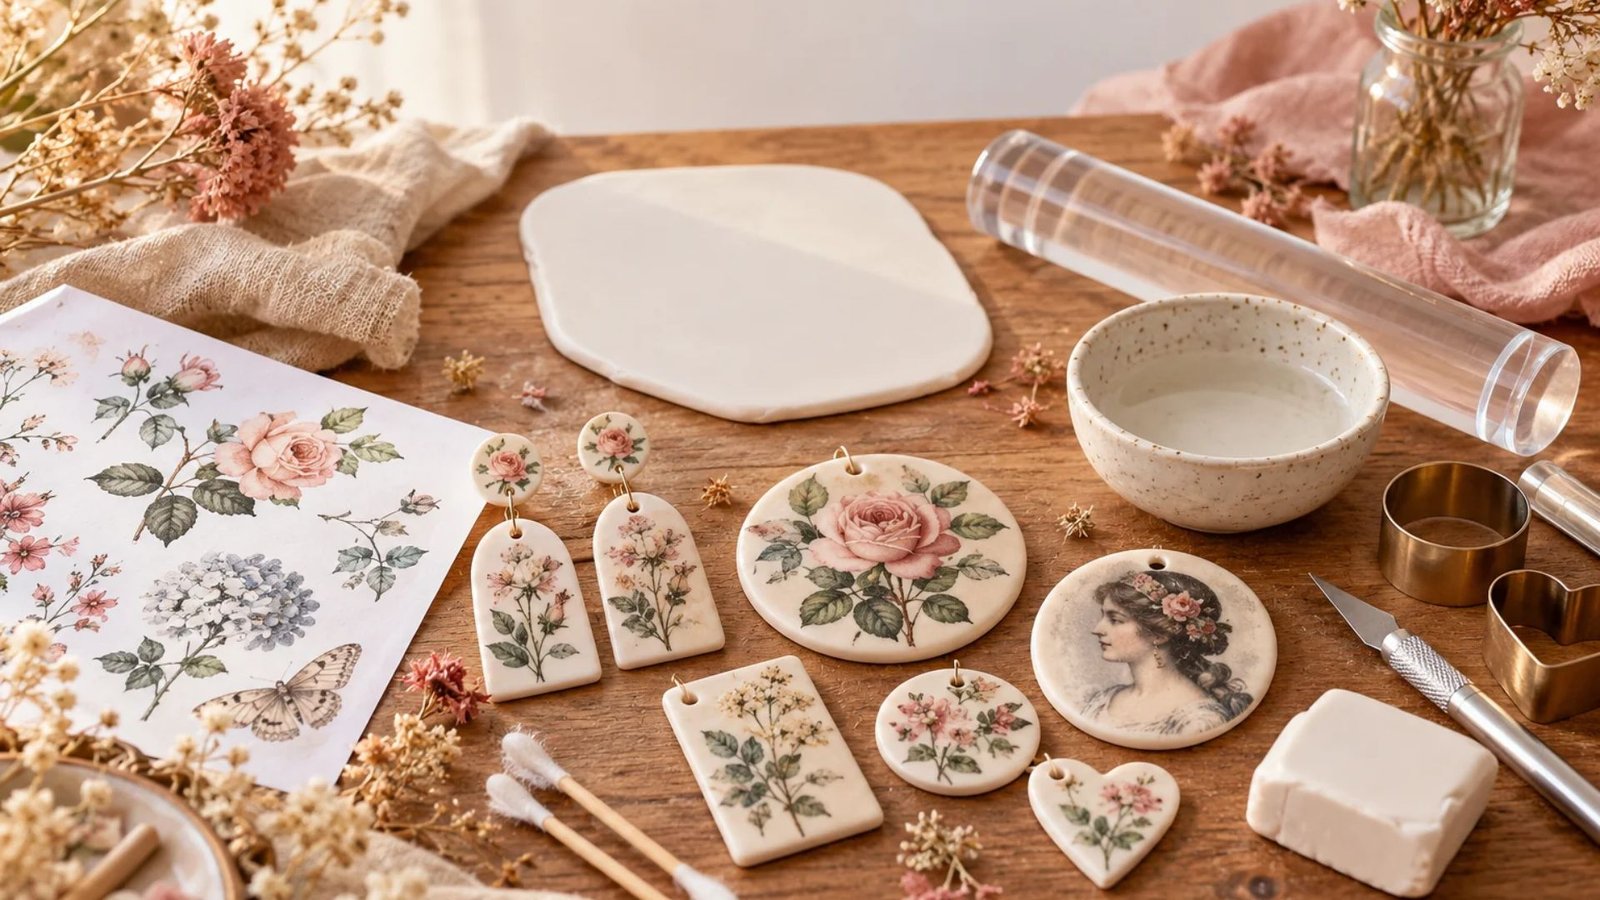
Have you ever wanted to turn a favorite photograph, pretty floral illustration, or vintage-inspired design into a handmade clay keepsake? I love how a simple image can transform an ordinary piece of clay into something personal and beautiful.
Image transfers are such a lovely way to create custom jewelry, decorative ornaments, magnets, and thoughtful handmade gifts without needing advanced artistic skills.
The first time you try this technique, it might feel a little tricky, but with the right materials and patience, you can achieve wonderful results. Today, I’m sharing my step-by-step guide to help you get started.
What Is an Image Transfer onto Polymer Clay?
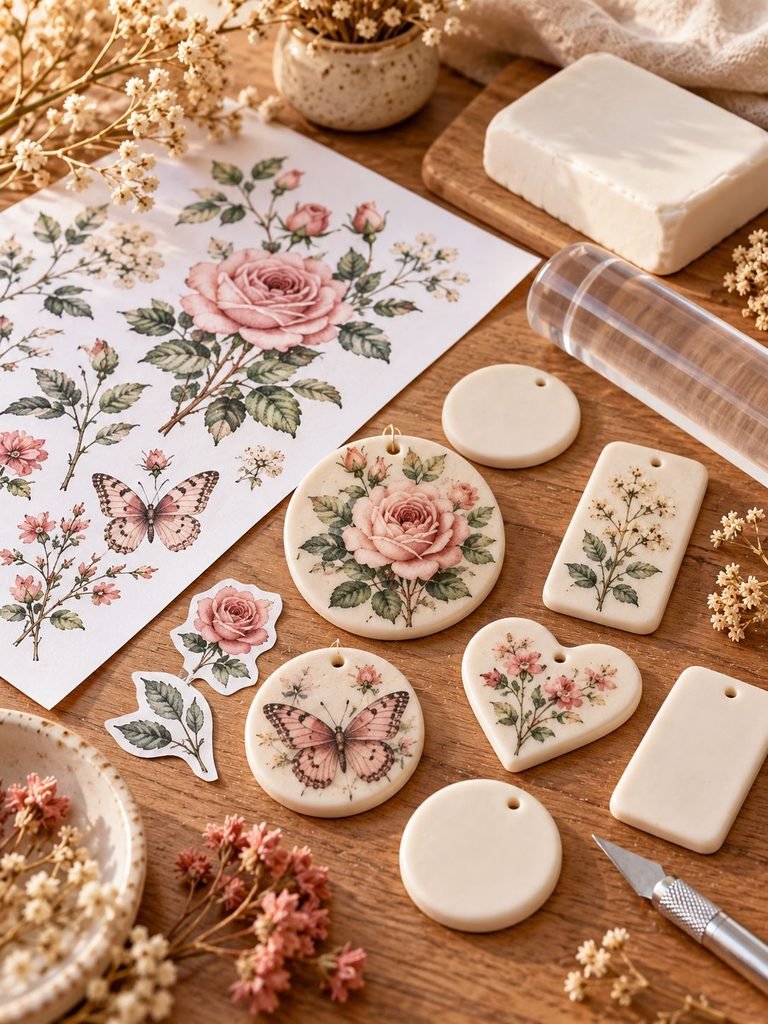
An image transfer is a crafting technique that allows you to place a printed picture, illustration, or design onto polymer clay. Instead of painting every little detail by hand, you can use a printed image to decorate your clay creation.
This technique is especially useful when you want to make personalized jewelry, miniature portraits, floral pendants, decorative magnets, gift tags, and unique ornaments.
Polymer clay is a versatile modeling material that becomes firm when baked according to the manufacturer’s instructions. You can shape it into different forms, decorate it with an image, and finish it with additional details to create a professional-looking handmade piece.
There are several ways to transfer images onto polymer clay. Some methods use laser-printed images and water, while others use specialty transfer paper, liquid polymer clay, or waterslide decals.
For this beginner-friendly tutorial, we’ll focus on a water-assisted laser-print transfer using ordinary printer paper. I’ll also explain alternative methods for those who use an inkjet printer.
One important thing to remember is that not every printer, paper, or transfer technique works the same way. Always test your chosen materials on a small piece of scrap clay before decorating your final project.
Materials You’ll Need
Before starting, gather your supplies so you can work comfortably without rushing through the process.
Essential supplies
- Polymer clay: White, ivory, or another light color makes most images easier to see.
- Laser printer and plain printer paper: For the water-assisted method described below.
- Printed image: Choose a photograph, illustration, floral pattern, or other suitable design.
- Acrylic clay roller: Helps create a smooth, even surface.
- Clay cutting tool or craft blade: For trimming your design and shaping the clay.
- Small bowl of water: Used to soften the paper during the transfer process.
- Cotton swabs or fingertips: Useful for gently removing softened paper fibers.
- Ceramic tile or another suitable work surface: A smooth surface makes handling the clay easier.
- Oven thermometer: Helps you check that your oven reaches the correct temperature.
- Baking surface: Use one recommended by your polymer clay manufacturer.
Optional supplies
- Clay cutters for making pendants, earrings, and decorative shapes.
- A toothpick or small tool for creating holes before baking.
- Liquid polymer clay for suitable transfer techniques and finishing.
- A compatible clear finish, if your project needs one.
- Fine decorative tools for adding borders, textures, or embellishments.
You don’t need every optional item to begin. Start with the basics and add more tools as you become comfortable with the technique.
Step 1: Choose the Right Image

The image you choose has a big impact on your finished project. For your first attempt, I recommend selecting a simple design with clear details and good contrast.
Beautiful options include vintage botanical illustrations, small floral drawings, butterflies, delicate leaves, black-and-white portraits, and simple decorative lettering.
If you’re making a tiny pendant or pair of earrings, remember that intricate details can become difficult to see when the image is reduced in size.
What makes a good transfer image?
- Clear details: Avoid images that are already blurry or pixelated.
- Good contrast: Dark lines against a light background are often easier to transfer and see.
- Suitable size: Resize your image to fit the clay shape before printing.
- Simple backgrounds: These can make the finished design look cleaner.
- Appropriate orientation: Text and directional designs may need to be mirrored before printing.
For the water-assisted laser method, print your image using a laser printer on ordinary, uncoated copy paper. The toner behaves differently from inkjet ink, which is why the transfer methods are not interchangeable.
If you’re using an inkjet printer, skip ahead to the alternative methods section rather than assuming that ordinary paper and water will produce the same result.
A helpful tip: Print a small test image first. This allows you to check the size, orientation, and clarity before using your best piece of clay.
Step 2: Prepare Your Polymer Clay
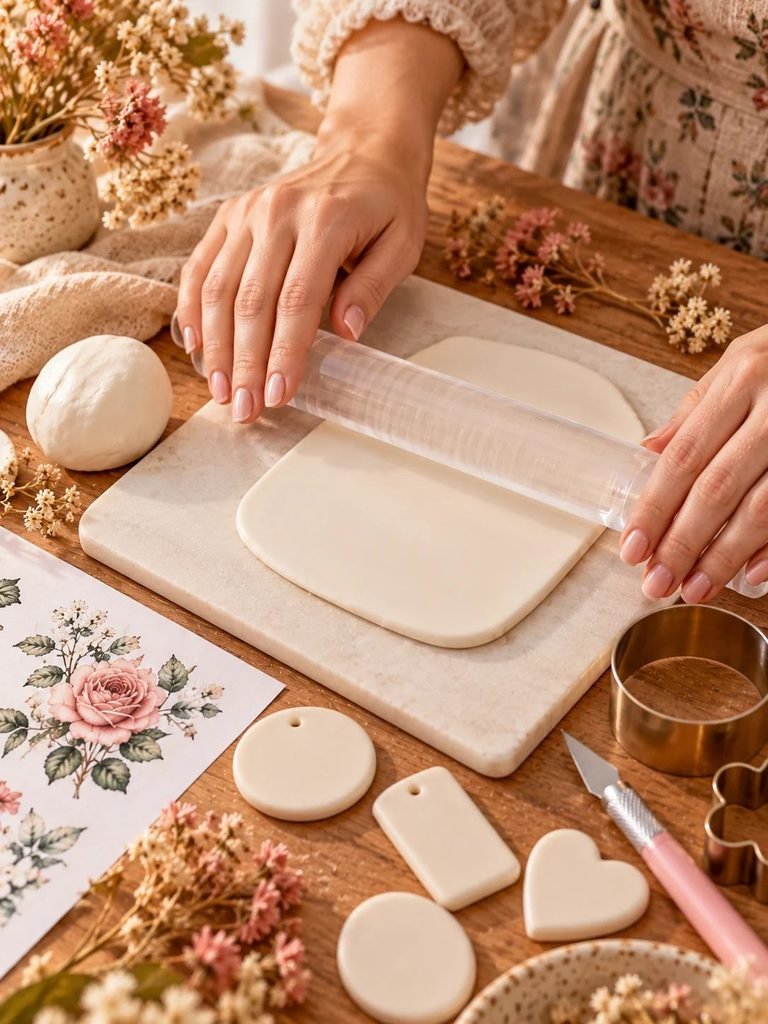
Now it’s time to prepare your clay.
Take a small piece of polymer clay and condition it according to the clay manufacturer’s recommendations. Conditioning means kneading and working the clay until it becomes smooth and pliable.
Roll the clay into an even sheet using an acrylic roller or clay conditioning machine.
For small pendants and ornaments, a thickness of approximately 3–5 mm can be a useful starting point, although the ideal thickness depends on your design.
Make sure the surface is as smooth as possible. Fingerprints, dust, crumbs, and uneven areas can become noticeable beneath your image.
Which clay color should you use?
White and ivory polymer clay are excellent choices because they allow most transferred images to stand out clearly.
Translucent clay can also be useful for certain techniques, particularly when you want a delicate, layered appearance. However, the final appearance depends on the image, clay, and transfer method.
Dark-colored clay may reduce the visibility of some images, especially those with pale details.
Once your clay is smooth, place it on a suitable work surface and avoid touching the front unnecessarily.
Read How to Avoid Cracks in Air Dry Clay: Simple Tips for Smooth, Strong Results
Step 3: Prepare and Position Your Printed Image
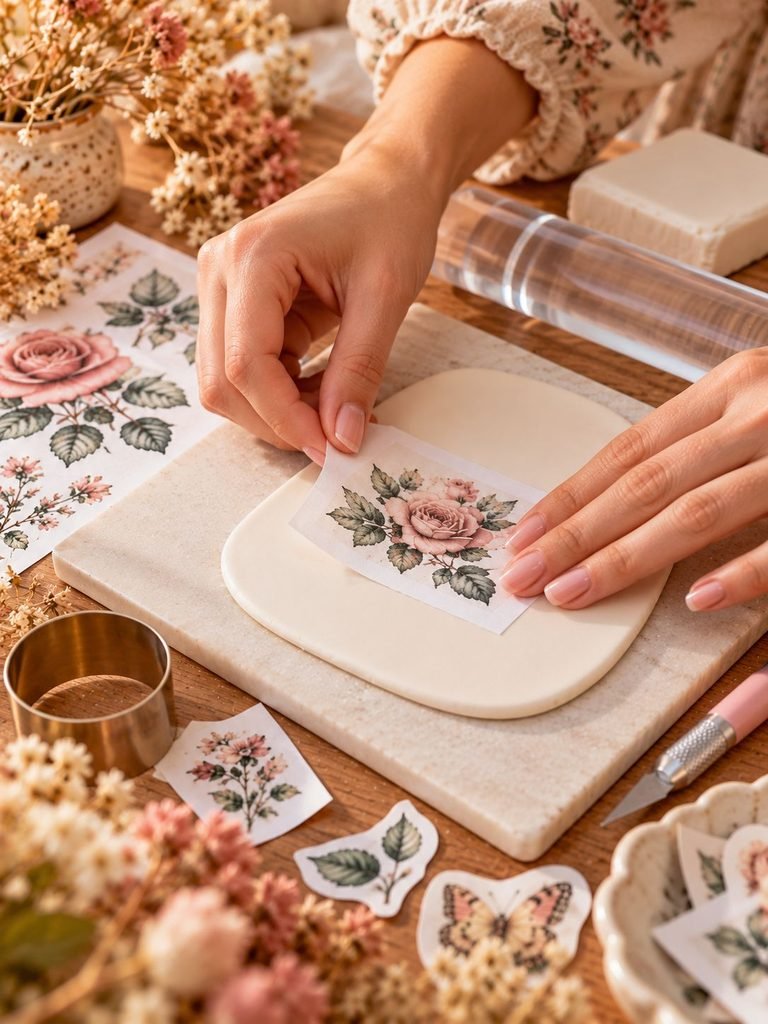
Cut around your printed design, leaving a small margin so you can handle the paper easily.
If you’re making a round pendant, for example, choose an image that fits comfortably inside the planned shape.
Place the image face-down on the raw polymer clay. The printed side should make direct contact with the clay.
Gently smooth the back of the paper with your fingertip or a clean roller. Work from the center toward the edges to remove trapped air and help the image make even contact with the clay.
Be careful not to slide the paper around. Once the image is positioned correctly, keeping it still helps prevent blurry or doubled details.
Remember to check the direction of your image
When a transfer reverses the image, text and directional details may appear backward. If your chosen technique reverses the design, mirror it before printing so it reads correctly on the finished piece.
A symmetrical flower or butterfly may look fine either way, but words, names, and some portraits need extra attention.
Step 4: Transfer the Image onto the Clay
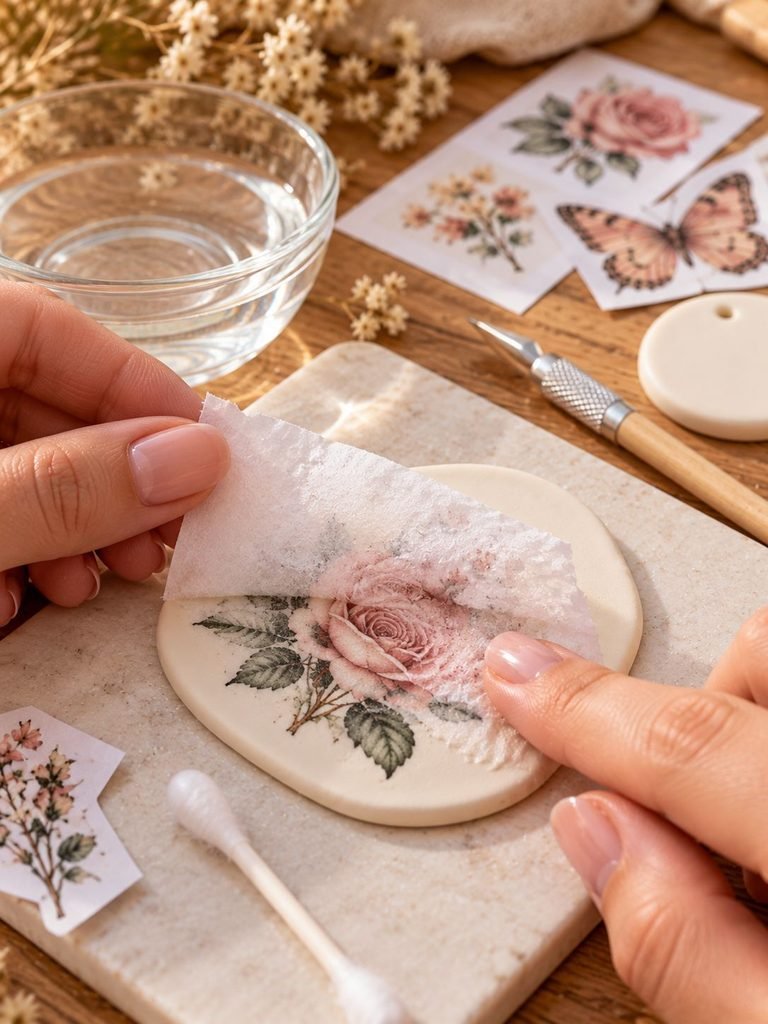
This is the most exciting part of the process because you’ll begin to see your design appear on the clay.
For the water-assisted laser transfer, lightly mist or wet the back of the paper with clean water. You want the paper damp enough to soften its fibers without flooding the clay.
Use your fingertip to gently rub the paper in small movements. Keep the pressure light and steady, paying attention to the edges and finer details.
As the paper softens, you can gradually begin removing it. Work slowly rather than trying to peel away the entire sheet at once.
The goal is to remove the paper backing while leaving the toner image on the clay.
How to remove the paper correctly
- Dampen the paper lightly with water.
- Allow it to soften for a short time.
- Gently rub the paper with your fingertip.
- Roll or lift away the loosened paper fibers.
- Repeat the process with small amounts of water as needed.
- Check the image carefully before removing more paper.
If the image begins lifting or breaking apart, stop rubbing. Allow the surface to settle, then continue more gently if the transfer is still intact.
The secret is patience. Rubbing too aggressively can remove parts of the design along with the paper, leaving gaps or faded areas.
Transfer results vary depending on the printer, toner, paper, clay, and technique. Some images may need more careful handling than others.
Step 5: Remove Remaining Paper Fibers
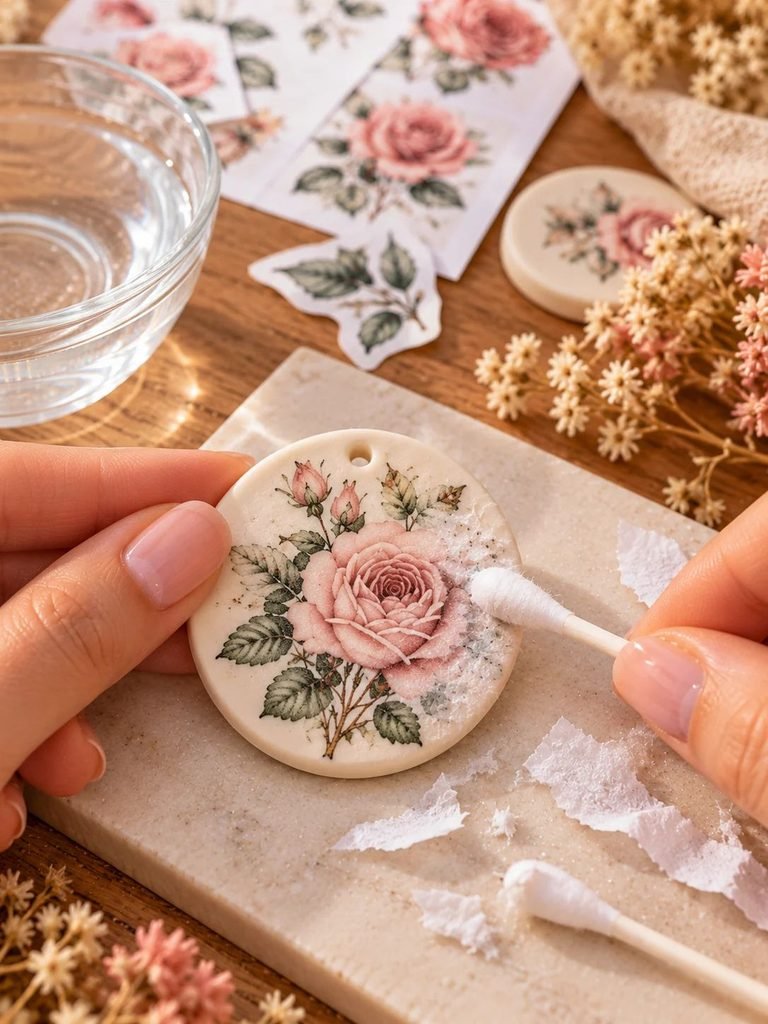
Once most of the paper has been removed, inspect the image closely.
Small white fibers may remain on the surface, making the transfer appear cloudy or pale. This is especially noticeable around dark lines and detailed illustrations.
Lightly dampen the surface and gently roll away the remaining fibers with your fingertip.
Avoid scraping the image with your fingernails or using a stiff brush. These actions can damage the transferred design.
If you’re struggling to see whether paper remains, let the surface dry briefly. Paper fibers may become more visible as the moisture disappears.
You can then dampen the area again and remove any remaining fibers carefully.
Be aware that the image itself may look slightly different when wet compared with when it is dry. Don’t keep rubbing simply because the colors appear less intense than you expected.
Once the paper is removed, allow excess moisture to evaporate before handling the surface further.
Step 6: Shape Your Clay Project
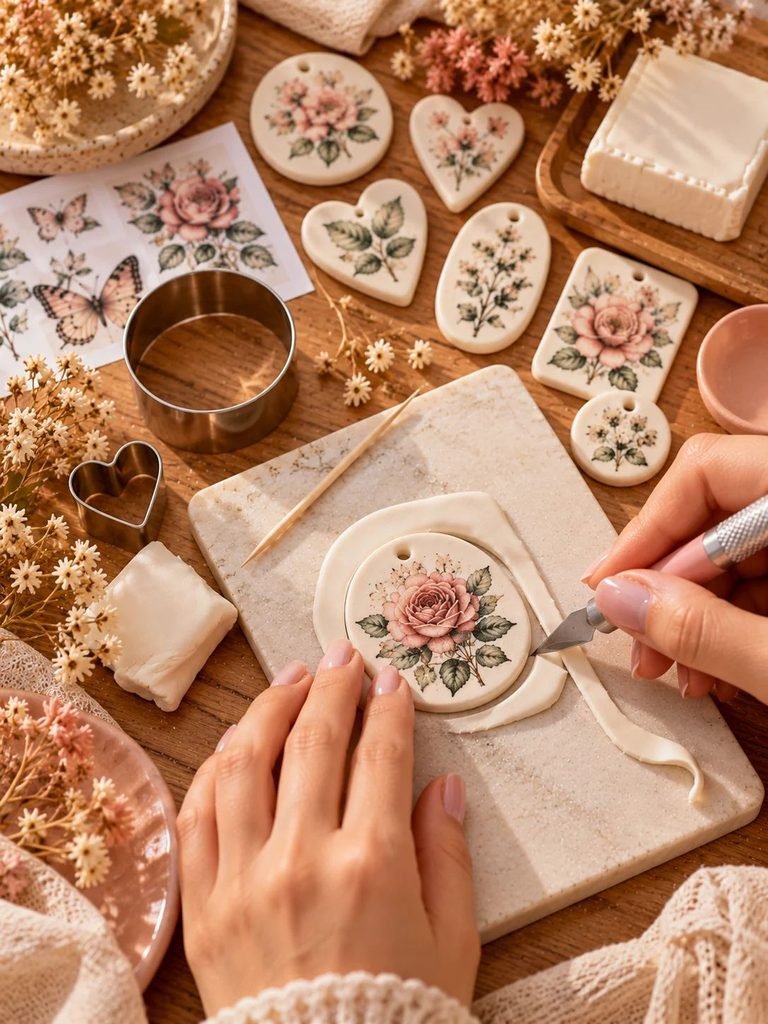
With the image transferred, you can turn the decorated clay into a finished craft.
If you want to make a pendant, use a clay cutter or suitable cutting tool to create your preferred shape. You can make circles, ovals, hearts, squares, or organic shapes with softly rounded edges.
For earrings, consider creating two matching pieces and checking that the images face the intended direction.
If you’re making a keychain or ornament, create a hole for the jump ring or hanging cord before baking. A toothpick or suitable clay tool can help create a neat opening.
Keep the blade away from your fingers and cut on a surface intended for crafting.
Ideas for finishing the edges
- Smooth the edges gently with a clean fingertip.
- Add a narrow border of contrasting clay.
- Press a subtle pattern around the outside.
- Add small clay flowers or decorative shapes beside the image.
- Create a softly rounded outline for a vintage-inspired finish.
Try not to manipulate the image area too much. The transferred design can be delicate before baking, and unnecessary handling may smudge or damage it.
Step 7: Bake the Polymer Clay
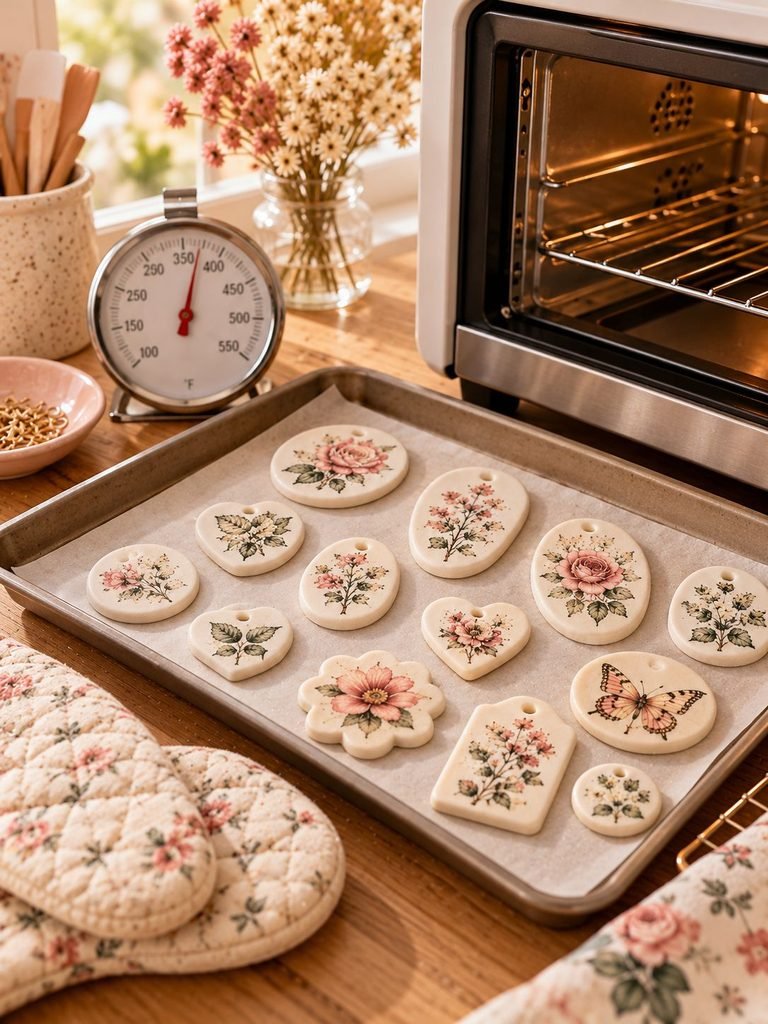
Baking is an essential step because it cures the polymer clay and helps make the finished piece firm.
Before baking, check the instructions on your specific clay package. Different brands and formulations may have different temperature and time requirements.
Preheat your oven to the recommended temperature and use an oven thermometer to check that the temperature is reasonably accurate.
Place your clay on a suitable baking surface and bake it for the time specified by the manufacturer for your piece’s thickness.
Don’t automatically use a temperature or baking time from another tutorial. Underbaking can leave polymer clay weak, while excessive heat can scorch it or produce harmful fumes.
Keep your workspace ventilated, follow the manufacturer’s safety guidance, and never leave the oven unattended.
If your image-transfer technique uses additional materials, such as liquid polymer clay or a specialty transfer medium, make sure those materials are compatible with the baking instructions.
When the baking time is complete, allow the piece to cool completely before handling it. Polymer clay may still be relatively soft while hot, so moving it too soon can cause bending or damage.
Step 8: Add a Protective Finish if Needed
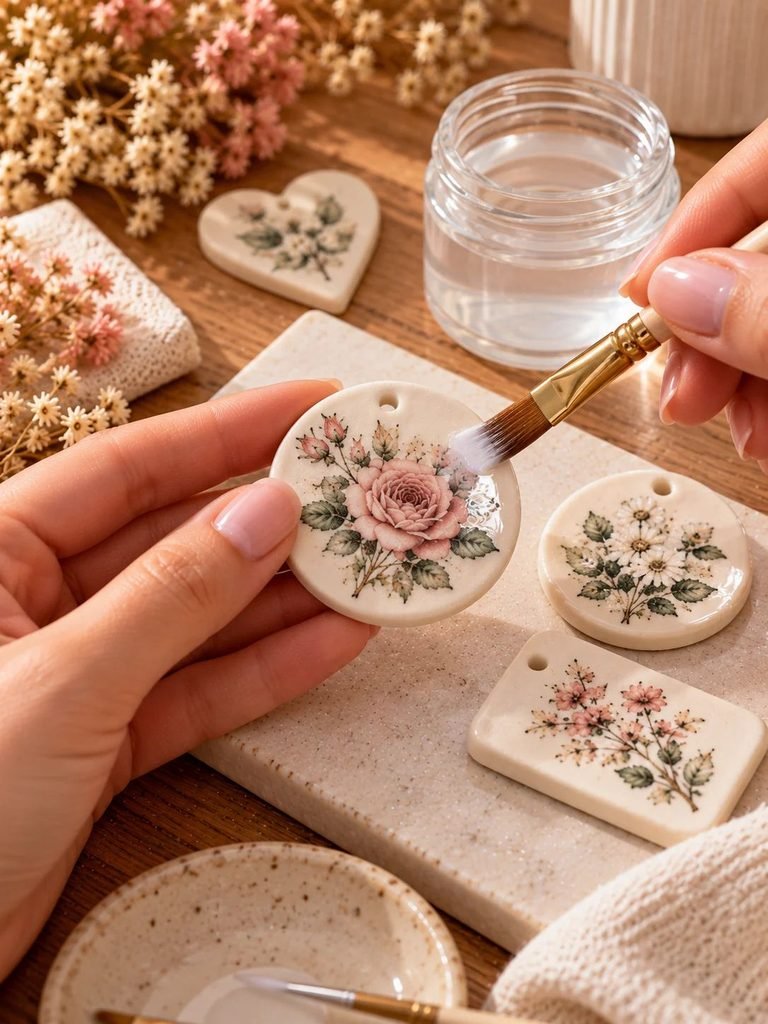
Once the clay has cooled, inspect the image and decide whether your project needs an additional finish.
Some transfers can be left uncoated, while others benefit from a compatible protective layer.
If you want a glossy appearance, choose a clear finish specifically designed for polymer clay and follow its application instructions.
A thin, even coat is usually preferable to a thick layer that could collect around the edges or obscure fine details.
Before applying any glaze, varnish, or sealant, test it on a spare piece made with the same clay and transfer materials. Some coatings can become sticky, cloudy, or incompatible with particular finishes.
Avoid assuming that every craft varnish, nail polish, or general-purpose sealant will work on polymer clay.
Should you seal every image transfer?
Not necessarily. The need for a coating depends on the transfer technique, intended use, and desired appearance.
For jewelry or keychains that receive frequent handling, a compatible finish may be helpful, but it won’t make an unsuitable transfer waterproof or guarantee that it will never wear.
If you’re making a piece that will be exposed to moisture or friction, check the durability of the complete project before using it regularly.
Alternative Ways to Transfer Images onto Polymer Clay
The water-assisted laser method is a useful place to begin, but it isn’t the only option. If you have an inkjet printer or want a different finish, consider one of these alternatives.
1. Liquid polymer clay transfer
Liquid polymer clay can be used with certain printed images and specialty transfer techniques.
One method involves applying a thin layer of compatible liquid polymer clay over an inkjet-printed image on suitable photo paper, then curing and separating the image according to the product’s instructions.
The resulting transfer can be placed onto raw clay and baked as directed.
This method requires more preparation than the basic water-assisted technique, but it can be useful for color photographs and detailed artwork.
Always follow the liquid clay manufacturer’s instructions for heat application, curing, ventilation, and compatible materials.
2. Waterslide decal transfers
Waterslide decals are another convenient option for decorating polymer clay.
These transfers typically use a printed image on specially coated decal paper. Depending on the product, you may need a particular printer type, a clear coating, or another preparation step before applying the decal.
The decal is usually released from its backing with water and positioned onto the clay.
Smooth it gently to remove air bubbles and follow the manufacturer’s instructions for curing or sealing.
Waterslide decals are particularly useful when you want a clean, printed appearance without manually removing ordinary paper fibers.
3. Specialty transfer paper
Transfer paper designed for polymer clay or compatible craft applications can make the process more predictable.
However, transfer papers differ in their printing requirements, adhesive systems, and application methods.
Read the product instructions carefully before printing. Some are designed for inkjet printers, while others require laser printing or a separate transfer medium.
Don’t assume that ordinary iron-on transfer paper, tattoo paper, and polymer clay transfer paper are interchangeable.
For additional manufacturer guidance, you can explore Sculpey’s polymer clay transfer tutorial.
Common Image Transfer Problems and How to Fix Them
Even when you follow the instructions carefully, your first attempt may not be perfect. Here are a few common problems and practical ways to improve your results.
The image looks blurry
Possible cause: The paper moved while you were rubbing it, or the image was already low-resolution.
How to improve it: Use a clear, high-contrast image and press the paper evenly onto the clay before wetting it. Avoid shifting the paper once the transfer process begins.
Parts of the image are missing
Possible cause: You rubbed too firmly, removed the paper too quickly, or the image didn’t make even contact with the clay.
How to improve it: Use lighter pressure, work in small sections, and remove paper fibers gradually. Test a different image or transfer method if the problem continues.
The transfer looks cloudy
Possible cause: Paper fibers remain on the surface.
How to improve it: Dampen the paper lightly and gently roll the fibers away. Let the surface dry briefly to check for remaining residue.
The image appears too faint
Possible cause: The image has low contrast, the transfer was incomplete, or the chosen printer and paper combination isn’t suitable.
How to improve it: Try a bolder image, check that you’re using the correct printing method, and test on scrap clay before repeating the project.
The image looks backward
Possible cause: The image was not mirrored before a transfer method that reverses it.
How to improve it: Check the requirements of your chosen technique and reverse text or directional images before printing when necessary.
The clay becomes scorched during baking
Possible cause: The oven temperature was too high, or the clay was exposed to excessive heat.
How to improve it: Follow the manufacturer’s temperature and time requirements, use an oven thermometer, and avoid placing the clay too close to heating elements.
If the clay scorches, stop using the piece. Don’t try to cover up a burned project and treat it as safe for continued use.
Helpful Tips for Better Polymer Clay Image Transfers
Once you’ve tried the basic process, a few small adjustments can make your results more consistent.
Start with light-colored clay. White and ivory provide a useful background for many printed designs.
Keep your image simple. Bold flowers, clear illustrations, and high-contrast designs are excellent choices for beginners.
Test before committing. A small scrap piece lets you experiment with paper removal and image clarity without wasting your best materials.
Work on a clean surface. Dust, hair, and fingerprints can spoil the appearance of an otherwise beautiful transfer.
Avoid excess water. Too much moisture can make paper removal messy and difficult to control.
Handle the image gently. Before the clay is cured, repeated rubbing and unnecessary touching can damage the transfer.
Check your image orientation. Mirroring requirements depend on the transfer method, so confirm them before printing.
Follow the clay manufacturer’s instructions. Baking temperature and duration should be based on the product you’re using, not a general rule from another project.
Use compatible finishes. Test glazes and sealants before applying them to your finished design.
Most importantly, give yourself room to experiment. A slightly imperfect first transfer is a useful learning experience, and each attempt helps you understand how your materials behave.
Creative Polymer Clay Projects You Can Make with Image Transfers
One of my favorite things about image transfers is how many different crafts you can create with the same basic technique.
Here are a few ideas to inspire your next project.
Floral polymer clay earrings
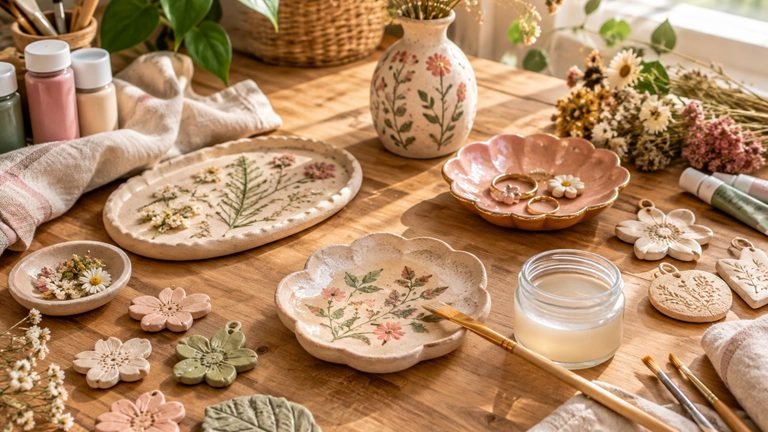
Transfer delicate roses, wildflowers, or botanical illustrations onto small clay shapes. Pair them with simple gold-tone findings for an elegant, handmade accessory.
Personalized pendants
Use a meaningful photograph, initial, or favorite illustration to make a necklace with a personal touch.
Decorative clay magnets
Create small botanical, cottagecore, or vintage-inspired magnets for a refrigerator or magnetic board.
Handmade gift tags
Decorate clay tags with miniature floral prints or decorative motifs. Add a hole for ribbon or twine to create a keepsake that can accompany a gift.
Seasonal ornaments
Use winter botanicals, stars, woodland illustrations, or festive designs to make unique seasonal decorations.
Miniature art pieces
Transfer small illustrations onto clay plaques or decorative tiles for a little piece of handmade art.
If you’re making gifts, consider coordinating the image with the recipient’s interests. A floral pendant, pet portrait, or personalized ornament can feel much more special than a generic store-bought accessory.
Frequently Asked Questions
Can I use an inkjet printer to transfer images onto polymer clay?
Yes, but you need a method designed for inkjet images. Inkjet ink and laser toner behave differently, so an ordinary-paper water transfer intended for laser prints may not work. Specialty transfer paper, compatible liquid polymer clay methods, and waterslide decals are possible alternatives.
Do I need to mirror my image before printing?
It depends on the transfer method. Methods that reverse the image require you to mirror the design before printing, particularly if it contains words, names, or directional details. Other techniques may preserve the original orientation. Always check the instructions for your chosen method.
What color polymer clay works best?
White and ivory are excellent starting points because they provide a light background that helps many designs stand out. Translucent clay can also work with certain transfer techniques, while dark clay may make pale details harder to see.
Can I transfer a photograph onto polymer clay?
Yes. Photographs can be used with suitable transfer methods, although the results depend on the printer, paper, image quality, and technique. For small photographs with many details, try a test piece before creating your final project.
Do I need to seal the transferred image?
Not always. Some transfers can be left as they are, while others benefit from a compatible clear finish. Choose a coating designed to work with polymer clay and your transfer materials, and test it first.
Can I wash polymer clay with an image transfer?
Don’t assume that every image transfer is waterproof or suitable for frequent washing. Durability depends on the transfer method, the clay, and any compatible finish used. Keep delicate pieces away from prolonged moisture unless you’ve verified that the complete project can withstand it.
Why did my image come off with the paper?
The transfer may not have adhered properly, or the paper may have been removed too aggressively. Try applying even contact pressure before wetting the paper, removing the paper in small sections, and using lighter rubbing motions. If the issue continues, experiment with a different image or transfer method.
Final Thoughts
Transferring images onto polymer clay is a wonderful way to add personality to handmade crafts without having to paint every detail yourself. With a suitable image, a smooth clay surface, and a little patience, you can create beautiful pendants, earrings, ornaments, magnets, and thoughtful gifts.
For your first project, keep things simple and choose a clear design on light-colored clay. Take your time removing the paper, handle the image gently, and follow the manufacturer’s instructions when baking and finishing your piece.
Don’t worry if your first attempt isn’t perfect. Every transfer teaches you something new about your materials and technique.
Now gather your favorite images, prepare a little clay, and enjoy creating something uniquely yours. I’d love to know which design you’d try first—a delicate floral print, a personalized photograph, or a vintage-inspired illustration!