DIY Mini Clay Star Garland: How to Make a Beautiful Handmade Star Decoration
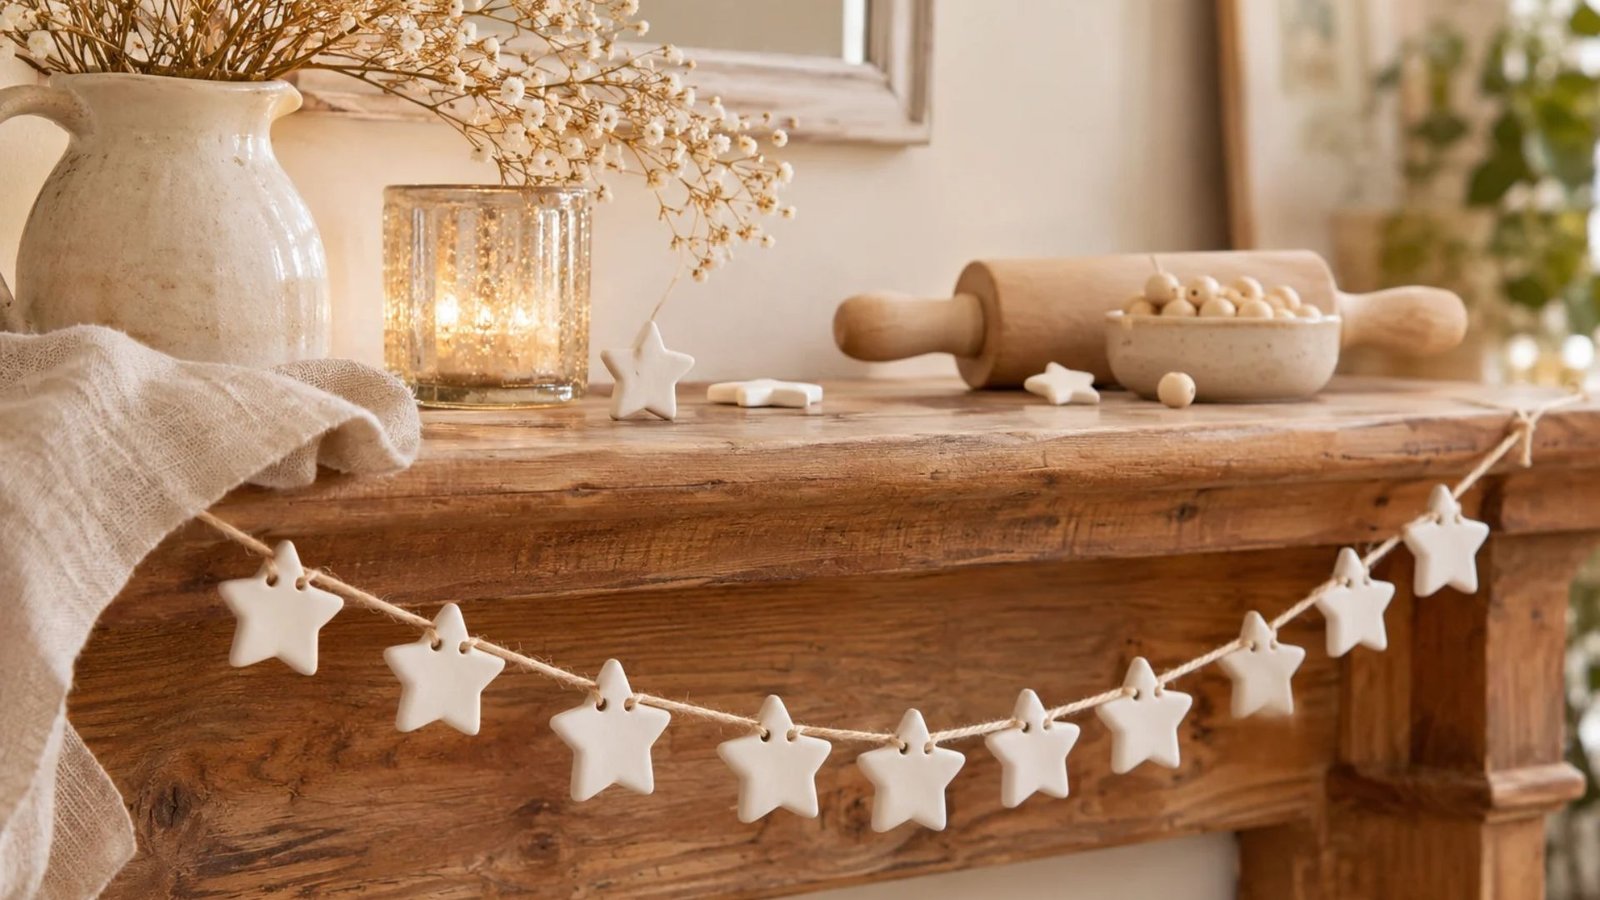
I love handmade decorations that make a room feel warm without asking for a big budget or an entire afternoon of complicated crafting.
A mini clay star garland is one of those sweet projects: simple, charming, and easy to personalise for Christmas, a nursery, a cosy reading corner, or a party table.
The best part is that you can make the dough with a few pantry ingredients, then turn it into delicate stars with a small cutter. In this tutorial, I’ll walk you through the process, share practical tips for neat, sturdy stars, and help you style your garland beautifully.
Why You’ll Love This DIY Mini Clay Star Garland
If you enjoy simple handmade decorations, this little project is definitely worth adding to your crafting list. It combines an inexpensive homemade clay recipe with a simple cutting and decorating process, making it suitable for beginners and experienced DIY enthusiasts alike.
Here are a few reasons to give it a try:
- Budget-friendly: The homemade clay requires just three basic ingredients: baking soda, cornstarch, and water.
- Beginner-friendly: You don’t need special pottery equipment or complicated crafting techniques.
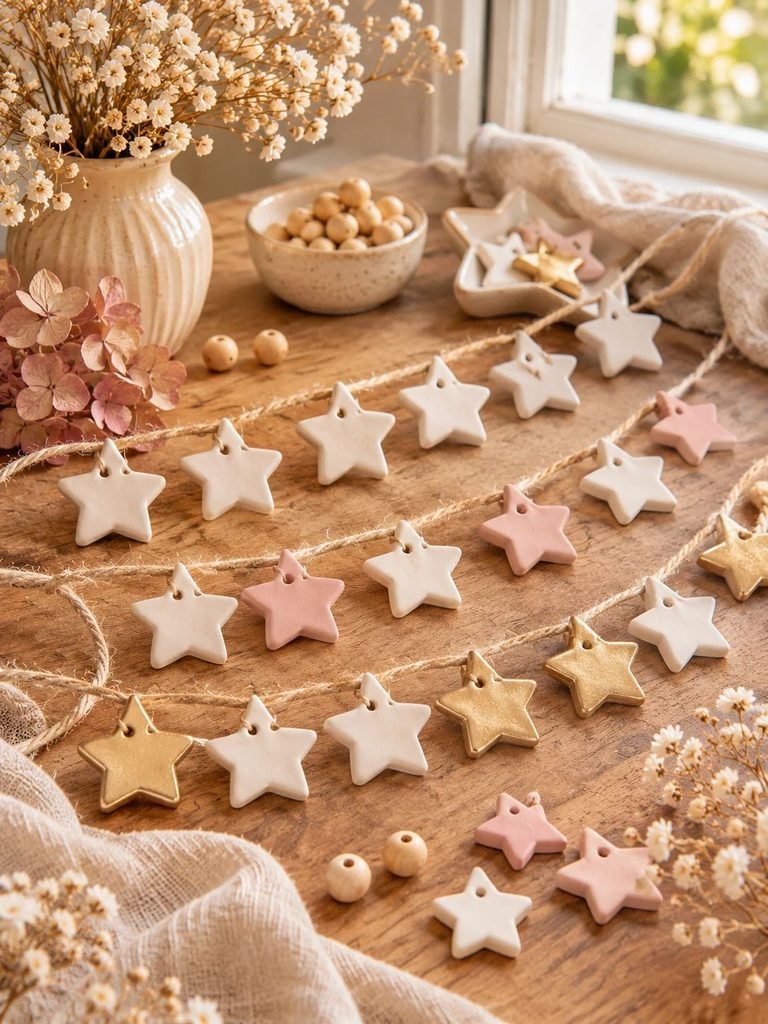
- Easy to customise: Paint your stars, leave them naturally white, or add subtle metallic details.
- Perfect for seasonal decorating: Use your garland for Christmas, winter celebrations, birthdays, or everyday home styling.
- A lovely handmade gift: A finished garland makes a thoughtful little present for friends and family.
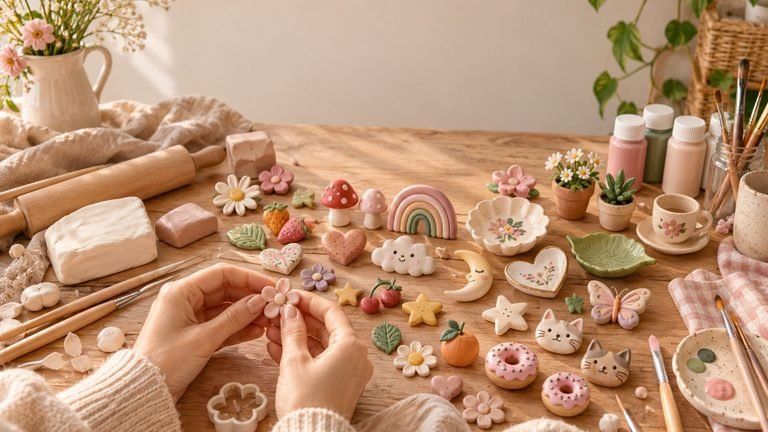
- Versatile: You can use the same clay recipe to create other decorative shapes, including hearts, moons, leaves, and flowers.
I especially love how the little stars look when grouped together. Their simple shapes and soft, natural finish create a lovely decorative detail without making a space feel too busy.
Materials You’ll Need
Before getting started, gather everything you need. Having your supplies ready makes the process much easier, especially when working with homemade clay.
For the homemade clay
- 2 cups baking soda
- 1 cup cornstarch
- 1½ cups water
For making the star garland
- Mini star-shaped cookie cutter
- Rolling pin
- Small saucepan
- Whisk or wooden spoon
- Baking sheet
- Parchment paper
- Toothpick, skewer, or small straw
- Fine twine, cotton string, or thin waxed cord
- Large sewing needle or embroidery needle
- Small bowl of cornstarch for dusting
Optional decorating supplies
- White acrylic paint
- Gold or champagne metallic paint
- Soft pink or beige acrylic paint
- Fine paintbrush
- Matte craft sealer
- Fine sandpaper
- Small decorative beads
A little tip: Choose a thin string that can comfortably pass through the holes in your stars. Waxed cotton cord is a lovely option because it is flexible, easy to thread, and gives the garland a neat handmade appearance.
Step 1: Make the Homemade Cornstarch Clay
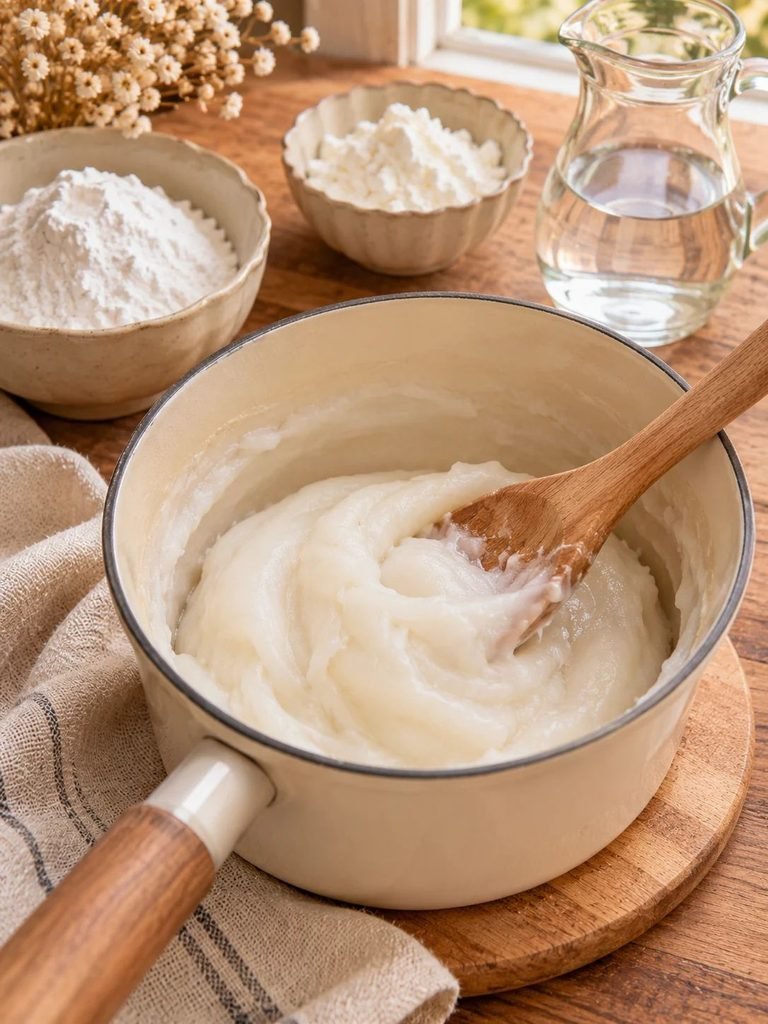
The first step is preparing the homemade clay. This recipe creates a smooth, porcelain-like dough using everyday kitchen ingredients.
Start by adding 2 cups of baking soda, 1 cup of cornstarch, and 1½ cups of water to a small saucepan.
Whisk everything together until the dry ingredients are completely dissolved and the mixture looks smooth. Try to remove any visible lumps before placing the saucepan on the stove.
Set the saucepan over medium heat and begin stirring continuously.
As the mixture heats, it will gradually become thicker. At first, it may look like a thin liquid, but after a few minutes, it will begin to resemble a soft paste.
Continue stirring for approximately 3–6 minutes, watching the consistency carefully.
Once the mixture thickens into a dough-like texture similar to mashed potatoes, remove it from the heat.
Avoid cooking it for too long. Overcooking can make the dough dry and difficult to knead, which may cause problems when rolling and cutting your stars.
Transfer the warm dough to a clean heat-safe bowl or plate. Cover it with a slightly damp cloth while it cools to help prevent the surface from drying out.
Allow it to cool completely before handling.
Important tip: The dough should feel soft and pliable once cooled, rather than wet or sticky. If it seems slightly dry, knead it gently. If it is excessively sticky, work in a very small amount of cornstarch.
Step 2: Knead the Clay Until Smooth
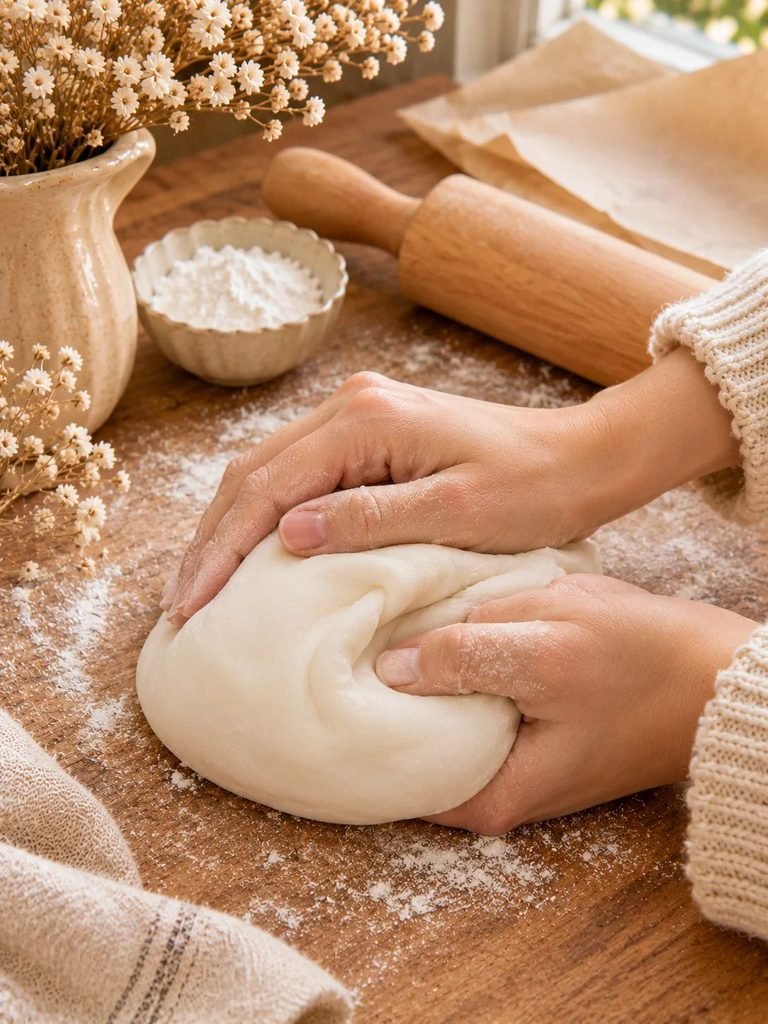
Once your clay has cooled, it’s time to prepare it for rolling.
Lightly dust your work surface with cornstarch. Place the dough on the surface and begin kneading it gently with your hands.
Fold the dough over itself and press it down repeatedly until it becomes smooth and evenly combined.
This step is important because it helps create a consistent texture, making it easier to roll out the clay without rough edges or uneven patches.
If you notice small cracks while kneading, try gently pressing the affected areas together.
Avoid adding too much extra cornstarch, as this can make the dough overly dry and brittle.
If you aren’t ready to cut your stars immediately, wrap the clay tightly in plastic wrap and place it inside an airtight container. Keep it refrigerated for short-term storage and allow it to return to a workable temperature before using it.
Read DIY Clay Gnome
Step 3: Roll Out the Clay
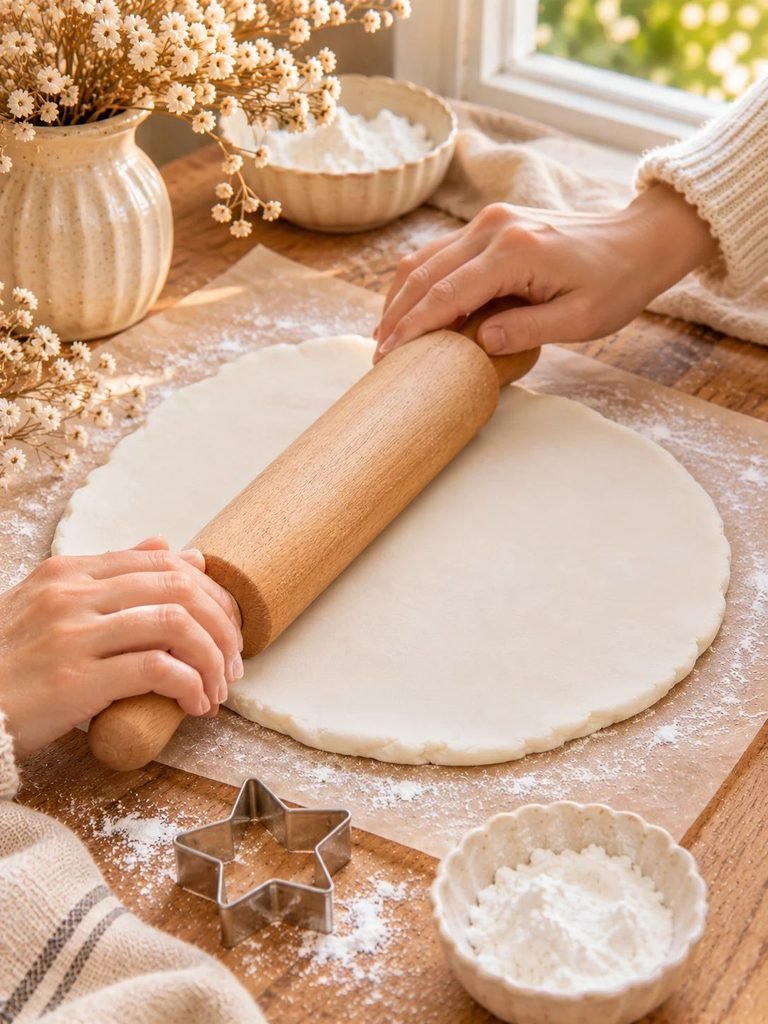
Now comes the fun part!
Place your smooth clay onto a lightly dusted work surface. Using a rolling pin, gently roll it out until it reaches approximately ¼ inch thick.
Try to maintain an even thickness across the entire sheet.
This is particularly important when making mini star garlands because stars that are too thick may become heavy and hang awkwardly once threaded. On the other hand, extremely thin stars can become fragile and break more easily.
A thickness of approximately ¼ inch provides a good starting point.
If you prefer a delicate, lightweight garland, you can experiment with slightly thinner stars, but handle them carefully during cutting and transferring.
My favourite tip: Roll the clay between two sheets of parchment paper if you find that it sticks to your rolling pin. This also helps you achieve a smoother surface without adding too much extra cornstarch.
Read How to Make a Marbled Air-Dry Clay Pot: An Easy DIY Tutorial
Step 4: Cut Out the Mini Clay Stars
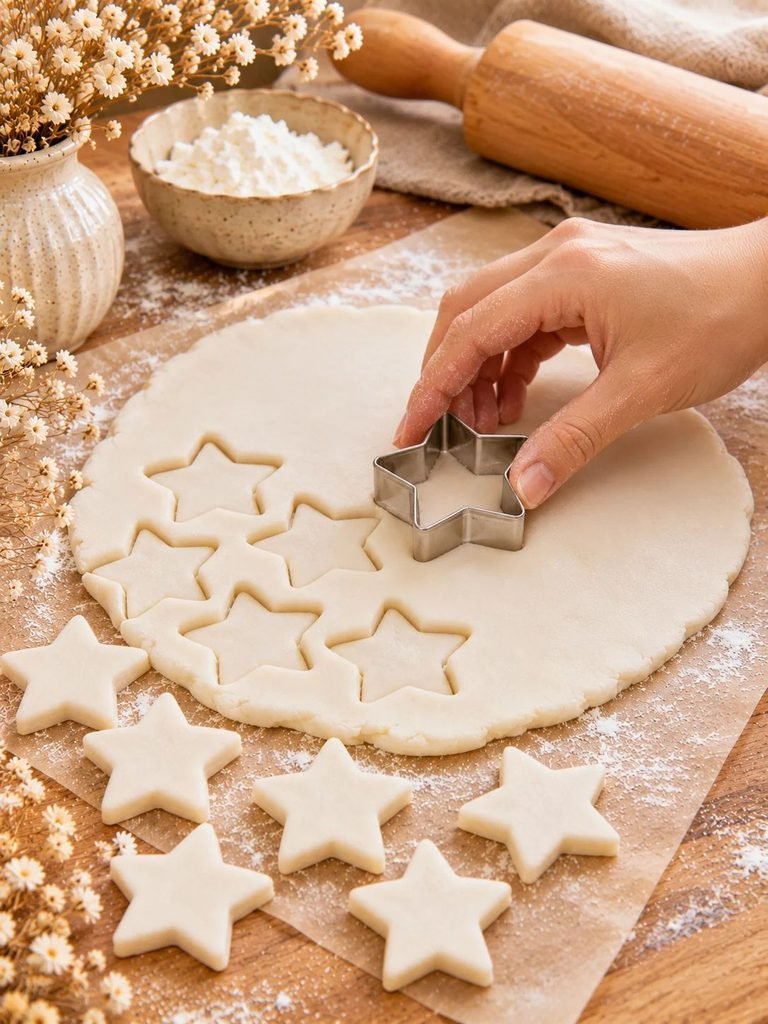
Once your clay is rolled out evenly, take your mini star-shaped cookie cutter.
Press the cutter firmly into the clay, making sure each star has clearly defined points.
Lift the cutter gently and carefully remove the surrounding excess clay.
Continue cutting until you’ve used as much of the rolled-out dough as possible.
Gather the leftover pieces, knead them together, and roll them out again to create more stars.
Try to make your stars relatively similar in size. This will help your finished garland look balanced and professionally styled.
If you want a more playful appearance, you can use two or three different star sizes and arrange them in a repeating pattern.
Place the freshly cut stars onto a parchment-lined baking sheet or another flat surface.
Leave a little space between each piece so they don’t accidentally stick together.
Read How to Make Air-Dry Clay Christmas Ornaments by Embossing Them
Step 5: Make Holes for the String
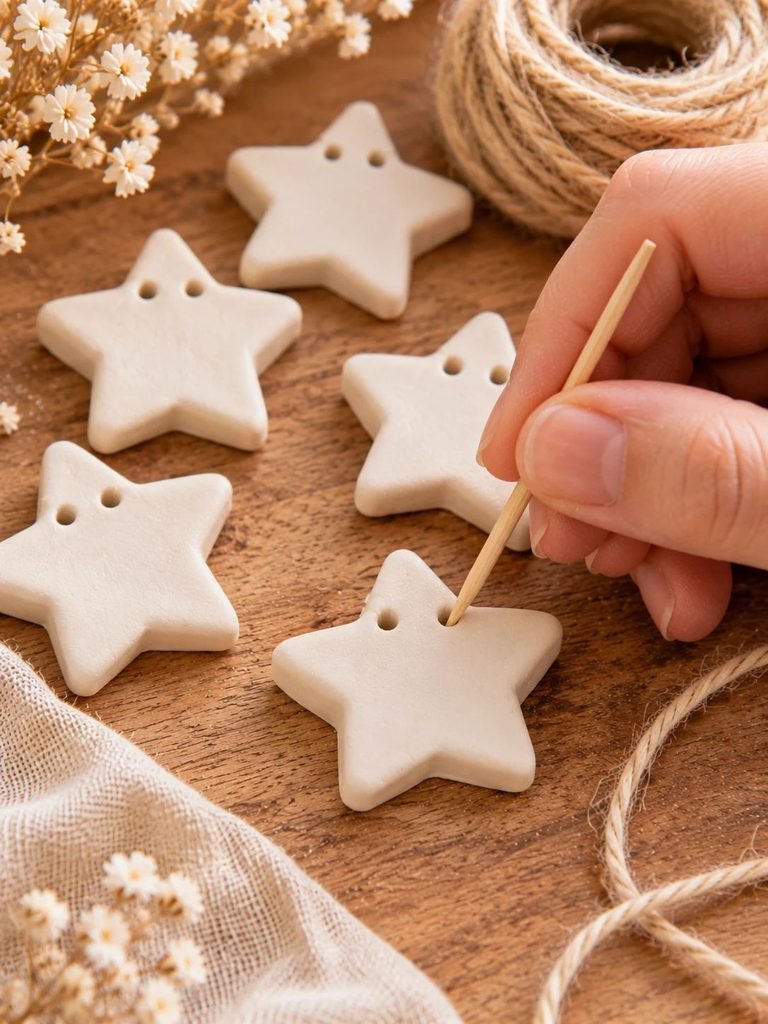
Before drying your clay stars, you need to create holes so they can be threaded onto your garland.
Using a toothpick, wooden skewer, or small straw, carefully make two holes near the upper section of each star.
Think of the holes as the two openings on a small button.
Position them slightly below the upper points, keeping enough space between the holes and the edges to prevent the clay from breaking.
Making two holes rather than one helps the stars hang more naturally and reduces unwanted twisting.
Here are a few tips for getting neat holes:
- Rotate the toothpick gently rather than forcing it through the clay.
- Make sure the openings are large enough for your chosen string.
- Remove any small pieces of clay around the holes.
- Check that both holes remain open before drying.
- Avoid placing the holes too close to the edges.
If the holes begin closing up, gently reshape them with your toothpick while the clay is still soft.
Allowing enough room around each opening is especially important because the stars can become fragile as they dry.
Read 16 Elegant Clay Candle Holder Ideas for a Handmade Luxury Look
Step 6: Dry the Clay Stars
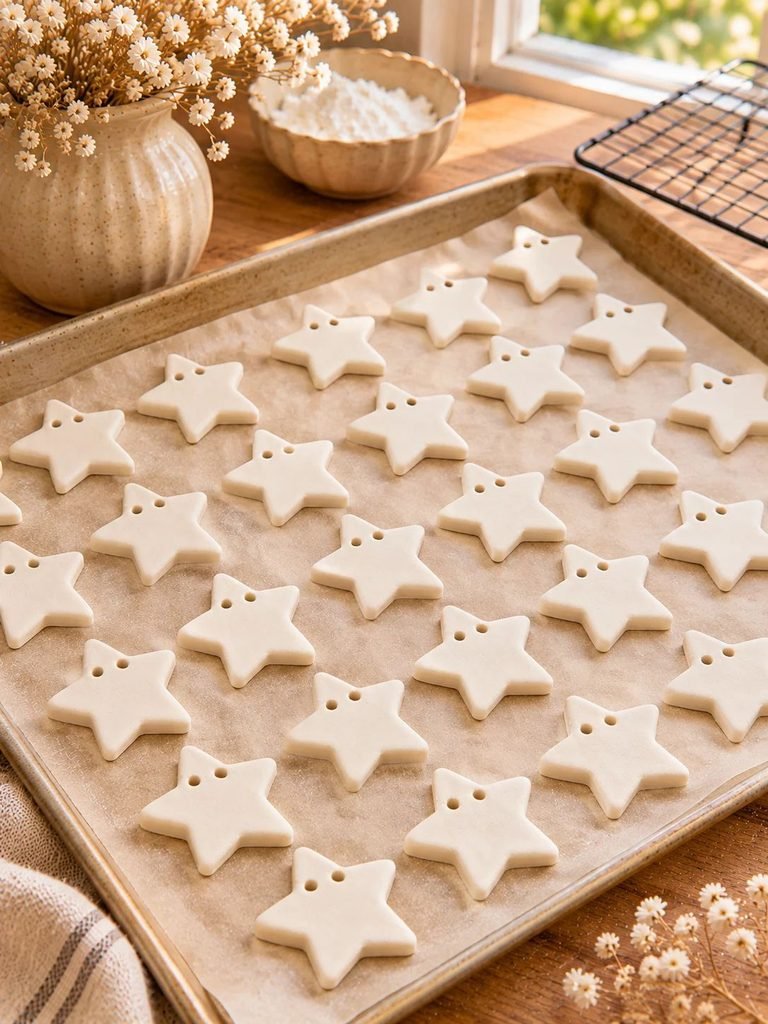
Once all your stars have been cut and prepared, they need to dry completely before you assemble the garland.
There are two main ways to do this.
Option 1: Drying in the oven
For a quicker drying process, place the parchment-lined baking sheet into an oven set to its lowest temperature.
A temperature of approximately 170–200°F (77–93°C) is commonly used for this type of homemade clay.
Allow the stars to dry for a couple of hours, checking them periodically.
The exact drying time will depend on their thickness, size, and your oven.
Turn the stars carefully if necessary to help them dry evenly.
Keep the temperature low because excessive heat can cause the clay to crack, discolour, or become brittle.
Option 2: Air-drying
If you prefer not to use an oven, you can leave your stars to dry naturally.
Arrange them in a single layer on parchment paper or a flat drying surface.
Place them somewhere warm, dry, and well ventilated, away from direct moisture.
Depending on their thickness and the humidity in your home, air-drying may take several days.
Turn them occasionally so both sides can dry evenly.
How do you know when they’re ready?
Your stars should feel completely firm and dry rather than cool, soft, or damp in the centre. Allow additional drying time if you’re unsure.
Don’t rush this stage. Drying your clay properly is one of the most important ways to help prevent breakage later.
Step 7: Smooth and Decorate Your Stars
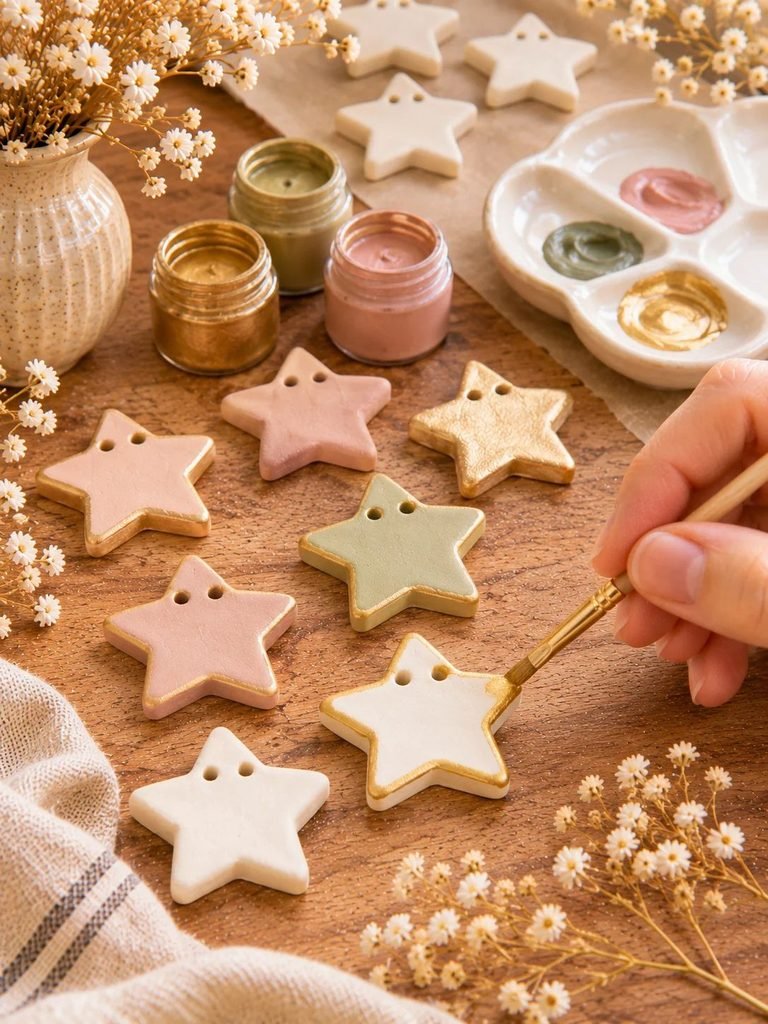
Once your stars have dried completely, you can leave them in their natural white finish or add a little colour.
Personally, I love the simple appearance of white clay stars. They have a soft, understated look that works beautifully with neutral interiors, natural wood, and cozy seasonal decorations.
However, there are plenty of ways to make your garland more personal.
Natural white stars
Leave the stars unpainted for a clean, minimalist appearance. Their soft, chalky finish looks especially pretty when paired with natural cotton twine.
Soft gold stars
Use a fine brush to add gold paint to the edges or tips of each star. This creates a subtle metallic detail without making the garland look too flashy.
Blush pink stars
Paint some of your stars in a muted blush pink or dusty rose shade. This is a lovely choice for feminine interiors, nurseries, and romantic seasonal decorations.
Sage green stars
A soft sage green finish gives your garland a natural cottagecore feel. Pair it with cream stars for a beautiful combination.
Subtle glitter details
If you enjoy a little sparkle, apply a small amount of craft glitter to selected stars using an appropriate craft adhesive.
Allow all paint and decorative finishes to dry fully before assembling your garland.
If you want to protect painted stars, you can apply a suitable clear craft sealer according to its instructions. Remember that sealing does not make homemade baking soda clay waterproof.
Step 8: Assemble Your Mini Clay Star Garland
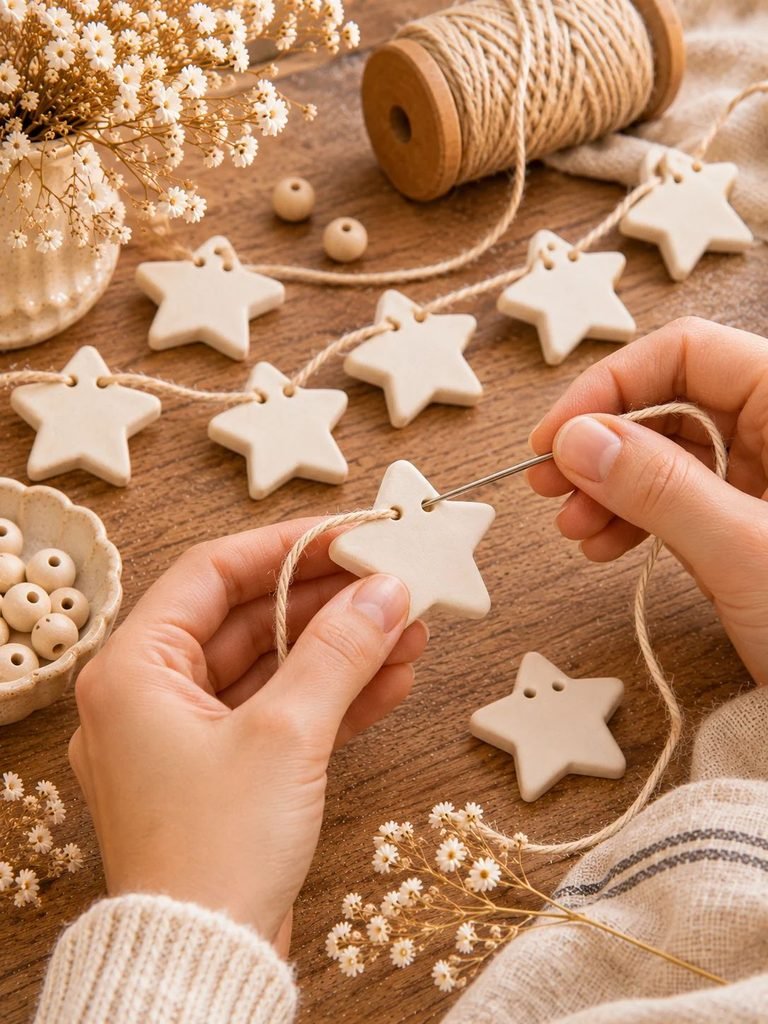
Now that your stars are completely dry and decorated, it’s time to turn them into a beautiful garland.
Cut a length of twine or cotton cord according to where you plan to hang your decoration.
A mantelpiece, shelf, bedroom wall, or Christmas tree may require different lengths, so measure your intended space first.
Thread your chosen string through a large needle.
Carefully pass the needle through both holes of each star, just as you would thread a button.
Continue adding stars until you reach your desired arrangement.
You can position the stars close together for a fuller appearance or leave a little space between them for a lighter, more delicate look.
To stop the stars from sliding around, tie a small knot in the string behind each star or secure the spacing with carefully positioned knots.
This also helps keep the stars evenly distributed when the garland is hanging.
Once you’ve threaded all your stars, leave a little extra string at both ends so you can create loops for hanging.
Your handmade mini clay star garland is now ready to display!
Beautiful Ways to Style Your Mini Clay Star Garland
One of my favourite things about this project is how easily it fits into different decorating styles.
Here are some lovely ways to use your finished garland.
1. Decorate Your Christmas Tree
Drape the garland gently around your Christmas tree, allowing the little stars to sit naturally between the branches.
White stars look beautiful against traditional green foliage, while gold and blush variations add a softer, more modern Christmas feel.
You can combine them with wooden ornaments, dried orange slices, and simple ribbon for a charming handmade look.
2. Style a Cozy Mantelpiece
Hang your star garland across a mantelpiece and pair it with small candles, greenery, and natural wooden decorations.
Allow the string to dip slightly in the middle for a relaxed, decorative appearance.
3. Add Charm to a Nursery
A neutral clay star garland can be a lovely decorative detail in a nursery.
Choose cream, white, or pale pink stars and hang them as decorative accents away from the reach of babies and young children.
Make sure the garland is securely mounted and never positioned within a child’s sleeping or play area.
4. Decorate a Bedroom Wall
Hang your garland above a dressing table, decorative shelf, or reading corner.
The small stars add a sweet handmade touch without overwhelming the room.
5. Use It for a Party or Celebration
Mini clay stars are also lovely for birthday parties, baby showers, and winter celebrations.
You can paint them to match your event colours and hang them across a dessert table or party backdrop.
Common Problems and How to Fix Them
Although this is a beginner-friendly project, homemade clay can sometimes be a little unpredictable.
Here are a few common problems and how to avoid them.
Why are my clay stars cracking?
Cracking can happen when the dough is too dry, the ingredients are not measured correctly, or the clay is cooked for too long.
Uneven thickness and drying too quickly can also contribute to cracks.
To prevent this, measure your ingredients carefully, stir continuously while cooking, and roll your clay to an even thickness.
Why are my stars breaking?
Stars may break if they are too thin, handled roughly, or not completely dry before being moved.
Try keeping them around ¼ inch thick and use a flat spatula to transfer them when necessary.
Avoid bending or pulling them while threading.
Why are my stars tilting forward?
If your stars lean forward when hanging, the holes may be positioned too low or the stars may be too thick and heavy.
Try placing the holes slightly higher and keeping the stars lightweight.
Why is my clay sticking to the work surface?
Your dough may contain too much moisture or your surface may not be sufficiently dusted.
Lightly sprinkle cornstarch onto your work surface and rolling pin. Avoid adding large quantities directly to the dough.
Why does my finished clay look rough?
Rough surfaces can happen when the dough is not kneaded sufficiently or becomes too dry.
Knead the mixture until smooth before rolling, and gently remove visible imperfections before drying.
How to Store Your Clay Star Garland
With proper care, your handmade garland can be enjoyed for multiple seasons.
Because this homemade clay is not waterproof, moisture is its biggest enemy.
Keep your finished decoration away from damp areas, outdoor weather, and places where it may come into contact with water.
When the season is over, gently remove the garland and wrap it in soft tissue paper.
Place it inside a sturdy storage box, ideally with the stars arranged in a single layer so they aren’t crushed.
Store the box somewhere cool and dry.
Avoid placing heavy decorations on top of it, as the stars can break under pressure.
If you take a little extra care when storing your garland, you can bring it out year after year.
Frequently Asked Questions
Can I make mini clay stars without a cookie cutter?
Yes! If you don’t have a star-shaped cookie cutter, you can use a small paper star template and carefully cut around it using a craft knife. Work slowly to keep the edges neat.
Can I use regular air-dry clay instead?
Absolutely. Commercial air-dry clay can also be used to make star garlands. Follow the manufacturer’s drying instructions, as different clay products have different requirements.
Can I paint the clay stars?
Yes. Once the stars are completely dry, you can decorate them with acrylic paint, metallic paint, or other suitable craft finishes.
Can I make the clay ahead of time?
Yes. Prepare the dough, allow it to cool, and store it tightly wrapped in an airtight container in the refrigerator for short-term storage.
How many stars do I need for a garland?
This depends on the size of your stars and how closely you want them arranged.
As a starting point, you can plan for approximately 9–10 small stars per foot of garland, then adjust according to their size and spacing.
Can I make larger ornaments with this recipe?
Yes, although larger pieces may be more prone to cracking or breaking if the dough is unevenly prepared or dried.
For larger decorations, pay particular attention to the thickness, consistency, and drying process.
Are these clay stars waterproof?
No. Baking soda and cornstarch clay is not waterproof. Even when sealed, it should be treated as a decorative material and kept away from moisture.
Can I add essential oils to the clay?
You can experiment with adding a small amount of fragrance to fully dried pieces, but test a spare piece first. Adding oils to the wet mixture may affect the consistency and drying process.
Final Thoughts
Making a DIY mini clay star garland is such a lovely way to spend a little creative time while creating something beautiful for your home. With just a few inexpensive ingredients, a small cookie cutter, and some simple twine, you can make a charming decoration that suits almost any season or occasion.
What I love most about this project is how easy it is to make it your own. Keep your stars beautifully simple in natural white, add a little gold for sparkle, or experiment with soft pastel colours to match your home.
Whether you’re decorating your Christmas tree, adding something special to a cozy corner, or making a thoughtful handmade gift, these little stars are a wonderful reminder that the simplest DIY projects can be the prettiest.
Happy crafting!
The Crafty Fix