DIY Air Dry Clay Ornaments: Easy, Beautiful Ideas to Make at Home
I have always loved how a few simple craft supplies can turn into something beautiful, especially when it comes to handmade decorations.
Air-dry clay is one of my favourite materials because it is affordable, easy to work with, and perfect for creating little keepsakes that feel personal.
Whether you want to make pretty ornaments for Christmas, decorate your home, or create thoughtful handmade gifts, these DIY air-dry clay ornaments are such a lovely project to try.
You don’t need fancy equipment or previous crafting experience, just a little creativity and patience.
Why You’ll Love Making Air-Dry Clay Ornaments

Air-dry clay ornaments are a wonderful way to bring a personal touch to your home. Unlike decorations you buy from a shop, handmade ornaments allow you to choose the shapes, colours, textures, and little details that match your style.
One of the best things about this project is how beginner-friendly it is. You don’t need a pottery wheel, kiln, or expensive equipment. Air-dry clay hardens naturally when exposed to air, making it suitable for simple home crafting.
Here are a few reasons to give this project a try:
- Budget-friendly: A small package of air-dry clay can make several ornaments.
- Beginner-friendly: Most designs require only basic rolling, cutting, and decorating techniques.
- Customisable: You can experiment with different colours, shapes, patterns, and finishes.
- Perfect for gifting: Handmade ornaments make thoughtful presents for birthdays, Christmas, and other special occasions.
- Lovely home decorations: Display them on Christmas trees, decorative branches, shelves, or gift packages.
- A relaxing activity: Working with clay is a lovely way to slow down and enjoy a creative afternoon.
The possibilities are endless, and you can make each ornament completely unique.
Supplies You’ll Need to Make DIY Air-Dry Clay Ornaments
Before getting started, gather your supplies. Most of these items are inexpensive and may already be sitting in your craft cupboard.
Essential materials
- Air-dry clay: Choose a good-quality white or natural-coloured clay that is easy to roll and shape.
- Rolling pin: A small wooden rolling pin works beautifully for flattening the clay.
- Cookie cutters: Use stars, hearts, circles, flowers, trees, and other decorative shapes.
- Parchment paper: This prevents the clay from sticking to your work surface.
- Drinking straw: Perfect for making small holes for hanging ribbons or twine.
- Craft knife: Useful for trimming uneven edges and creating custom shapes. Use carefully.
- Sandpaper: Fine-grit sandpaper helps smooth rough edges after drying.
- Acrylic paints: Choose your favourite colours for decorating.
- Paintbrushes: Small brushes are ideal for adding delicate details.
- Twine or ribbon: Use these to hang your finished ornaments.
- Clear acrylic sealer: Helps protect painted ornaments from dust and light moisture.
Optional decorative supplies
- Rubber stamps for creating patterns.
- Lace or textured fabric for impressions.
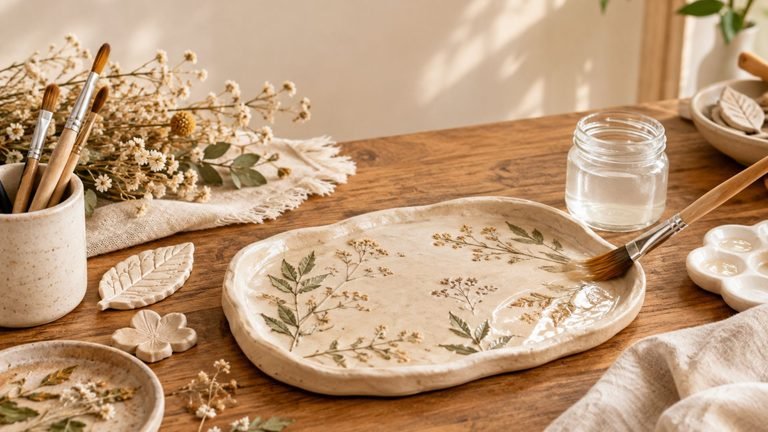
- Dried flowers and botanical leaves for impressions.
- Gold leaf or metallic acrylic paint.
- Letter stamps for personalised messages.
- Small wooden beads for decorative finishing.
You don’t need every item on this list. Start with the basics and add extra decorations as you become more comfortable working with clay.
How to Make DIY Air-Dry Clay Ornaments Step by Step
Making air-dry clay ornaments is easier than you might think. The most important things are preparing your clay properly, keeping your ornaments an even thickness, and allowing enough drying time.
Step 1: Prepare Your Workspace

Start by choosing a clean, flat surface where you can comfortably work. Cover your table with parchment paper or a reusable craft mat.
Make sure your hands and tools are clean before handling the clay. Dust, dirt, and other materials can leave unwanted marks on your ornaments.
Take your air-dry clay out of its packaging and knead a small portion between your hands.
Kneading helps soften the clay, making it easier to roll and shape. If your clay feels slightly stiff, work it gently until it becomes more pliable.
Helpful tip: Keep unused clay covered in an airtight bag or container. Air-dry clay can begin hardening when exposed to air, even before you finish your project.
Step 2: Roll Out the Clay
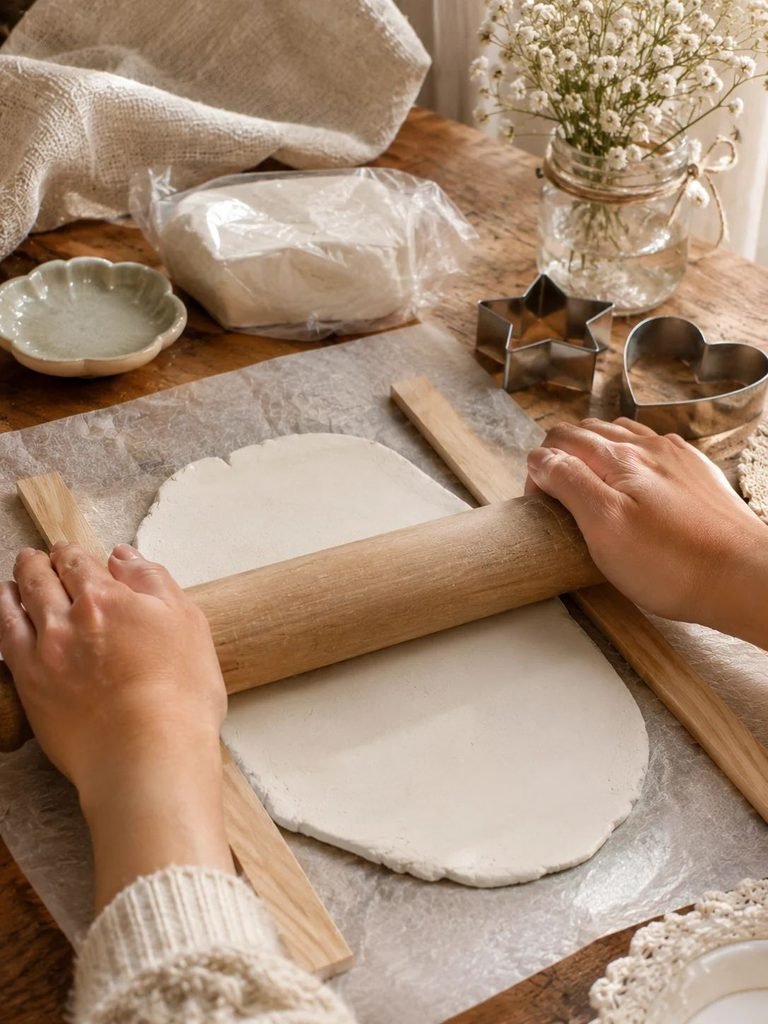
Place your clay on the prepared surface and use a rolling pin to flatten it.
For most decorative ornaments, aim for approximately 4–6 mm thickness. This gives your ornaments enough strength without making them unnecessarily heavy.
Try to keep the thickness consistent across the entire piece.
If some areas are much thinner than others, they may dry unevenly and become more likely to crack or break.
You can place two wooden craft sticks of equal thickness on either side of the clay as guides for more even rolling.
Step 3: Cut Out Your Ornament Shapes

Now comes one of the most enjoyable parts!
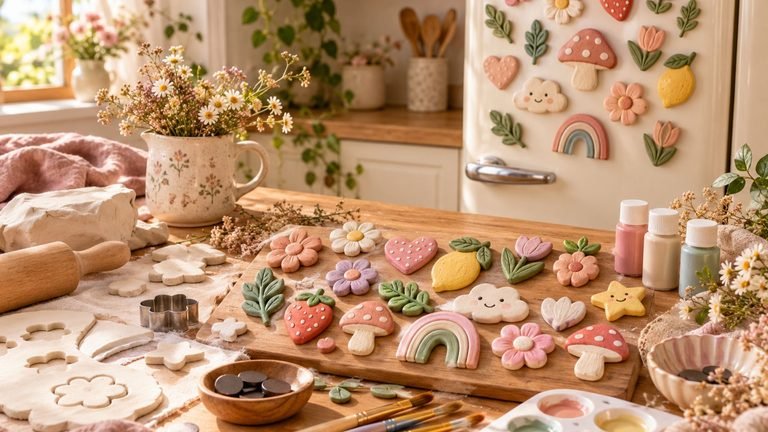
Choose your favourite cookie cutters and gently press them into the rolled clay.
Some lovely shapes to try include:
- Stars
- Hearts
- Christmas trees
- Snowflakes
- Flowers
- Moons
- Circles
- Gingerbread houses
- Bells
- Leaves
Carefully remove the excess clay around each shape.
If you don’t have cookie cutters, you can create your own designs using a craft knife and a simple paper template.
Smooth the edges gently with your fingers or a slightly damp fingertip.
Step 4: Make Holes for Hanging

Before your ornaments dry, remember to make a small hole near the top of each piece.
Use a drinking straw, wooden skewer, or similar rounded tool to create the opening.
Make sure the hole is large enough for your chosen ribbon or twine to pass through.
Avoid placing the hole too close to the edge, as this can make the ornament weaker and more likely to break when you hang it.
I recommend checking every ornament before moving on. It is much easier to make adjustments while the clay is still soft.
Step 5: Add Beautiful Textures and Details

This is where you can really let your creativity shine.
You can leave your ornaments smooth and simple, or add beautiful textures using everyday household items.
Try these techniques:
- Lace impressions: Press a small piece of lace gently into the clay to create an elegant pattern.
- Leaf impressions: Place a fresh leaf on the clay and gently roll over it to transfer its natural details.
- Fabric textures: Use textured linen or cotton fabric to create subtle patterns.
- Rubber stamps: Press decorative stamps into the surface for delicate designs.
- Personalised lettering: Add initials, names, or meaningful dates using letter stamps.
- Dot patterns: Use the end of a paintbrush or a rounded tool to create small decorative dots.
Don’t press too deeply, as this can make the clay uneven or weaken delicate areas.
Step 6: Allow the Ornaments to Dry Completely
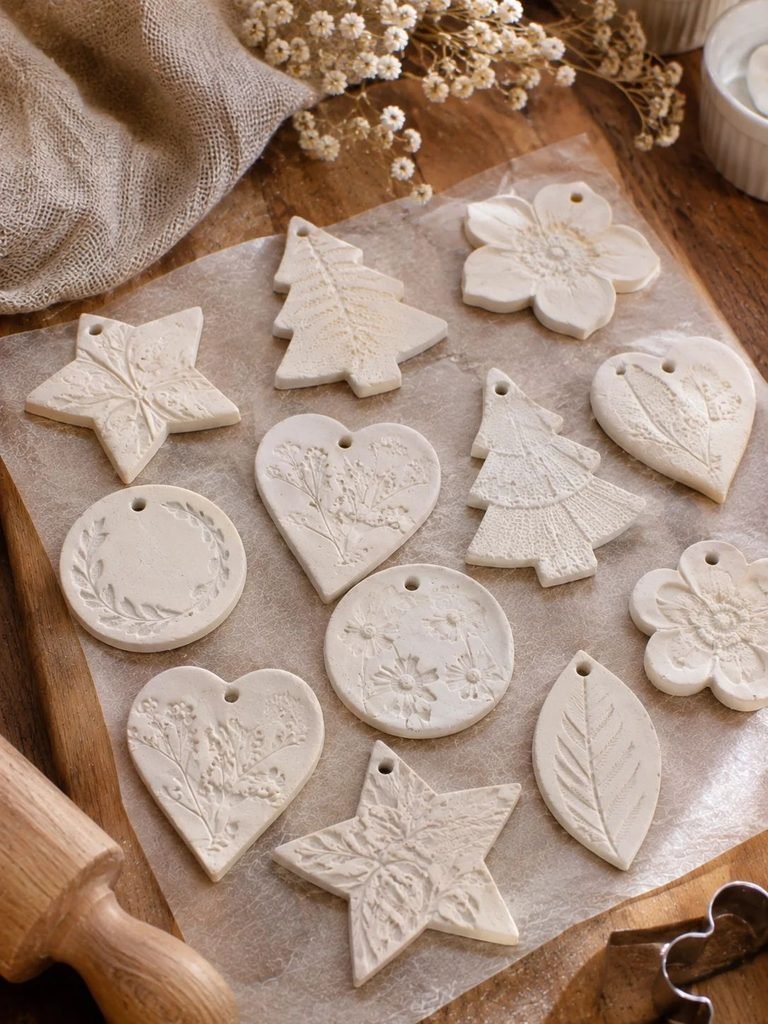
Drying is one of the most important stages of this project.
Arrange your ornaments on a flat surface lined with parchment paper and leave enough space between them for air circulation.
Follow the drying instructions provided by your clay manufacturer. Depending on the thickness, humidity, and room temperature, drying may take 24–72 hours or longer.
For thicker ornaments, allow additional time.
Turn the ornaments carefully once the surface is firm enough to handle. This helps both sides dry more evenly.
Avoid placing them directly in strong sunlight, near heaters, or in an oven unless the clay manufacturer specifically recommends it.
My tip: Don’t rush this stage. An ornament that feels dry on the outside may still contain moisture inside. Painting or sealing it too early can cause problems later.
Step 7: Smooth the Edges

Once your ornaments are completely dry, inspect them carefully.
Use fine-grit sandpaper to smooth any rough edges or uneven areas.
You can also gently sand the front and back surfaces if you want a more polished appearance.
Wipe away the dust with a clean, dry cloth before painting.
Wear a suitable dust mask and avoid inhaling sanding dust.
Step 8: Paint and Decorate Your Ornaments

Now you can bring your designs to life!
Acrylic paint works beautifully for decorating dry air-dry clay ornaments.
Here are some colour combinations I particularly love:
| Colour combination | Style |
|---|---|
| Cream and champagne gold | Elegant and timeless |
| Blush pink and ivory | Soft and feminine |
| Sage green and beige | Natural and cottagecore |
| Terracotta and warm white | Rustic and earthy |
| Dusty blue and silver | Winter-inspired |
Apply thin coats of paint and allow each coat to dry before adding another.
You can also add tiny floral patterns, gold dots, delicate borders, or personalised lettering.
Remember that simple designs can look just as beautiful as detailed ones.
Step 9: Seal Your Finished Ornaments
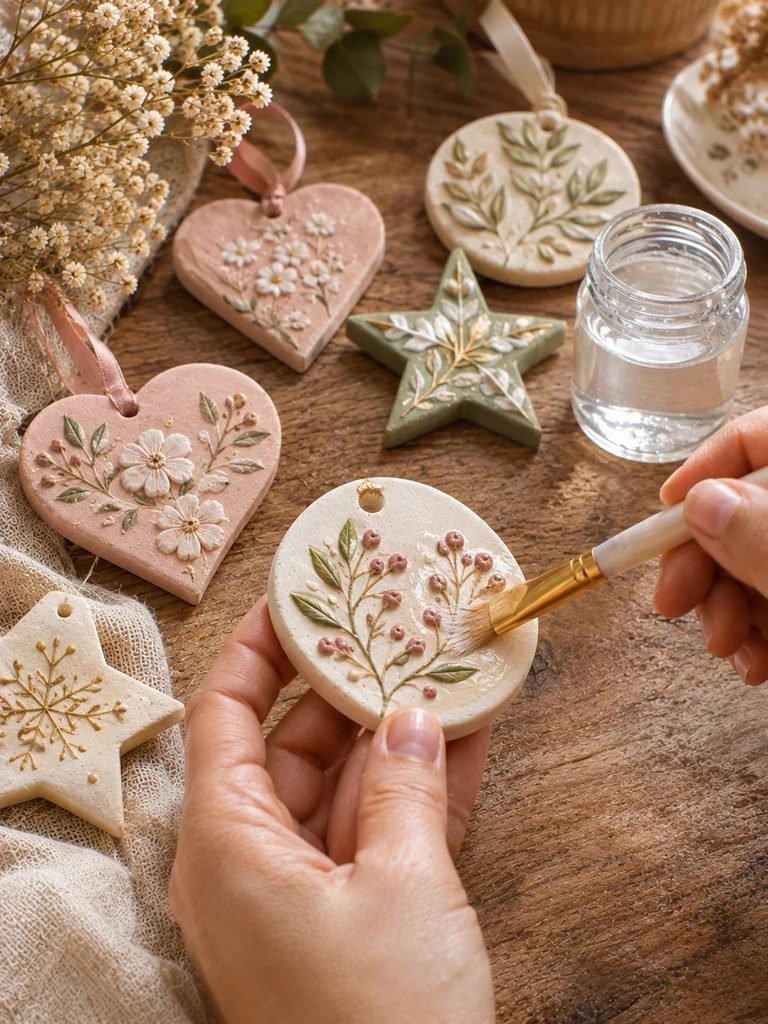
Once the paint has dried completely, apply a suitable clear acrylic sealer.
Acrylic spray sealers or brush-on sealers can help protect the painted surface from dust, handling, and minor moisture exposure.
Follow the manufacturer’s instructions and apply thin, even coats in a well-ventilated area.
Allow the sealer to cure fully before handling or storing your ornaments.
Keep in mind that sealing does not make ordinary air-dry clay completely waterproof. These ornaments are best used indoors and should be kept away from water and excessive humidity.
Step 10: Add Ribbon or Twine
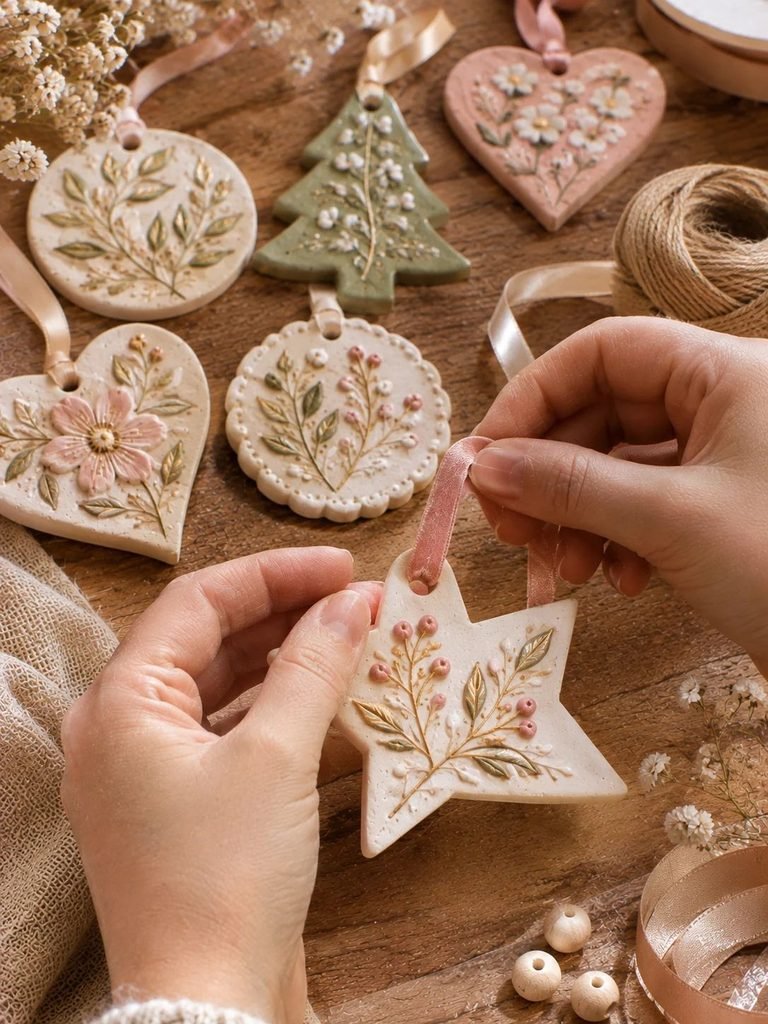
The final step is adding something to hang your ornaments with.
Thread your favourite ribbon, cotton string, or natural twine through the holes you created earlier.
Tie a small knot or bow at the top.
For a more elegant finish, try:
- Champagne satin ribbon.
- Blush velvet ribbon.
- Natural jute twine.
- Cream cotton string.
- Thin gold cord.
Your handmade ornaments are now ready to display, gift, or add to your seasonal decorations!
12 Beautiful DIY Air-Dry Clay Ornament Ideas
If you’re looking for inspiration, here are twelve lovely designs you can make using the same basic techniques.
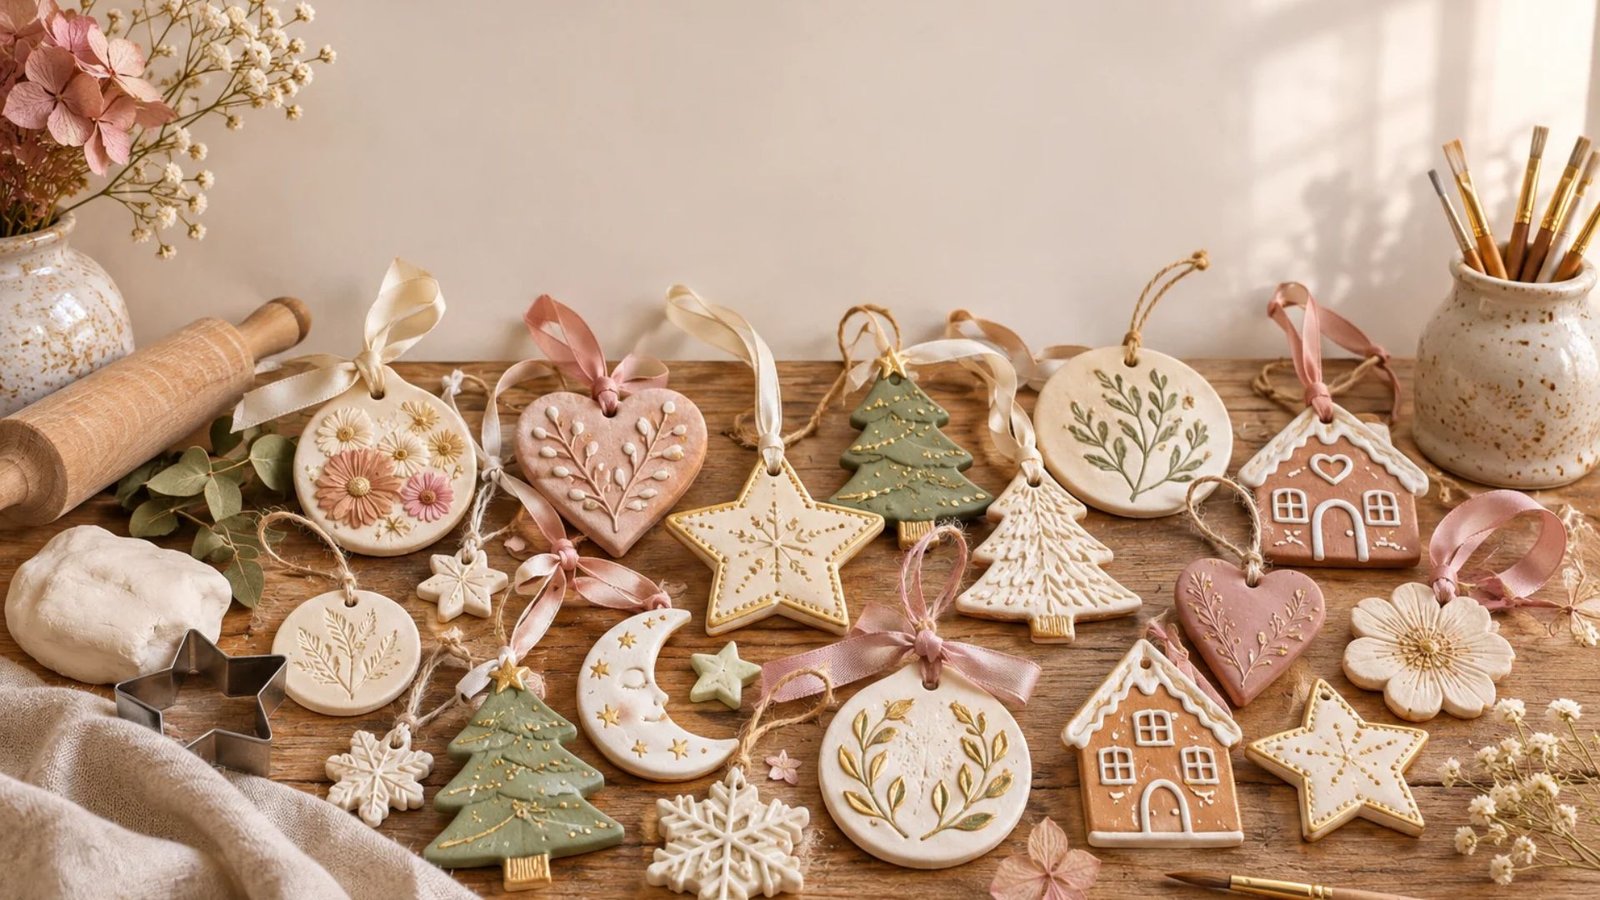
1. Floral Air-Dry Clay Ornaments
Floral ornaments are perfect if you love delicate, feminine decorations.
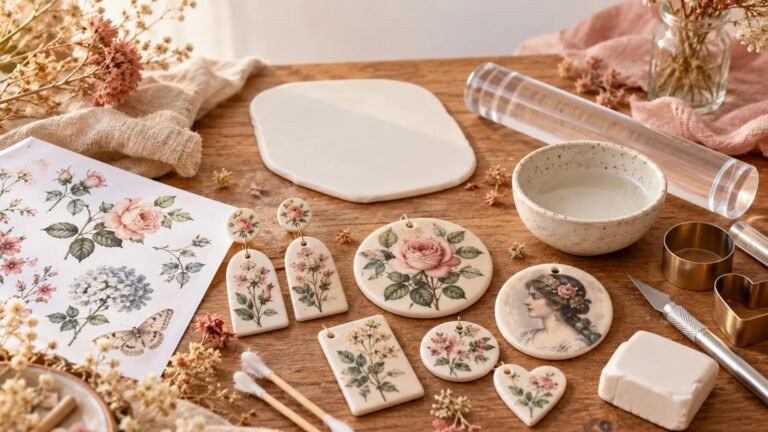
Cut out circles or oval shapes and press small leaves or flowers into the surface. You can leave them natural white or add soft blush and sage green details.
They look beautiful hanging from decorative branches or wrapped around handmade gifts.
2. Personalised Name Ornaments
Personalised ornaments make thoughtful keepsakes for family and friends.
Use letter stamps to add names, initials, or meaningful dates.
You can make one for every family member or create personalised gift tags for special occasions.
3. Clay Star Ornaments
Star ornaments are simple, timeless, and easy to make.
Use a star-shaped cookie cutter and add a subtle textured pattern before drying.
For an elegant finish, paint the edges with champagne gold or leave them in their natural cream colour.
4. Rustic Heart Ornaments
Heart-shaped ornaments are lovely for Valentine’s Day, weddings, anniversaries, and everyday home decorations.
You can personalise them with initials, small floral impressions, or delicate stamped messages.
5. Christmas Tree Ornaments
Create little Christmas trees using a tree-shaped cookie cutter.
Decorate them with tiny painted dots, gold stars, or simple textured patterns.
You can make several in different shades of green for a coordinated Christmas collection.
6. Moon and Sun Ornaments
For something a little different, create celestial-inspired decorations.
Combine crescent moons, little stars, and sun shapes. Add delicate gold details for a lovely decorative finish.
These look particularly beautiful when arranged together as a hanging wall decoration.
7. Botanical Leaf Ornaments
Use real leaves to create beautiful botanical impressions.
Fern leaves, eucalyptus, and other textured leaves work especially well.
These ornaments are perfect for a natural, cottagecore-inspired decorating style.
8. Mini Gingerbread House Ornaments
Create miniature gingerbread houses using simple house-shaped templates.
Once dry, paint them warm brown and add white decorative lines to resemble icing.
They make adorable additions to a Christmas tree.
9. Snowflake Ornaments
Snowflake ornaments are perfect for winter decorating.
Use snowflake cookie cutters or create your own patterns with small sculpting tools.
Keep them white for a classic winter look or add a little silver paint.
10. Textured Round Ornaments
Round ornaments are incredibly versatile.
You can decorate them with lace impressions, geometric patterns, stamped letters, or delicate botanical details.
Try making a collection of different textures in the same colour palette.
11. Clay Flower Ornaments
If you enjoy floral crafts, try making small three-dimensional flower ornaments.
Create individual petals and gently arrange them into a flower shape.
Allow the finished design to dry completely before painting or sealing. Be careful with delicate petals, as they can be fragile.
12. Minimalist Initial Ornaments
These are especially lovely for Christmas gifts and personalised decorations.
Cut out simple circles or hearts and stamp a single initial into the centre.
Finish with natural twine or a beautiful satin ribbon.
Helpful Tips for Making Beautiful Air-Dry Clay Ornaments
Even though this is a beginner-friendly project, a few simple tricks can make a big difference to the finished results.
1. Keep Your Clay Covered
Air-dry clay begins to harden when exposed to air. Keep unused portions wrapped tightly in plastic or stored in an airtight container.
2. Avoid Making Your Ornaments Too Thin
Very thin ornaments are more likely to crack or break. Aim for a reasonably even thickness of around 4–6 mm for most simple designs.
3. Make Hanging Holes Before Drying
Always create your holes while the clay is still soft. Trying to drill or force a hole into a fully dried ornament can cause cracking.
4. Allow Enough Drying Time
Patience is essential. Don’t paint or seal your ornaments until they are completely dry.
5. Smooth the Edges While the Clay Is Soft
A slightly damp fingertip can help smooth rough edges before drying. Avoid using too much water because it can weaken the clay’s surface.
6. Turn Your Ornaments Carefully
Once they are firm enough to handle, carefully turn them to help both sides dry evenly.
7. Use Thin Layers of Paint
Several thin coats generally give a neater finish than one thick coat. Allow each layer to dry before adding another.
8. Store Them Carefully
Air-dry clay is not as durable as fired ceramic. Store finished ornaments in a dry place and wrap delicate pieces individually in tissue paper or bubble wrap.
Common Mistakes to Avoid When Making Clay Ornaments
Here are some mistakes beginners should watch out for.
| Common mistake | How to avoid it |
|---|---|
| Rolling clay unevenly | Use guides to maintain consistent thickness |
| Making ornaments too thin | Aim for approximately 4–6 mm |
| Forgetting hanging holes | Add holes before the clay dries |
| Drying too quickly | Let ornaments dry naturally at room temperature |
| Painting damp clay | Wait until the clay is completely dry |
| Using too much water | Use only a tiny amount when smoothing |
| Applying thick paint | Build colour with thin coats |
| Sealing too early | Allow paint to dry fully first |
Taking a little extra care during each stage will help your ornaments look neater and last longer.
How to Display Your Handmade Air-Dry Clay Ornaments
Once your ornaments are finished, you can use them in so many different ways.
Here are some of my favourite display ideas:
- Christmas tree decorations: Hang your favourite designs on a Christmas tree using ribbon or twine.
- Decorative branches: Arrange several ornaments on dried branches in a beautiful vase.
- Gift decorations: Attach personalised clay ornaments to wrapped presents for an extra-special touch.
- Wall decorations: Combine different shapes to create a simple decorative hanging.
- Seasonal displays: Arrange them on a shelf with candles, dried flowers, and other seasonal decorations.
- Table decorations: Use larger flat ornaments as decorative place settings or table accents.
You can also create matching collections for different seasons. Think pastel flowers for spring, botanical leaves for autumn, and stars and snowflakes for winter.
Frequently Asked Questions About DIY Air-Dry Clay Ornaments
1. How long do air-dry clay ornaments take to dry?
Most small ornaments take approximately 24–72 hours to dry, depending on their thickness, the clay brand, and the surrounding humidity. Thicker pieces may take longer. Always follow the manufacturer’s instructions and make sure the ornaments are completely dry before painting.
2. Can I use homemade air-dry clay for ornaments?
Yes! Homemade clay recipes, such as baking soda and cornstarch clay, can be used to make decorative ornaments. However, their texture, drying time, and durability may differ from commercial air-dry clay.
3. Do air-dry clay ornaments crack easily?
They can crack if the clay is rolled too thinly, dries unevenly, or is exposed to excessive heat. To reduce cracking, maintain an even thickness, avoid rushing the drying process, and follow the clay manufacturer’s recommendations.
4. What is the best paint for air-dry clay ornaments?
Acrylic paint is one of the best choices for decorating completely dry air-dry clay. It comes in many colours, dries relatively quickly, and works well for both simple and detailed designs.
5. Can I make air-dry clay ornaments waterproof?
Ordinary air-dry clay is naturally porous and not waterproof. A suitable sealer can improve resistance to minor moisture, but it does not make the ornament fully waterproof. Keep your decorations indoors and away from water.
6. Can I make air-dry clay ornaments without cookie cutters?
Absolutely! You can cut shapes using a craft knife and paper templates. You can also shape simple hearts, leaves, and other designs by hand.
7. How do I stop clay ornaments from breaking?
Avoid making them too thin, keep the edges smooth, allow them to dry completely, and store them carefully. Adding a hanging hole too close to the edge can also weaken the ornament.
8. Can I make air-dry clay ornaments ahead of time?
Yes! These ornaments are wonderful for preparing ahead of Christmas, birthdays, or other celebrations. Make sure they are completely dry, painted, and sealed before storing them in a cool, dry place.
Final Thoughts
Making DIY air-dry clay ornaments is such a lovely way to spend a little time being creative. What I love most is that you can start with one simple piece of clay and turn it into something meaningful, whether it’s a personalised Christmas decoration, a pretty floral ornament, or a thoughtful handmade gift.
You don’t have to make everything perfect. Sometimes the little imperfections are what make handmade decorations so special. Experiment with different shapes, textures, and colours until you find designs you truly love.
I hope these ideas inspire you to bring out your craft supplies and create a beautiful collection of your own. Happy crafting!