DIY Clay Hand Jewelry Holder: How to Make a Beautiful Ring and Jewelry Dish
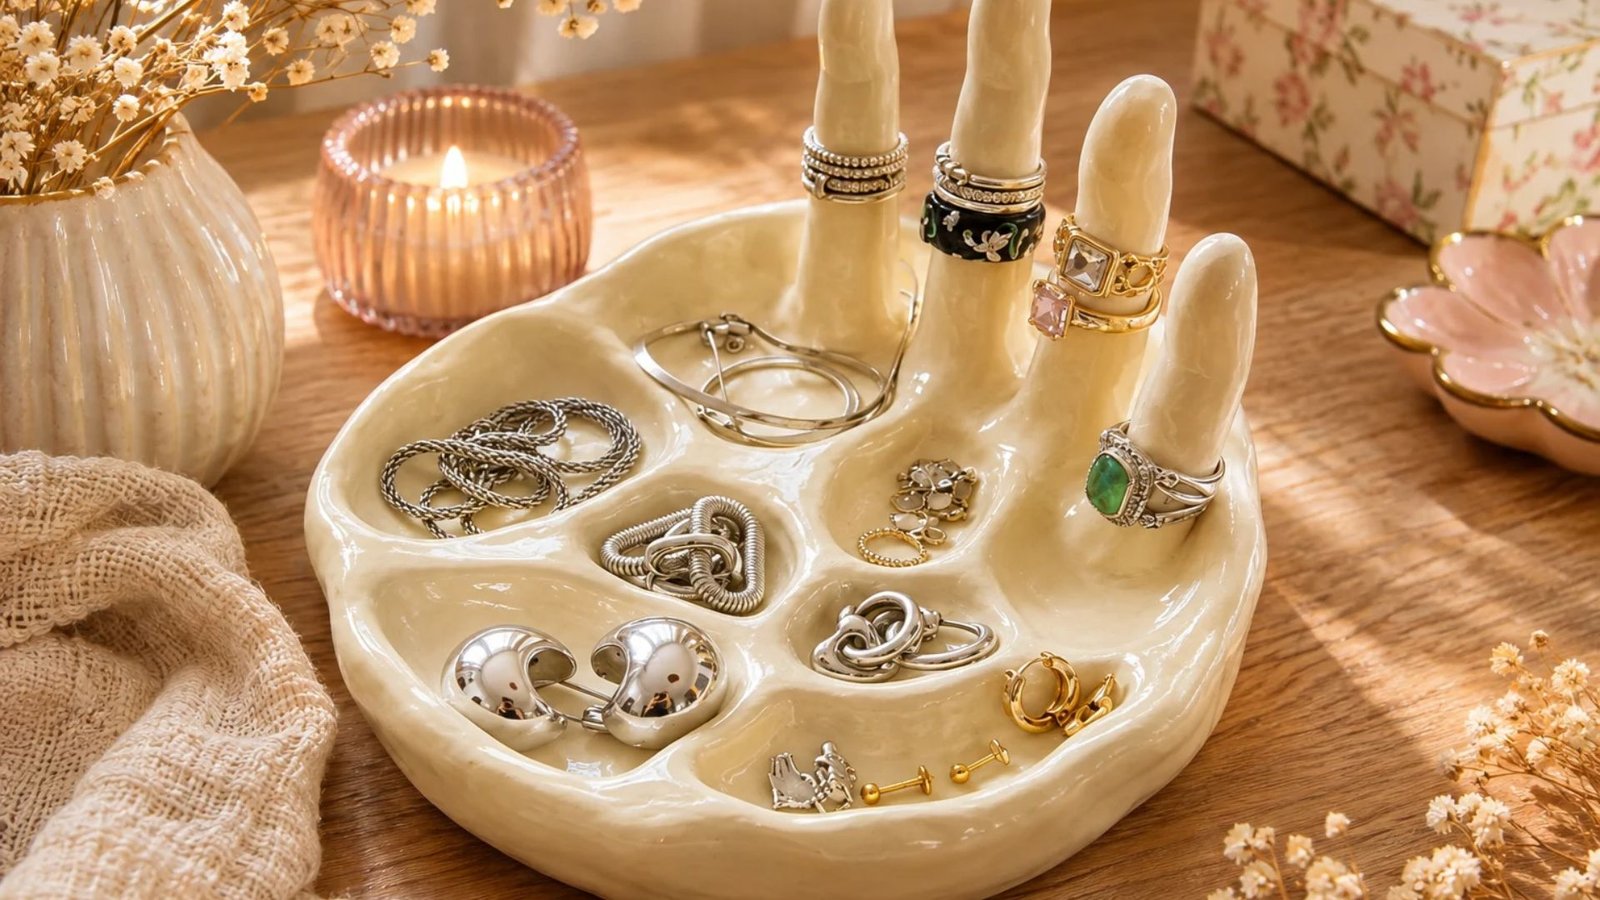
I have always loved little handmade pieces that make everyday spaces feel a little more special, and this clay hand jewelry holder is one of those projects I cannot stop admiring.
It combines a pretty decorative dish with tiny finger-shaped ring holders, giving you a lovely place to keep your favorite jewelry organized.
What I especially adore is how something made from simple clay can turn into such a beautiful and practical accessory for a bedroom or dressing table. If you enjoy creative clay projects, this is a wonderful little craft to try at home.
What Is a Clay Hand Jewelry Holder?

A clay hand jewelry holder is a decorative handmade organizer designed to keep rings, earrings, bracelets, necklaces and other small accessories in one beautiful place.
Unlike ordinary jewelry dishes, this design has a sculptural hand-shaped section with raised fingers that allow you to slide rings onto them. The palm area forms a shallow dish, while the surrounding sections can be shaped into small compartments for storing different jewelry pieces.
One of the prettiest things about this project is that you can customize almost every detail. You can create a soft ivory finish for a minimalist look, add blush pink accents for a feminine touch, or experiment with earthy colors for a more natural handmade appearance.
It is also a lovely project for anyone who wants to make a thoughtful handmade gift without purchasing expensive pottery supplies.
Why You Will Love This DIY Clay Jewelry Holder
There are plenty of reasons to add this project to your next crafting afternoon.
- Beginner-friendly: You do not need advanced pottery skills or professional equipment to make a beautiful version.
- Practical and decorative: It gives your jewelry a dedicated place while adding personality to your dressing table.
- Customizable: You can choose your preferred colors, shapes, textures and decorative details.
- Budget-friendly: A small amount of air-dry clay can go a long way.
- Perfect for gifting: It makes a thoughtful birthday, Mother’s Day, Christmas or Valentine’s Day gift.
- A lovely handmade keepsake: Every piece has its own little imperfections, making it feel unique.
Materials You Will Need
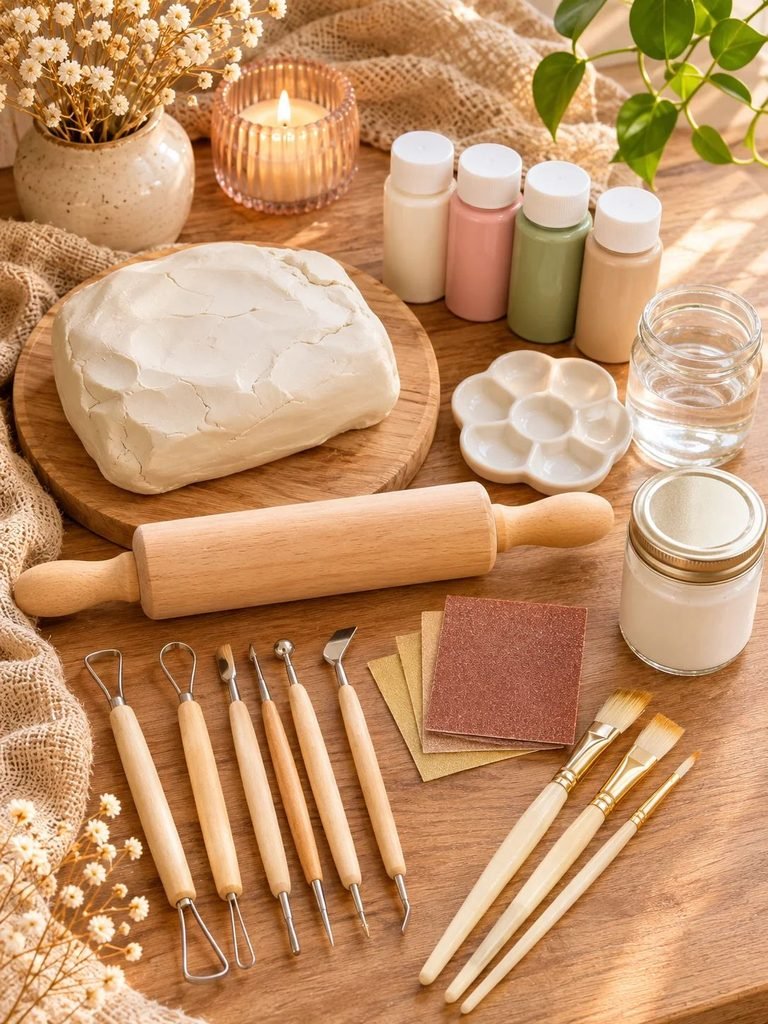
Before getting started, gather everything you need. Having your supplies ready will make the process much easier and more enjoyable.
Essential Supplies
- Air-dry clay: Choose a good-quality white or natural air-dry clay that is easy to shape and smooth.
- Rolling pin: A small acrylic or wooden rolling pin works well for flattening the clay.
- Craft knife: Useful for trimming excess clay and shaping the edges.
- Clay sculpting tools: These help create the fingers, compartments and decorative details.
- Small bowl: Use this as a guide when shaping the main dish.
- Water: A little water helps smooth the clay and blend joints.
- Fine sandpaper: Use this after drying to smooth rough edges.
- Acrylic paint: Choose ivory, cream, beige, blush pink or any color you love.
- Paintbrushes: Small brushes make it easier to reach detailed areas.
- Clear protective varnish: Choose a suitable water-based sealer recommended for your clay and paint.
Optional Decorative Supplies
- Gold acrylic paint for delicate accents.
- Small silicone sculpting tools.
- A soft sponge for smoothing.
- A craft mat or baking parchment.
- A ruler for checking thickness.
- A small amount of tissue paper for temporary shaping support.
How to Make a DIY Clay Hand Jewelry Holder
Now comes the fun part! We are going to create the main jewelry dish, sculpt the raised fingers and add separate storage compartments.
Take your time with this project, especially when shaping the fingers. They are what give the finished piece its distinctive appearance.
Step 1: Prepare Your Clay

Start by preparing your air-dry clay on a clean, smooth work surface.
Take a generous piece of clay and knead it gently until it becomes soft and workable. This helps remove small air pockets and makes the clay easier to shape.
If the clay feels too dry, follow the manufacturer’s instructions for conditioning it. Avoid adding too much water, as overly wet clay can become difficult to handle and may crack or warp as it dries.
Divide your clay into several portions:
- One large portion for the main dish.
- Four smaller portions for the raised fingers.
- Additional clay for the compartments and decorative details.
Keep unused clay covered with an airtight bag or container so it does not dry out while you work.
Read 12 Grown-Up Crafts for Kmart Air Dry Clay That Look Beautiful and Stylish
Step 2: Shape the Main Jewelry Dish
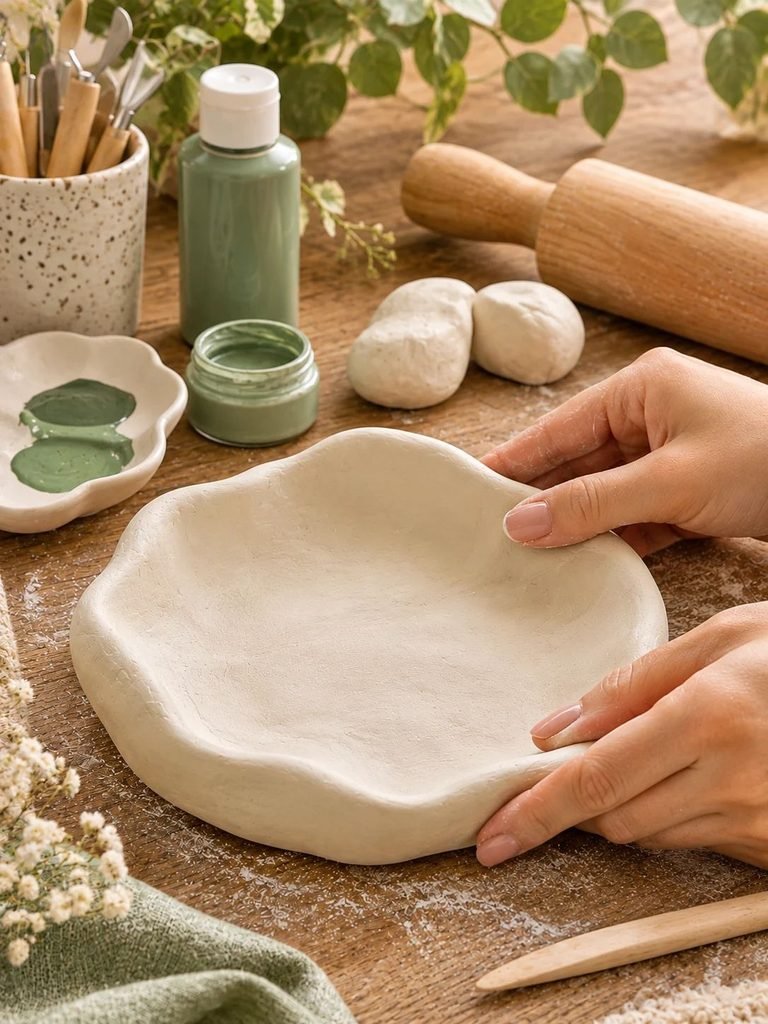
Take the largest portion of clay and roll it into a thick, even slab.
Aim for approximately 6–8 mm in thickness. Try to keep the surface consistent so that the finished dish dries evenly.
Use your hands or a craft knife to shape the clay into a rounded, irregular hand-like silhouette.
The shape does not need to be perfectly symmetrical. In fact, slightly organic edges can make the finished piece look more like handmade pottery.
Place the clay over an appropriately sized shallow bowl covered with a suitable release material, following the clay manufacturer’s instructions.
Gently press the clay into the bowl to create a shallow curved dish.
Smooth the edges using your fingertips and a slightly damp sponge.
Do not make the dish too deep. You want enough space to create small jewelry compartments while keeping the overall design elegant.
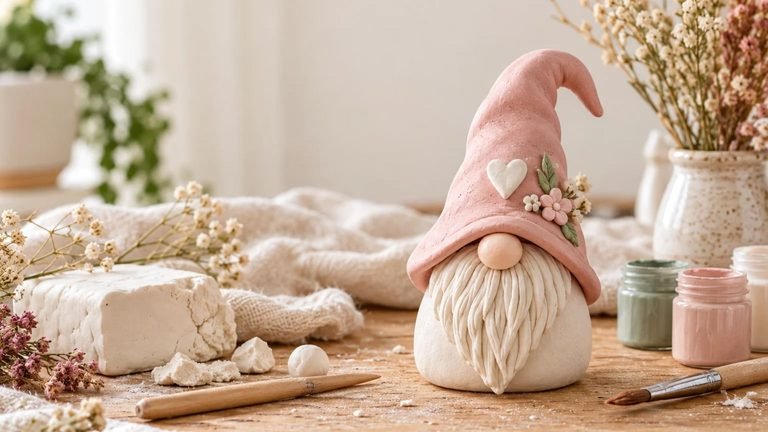
Read DIY Clay Gnome
Step 3: Create the Raised Finger Holders

This is the detail that makes the project particularly special.
Take four smaller portions of clay and roll each one into a thick, elongated finger shape.
Make each finger slightly different in height to create a natural sculptural appearance.
The fingers should be thick enough to support lightweight rings without becoming fragile.
Gently round the tips of each finger using your fingertips.
Next, create the lower sections that will connect the fingers to the main dish.
Arrange the four finger shapes toward the back of the jewelry holder, leaving enough space between them for rings to slide on and off comfortably.
To attach each finger, score the connecting surfaces with a sculpting tool. Apply a small amount of clay slip or the joining mixture recommended for your clay.
Press the pieces together gently and blend the joints with your fingers or a sculpting tool.
Make sure each finger stands securely and is supported by the main structure.
Helpful tip: Do not make the fingers too tall or too thin. Taller fingers may become unstable, especially when holding heavier rings.
Read 16 Elegant Clay Candle Holder Ideas for a Handmade Luxury Look
Step 4: Build the Jewelry Compartments
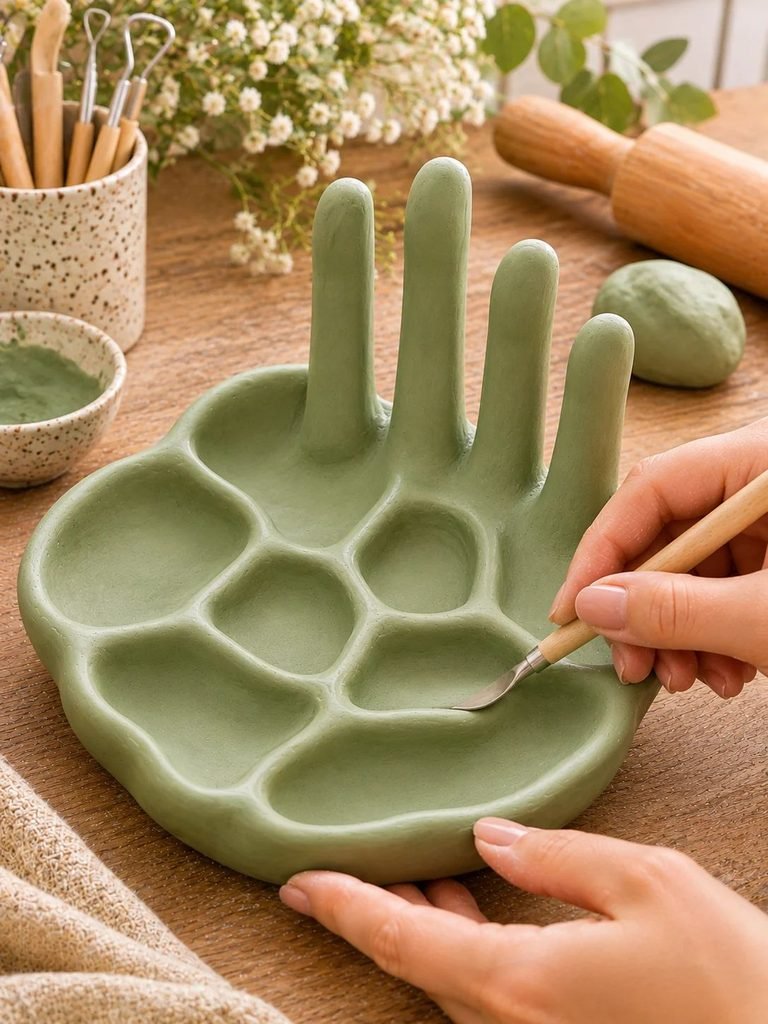
Now it is time to create the small compartments around the palm area.
These sections are perfect for storing earrings, small bracelets, chains and other jewelry pieces.
Roll several thin pieces of clay into long, soft strips.
Arrange them across the main dish to create separate sections.
You can make:
- One larger compartment for necklaces or bracelets.
- Two smaller compartments for rings and earrings.
- A rounded section for statement earrings.
- A narrow compartment for delicate jewelry.
Use your fingers or sculpting tools to blend the bottom edges of each divider into the main dish.
Smooth the surfaces carefully so that there are no sharp edges or gaps.
Try not to overcrowd the dish. Leaving enough space between the compartments will make the finished design more attractive and practical.
Step 5: Refine the Shape and Smooth the Surface

Before allowing your jewelry holder to dry, take a few minutes to refine the entire design.
Look carefully at the fingers, edges and compartments.
Use a slightly damp sponge or your fingertips to smooth any uneven areas.
If you notice small cracks, gently work the clay together while it is still workable, following the manufacturer’s recommendations.
Check that the raised fingers are securely attached and that the dish sits evenly on your work surface.
You can also use a small sculpting tool to create subtle curved details around the edges.
Remember that handmade pottery-inspired pieces do not need to look perfectly manufactured. A little natural texture can make the design even more charming.
Step 6: Allow the Clay to Dry Completely
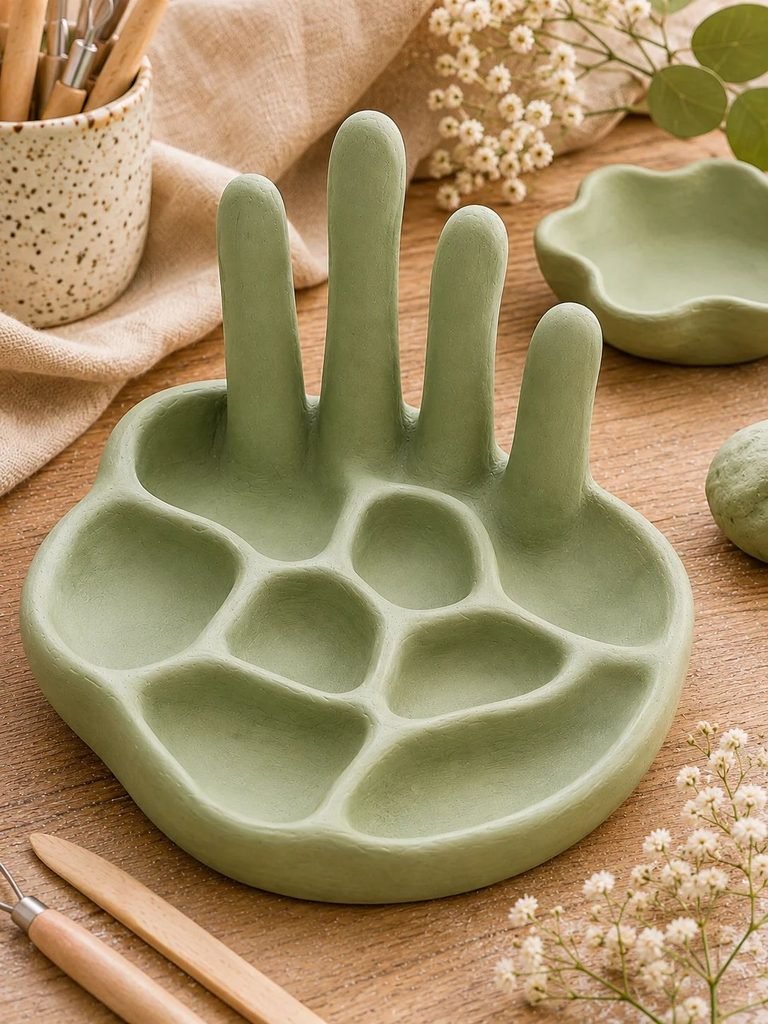
Drying is one of the most important stages of this project.
Place your jewelry holder in a safe, well-ventilated area away from direct sunlight, heaters and strong drafts.
Allow it to dry slowly according to the manufacturer’s instructions.
Depending on the clay brand, thickness and room conditions, drying may take several days.
Avoid moving the piece unnecessarily while it is still soft.
It is also helpful to turn the piece carefully when appropriate so that the underside can dry evenly. Make sure it is adequately supported when doing this.
Do not rush the drying process with excessive heat. Rapid drying can cause cracking, particularly around the thicker finger attachments.
Step 7: Sand the Dried Jewelry Holder
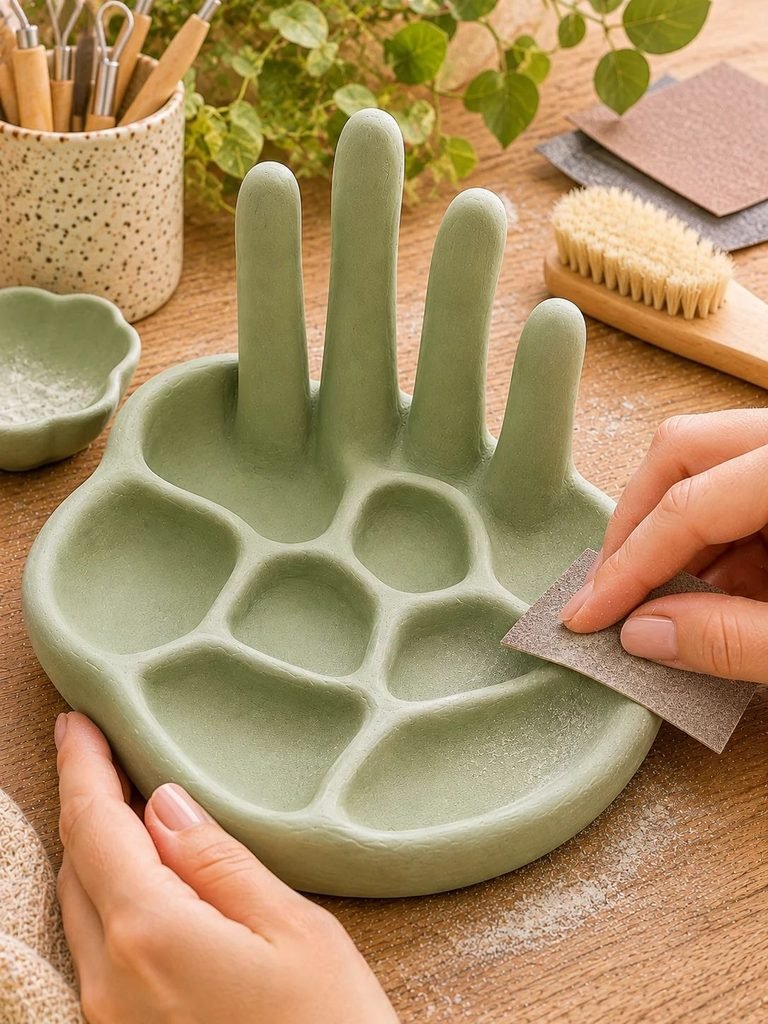
Once the clay is completely dry, inspect the surface.
You may notice a few rough edges or small imperfections.
Use fine-grit sandpaper to gently smooth these areas.
Pay particular attention to:
- The outer edges of the dish.
- The tips of the fingers.
- The areas around the compartments.
- Any visible joining marks.
Work gently to avoid damaging the delicate sculptural details.
After sanding, remove the dust using a clean, dry soft brush or cloth.
Step 8: Paint Your Clay Jewelry Holder
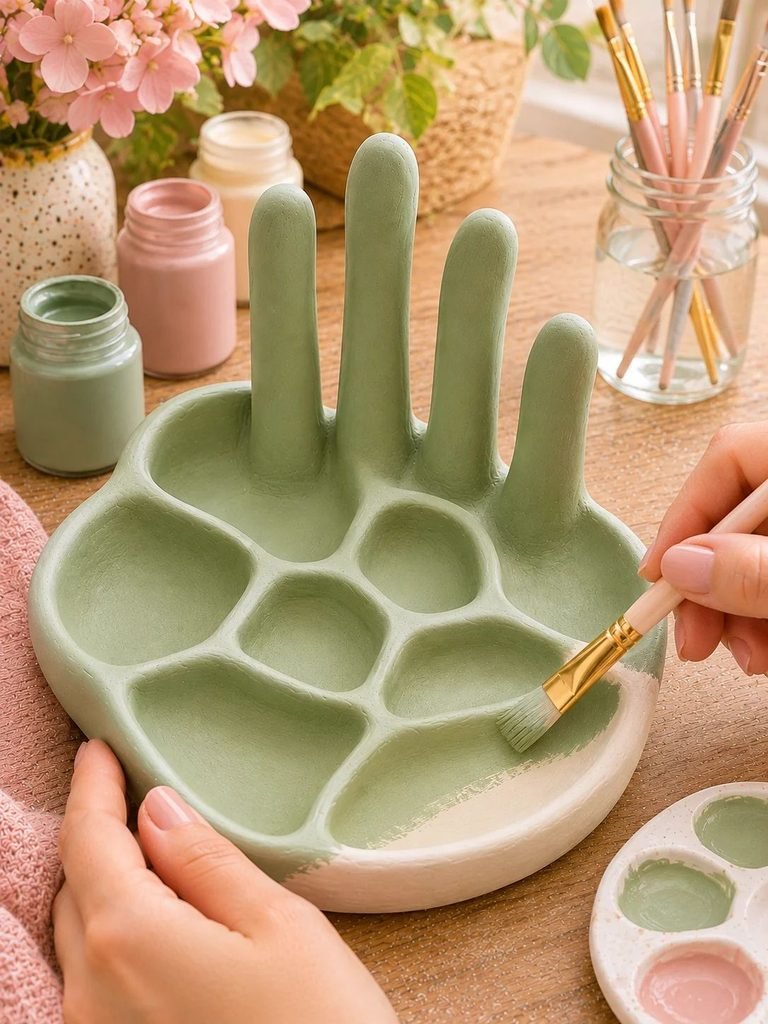
This is where you can give your creation its own personality.
For a look similar to the inspiration design, I recommend choosing a beautiful warm ivory or creamy beige shade.
These colors create a timeless pottery-inspired appearance that looks lovely on a wooden dressing table.
Apply a thin coat of acrylic paint and allow it to dry according to the paint manufacturer’s instructions.
Add another thin coat if needed to achieve an even finish.
Here are some beautiful color combinations to consider:
Warm ivory: A creamy neutral shade for a classic ceramic-inspired finish.
Soft blush pink: Perfect for a feminine and romantic jewelry holder.
Sage green: A lovely earthy color that works beautifully with natural decor.
Champagne beige: A sophisticated neutral shade with a warm undertone.
Dusty rose: A slightly deeper pink for a pretty vintage-inspired appearance.
You can also add tiny gold accents along the edges or around the finger details for an elegant finish.
Step 9: Apply a Protective Sealer

Once the paint has dried completely, apply a suitable clear protective varnish.
Choose a sealer compatible with your clay and paint.
Apply thin, even coats, allowing each layer to dry according to the manufacturer’s instructions.
A protective coating can help reduce surface staining and make the jewelry holder easier to clean.
However, remember that air-dry clay is not waterproof simply because it has been sealed. Avoid soaking the holder or exposing it to excessive moisture.
For a jewelry organizer, a decorative finish is generally all you need.
Step 10: Arrange Your Favorite Jewelry
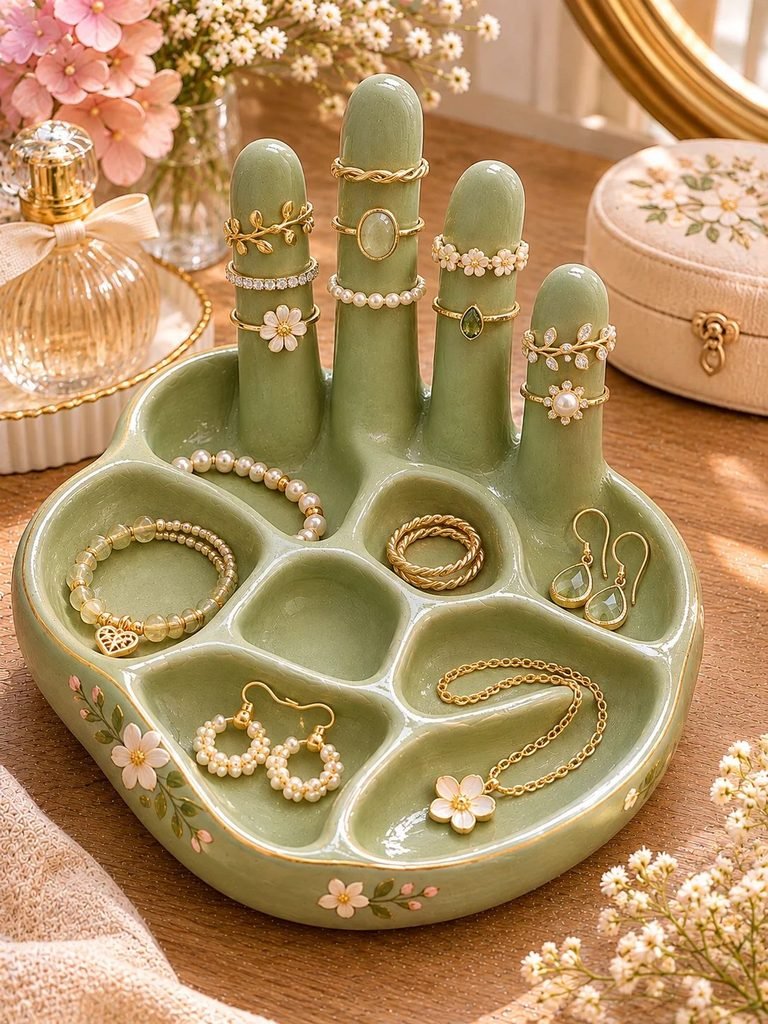
Once everything is completely dry and cured, your handmade jewelry holder is ready to use.
Place it on your dressing table, bedside table or vanity.
Slide your favorite rings onto the raised fingers.
Use the smaller compartments for earrings, delicate chains, bracelets and other accessories.
You can also place a small decorative trinket in one of the compartments to make the arrangement feel even prettier.
I love the idea of pairing this piece with a small jewelry box, a perfume bottle and a pretty decorative mirror for a coordinated dressing table display.
Tips for Making Your Clay Hand Jewelry Holder Look Beautiful
A few small details can make a big difference to the final appearance.
1. Keep the Fingers Proportionate
The raised fingers should look balanced with the main dish. Avoid making them excessively long or thin, as this can affect their stability.
2. Create Different Compartment Sizes
Having a mixture of large and small compartments makes the jewelry holder more useful.
You will have room for everything from tiny earrings to larger statement pieces.
3. Choose a Soft Neutral Color
Cream, ivory and beige are particularly beautiful choices for this design.
They give the holder a timeless, sophisticated appearance that works with many different decorating styles.
4. Pay Attention to the Edges
Smooth, rounded edges make the finished jewelry holder look more polished.
Take your time when refining the outer shape.
5. Avoid Making the Dish Too Thin
A sturdy base helps the jewelry holder maintain its shape and supports the raised fingers.
Follow your clay manufacturer’s recommended thickness and drying instructions.
Common Mistakes to Avoid
Even though this is a beginner-friendly project, there are a few mistakes worth avoiding.
Making the fingers too thin: Thin fingers can become fragile and may break easily. Keep them thick enough to support lightweight jewelry.
Adding too much water: Excess moisture can weaken the clay and make the surface difficult to control.
Rushing the drying process: Allow the entire structure to dry slowly. Thick sections and connecting joints may take longer than the thinner areas.
Skipping the joining process: Simply pressing two pieces of clay together may not create a strong connection. Score and join the pieces properly using the recommended clay joining method.
Applying paint before the clay is dry: Painting damp air-dry clay can trap moisture and affect the final finish.
Using too much varnish: Thick layers can leave an uneven or sticky-looking surface. Apply thin coats instead.
How to Customize Your DIY Jewelry Holder
One of my favorite things about handmade clay projects is that you can make them completely your own.
Here are a few ideas you can experiment with.
Add a Marble Effect
Mix small portions of white and beige clay together without blending them completely.
This creates a beautiful natural marbled appearance.
Try a Speckled Pottery Finish
Use a small amount of contrasting paint to create delicate speckles across the surface.
A cream base with tiny brown or taupe speckles can give your jewelry holder a lovely handmade ceramic look.
Add Gold Details
Use metallic gold acrylic paint to decorate the edges of the compartments or add small accents around the fingers.
Keep the details subtle for a more elegant finish.
Create a Floral Design
Add small sculpted clay flowers around the outer edges or decorate the surface with delicate painted botanical details.
This is particularly lovely if you enjoy cottagecore-inspired crafts.
Make a Matching Jewelry Set
You can use leftover clay to create a small ring dish, an earring holder or a matching trinket tray.
Together, these pieces would make a beautiful handmade vanity collection.
How to Care for Your Handmade Clay Jewelry Holder
Taking proper care of your finished piece will help it remain attractive for longer.
- Keep it in a dry indoor location.
- Avoid soaking it in water.
- Clean it using a soft, dry or slightly damp cloth, provided your finish allows it.
- Do not use harsh cleaning chemicals.
- Avoid placing heavy jewelry on the raised fingers.
- Keep it away from areas where it could easily fall or get knocked over.
Remember that air-dry clay is best suited to decorative and light-use projects. It is not the same as kiln-fired ceramic and should not be treated as waterproof pottery.
Frequently Asked Questions
Can I Make a Hand-Shaped Jewelry Holder With Air-Dry Clay?
Yes! Air-dry clay is a convenient material for creating this type of decorative jewelry holder. It does not require a pottery kiln, making it accessible to beginners and home crafters.
Just make sure you follow the manufacturer’s instructions for shaping, joining and drying the clay.
How Long Does an Air-Dry Clay Jewelry Holder Take to Dry?
Drying time depends on the clay brand, thickness, humidity and room temperature.
A small project may take a few days, while thicker sections can take longer. Always allow the entire piece to dry completely before sanding, painting or sealing.
Can I Use Polymer Clay Instead?
Yes, but polymer clay works differently from air-dry clay.
Polymer clay needs to be cured according to the manufacturer’s instructions, usually in a dedicated oven at a specified temperature.
Because this design has several sculptural sections, you would need to consider the thickness and structural support of the finished piece.
Is a Sealed Air-Dry Clay Jewelry Holder Waterproof?
No. A protective varnish can help reduce surface staining and moisture exposure, but it does not make ordinary air-dry clay fully waterproof.
Keep your jewelry holder dry and avoid washing or soaking it.
Can This Jewelry Holder Hold Heavy Rings?
It is best suited to lightweight rings, earrings and small accessories.
For heavier jewelry, use the compartments rather than placing too much weight on the raised fingers.
Can I Make This Project Without Professional Sculpting Tools?
Absolutely! You can use everyday household items such as a rolling pin, a craft knife, a small bowl and your fingertips.
However, a basic set of clay sculpting tools can make it easier to create smooth details and neat compartments.
Final Thoughts
This DIY clay hand jewelry holder is such a lovely way to turn a simple crafting afternoon into something useful and beautiful. I especially love how the raised fingers give the piece a sculptural look while the little compartments provide plenty of room for everyday jewelry.
You can keep yours simple with a warm ivory finish, experiment with pretty pastel colors or add delicate gold details for something a little more special. It is also a thoughtful handmade gift for someone who enjoys beautiful accessories and creative home decor.
Most importantly, do not worry about making every curve or compartment perfectly symmetrical. The little details and handmade imperfections are part of what make this project so charming. Have fun creating a jewelry holder that feels completely your own!