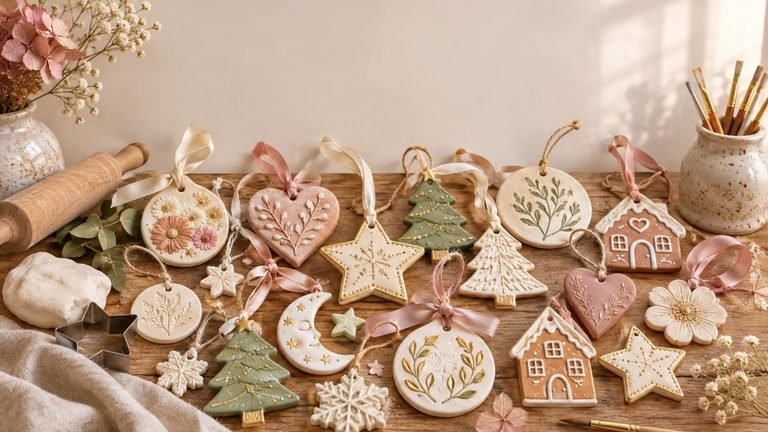
15 Celestial Air Dry Clay Projects for a Whimsigoth Home
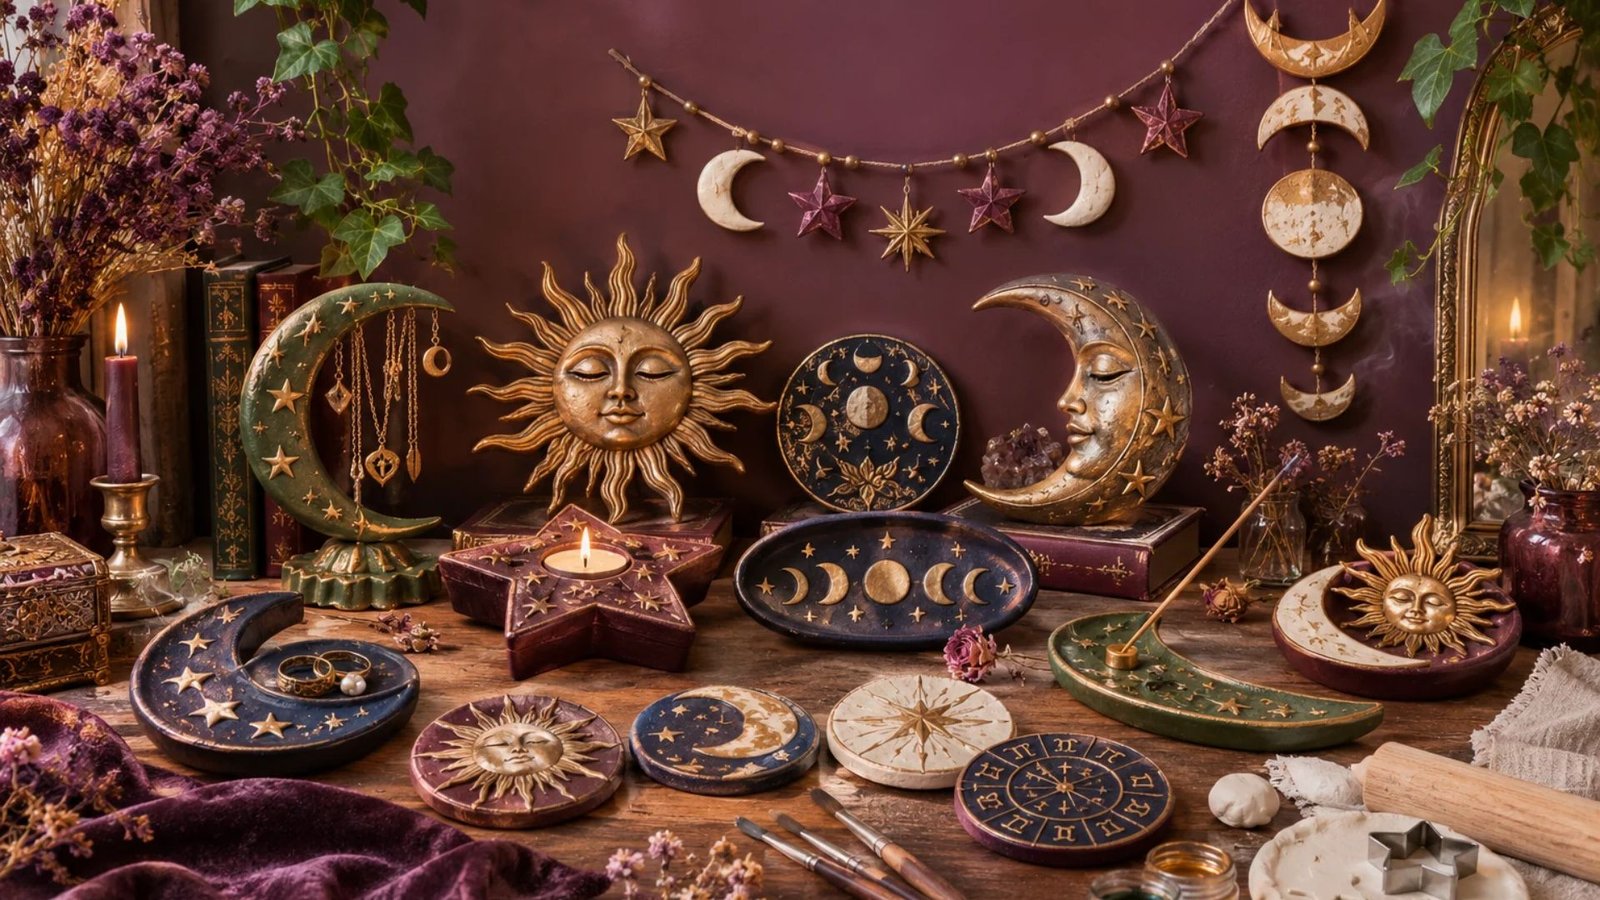
I have always loved how a few handmade decorations can completely transform a space, especially when they have a little magic and personality.
Lately, I have been drawn to the beautiful whimsigoth aesthetic, with its dreamy celestial details, deep moody colours, vintage-inspired touches, and mysterious little accents.
One of my favourite ways to bring this style into my home is through air dry clay. It is affordable, beginner-friendly, and offers so many possibilities for creating beautiful handmade decorations.
If you love moons, stars, sunbursts, and all things celestial, these 15 air dry clay projects will inspire you to create a home that feels cosy, magical, and uniquely yours.
What Is the Whimsigoth Aesthetic?

Whimsigoth is a beautiful decorating style that combines whimsical details with darker, gothic-inspired elements. Think of it as a dreamy mixture of celestial magic, vintage charm, romantic interiors, and mystical decorations.
Unlike traditional gothic decor, which often focuses on darker and more dramatic elements, whimsigoth brings in softer details such as delicate stars, moon phases, botanical patterns, candles, and dreamy textures.
Some colours commonly associated with this aesthetic include:
- Deep plum and burgundy
- Midnight blue and navy
- Forest and emerald green
- Antique gold and bronze
- Dusty rose and muted lavender
- Warm cream and earthy brown
Air dry clay is perfect for this style because you can shape it into almost anything. With a little paint, texture, and creativity, simple clay pieces can become beautiful decorations that look like vintage treasures.
Supplies You Will Need for Celestial Air Dry Clay Projects
Before getting started, it helps to gather a few basic supplies. Most of these materials are inexpensive and can be used for several different projects.
Basic supplies:
- Air dry clay
- Rolling pin
- Craft knife or clay cutting tools
- Small bowls for shaping
- Acrylic paints
- Paintbrushes
- Sandpaper
- Water and a small sponge
- Parchment paper
- Clear acrylic sealer or varnish
- Gold metallic paint
- Cookie cutters in moon, star, and circular shapes
Optional decorating materials:
- Rubber stamps
- Lace or textured fabric
- Small dried flowers
- Metallic paint pens
- Fine glitter
- Celestial-themed stencils
You do not need professional pottery equipment to make these projects. A simple crafting table and a little patience are enough to get started.
15 Celestial Air Dry Clay Projects for a Whimsigoth Home
1. Celestial Moon Phase Wall Hanging
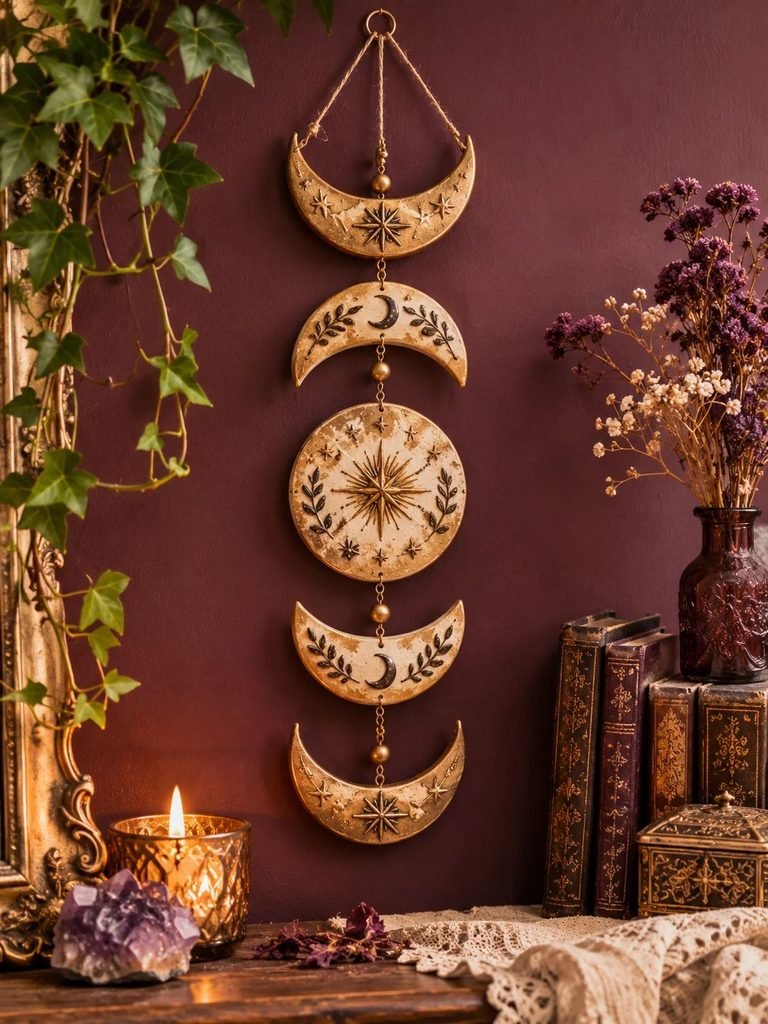
A moon phase wall hanging is one of the prettiest ways to introduce celestial decorations into your home. It captures the dreamy atmosphere of the whimsigoth aesthetic while creating a beautiful focal point for an empty wall.
You can make several clay moons representing the different lunar phases and connect them with twine or delicate metal chains.
How to make it:
- Roll out your air dry clay to approximately ¼ inch thick.
- Use round cutters and smaller circular cutters to create crescent moons and other lunar shapes.
- Make a small hole at the top of each piece before drying.
- Allow the clay to dry completely according to the manufacturer’s instructions.
- Smooth rough edges with fine sandpaper.
- Paint the moons in antique gold, charcoal, deep plum, or ivory.
- Connect the pieces using twine or decorative chains.
For a vintage-inspired finish, lightly brush darker paint into the engraved details and add a little metallic gold along the edges.
2. Mystical Celestial Trinket Dish

A celestial trinket dish is both decorative and practical. It gives you a lovely place to keep your rings, earrings, necklaces, and other small accessories.
I especially love the idea of making one shaped like a crescent moon, with tiny stars scattered across the surface.
How to make it:
- Roll out a piece of clay evenly.
- Cut out a crescent moon or circular shape.
- Gently lift the edges to create a shallow dish.
- Add tiny stars, dots, or moon engravings using clay tools.
- Allow it to dry completely.
- Sand the edges and paint with midnight blue or deep purple acrylic paint.
- Add gold detailing to the stars and moon.
You can even make a small collection in different celestial shapes and display them on your bedside table or dressing table.
Remember that ordinary air dry clay dishes are decorative and should not be used for food or liquids.
Read 15 Functional Air Dry Clay Projects You’ll Actually Use
3. Sun and Moon Incense Holder
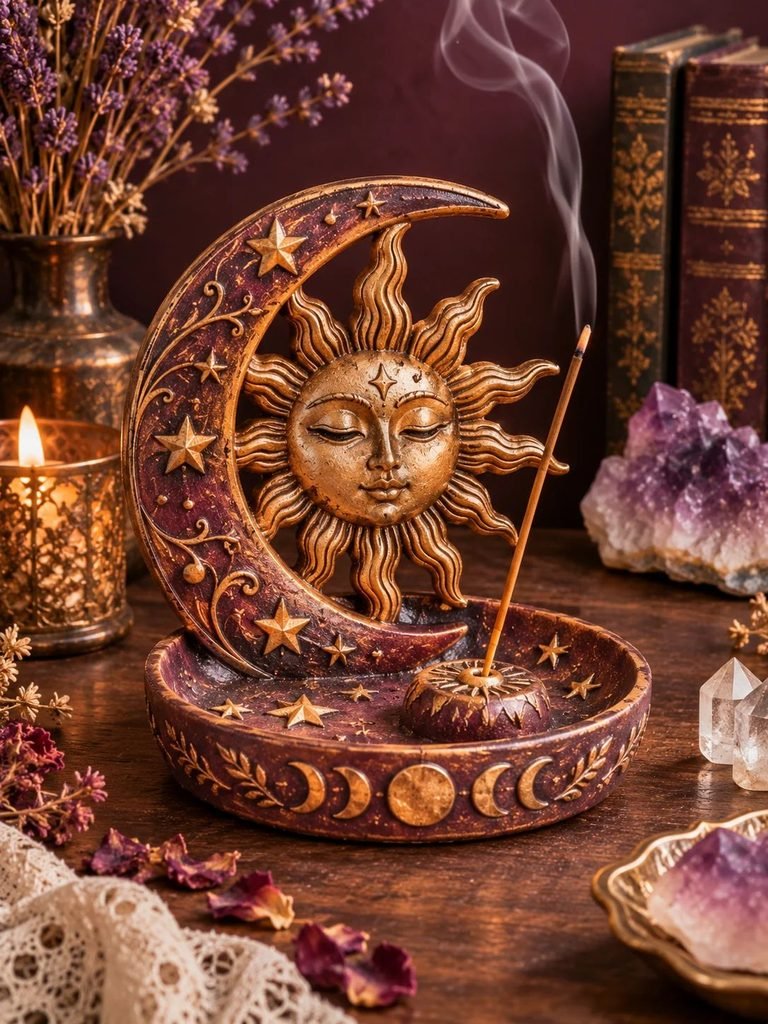
If you enjoy creating a peaceful atmosphere at home, this sun and moon incense holder is a lovely project to try.
The combination of a sculpted sun and crescent moon creates a beautiful mystical design that works especially well on a meditation shelf or decorative altar.
How to make it:
- Roll out your clay and cut a circular or crescent-shaped base.
- Create a raised sun or moon design using additional clay.
- Attach the decorative elements with slip made from clay and water.
- Carefully create a suitable opening for your incense stick, matching its diameter.
- Let the piece dry completely.
- Paint it with antique gold, bronze, or muted terracotta.
Make sure the incense opening securely accommodates your incense stick. Use the holder only on a stable, heat-resistant surface, never leave burning incense unattended, and keep it away from flammable decorations.
Read How to Make Air-Dry Clay Waterproof: Easy Ways to Protect Your Clay Projects
4. Crescent Moon Jewelry Holder
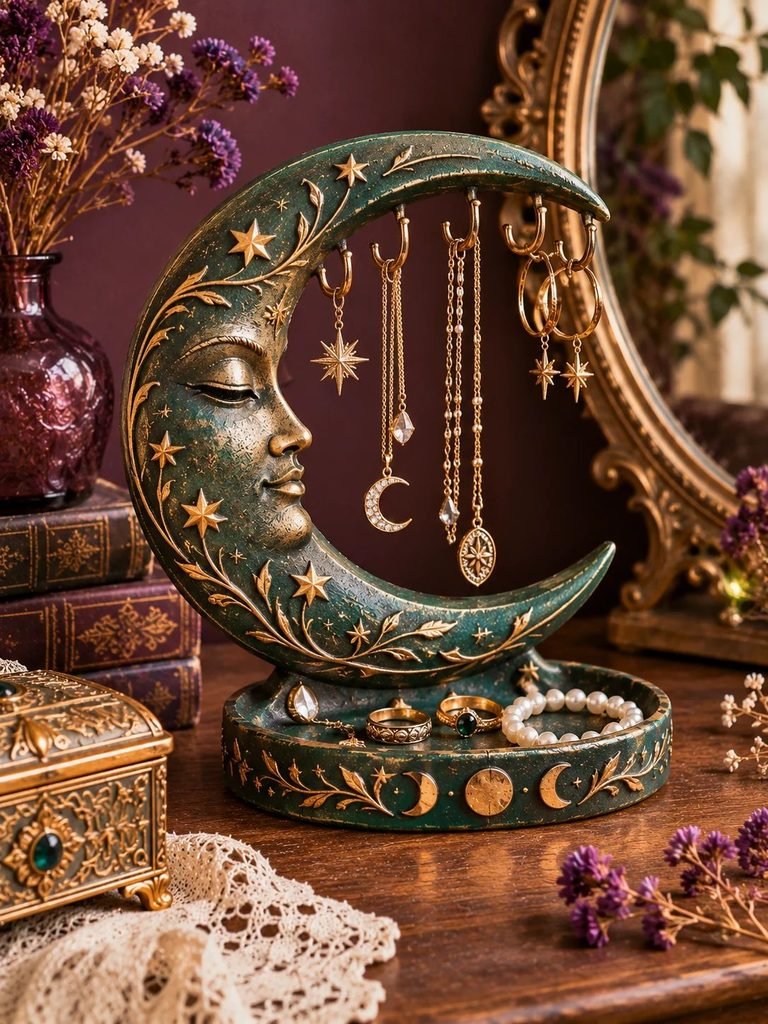
A crescent moon jewelry holder is a beautiful addition to a whimsigoth bedroom. It looks decorative even when you are not using it, and it gives your favourite jewellery a special place to sit.
I would choose a deep emerald green, midnight blue, or antique gold finish for this project.
How to make it:
- Draw a large crescent moon shape on paper.
- Roll out your clay and use the template to cut the shape.
- Add small raised stars and decorative details.
- Create small rounded projections or hooks from clay, ensuring they are securely attached.
- Allow everything to dry completely.
- Sand and paint your finished piece.
- Seal with a suitable clear acrylic finish.
You can use it to display lightweight necklaces, bracelets, and earrings. For heavier jewellery, consider adding securely fitted metal hooks instead of relying on clay projections.
Read How to Avoid Cracks in Air Dry Clay: Simple Tips for Smooth, Strong Results
5. Celestial Star Candle Holder
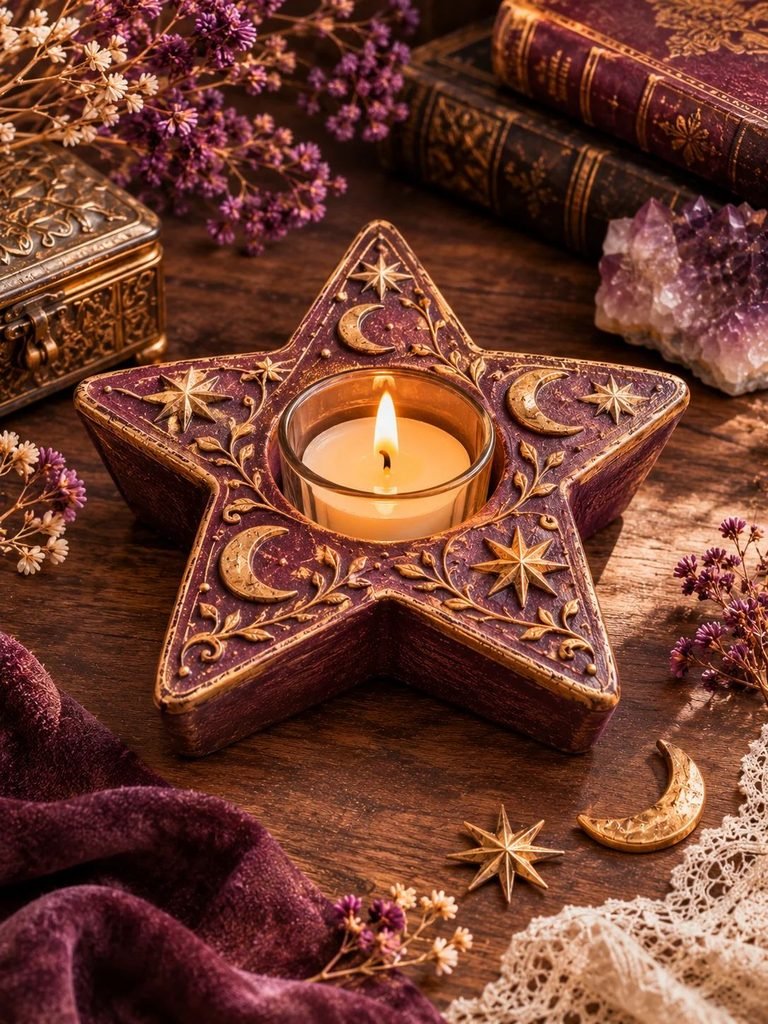
Star-shaped candle holders are another lovely way to bring celestial details into your home. Their sculptural shape looks especially beautiful when styled with vintage books, dried flowers, and other decorative objects.
How to make it:
- Roll your clay into an even sheet.
- Cut out a large star shape.
- Carefully shape a shallow central recess.
- Smooth the edges using a damp sponge.
- Let the piece dry thoroughly.
- Paint it in antique gold, burgundy, or dark charcoal.
For safety, treat ordinary air dry clay holders as decorative pieces only. Do not place a burning tealight directly inside them. Instead, use an appropriately sized, heat-resistant glass candle insert with sufficient clearance, or display an unlit LED tealight.
Read How to Glaze Air Dry Clay: A Beginner’s Guide to a Smooth, Beautiful Finish
6. Celestial Sunburst Wall Decor

A sunburst wall decoration is perfect if you want something that feels a little more dramatic. The beautiful rays surrounding the central sun create a vintage celestial look that works wonderfully above a bed, reading nook, or console table.
How to make it:
- Roll out a generous piece of clay.
- Cut a large circle for the centre.
- Shape several long triangular rays.
- Arrange the rays around the circle.
- Attach everything using clay slip and gently blend the joints.
- Add facial details or decorative markings.
- Allow the entire piece to dry slowly and evenly.
- Paint it antique gold with darker brown detailing.
For a more aged appearance, lightly brush brown paint around the edges to create an antique finish.
7. Moon Phase Jewellery Dish
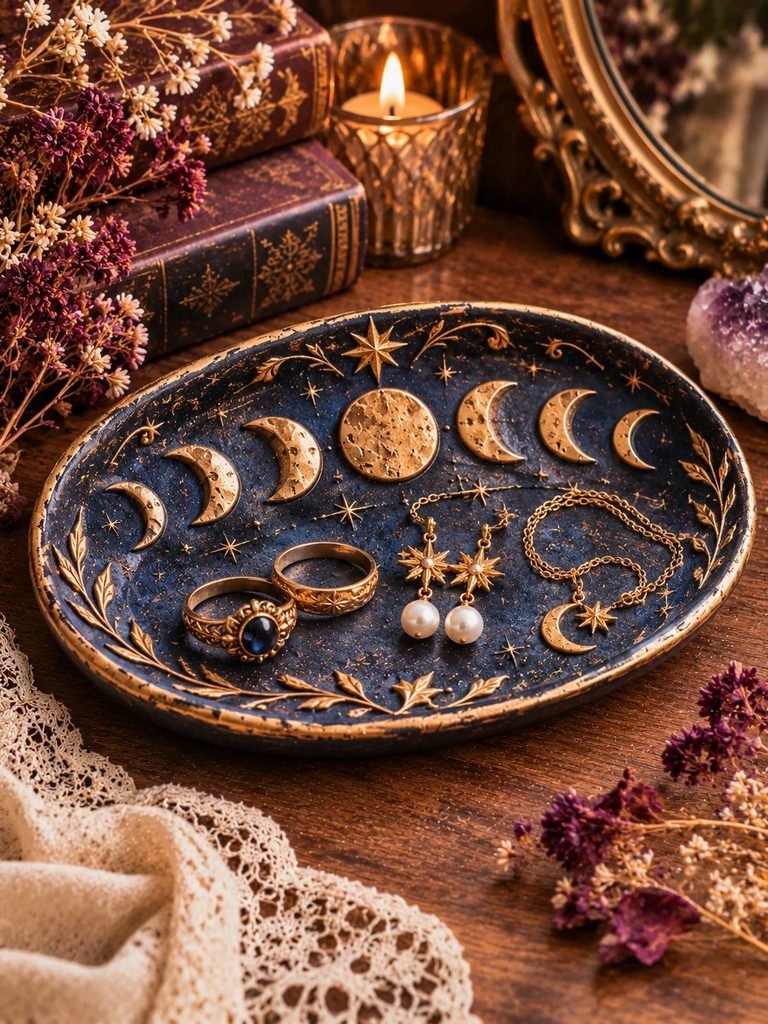
If you love small handmade accessories, a moon phase jewellery dish is a project worth adding to your crafting list.
Unlike a simple trinket dish, this design features several lunar phases arranged across the surface, making it feel like a miniature piece of celestial artwork.
How to make it:
- Roll out your clay into a circular or oval shape.
- Cut out your preferred tray shape.
- Gently raise the edges.
- Press small moon phase designs into the surface.
- Add stars and tiny decorative dots.
- Let the clay dry completely.
- Paint the base in midnight blue or deep plum.
- Highlight the moon details using metallic gold paint.
This is a lovely handmade gift for anyone who enjoys astrology-inspired accessories and mystical home decor.
8. Mystical Clay Wall Plaques
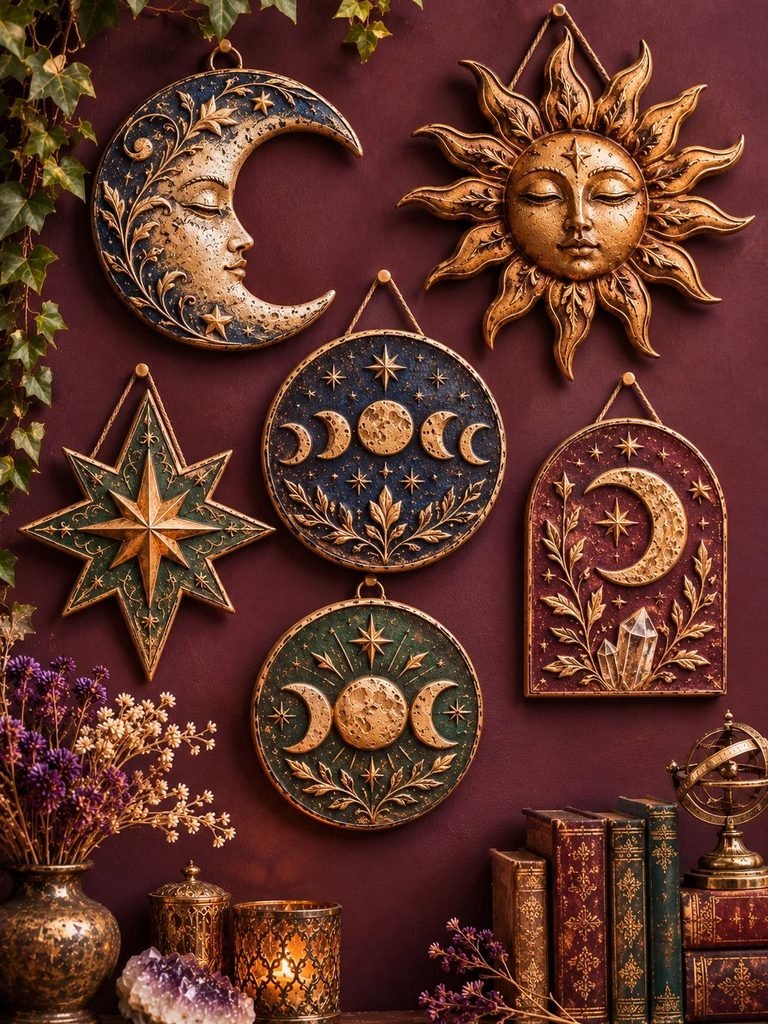
Clay wall plaques are wonderful because you can create completely different designs while keeping the same overall aesthetic.
You could make one featuring a crescent moon, another with a sun face, and a third decorated with stars and botanical patterns.
How to make them:
- Roll out several small clay sheets.
- Cut them into circles, arches, or irregular decorative shapes.
- Press celestial patterns into each piece.
- Add raised details using small amounts of clay.
- Create hanging holes before drying.
- Allow them to dry completely.
- Paint each plaque in complementary colours.
- Add metallic accents for a vintage appearance.
Arrange the finished plaques together to create a charming little gallery wall.
9. Celestial Moon Incense Catcher Tray
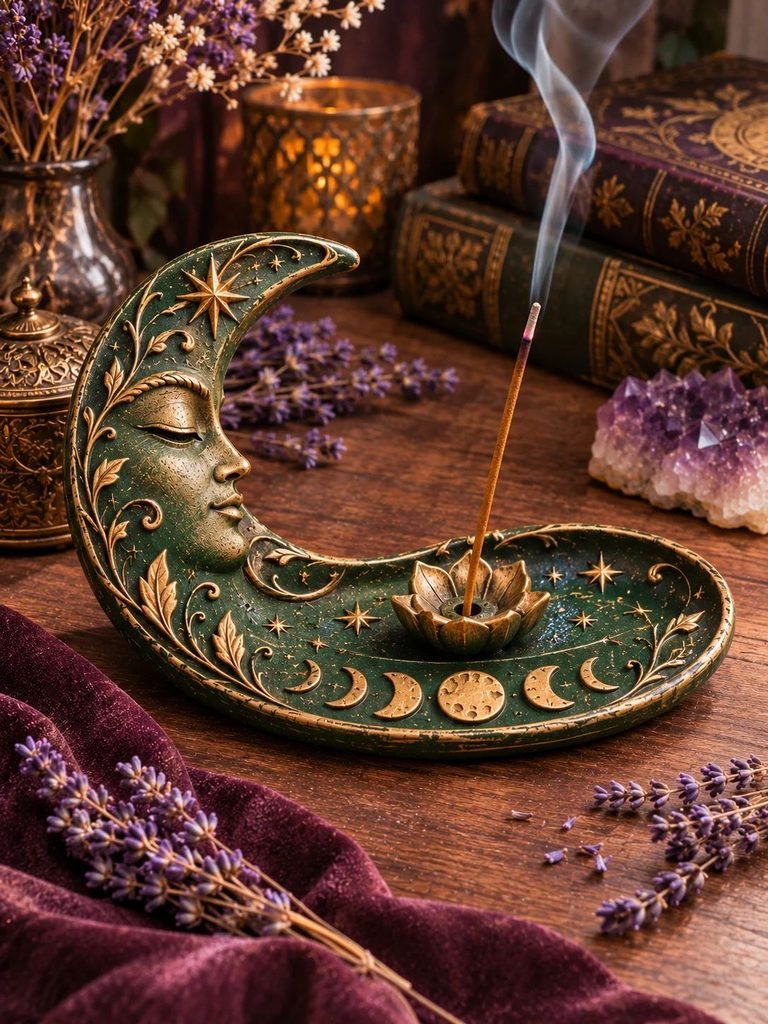
A crescent moon incense catcher tray is a simple project that combines beautiful styling with everyday practicality.
The curved shape gives you plenty of room to experiment with little stars, sunbursts, and engraved moon details.
How to make it:
- Draw a crescent moon template.
- Roll out your clay and cut around the template.
- Make the centre slightly wider to provide enough room for your design.
- Add engraved stars and decorative patterns.
- Allow the tray to dry completely.
- Sand the edges and paint it in a deep celestial colour.
- Finish with gold highlights.
Use this as a decorative tray or pair it with a separate heat-resistant incense holder. Do not let burning incense or hot ash come into direct contact with ordinary air dry clay.
10. Celestial Star Garland
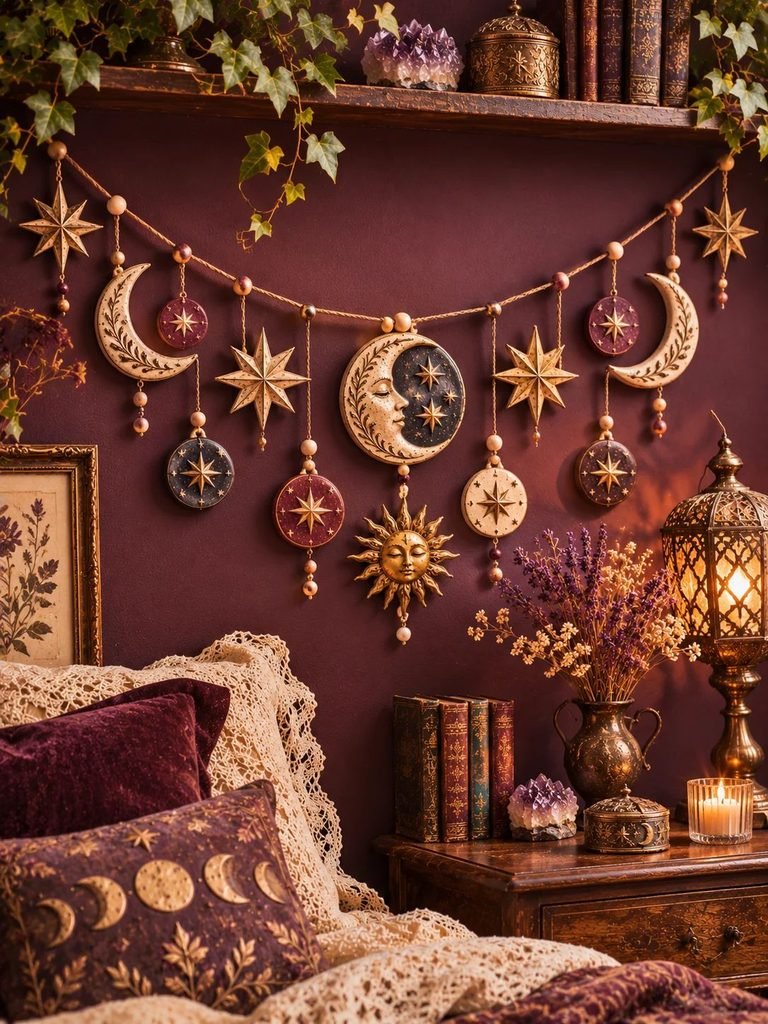
If you prefer smaller projects that do not require too much clay, a celestial star garland is a beautiful option.
You can hang it across a bedroom wall, above a bookshelf, around a mirror, or near a window.
How to make it:
- Roll your clay into a thin, even sheet.
- Cut out stars, moons, and tiny circles.
- Use a straw or skewer to make a hanging hole in each shape.
- Let the pieces dry completely.
- Paint them in gold, cream, burgundy, and dark purple.
- Thread them onto natural twine or decorative cord.
- Space the shapes evenly.
For extra charm, alternate large stars with tiny crescent moons and add small wooden beads between the clay pieces.
11. Antique Celestial Mirror Frame Decorations

A plain mirror can become something truly special with a few handmade clay decorations.
Rather than creating an entirely new mirror frame, you can make individual moon, star, and sun ornaments and attach them to a suitable wooden frame.
How to make them:
- Make small celestial shapes using air dry clay.
- Add engraved details and raised patterns.
- Allow each piece to dry thoroughly.
- Paint them using antique gold, bronze, or dark green.
- Seal and let them cure fully.
- Attach them to a wooden mirror frame using a suitable strong adhesive.
Try arranging the larger moon and sun decorations at the top corners, with smaller stars scattered around the sides.
12. Whimsigoth Celestial Bookends
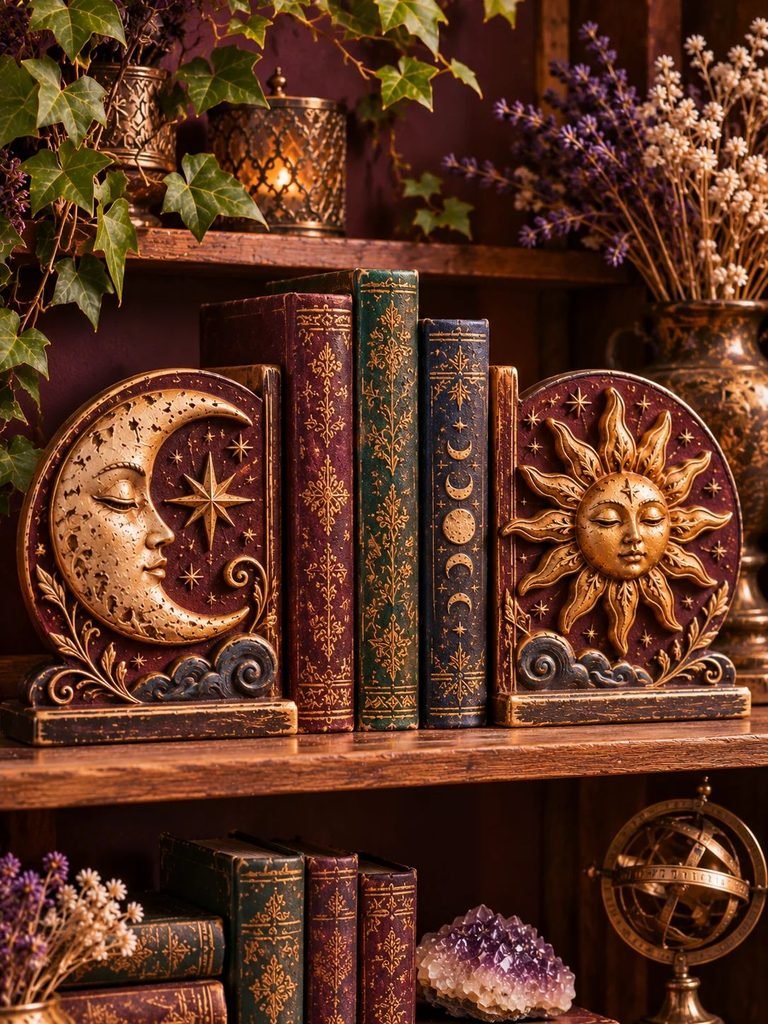
For anyone who loves decorating bookshelves, celestial bookends are a lovely way to combine creativity and functionality.
You can create sculptural moon faces, little stars, or mystical sun designs that look beautiful beside vintage books.
How to make them:
- Create two sturdy bookend bases using wooden or other rigid supports.
- Sculpt your celestial decorations separately from air dry clay.
- Add moon faces, stars, and other raised details.
- Let every clay piece dry completely.
- Sand and paint with your preferred colour palette.
- Attach the decorations securely to the supports.
Since air dry clay can be fragile, avoid making the entire bookend from thin clay alone. A sturdy internal support will help the finished project handle the weight of your books.
13. Celestial Moon Planter Decoration

Plants and celestial decorations are a beautiful combination. A moon-inspired planter decoration can bring a little mystical personality to your indoor garden.
You can make a crescent moon ornament that sits beside a small plant or attach a clay moon design to the outside of a suitable decorative planter.
How to make it:
- Shape your clay into a crescent moon.
- Add small stars and engraved details.
- Create a flat bottom if you want the moon to stand independently.
- Let it dry completely.
- Paint it in antique gold, sage green, or midnight blue.
- Add a few tiny white or gold stars.
- Seal with an appropriate clear finish.
Keep ordinary air dry clay away from prolonged moisture. Use it as an external decorative accent rather than a waterproof plant pot.
14. Celestial Astrology Coaster Set
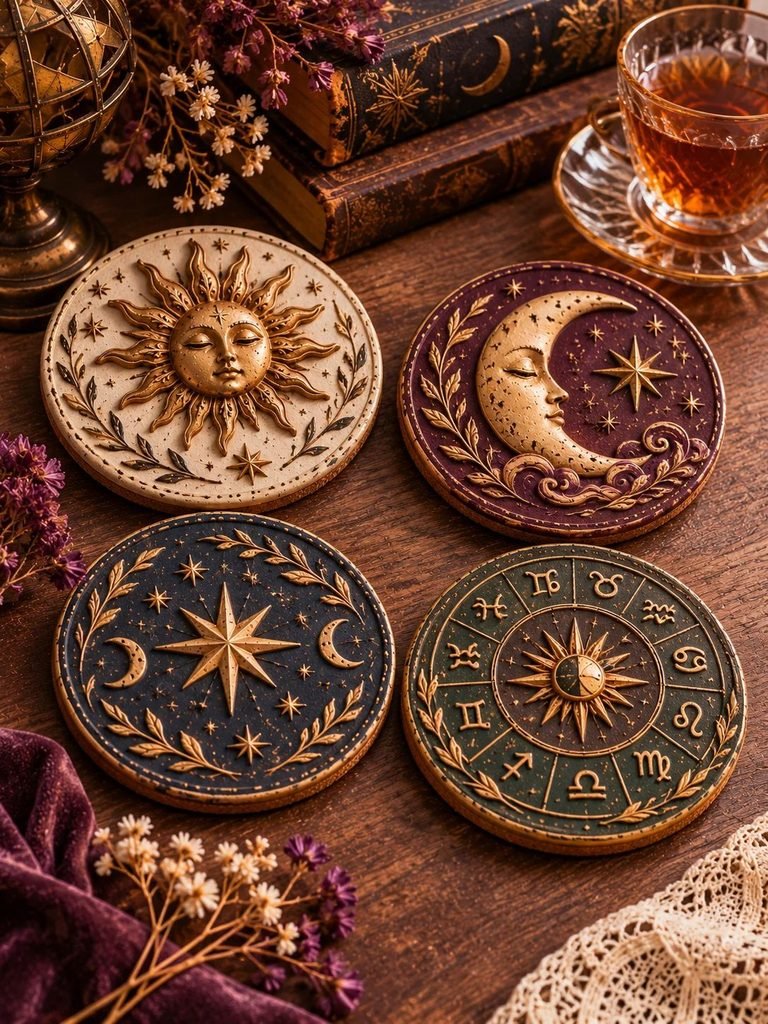
A set of celestial coasters is a practical project that allows you to experiment with different patterns.
You could create four matching designs featuring the sun, crescent moon, stars, and zodiac-inspired symbols.
How to make them:
- Roll out your clay to an even thickness.
- Cut four circular or square shapes.
- Press different celestial designs into each coaster.
- Smooth the edges with a little water.
- Allow them to dry completely.
- Sand any rough areas.
- Paint each coaster in a matching colour scheme.
- Apply a suitable clear sealer.
Add cork or felt backing to help protect your furniture.
Keep in mind that ordinary air dry clay is not naturally waterproof or heatproof. These coasters are best for decorative use or cool, dry cups unless you use a product specifically designed and tested for the intended conditions.
15. Celestial Moon Face Decorative Sculpture

I had to include a moon face sculpture because it captures the whimsigoth aesthetic so beautifully. With its dreamy expression, curved shape, and antique-inspired finish, this piece can easily become one of the most eye-catching decorations in your collection.
How to make it:
- Draw a crescent moon with a gentle face on paper.
- Roll out your clay and cut out the main shape.
- Use clay tools to create the eyes, nose, and lips.
- Add small stars around the outer curve.
- Build up selected areas with additional clay for a sculptural appearance.
- Allow the piece to dry slowly and completely.
- Sand the edges carefully.
- Paint it in antique gold, muted bronze, or deep plum.
- Add darker shading around the facial details.
Display it on a bookshelf, dressing table, or decorative wall shelf for a beautiful mystical touch.
Tips for Making Your Air Dry Clay Projects Look More Expensive
One thing I love about air dry clay is how easily you can transform simple pieces into decorations that look like vintage boutique finds.
Here are a few tricks I recommend trying.
1. Choose a Consistent Colour Palette
Rather than painting every project a completely different colour, choose three or four shades that work beautifully together.
For a whimsigoth home, I would combine antique gold, midnight blue, deep plum, and warm ivory.
2. Experiment with Antique Finishes
Metallic gold paint is one of the easiest ways to give handmade clay decorations a vintage appearance.
Try applying a darker base colour first, then lightly brushing gold paint over raised details.
3. Add Texture Before the Clay Dries
You can create beautiful patterns using lace, textured fabric, rubber stamps, leaves, and small decorative tools.
Press your chosen material gently into the clay before it dries to create interesting surface details.
4. Take Your Time with Drying
Air dry clay needs time to dry properly. Thick pieces may take several days, depending on their size, thickness, humidity, and the manufacturer’s recommendations.
Allow air to circulate around your projects and turn them carefully when appropriate. Avoid rushing the process with excessive heat, as uneven drying can cause cracks.
5. Sand and Seal Your Finished Pieces
Once your projects are completely dry, use fine sandpaper to smooth rough edges.
You can then apply a suitable acrylic varnish or clear sealer to help protect the painted surface. Always follow the product instructions and remember that sealing does not automatically make ordinary air dry clay waterproof or heatproof.
Common Mistakes to Avoid When Working with Air Dry Clay
Even though air dry clay is beginner-friendly, a few small mistakes can affect the final appearance of your projects.
- Rolling the clay too thin: Very thin pieces can become fragile and break easily.
- Adding too much water: Excess water can make the clay sticky and weaken its structure.
- Drying too quickly: Uneven drying can cause cracks, especially in thicker pieces.
- Skipping sanding: Rough edges can make an otherwise beautiful project look unfinished.
- Applying paint too early: Always make sure your clay is completely dry before painting.
- Forgetting hanging holes: If you are making wall decorations or garlands, remember to create holes before the clay dries.
- Using ordinary clay for functional heat or water applications: Air dry clay is best suited to decorative projects unless the product is specifically designed for the intended use.
Final Thoughts
Creating your own celestial decorations is such a lovely way to bring the whimsigoth aesthetic into your home without spending a fortune on expensive decor.
From crescent moon trinket dishes to antique-inspired wall hangings and beautiful sunburst sculptures, air dry clay gives you endless opportunities to make something personal and meaningful.
My favourite thing about these projects is that you can experiment with different colours, textures, and celestial details until everything feels just right. You do not have to make every piece perfect.
Sometimes, those little handmade imperfections are what make a decoration feel truly special. So gather your clay, put on your favourite music, and let your creativity create a little magic!