DIY Mushroom Clay Jewelry Holder: How to Make a Whimsical Fairy Garden Jewelry Organizer
I’ve always loved little handmade decorations that are both pretty and useful, especially pieces that bring a touch of magic into an everyday space.
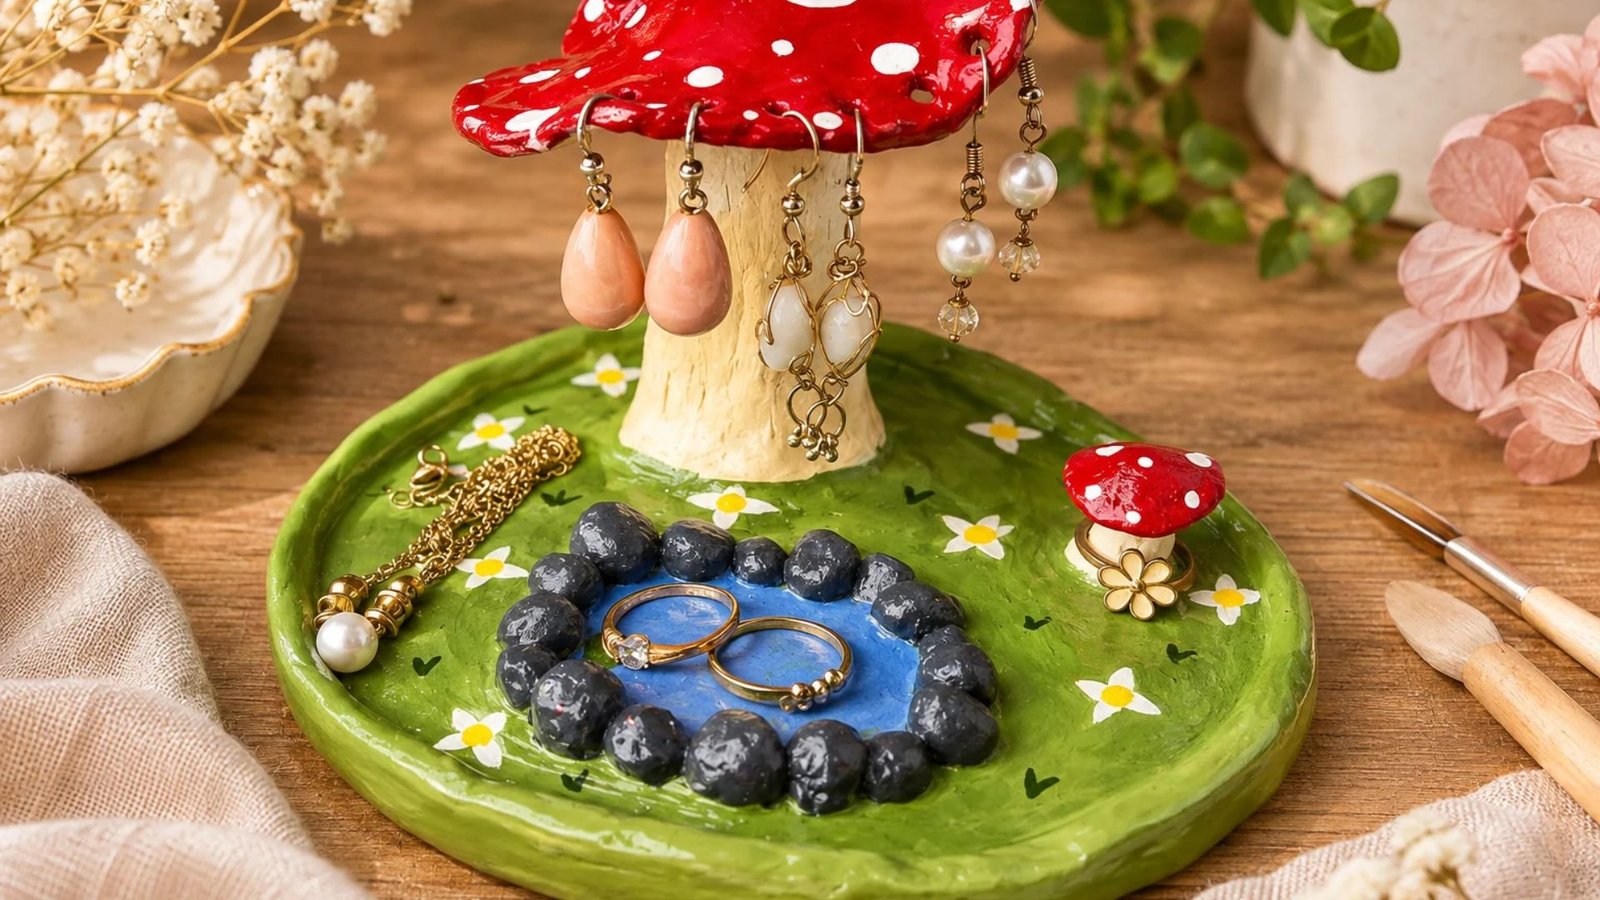
This adorable mushroom clay jewelry holder is such a lovely example! With its bright red mushroom top, delicate white flowers, tiny pond, and charming miniature details, it feels like something straight out of a fairy garden.
What makes this project even more special is that it isn’t just decorative; it gives you a beautiful place to display your favorite earrings, rings, and bracelets. If you enjoy whimsical crafts, let’s make one together!
What Is a Mushroom Clay Jewelry Holder?

A mushroom clay jewelry holder is a handmade jewelry organizer inspired by the charming appearance of woodland mushrooms and fairy gardens. It combines a decorative mushroom-shaped stand with a small tray or base where you can keep rings, bracelets, necklaces, and other little accessories.
Unlike ordinary jewelry organizers, this design has a playful cottagecore appearance. The main mushroom acts as an earring display, while the surrounding base provides additional storage space.
For this particular design, the base resembles a miniature green garden. It features a little blue pond surrounded by dark stones, tiny white flowers, miniature mushrooms, and decorative greenery.
The large mushroom has a cream-colored stem and a bright red cap with white spots. Small earrings can hang from the edges of the mushroom cap, making it both practical and beautiful.
You can customize the colors, flowers, mushroom shapes, and decorative details to create a design that matches your bedroom or vanity.
Why You’ll Love This DIY Mushroom Jewelry Holder
There are so many reasons to try this adorable clay project.
- It’s functional: The mushroom cap can hold hanging earrings, while the base provides space for rings, bracelets, and other small accessories.
- It makes beautiful bedroom decor: The fairy garden-inspired design looks lovely on a dressing table, bedside table, or vanity.
- It’s customizable: You can choose your favorite colors, add tiny flowers, or create different mushroom shapes.
- It’s a thoughtful handmade gift: It would make a lovely birthday, Christmas, Mother’s Day, or Valentine’s Day gift.
- It’s beginner-friendly: You don’t need advanced sculpting skills to create a beautiful version of this project.
- It’s a creative way to use air-dry clay: You can experiment with different textures, shapes, and decorative techniques.
Materials and Supplies You’ll Need
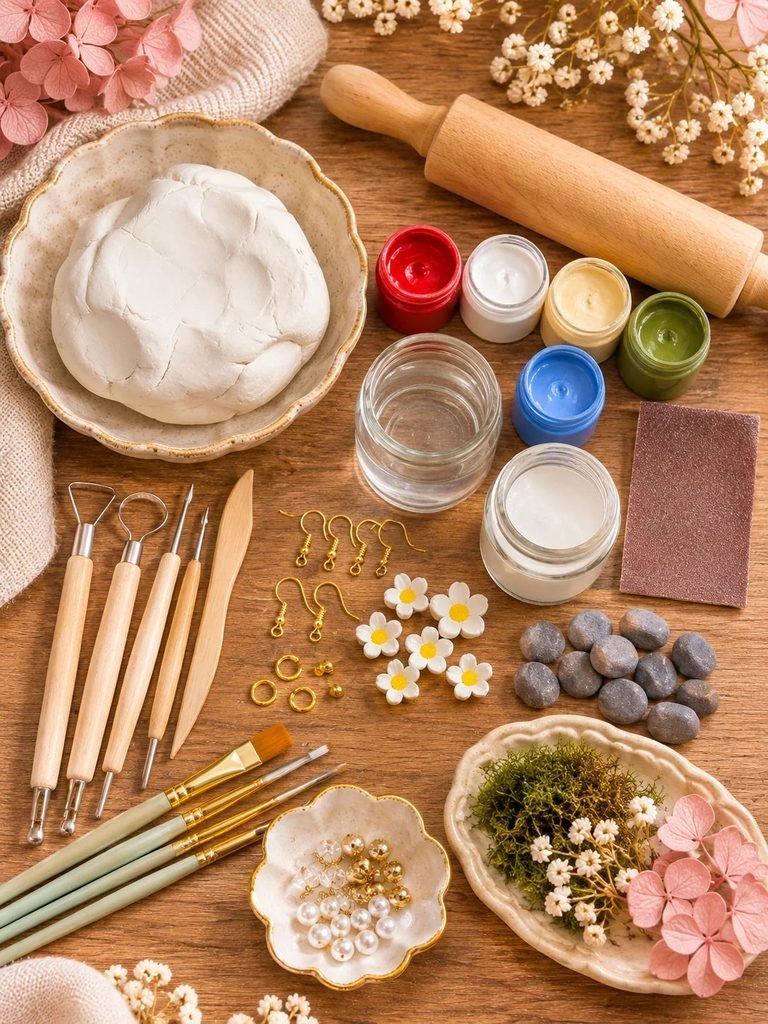
Before starting, gather everything you need. Having your materials ready makes the process much easier and helps you enjoy the creative part without constantly stopping to look for supplies.
Main materials
- Air-dry clay: White or natural-colored clay works beautifully.
- Acrylic paints: Red, white, cream, green, blue, black, and brown.
- Paintbrushes: Small brushes are useful for delicate details.
- Clear water-based acrylic sealer: Helps protect the finished painted surface.
- Strong craft adhesive: Choose an adhesive suitable for your clay and project materials.
- Sandpaper: Fine-grit sandpaper for smoothing rough edges.
- Water: For gently smoothing the clay.
- Crafting mat: Protects your working surface.
Decorative supplies
- Small decorative stones or clay pebbles.
- Miniature artificial flowers or handmade clay flowers.
- Gold or bronze-colored jewelry findings.
- Small decorative mushroom embellishments.
- Earring hooks or small metal hanging loops.
- Optional glitter or metallic acrylic paint.
Helpful tools
- Rolling pin or clay roller.
- Craft knife.
- Clay sculpting tools.
- Toothpick.
- Small round shaping tools.
- Pencil or wooden skewer.
- Ruler.
- Small bowl or rounded object for shaping the tray.
You don’t need every decorative item. Start with the basic supplies and add extra details as your design develops.
How to Make a DIY Mushroom Clay Jewelry Holder
This project is best completed in stages because the clay needs enough time to dry before painting and assembling.
Step 1: Prepare Your Clay and Workspace

Start by cleaning your working surface and gathering your materials.
Take a portion of air-dry clay and knead it gently until it becomes soft and easy to work with. Removing large air pockets is important because trapped air can sometimes contribute to cracks or uneven drying.
If your clay feels too dry, follow the manufacturer’s instructions for conditioning it. Avoid adding excessive water, as overly wet clay can become difficult to shape.
Divide your clay into separate portions for:
- The large mushroom stem.
- The large mushroom cap.
- The garden tray.
- The miniature mushroom.
- Small decorative flowers.
- Stones and other details.
Keep unused clay covered while working so it doesn’t dry out.
Read How to Glaze Air Dry Clay: A Beginner’s Guide to a Smooth, Beautiful Finish
Step 2: Create the Garden-Shaped Jewelry Tray

The base is one of the most important parts of this design because it holds the miniature garden details and provides storage for your jewelry.
Take a generous piece of clay and roll it into a thick, even sheet.
Create an oval or rounded shape for the tray. You can use a template or shape it by hand.
Next, roll a separate strip of clay to create the raised border around the tray. Attach it carefully around the outer edge, blending the seam with a little water and your fingers.
Keep the border slightly irregular rather than perfectly straight. This gives the finished piece a natural woodland appearance.
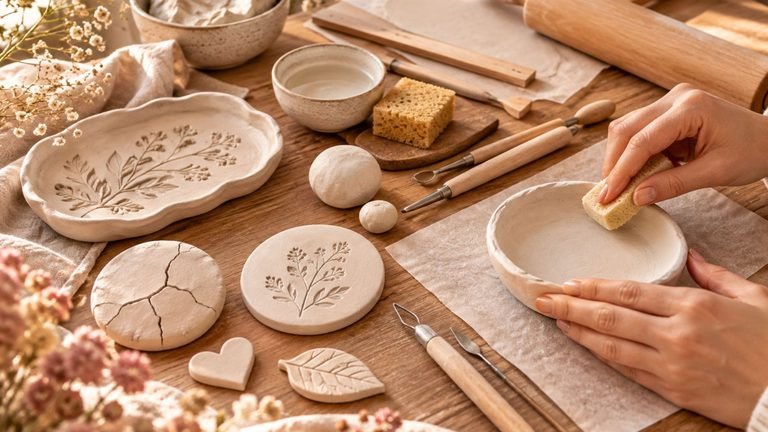
Smooth the inside and outside surfaces using your fingers or a damp sponge.
Make sure the tray is wide enough to accommodate the mushroom stand and leave some room for the decorative pond and jewelry storage.
Allow the base to firm up slightly before adding heavy decorative details.
Step 3: Sculpt the Large Mushroom Stem
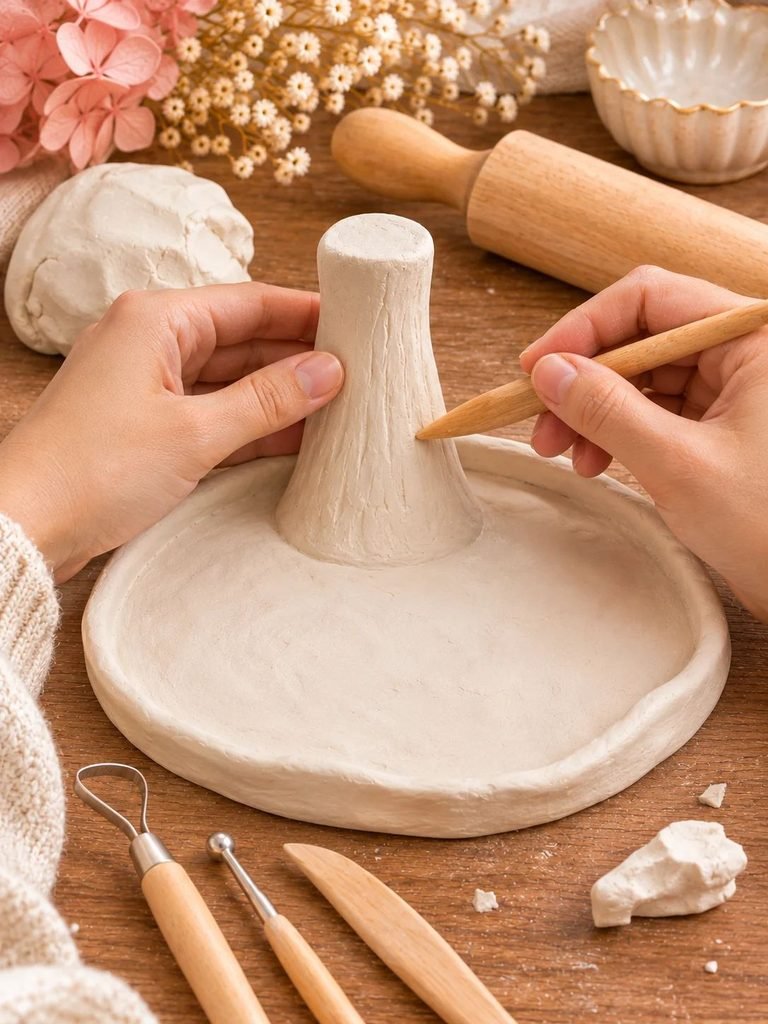
The mushroom stem is what gives this jewelry organizer its height.
Take a portion of clay and roll it into a thick cylindrical shape.
Gently taper one end so the stem becomes slightly narrower toward the top. The bottom should remain wider and stable enough to support the mushroom cap.
Shape the stem with gentle curves rather than making it perfectly straight. Natural mushrooms often have subtle irregularities, and these little imperfections make the sculpture look more realistic.
Flatten the bottom slightly so it can stand securely on the tray.
Attach the stem to the base using a little clay slip or an appropriate clay-joining technique. Blend the bottom edges carefully.
For a stronger structure, consider making the stem separately, allowing it to dry, and attaching it to the fully dried base with a suitable adhesive. If you choose this approach, ensure the stem is well-supported while the adhesive cures.
Step 4: Make the Red Mushroom Cap
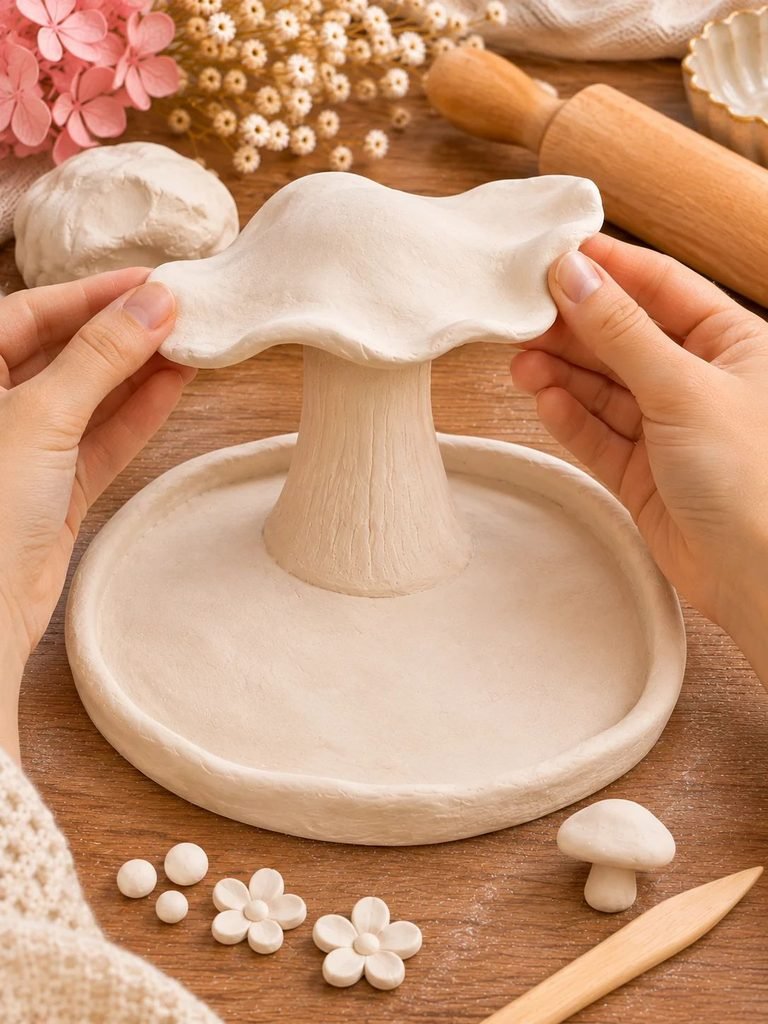
Now comes one of the prettiest parts of the project!
Take another portion of clay and roll it into a rounded ball.
Flatten it gently, then shape it into a wide mushroom cap. The top should have a soft dome, while the edges can curve slightly downward.
Make the cap wide enough to accommodate several pairs of earrings.
Use your fingers to create a few natural curves around the edges. You don’t need perfect symmetry; an organic mushroom shape looks much more charming.
Carefully position the cap on top of the stem.
If the clay pieces are still workable, score both joining surfaces lightly, apply a small amount of clay slip, and press them together. Blend the connection gently.
For a large or top-heavy design, consider using a lightweight internal support compatible with your clay and construction method. Never rely on a weak clay joint to support a heavy cap.
Allow the mushroom to dry thoroughly before decorating.
Step 5: Add the White Mushroom Spots
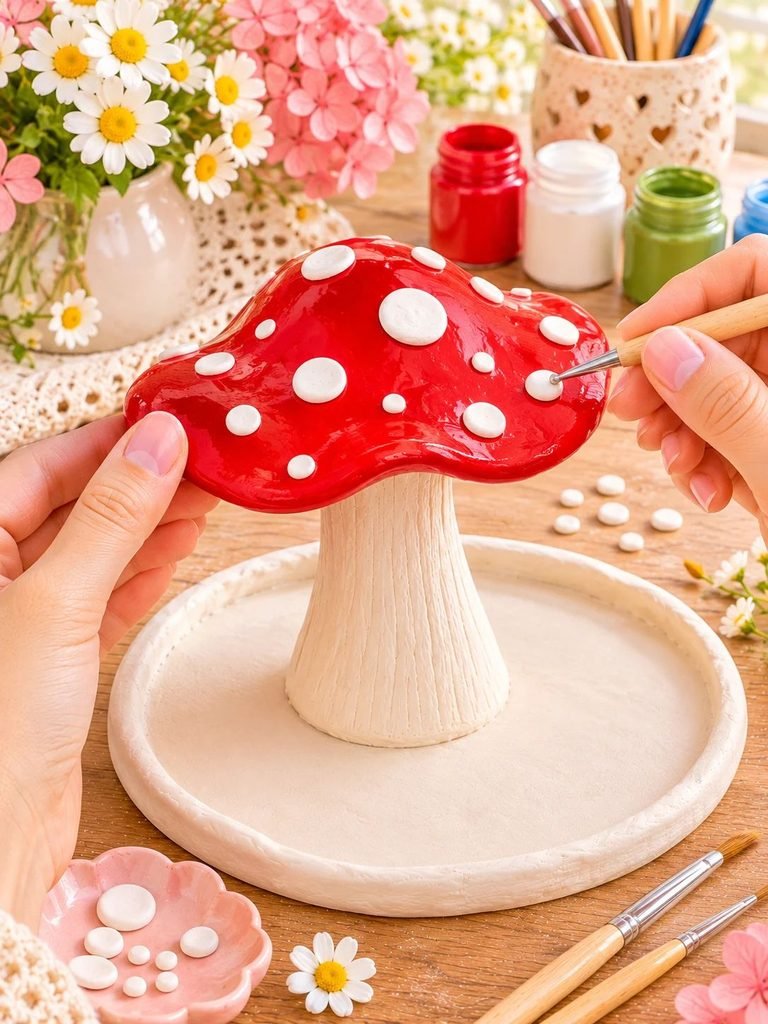
The white spots are what give the mushroom its classic fairytale appearance.
Roll several tiny balls of white clay.
Flatten each one slightly and place them across the red mushroom cap.
Vary their sizes to create a more natural look. Add a few smaller dots around the larger ones.
If the cap is already dry, you can paint the spots with white acrylic paint instead.
Keep the spots slightly irregular rather than arranging them in perfectly straight rows.
Step 6: Create the Miniature Blue Pond
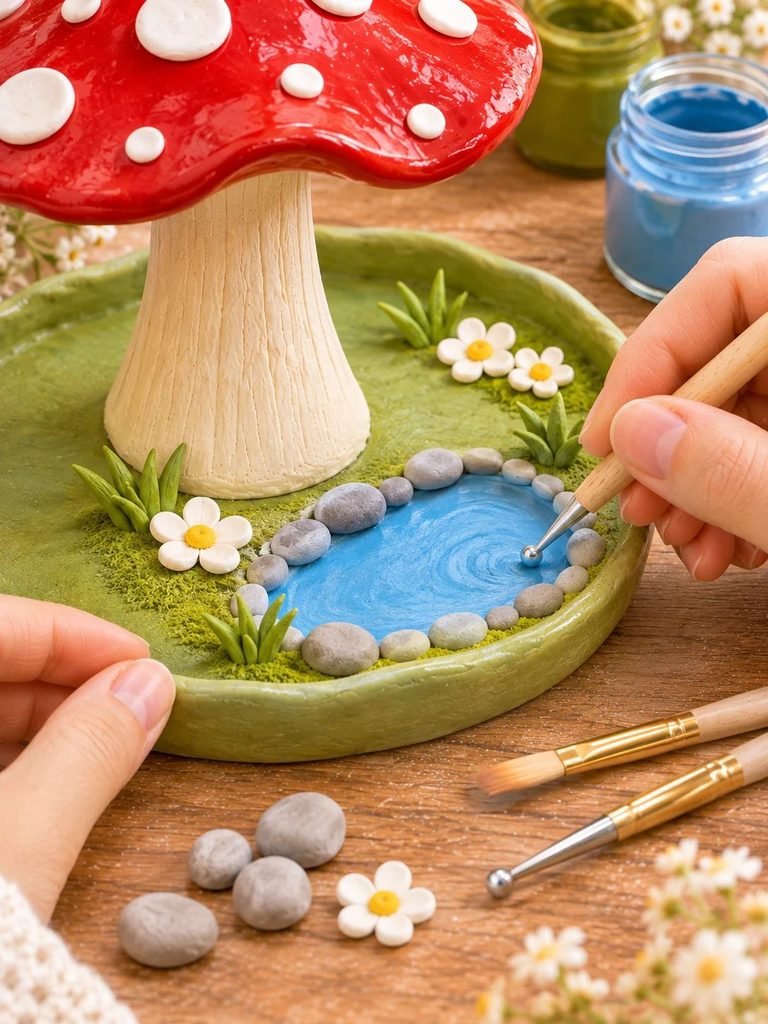
The little pond adds an especially magical detail to the garden-inspired base.
Take a small piece of blue clay and flatten it into an irregular oval shape.
Position it on the green tray, leaving enough room around it for the decorative stones.
Use your fingers or a rounded sculpting tool to create a slightly uneven pond edge.
You can make the pond look more realistic by adding a few lighter blue details after painting.
Once dry, paint the surface with a combination of blue and slightly darker blue acrylic paint. A small amount of white can be used to create gentle water highlights.
Step 7: Make the Decorative Stone Border
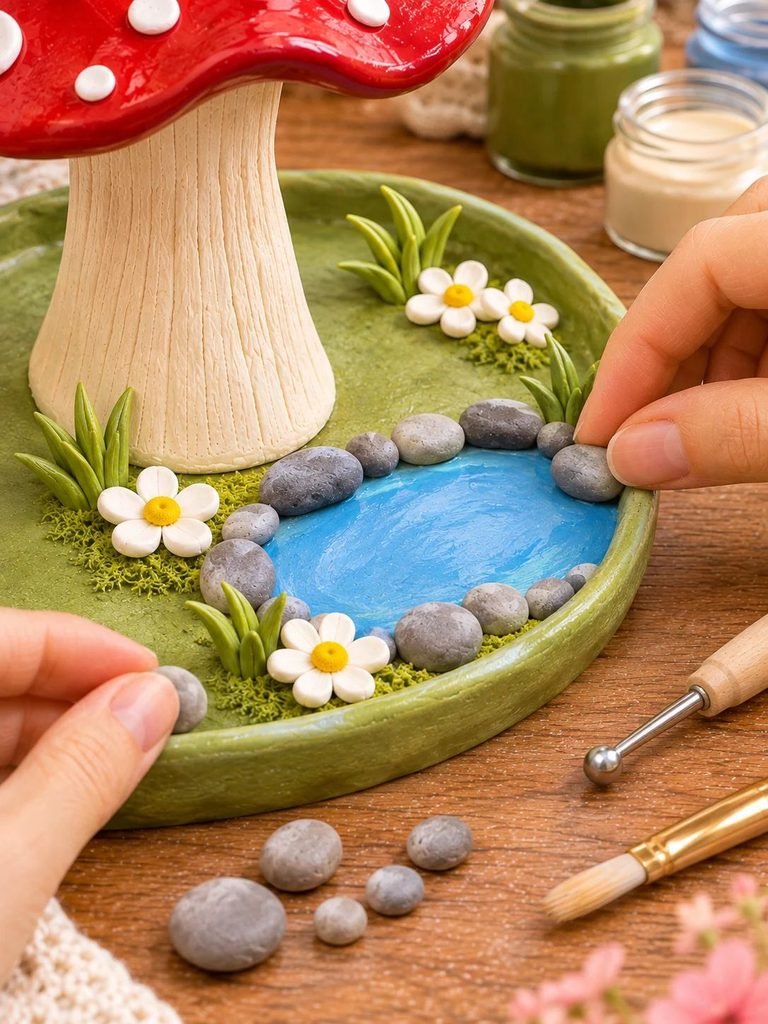
Roll several small pieces of dark gray or black clay into rounded pebble shapes.
They don’t need to be identical. In fact, using different sizes makes the pond look more natural.
Arrange the pebbles around the edge of the pond.
Press them gently into position, making sure they are securely attached.
You can add subtle gray or white highlights after painting to give the stones a realistic appearance.
If you prefer an easier option, small clean decorative pebbles can also be attached after the clay has dried.
Step 8: Add Tiny White Garden Flowers
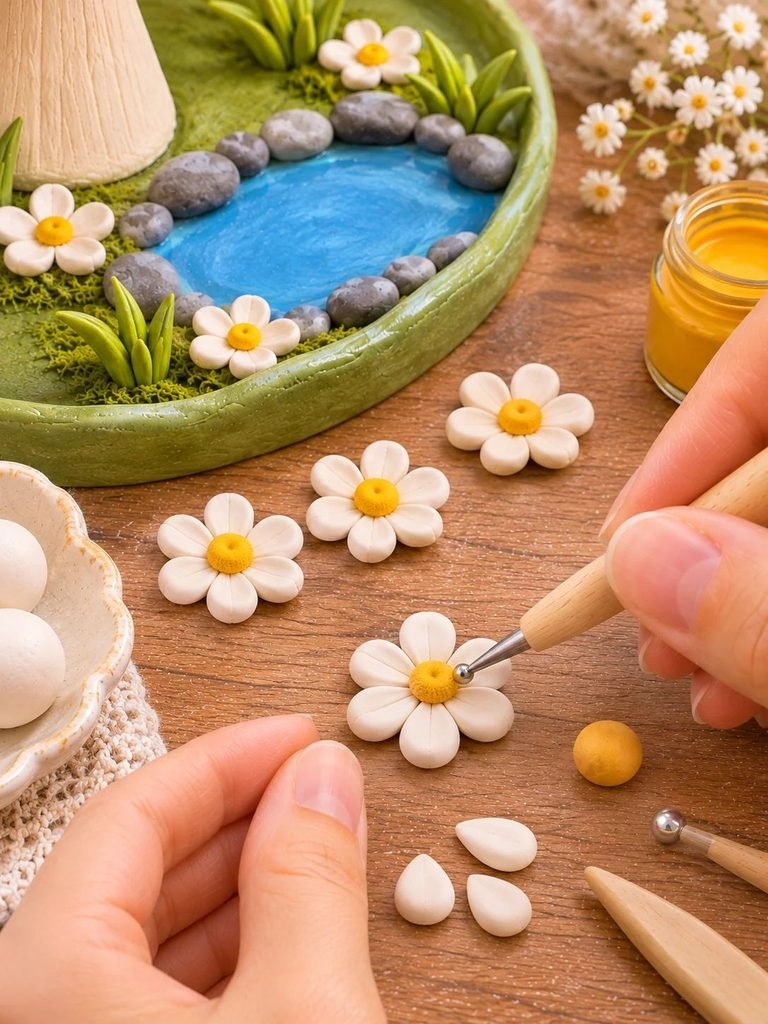
The little flowers are what make this design feel like a miniature fairy garden.
To create simple daisies, take a small amount of white clay and divide it into tiny portions.
Roll each portion into a small petal shape.
Arrange five or six petals in a circle and press them gently together.
Add a tiny yellow clay ball in the middle.
Create several flowers in different sizes and arrange them around the green tray.
You can also use a toothpick to add delicate details to the petals.
Allow the flowers to dry completely before attaching them if you are making them separately.
Step 9: Create a Miniature Mushroom Decoration
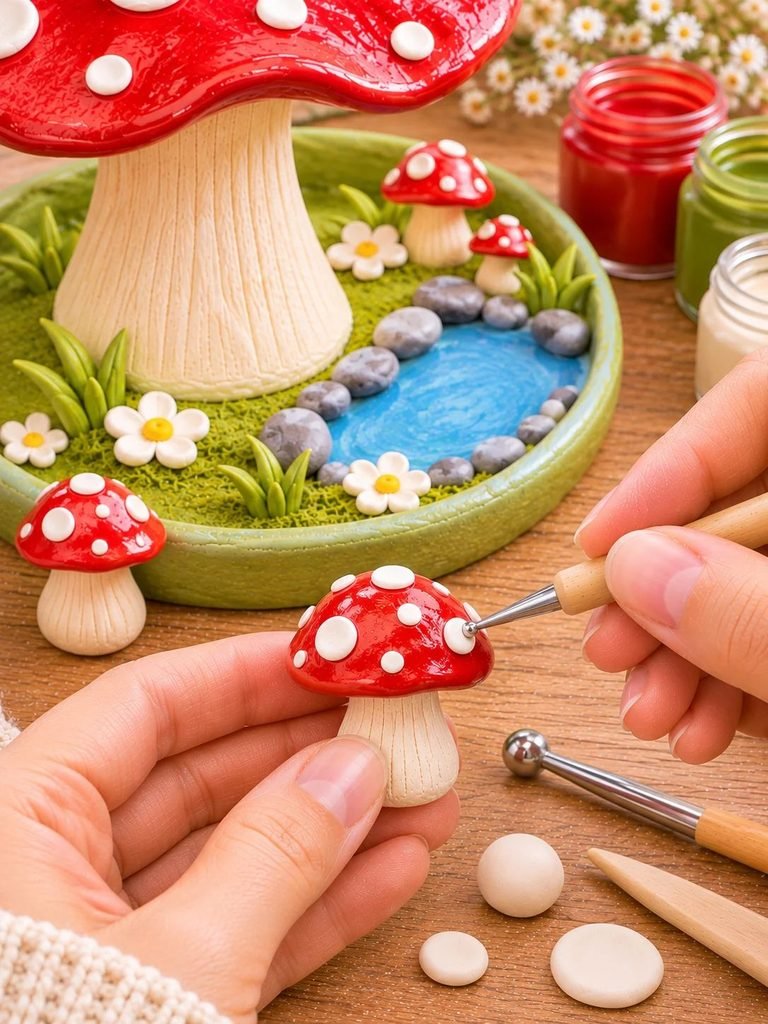
A second, smaller mushroom adds another adorable detail to the garden.
Roll a small piece of clay into a short stem.
Shape another piece into a tiny rounded cap.
Attach the two pieces carefully.
Add small white spots to the cap using tiny clay balls or white acrylic paint.
Position the miniature mushroom on one side of the tray.
You can make it slightly different from the main mushroom by using a narrower cap or a more rounded shape.
Step 10: Add the Green Garden Details
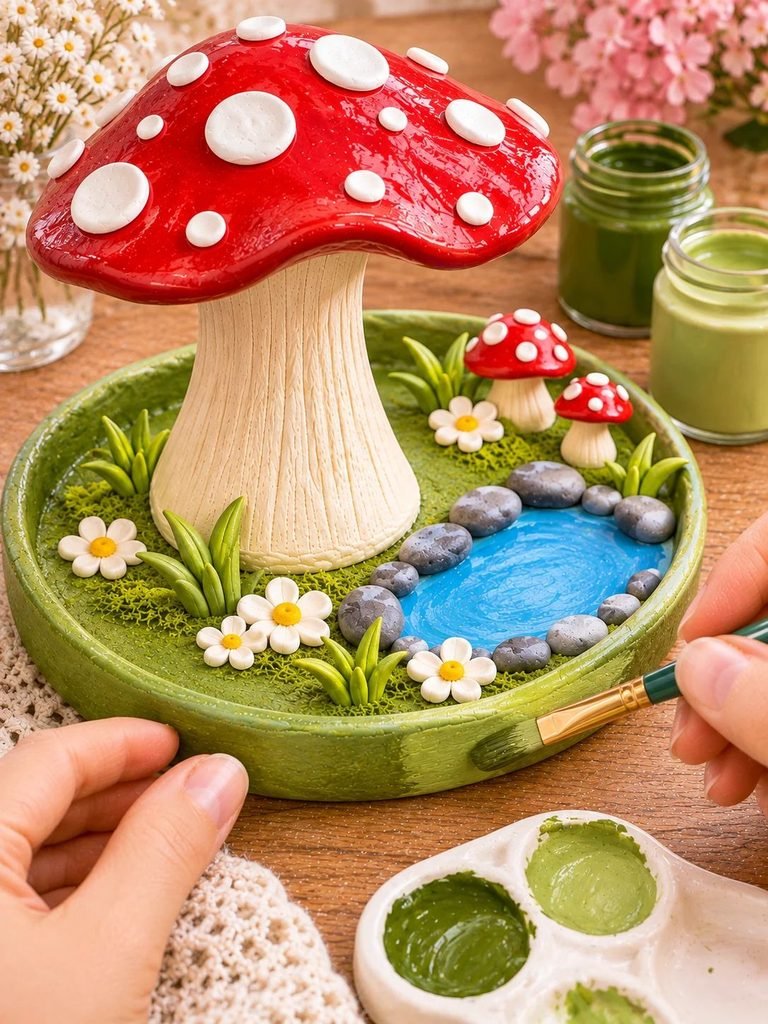
The green surface ties the entire design together.
Use a combination of green and a little yellow or brown acrylic paint to create a natural garden color.
Paint the tray carefully, working around the pond, stones, flowers, and mushroom decorations.
For added dimension, use a lighter shade of green on raised areas and a slightly darker shade around the edges.
You can also add tiny painted leaves, grass marks, and delicate botanical details.
Avoid making every section perfectly smooth. A little texture gives the garden a handmade appearance.
Step 11: Create the Earring-Hanging Points
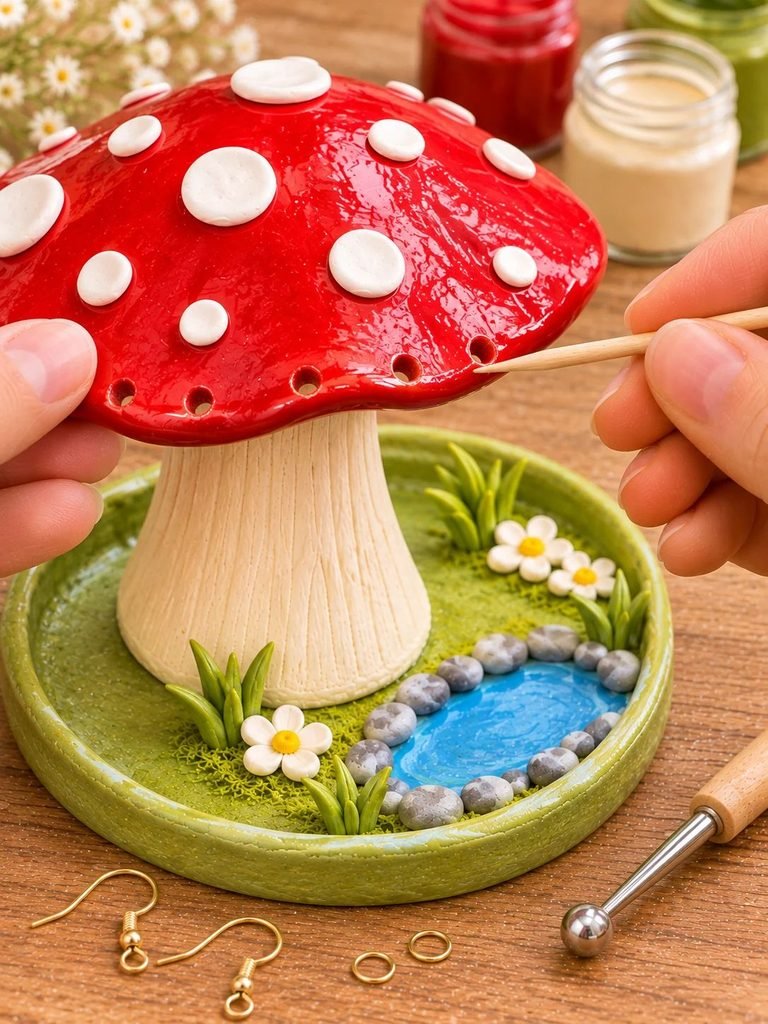
This is the most important functional feature of the jewelry holder.
The edges of the large mushroom cap can be used to display dangling earrings.
If you want to hang earrings directly from the clay cap, plan the hanging points before the clay dries.
Use a thin skewer or suitable small tool to create evenly spaced holes along the mushroom cap’s edges.
Make sure the holes are wide enough for the earring hooks you intend to use.
Avoid placing holes too close to the outer edge because this can weaken the clay.
Allow the holes to dry without becoming blocked or distorted.
If the clay is already dry, you can carefully create openings using an appropriate drill bit and suitable protective equipment. Work slowly to avoid cracking the piece.
For a more durable alternative, small metal eyelets or hooks can be incorporated into the design, provided they are securely installed and compatible with the clay.
Step 12: Paint and Decorate the Mushroom
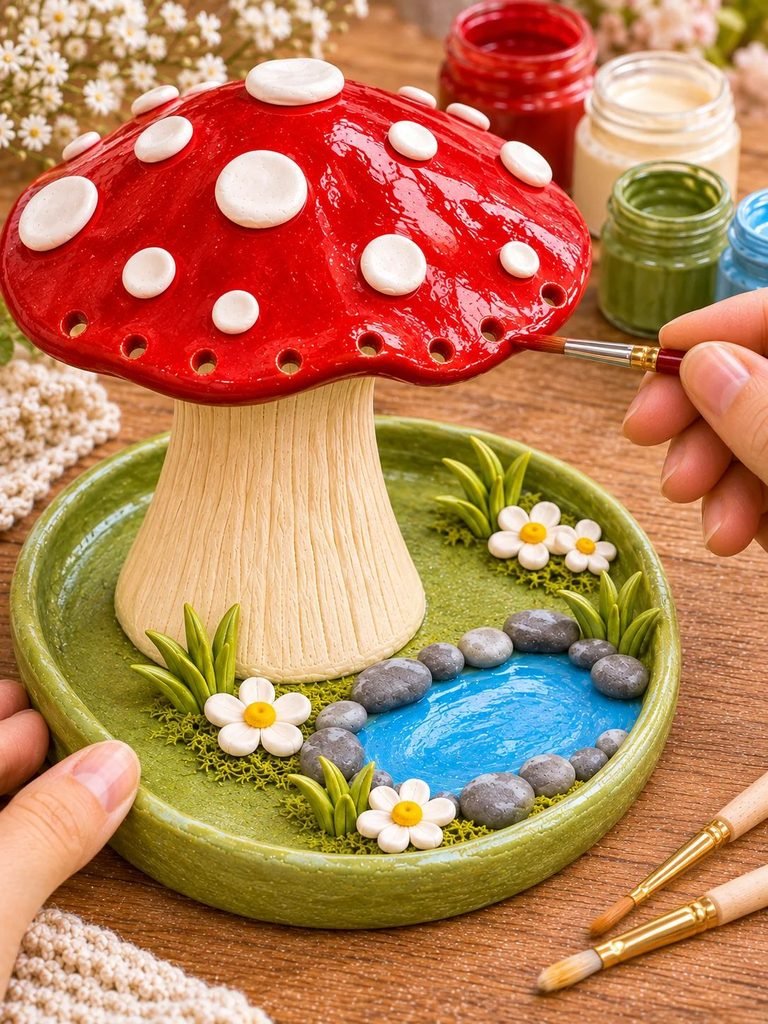
Once the clay has dried completely, it’s time to bring the colors to life.
Paint the mushroom cap a beautiful glossy red.
Use white acrylic paint for the spots and cream or pale beige for the stem.
Allow each color to dry before adding the next.
You can add subtle brown shading around the stem to create a more natural mushroom appearance.
The garden base can be painted in shades of fresh green, while the pond should have a lovely blue finish.
Take your time with the small details. A fine paintbrush will help you create delicate flowers, leaves, and little decorative marks.
Step 13: Seal Your Finished Jewelry Holder
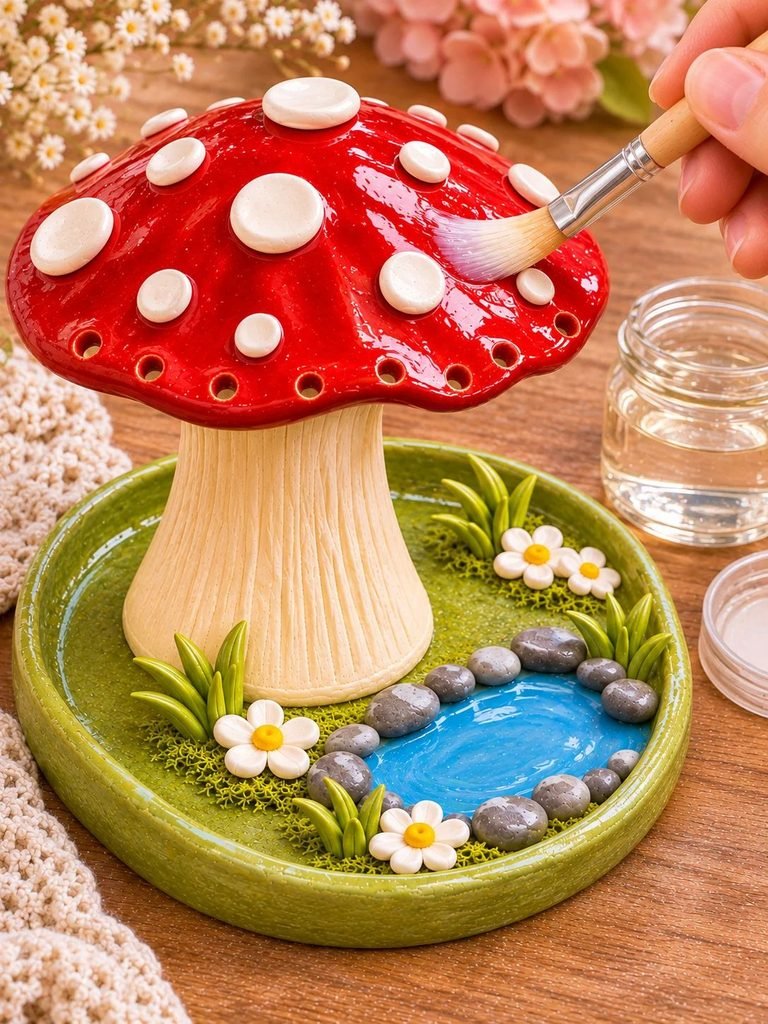
After all the paint has dried, apply a suitable clear acrylic sealer.
A satin or gloss finish works beautifully for this type of decorative project.
Apply thin, even coats rather than one thick layer. Allow each coat to dry according to the product instructions.
Pay attention to the mushroom cap, tray, and decorative details.
A sealer helps protect the painted finish from dust and minor handling, although ordinary air-dry clay is not waterproof. Keep the finished organizer away from water and damp surfaces.
Step 14: Style Your Mushroom Jewelry Organizer
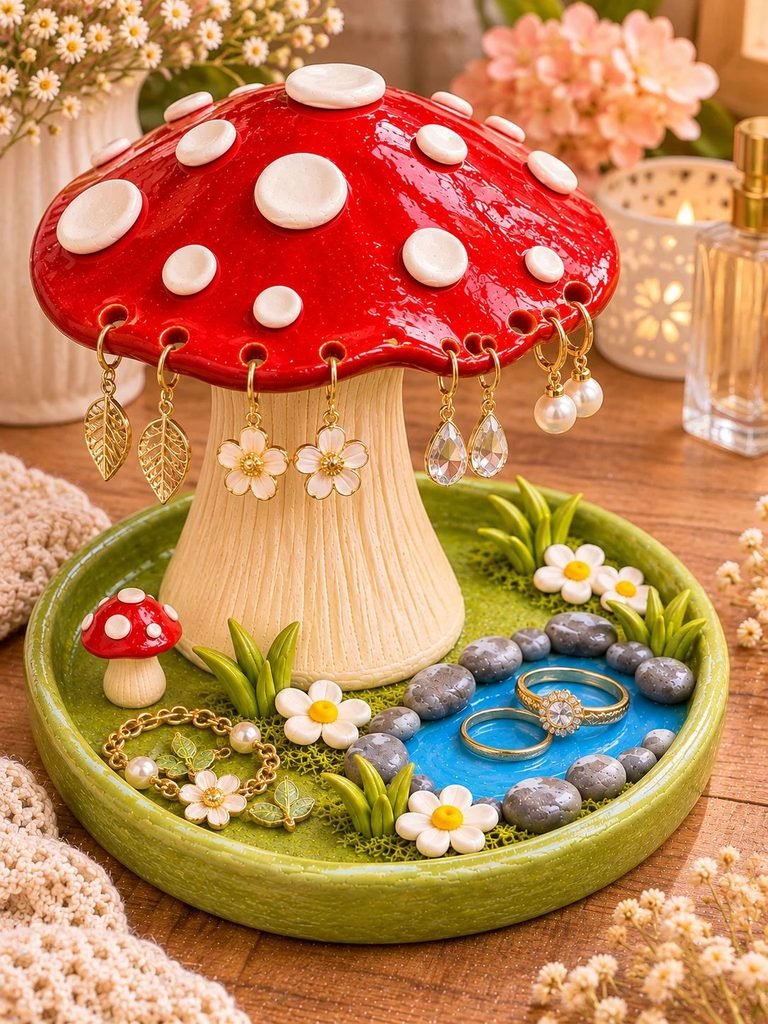
Once everything is completely dry and securely attached, you can finally add your favorite accessories.
Hang lightweight earrings from the mushroom cap.
Place rings inside the little pond area or around the stone border.
Arrange bracelets and delicate necklaces on the remaining tray space.
You can also add a few miniature decorative pieces to make the garden feel even more magical.
Your handmade mushroom jewelry holder is now ready to display!
Tips for Getting the Best Results
A few simple techniques can make a big difference in how your finished project looks and lasts.
1. Build a stable base. The mushroom stand should be securely attached and balanced. A top-heavy design can easily tip over.
2. Keep the mushroom cap lightweight. A very thick or heavy cap can put unnecessary pressure on the stem.
3. Allow enough drying time. Follow the clay manufacturer’s instructions and allow thicker sections to dry thoroughly before painting.
4. Smooth the clay while shaping. Use a small amount of water or a damp sponge to remove fingerprints and rough areas.
5. Plan the earring holes early. Mark the positions before the clay dries to make the process easier.
6. Use thin layers of paint. Several thin coats usually create a more attractive finish than one thick coat.
7. Choose a suitable sealer. Use a clear finish compatible with your clay and acrylic paint.
8. Keep decorative details proportional. Tiny flowers, stones, and mushrooms look more convincing when they complement the size of the main mushroom.
Common Mistakes to Avoid
Making the mushroom stem too thin
A thin stem may struggle to support a wide mushroom cap. Make sure the stem has enough thickness and a stable connection to the base.
Adding too many decorative details
It’s tempting to fill every available space with flowers, stones, and miniature decorations. However, leaving some open areas makes the finished piece look more balanced and provides useful room for jewelry.
Painting before the clay is completely dry
Painting damp clay can trap moisture and lead to an uneven finish. Always allow the clay to dry according to its manufacturer’s instructions.
Making the earring holes too close to the edges
This can cause the mushroom cap to crack or weaken. Leave enough clay around every opening.
Using too much water
Excessive water can make air-dry clay weak and difficult to handle. Use only small amounts when smoothing or joining pieces.
Beautiful Ways to Customize Your Mushroom Jewelry Holder
One of my favorite things about this project is how many different looks you can create with a few simple changes.
1. Classic Red and White Mushroom
Choose a bright red mushroom cap with white spots, a cream-colored stem, and a fresh green garden base. This is the traditional fairytale-inspired look.
2. Pastel Pink Mushroom Jewelry Holder
Use dusty blush pink for the mushroom cap, pale cream spots, and soft sage green for the base. Add tiny pink and white flowers for a delicate feminine finish.
3. Sage Green Cottagecore Design
Paint the mushroom cap muted sage green and decorate it with cream-colored spots. Use earthy green shades for the garden and add miniature white daisies.
4. Lavender Fairy Garden
Choose a soft lavender mushroom cap with ivory spots. Add tiny purple flowers, a pale blue pond, and delicate decorative stones.
5. Woodland-Inspired Mushroom Organizer
Use warm terracotta, earthy brown, cream, and moss green. Add natural-looking stones and tiny botanical details for a rustic woodland appearance.
How to Use Your Finished Mushroom Jewelry Holder
This little organizer can be used in several ways around your home.
- Earring display: Hang lightweight earrings from the mushroom cap.
- Ring dish: Keep rings in the tray or designated decorative areas.
- Bracelet organizer: Arrange small bracelets and delicate chains around the base.
- Vanity decoration: Display it on your dressing table as a charming handmade accent.
- Gift presentation: Use it as part of a thoughtful handmade gift for someone who loves jewelry and whimsical decor.
One important tip: Keep heavy necklaces and chunky jewelry off the mushroom cap. It is best suited to lightweight dangling earrings, while heavier accessories should be stored on the tray.
How to Care for Your Air-Dry Clay Jewelry Holder
Air-dry clay is a wonderful material for decorative crafts, but it needs gentle care.
Keep your jewelry holder in a dry indoor location.
Dust it regularly with a soft, dry paintbrush or microfiber cloth.
Avoid soaking it or cleaning it with wet cloths. Even when sealed, air-dry clay should not be treated as waterproof.
Don’t place heavy objects on the mushroom cap, and avoid dropping the organizer.
If a small decorative detail becomes loose, repair it with an adhesive suitable for the materials involved.
With gentle handling and proper storage, your handmade piece can remain a lovely part of your home decor for a long time.
Frequently Asked Questions
Can I make a mushroom jewelry holder with air-dry clay?
Yes! Air-dry clay is suitable for creating this type of decorative jewelry organizer. It can be shaped into the mushroom, tray, flowers, stones, and other miniature details without requiring a kiln.
How long does an air-dry clay mushroom jewelry holder take to dry?
Drying time depends on the thickness of the clay, humidity, temperature, and the manufacturer’s instructions. Thin sections may dry relatively quickly, while a thick mushroom stem or base may require several days. Allow every component to dry thoroughly before painting and sealing.
Can I use polymer clay instead?
Yes. Polymer clay is another option, but it requires baking according to the manufacturer’s instructions. You can use it to create the mushroom decorations and other small components.
How do I make the mushroom jewelry holder stronger?
Use a sufficiently wide base, keep the mushroom cap lightweight, and create secure connections between the stem and cap. For larger designs, suitable internal support may also help.
Can the mushroom holder store all types of earrings?
It works particularly well for lightweight dangling earrings and hook earrings. Stud earrings may require additional holes or a separate earring display section. Heavy earrings should be stored in the tray rather than on the mushroom cap.
Is the finished jewelry holder waterproof?
No. Ordinary air-dry clay is not waterproof. A suitable sealer can improve resistance to minor moisture and everyday handling, but it does not make the piece suitable for soaking or washing.
Can I sell handmade mushroom jewelry holders?
Yes! They can make lovely handmade products for craft fairs, online shops, and gift collections. If you plan to sell them, pay special attention to construction quality, smooth finishing, secure hanging points, and protective packaging.
Final Thoughts
This DIY mushroom clay jewelry holder is such a lovely way to combine creativity and everyday organization. I especially love how the little details, from the red spotted mushroom and tiny white flowers to the miniature blue pond, turn an ordinary jewelry organizer into something that feels magical.
The best part is that you can make the design your own. Experiment with different colors, create your own miniature garden decorations, or make several versions to give as handmade gifts.
Whether you’re a beginner exploring air-dry clay for the first time or someone who already enjoys making beautiful handmade decorations, this project is a wonderful opportunity to create something both useful and unique.
So gather your clay, choose your favorite colors, and have fun creating your own little fairy garden jewelry organizer!