DIY Twisted Clay Candy Cane Ornaments: A Beautiful Handmade Christmas Craft
I have always loved little handmade Christmas decorations, especially the ones that bring a warm, personal touch to the home without requiring too many supplies.
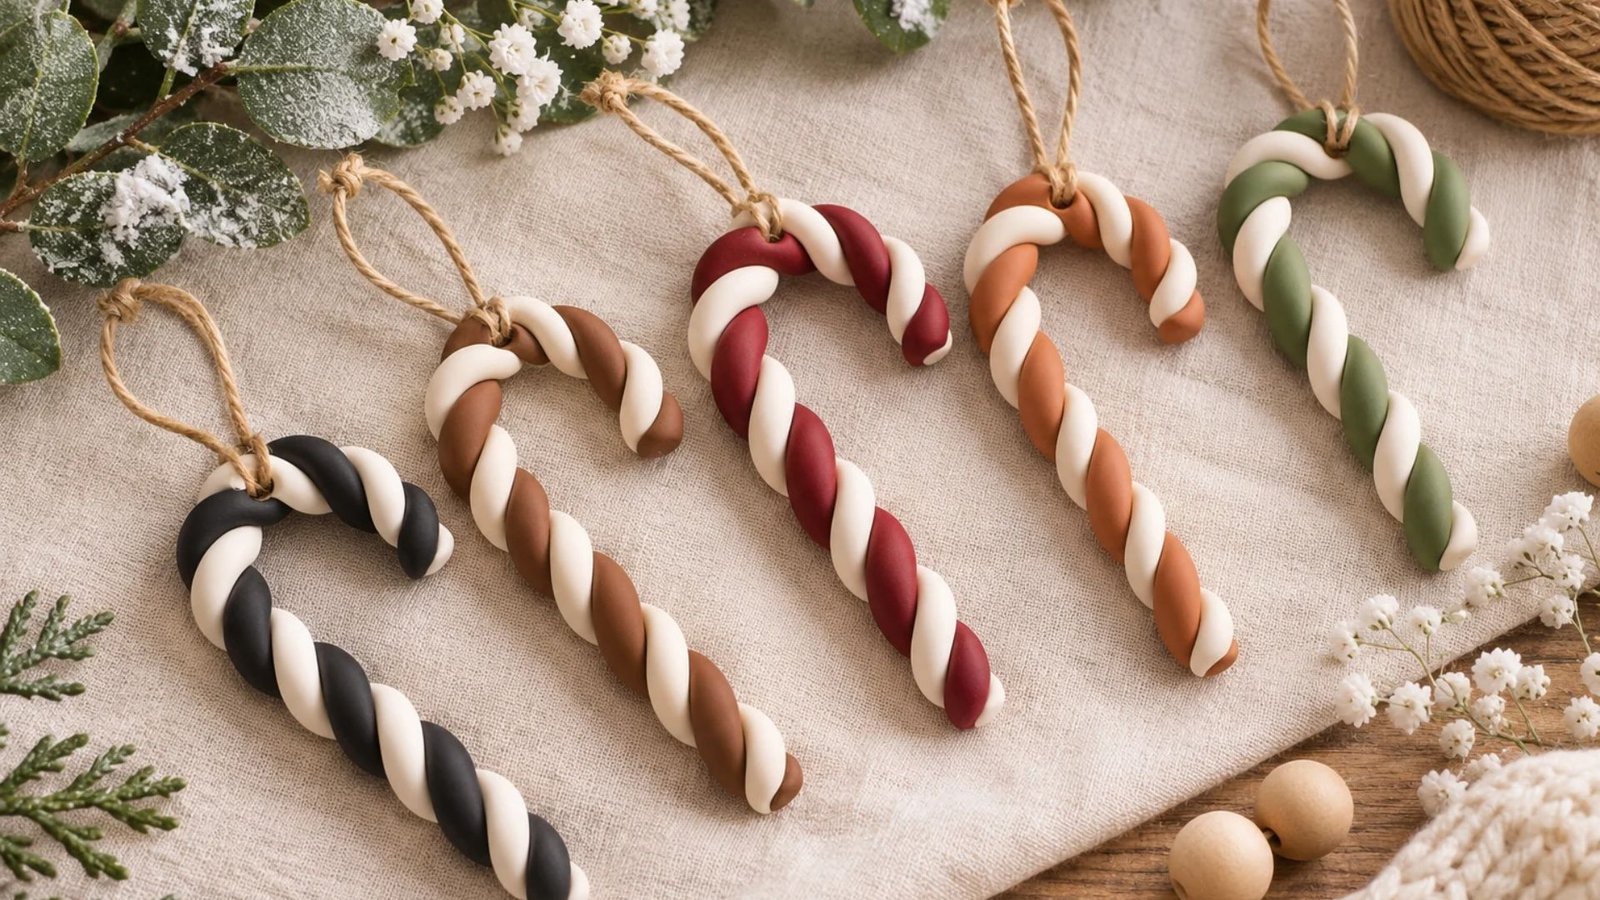
These twisted clay candy cane ornaments are one of those projects that instantly make me smile. I love how the simple combination of two clay colours creates such a charming, traditional design with a lovely modern feel.
Whether you prefer classic red and white, earthy brown and cream, or beautiful sage green, these little ornaments are surprisingly easy to make and look gorgeous hanging on a Christmas tree.
Why You’ll Love These DIY Clay Candy Cane Ornaments

If you enjoy making handmade Christmas decorations, these little candy cane ornaments are such a lovely project to add to your holiday crafting list.
They have a beautiful twisted design that makes them look much more detailed than they actually are. The best part is that you only need a few basic craft supplies to create them.
Here are a few reasons why I think you’ll love making them:
- Beginner-friendly: You don’t need any previous clay crafting experience to make these ornaments.
- Beautiful colour combinations: You can experiment with traditional Christmas colours or choose softer, neutral shades.
- Affordable to make: A little clay goes a long way, making this a budget-friendly holiday craft.
- Perfect handmade gifts: They look adorable when wrapped in tissue paper and tied with a pretty ribbon.
- Customisable: You can make them in different sizes, colours, and finishes to suit your Christmas decorating style.
- Lovely Christmas tree decorations: Their delicate twisted shape adds a handmade touch to your festive tree.
I especially love that no two ornaments need to look exactly alike. Small differences in the twists and colour combinations give each one its own personality.
What You’ll Need to Make Twisted Clay Candy Cane Ornaments
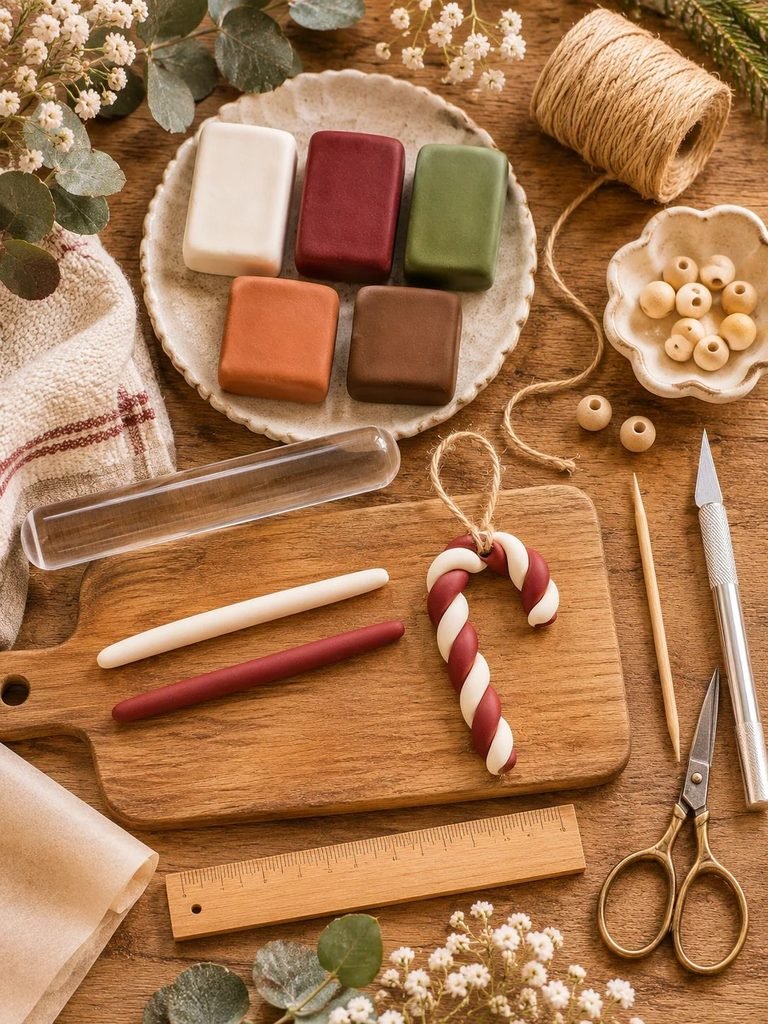
Before getting started, gather your supplies and prepare a clean, flat crafting surface. You don’t need a large workspace, just enough room to roll your clay and shape the ornaments.
Materials and supplies
1. White clay
White clay will form one half of your candy cane design. You can use white polymer clay or white air-dry clay, depending on the finish and durability you want.
2. Coloured clay
Choose a second colour to create the twisted effect. Some lovely options include:
- Burgundy and white for a traditional Christmas look.
- Sage green and white for a soft botanical style.
- Terracotta and cream for a warm, earthy appearance.
- Black and white for a simple modern design.
- Chocolate brown and ivory for a cosy neutral colour palette.
3. Crafting surface
A smooth, clean work surface will make rolling and shaping your clay much easier. A silicone craft mat or dedicated clay work surface works beautifully.
4. Rolling tool
A small acrylic clay roller is ideal for conditioning and flattening clay when necessary.
5. Craft knife or clay cutting blade
Use this to trim uneven ends and create neat candy cane shapes.
6. Wooden skewer or small hole-making tool
You’ll need this to make a small hole near the top of each ornament for hanging.
7. Natural jute twine
This creates the rustic hanging loop seen in the inspiration design. You can also use thin cotton cord or festive ribbon.
8. Ruler
A ruler helps you keep your clay ropes approximately the same length and thickness.
9. Baking tray and parchment paper (for polymer clay)
If you’re using polymer clay, prepare a dedicated baking surface and follow the manufacturer’s curing instructions.
10. Optional finishing supplies
You can use a suitable clay-compatible varnish or sealer if you want a particular finish. Always check that it is compatible with your clay.
How to Make DIY Twisted Clay Candy Cane Ornaments
Now comes the fun part! These ornaments are made by rolling two different clay colours into long ropes and gently twisting them together to create that beautiful candy cane pattern.
Take your time with the twisting process because gentle, even movements will give you the prettiest results.
Step 1: Prepare Your Clay
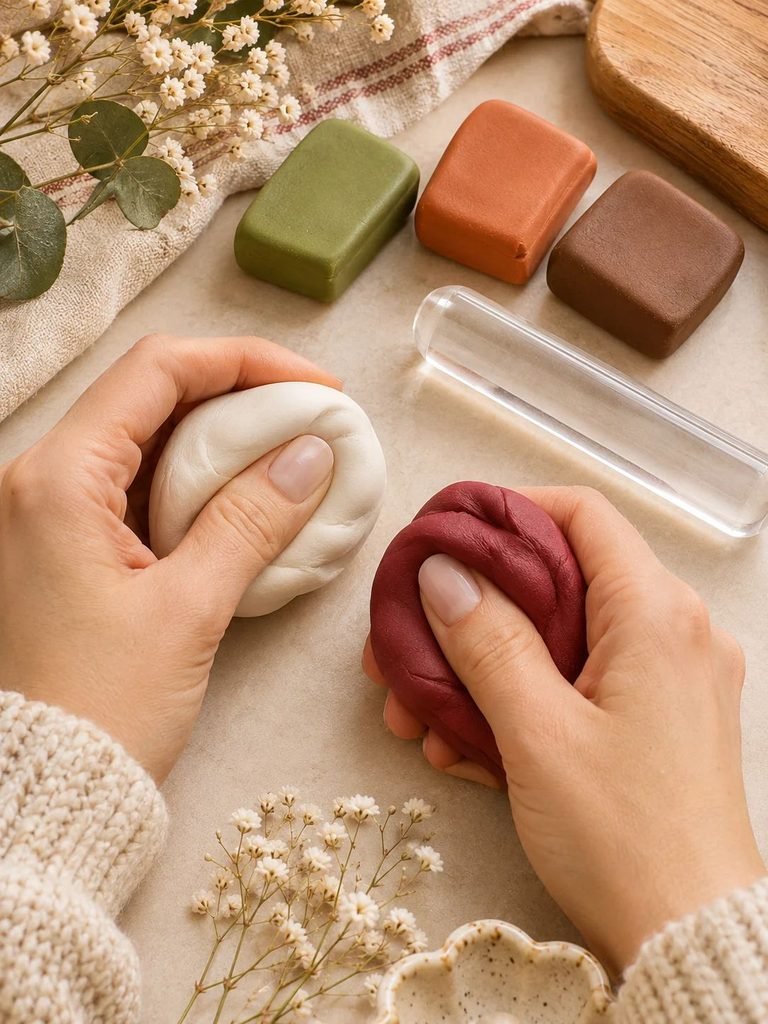
Start by selecting the two colours you’d like to use for your candy cane ornaments.
For the classic Christmas appearance, white and burgundy are beautiful together. If you prefer something softer, try cream and sage green or ivory and warm terracotta.
Take a small amount of each clay colour and knead it gently until it becomes smooth and pliable.
If you’re using polymer clay, conditioning it properly is especially important. Some polymer clays feel quite firm straight out of the packet, so kneading helps make them easier to work with.
For air-dry clay, work gently and avoid adding too much water. Excess moisture can make the clay sticky and affect how it dries.
Keep your unused clay covered while working so it doesn’t become dry or collect dust.
Step 2: Roll the Clay Into Two Long Ropes
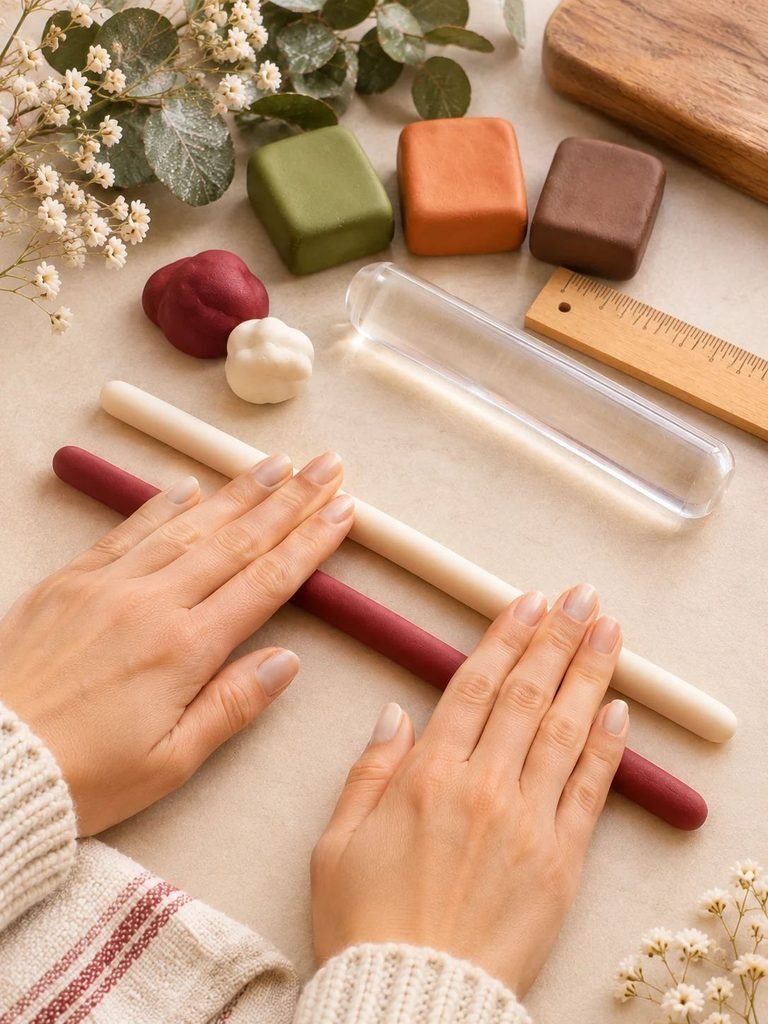
Take your first clay colour and place it on your clean work surface.
Using the palms of your hands, gently roll it backwards and forwards until it forms a long, even rope.
Repeat the same process with your second clay colour.
Try to make both ropes approximately the same length and thickness. This is important because uneven ropes can create an unbalanced twisted pattern.
For small Christmas tree ornaments, you can start with ropes approximately 12–15 cm long, adjusting the size to suit your preferred ornament.
Don’t worry if your first attempt isn’t perfectly smooth. You can gently roll and reshape the clay until the ropes look even.
Helpful tip: Avoid pressing too hard while rolling. Gentle pressure helps maintain an even thickness throughout the rope.
Read How to Avoid Cracks in Air Dry Clay: Simple Tips for Smooth, Strong Results
Step 3: Place the Two Colours Together

Once both ropes are ready, place them side by side.
Bring the ends together at one end and gently press them so the two pieces stay connected.
Make sure the colours are positioned neatly alongside each other rather than one sitting completely on top of the other.
This will help create the lovely two-tone spiral effect.
You should now have two long clay ropes ready to twist together.
Step 4: Twist the Clay Ropes Together

This is the most important step because it creates the beautiful candy cane appearance.
Hold one end of both ropes gently between your fingers.
Begin twisting the two ropes around each other, moving slowly along their length.
Try to keep the twists evenly spaced so the white and coloured sections create a consistent spiral pattern.
Avoid pulling the clay too tightly because this can stretch the ropes and make the ornament uneven.
If the clay begins to separate, gently press the two colours together again.
Continue twisting until the entire length has a beautiful striped appearance.
My favourite tip: Take your time with this step. A relaxed, even twist creates a much prettier result than trying to finish the ornament quickly.
Step 5: Shape the Candy Cane
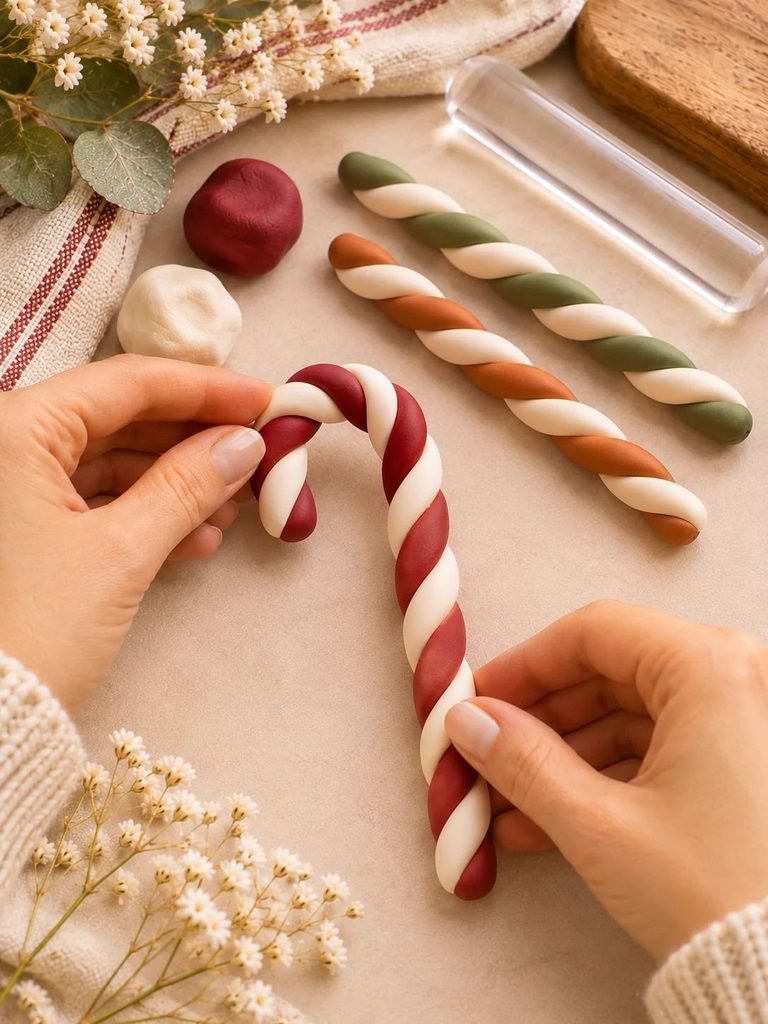
Once your two colours are twisted together, it’s time to create the familiar candy cane shape.
Place the twisted clay rope on your work surface.
Gently bend one end over to form a rounded hook.
The remaining length should extend downwards, creating the long curved shape of a traditional candy cane.
Avoid making a sharp bend because it can cause the clay to crack, separate, or lose its rounded appearance.
Use your fingers to gently adjust the curve until you’re happy with the shape.
If necessary, smooth the bend carefully without disturbing the twisted pattern.
Trim the bottom ends with a clay blade to make them neat and even.
You can leave the two coloured ends slightly visible for a lovely handmade finish.
Step 6: Make a Hole for Hanging
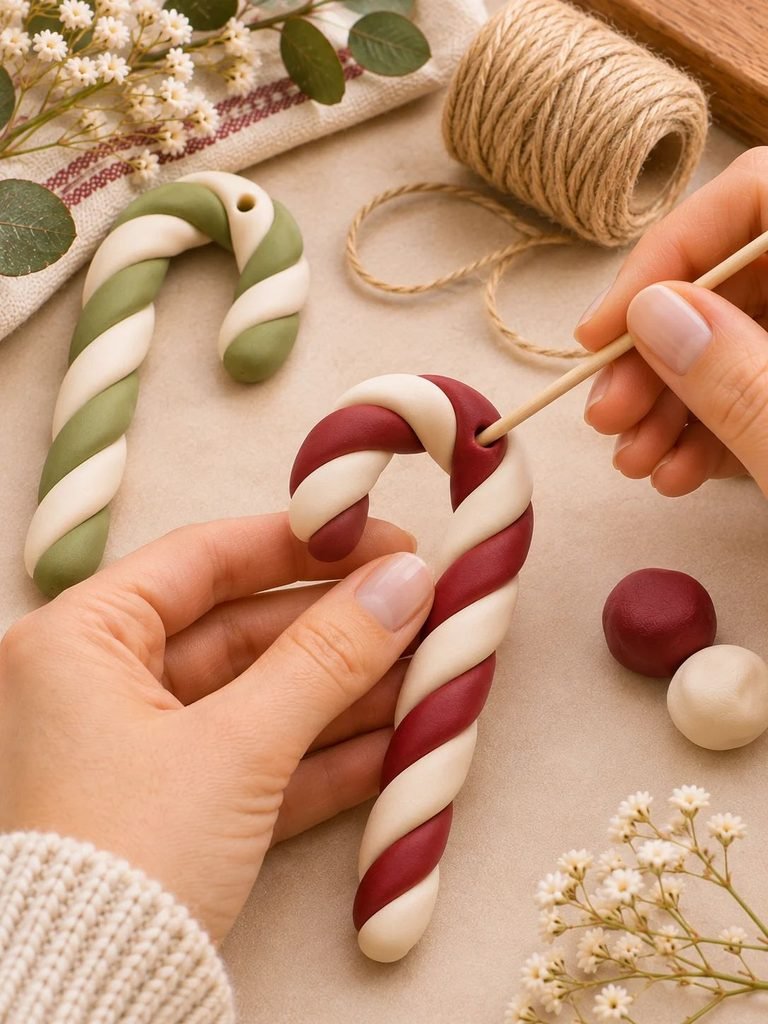
Before curing or drying your ornament, you’ll need to create a small hole for the hanging string.
Take a wooden skewer or suitable hole-making tool and carefully make a hole near the top of the candy cane.
Position it close enough to the rounded hook that the ornament will hang naturally, but leave enough space around the hole so the clay doesn’t become too thin.
Make sure the hole passes completely through the clay.
Gently rotate the skewer if necessary to create a neat opening.
Avoid making the hole too close to the edge, as this could weaken the ornament and cause it to break when you attach the string.
Remove any small bits of clay around the opening.
Step 7: Cure or Dry Your Clay

How you finish this step depends on the type of clay you’re using.
If you’re using polymer clay:
Place your finished ornaments on a suitable baking surface and cure them according to the manufacturer’s instructions.
Follow the recommended temperature and baking time for your particular brand and thickness. Use an oven thermometer if necessary to check the temperature.
Never guess the baking temperature, and avoid overheating polymer clay.
Allow the ornaments to cool completely before handling them.
If you’re using air-dry clay:
Place your ornaments on a flat, clean surface where they can dry undisturbed.
Allow them to dry according to the clay manufacturer’s instructions.
Drying times vary depending on the clay thickness, humidity, and room temperature. Turn the ornaments carefully if the manufacturer’s directions recommend doing so.
Make sure the ornaments are completely dry before decorating or handling them regularly.
Air-dry clay is generally more fragile than properly cured polymer clay, so take extra care with the thin twisted sections.
Step 8: Smooth and Finish Your Ornaments

Once your ornaments have completely cooled or dried, inspect them carefully.
If you notice any rough areas, gently smooth them using a suitable fine sanding sponge or sandpaper, following the clay manufacturer’s recommendations.
Be especially careful around the twisted sections because you don’t want to remove too much of the decorative pattern.
You can leave the ornaments with their natural matte finish or apply a compatible clay sealer if desired.
For this particular design, I love a simple matte appearance because it gives the candy canes a beautiful handmade look.
Avoid using an unsuitable varnish, especially on polymer clay, as some finishes may remain sticky or react with the material.
Step 9: Add the Hanging Twine
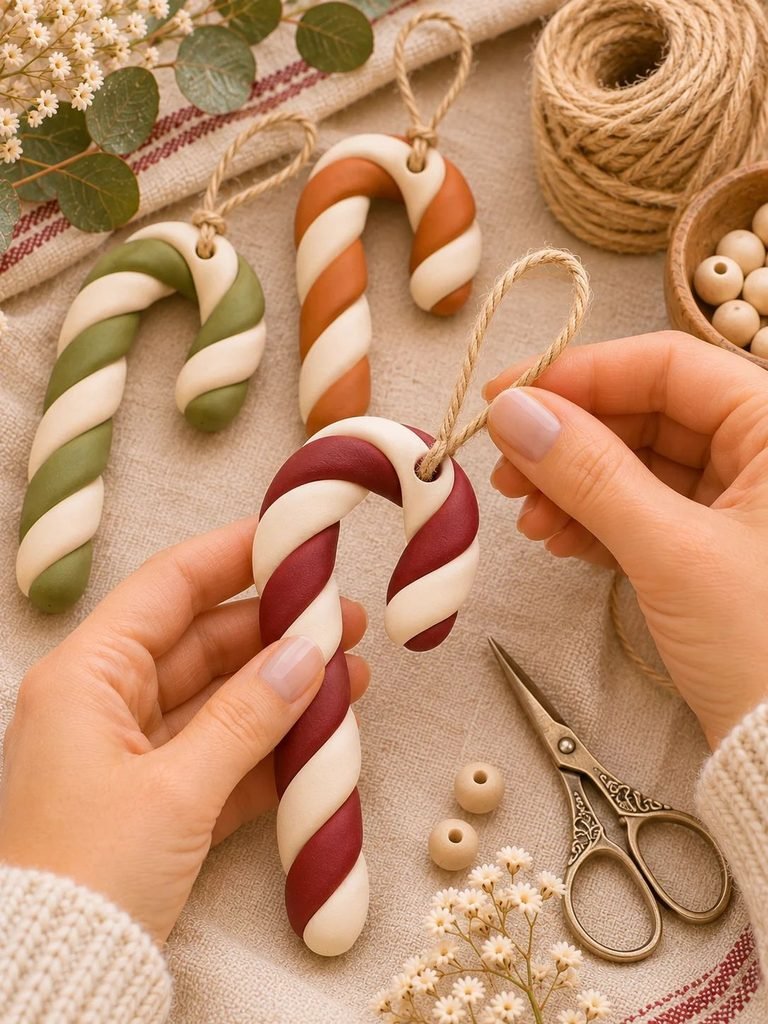
Now your little candy cane ornaments are almost ready!
Cut a small length of natural jute twine.
Fold it in half to create a loop and carefully thread the loose ends through the hole at the top of your ornament.
Pass the ends through the loop and pull gently to secure the hanging string.
Make sure the knot is firm but not so tight that it puts pressure on the clay around the hole.
Trim any excess twine if necessary.
I love using natural jute because it adds a rustic, cosy touch that complements the earthy colours beautifully.
You can also use thin cream cotton cord or a small velvet ribbon for a more elegant appearance.
Step 10: Style Your Finished Candy Cane Ornaments

Your handmade clay candy canes are ready!
Hang them on your Christmas tree, attach them to wrapped presents, or arrange several together as part of a festive display.
They look especially pretty when combined with natural greenery, wooden decorations, dried orange slices, and warm white fairy lights.
You can also make several colour combinations to create a coordinated handmade Christmas collection.
Beautiful Colour Combinations to Try
One of my favourite things about this project is how easily you can change its appearance simply by choosing different clay colours.
Here are some combinations worth trying.
1. Classic Burgundy and White
This combination gives your candy cane ornaments a traditional Christmas appearance.
The rich burgundy colour looks beautiful against creamy white, making it a lovely choice for classic holiday decorating.
2. Sage Green and Cream
<AsyncImage query=”sage green and ivory twisted polymer clay candy cane Christmas ornaments handmade rustic twine eucalyptus styling” aspectRatio=”5:4″ width=”100%”/>
For a softer, more natural look, try sage green and warm cream.
This combination works beautifully with neutral Christmas decorations, natural greenery, wooden ornaments, and simple linen ribbons.
3. Terracotta and Ivory
<AsyncImage query=”terracotta brown and ivory twisted clay candy cane Christmas ornaments handmade rustic neutral holiday decor” aspectRatio=”5:4″ width=”100%”/>
Terracotta and ivory create a warm, earthy appearance.
I especially love this combination for a cosy cottage-inspired Christmas tree.
4. Black and White
<AsyncImage query=”black and white twisted clay candy cane ornaments handmade minimalist Christmas decorations” aspectRatio=”5:4″ width=”100%”/>
If you prefer a more modern decorating style, black and white are a beautiful choice.
The contrasting colours make the spiral pattern stand out and give the ornaments a contemporary appearance.
5. Chocolate Brown and Cream
<AsyncImage query=”chocolate brown and cream twisted polymer clay candy cane ornaments rustic Christmas tree decorations” aspectRatio=”5:4″ width=”100%”/>
This combination is perfect if you love warm, natural Christmas decorations.
It has a lovely understated appearance and pairs beautifully with wooden beads, dried oranges, and neutral fabric decorations.
Helpful Tips for Making Perfect Clay Candy Cane Ornaments
Although this is a beginner-friendly project, a few small details can make a big difference to your finished ornaments.
Keep both clay ropes the same thickness.
This is one of the easiest ways to achieve a balanced spiral pattern. If one rope is considerably thicker than the other, the finished ornament may look uneven.
Twist slowly and gently.
Avoid pulling the clay while twisting. Gentle movements help maintain the shape and prevent the two colours from separating.
Don’t make the hook too tight.
A smooth, rounded curve looks much more like a traditional candy cane and helps reduce stress on the clay.
Make the hanging hole before drying or baking.
Trying to create a hole after the clay has hardened can cause cracking or breakage.
Keep your workspace clean.
Dust, hair, and small particles can easily become trapped in light-coloured clay. Wipe your work surface before starting.
Make several ornaments at once.
Since the process is quite simple, making a small collection in one crafting session is a lovely way to prepare for Christmas.
Common Mistakes to Avoid
If you’re making these ornaments for the first time, here are a few mistakes to watch out for.
Using Uneven Clay Ropes
If your two clay ropes have different thicknesses, the twisted pattern may look unbalanced.
Take a moment to compare them before twisting and adjust them if needed.
Twisting Too Tightly
Pulling the ropes too firmly can stretch the clay and make the stripes uneven.
Keep your movements gentle and allow the ropes to twist naturally.
Making the Hanging Hole Too Small
A hole that’s too small can make threading your twine difficult.
Create a neat opening that comfortably accommodates your chosen string without leaving the surrounding clay too thin.
Rushing the Drying Process
This is particularly important when working with air-dry clay.
Allow the ornaments to dry completely. Handling them too early can cause bending, cracking, or breakage.
Using Too Much Water
When working with air-dry clay, excess water can make the surface sticky and weaken the shape.
Use only the amount recommended by the clay manufacturer.
Choosing an Incompatible Sealer
Not every varnish or sealant works with every clay type.
Always check product compatibility and test your finish on a small sample before applying it to your finished ornaments.
Creative Ways to Use Your Handmade Clay Candy Canes
These little decorations are useful for more than just Christmas trees!
Here are a few ways to enjoy your finished creations.
Christmas tree decorations: Hang them between your favourite baubles and greenery for a lovely handmade touch.
Gift decorations: Attach one to a wrapped Christmas present instead of using a traditional gift tag. It makes the wrapping feel extra special.
Festive garlands: Make several ornaments in coordinating colours and hang them along a decorative garland.
Christmas table decorations: Use them as part of a seasonal table display, arranging them around greenery and candles.
Handmade holiday gifts: Package a small collection in a pretty gift box with tissue paper and a handwritten note.
Christmas wreath decorations: Add a few lightweight ornaments to a decorative wreath, securing them properly with suitable craft wire or ribbon.
Remember that these are decorative ornaments rather than edible candy canes, and they should be kept away from young children and pets.
How to Store Your Clay Candy Cane Ornaments
Once the Christmas season is over, you’ll want to store your ornaments carefully so they remain in good condition for the following year.
Start by removing the hanging twine if it becomes tangled or dirty.
Wrap each ornament individually in soft tissue paper or place them in small padded compartments.
Avoid storing them loose in a box with heavier decorations because the twisted sections can become damaged if too much pressure is applied.
Keep the storage box somewhere cool and dry, away from direct sunlight and extreme temperatures.
If you’ve used air-dry clay, be especially careful because these ornaments can be more delicate and may absorb moisture.
With proper storage and gentle handling, your handmade decorations can become part of your Christmas collection for many seasons.
Frequently Asked Questions
1. Can I Make Clay Candy Cane Ornaments Without Polymer Clay?
Yes! You can use air-dry clay for this project. It is a lovely option if you don’t have access to an oven or prefer a simple no-bake craft.
However, air-dry clay ornaments can be more fragile, particularly around the curved hook and twisted sections. Allow them to dry completely and handle them gently.
2. How Long Does It Take to Make These Ornaments?
The actual shaping process is relatively quick. Most of the time is spent preparing the clay, rolling the ropes, twisting them, and shaping the candy cane.
Polymer clay needs to be cured according to its packaging instructions, while air-dry clay requires additional drying time.
For a small collection, I recommend setting aside an afternoon for crafting and finishing.
3. What Is the Best Clay for These Candy Cane Decorations?
Polymer clay is generally my preferred option for ornaments that will be handled and stored repeatedly because properly cured polymer clay is usually more durable than air-dry clay.
Air-dry clay is still suitable for decorative pieces, provided you handle and store them carefully.
4. Can I Make These Ornaments in Different Sizes?
Absolutely!
You can make miniature candy canes for gift decorations or larger versions for a Christmas tree.
Just remember that thicker pieces may require different curing or drying times, depending on the clay you’re using.
5. Why Are My Clay Candy Canes Cracking?
Cracking can happen for several reasons, including overly dry clay, uneven thickness, excessive stretching, or bending the clay too sharply.
For air-dry clay, uneven drying and insufficient moisture in the material can also contribute to cracks.
Try working with fresh, pliable clay and shaping the hook gently.
6. Do I Need to Seal My Clay Candy Cane Ornaments?
Not necessarily.
Polymer clay does not always need a sealer, and its natural finish can be beautiful on its own.
Air-dry clay may benefit from a suitable protective coating, especially if you want to reduce its exposure to moisture. However, no ordinary craft sealer makes air-dry clay completely waterproof.
Always choose a finish designed for your specific clay.
7. Can I Make These Ornaments Ahead of Christmas?
Yes! These are wonderful decorations to make ahead of the holiday season.
Once they’re fully cured or dry, store them in a protective box until you’re ready to decorate your home or wrap your gifts.
Final Thoughts
I absolutely love how something as simple as two little pieces of clay can turn into such charming Christmas decorations. These twisted clay candy cane ornaments are a lovely reminder that holiday crafting doesn’t have to be complicated or expensive to be beautiful.
Whether you make them in traditional burgundy and white, earthy terracotta and cream, or soft sage green, each little ornament brings its own special character to your festive decorations.
You can hang them on your Christmas tree, add them to handmade gifts, or make a whole collection to give to friends and family.
So gather your favourite clay colours, put on some Christmas music, and enjoy creating something beautiful with your hands. I think you’ll be surprised by just how lovely these little handmade ornaments turn out!