Crochet Sofa Organizer Pattern: A Pretty and Practical Couch Arm Caddy
I love little handmade pieces that make a home feel warmer while quietly making everyday life easier.
My sofa is where I settle with a cup of tea, a book, and a remote, but those small essentials never seem to stay where I need them.
That is why I adore the idea of a crochet sofa organizer. It turns a plain armrest into a pretty, useful storage spot, and in soft blush pink with creamy details, it feels just as lovely as it is practical.
This simple project is a sweet way to add handmade charm to your living room.
What Is a Crochet Sofa Organizer?
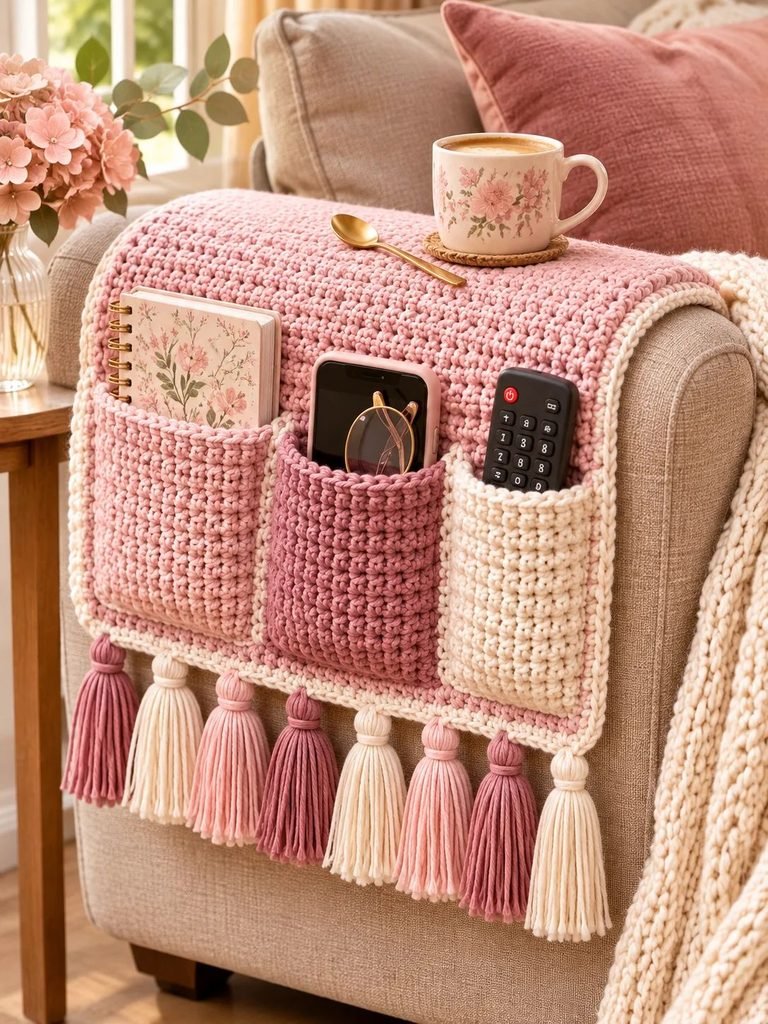
A crochet sofa organizer, sometimes called a couch arm caddy or sofa armrest organizer, is a handmade storage accessory that hangs over the arm of your sofa or armchair.
It is designed with a long rectangular crochet panel that rests across the armrest and hangs down one side. The hanging section features pockets where you can store everyday essentials without taking up additional space in your living room.
Think of it as a pretty little storage station for your favourite things!
You can use the pockets to hold:
- Television remotes and streaming device controllers.
- Mobile phones and charging cables.
- Reading glasses and sunglasses.
- Small notebooks and pens.
- Crochet hooks and small craft supplies.
- Books, magazines, and e-readers.
- Hand cream, lip balm, and other small accessories.
What makes this project especially lovely is that it combines everyday organization with beautiful handmade home décor.
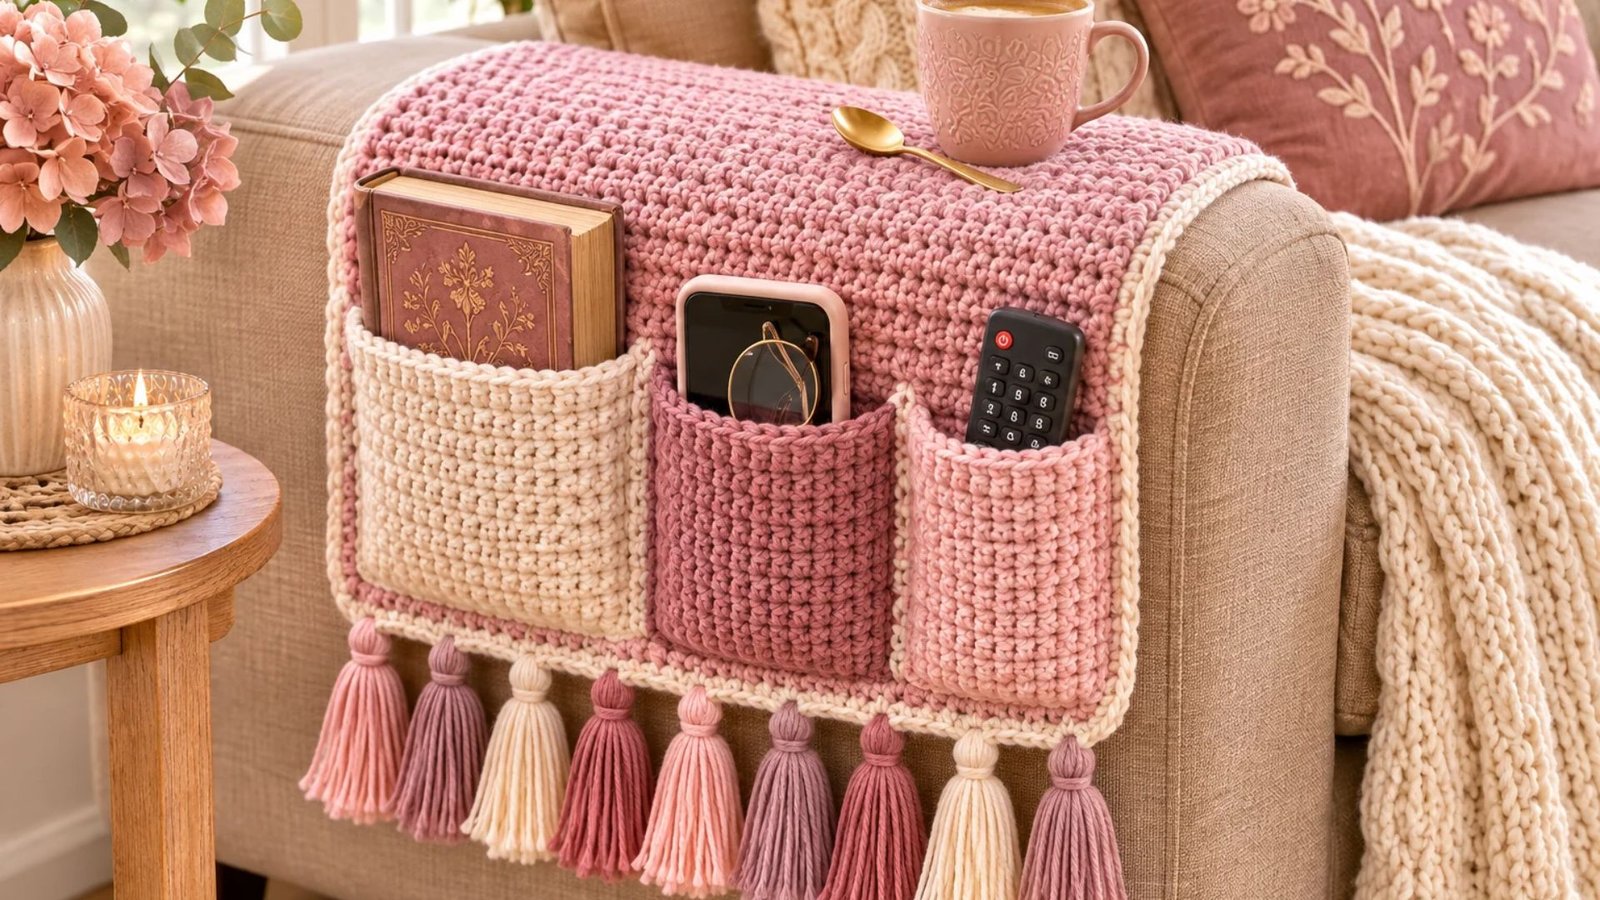
For this version, I am using a feminine combination of blush pink, dusty rose, and warm cream. The finished organizer has three spacious front pockets, a textured crochet surface, and soft decorative tassels along the bottom.
Read Mini Spiral Crochet Christmas Tree for the Holiday Table
Why You Will Love This Crochet Sofa Organizer

If you enjoy crochet projects that are both beautiful and useful, this is one worth adding to your project list.
1. It helps keep your living room organized
No more searching between sofa cushions for the television remote or wondering where you left your glasses. Everything can have its own little pocket.
2. It is a lovely handmade home accessory
The soft pink shades and textured stitches give your sofa a cozy, welcoming appearance. It is a simple way to introduce handmade details into your home.
3. You can customize the measurements
Not every sofa armrest is the same size. You can easily adjust the length and width of your organizer to suit your furniture.
4. It makes a thoughtful handmade gift
A crochet sofa caddy is a practical gift for birthdays, Mother’s Day, housewarmings, or anyone who enjoys cozy home accessories.
5. It is a wonderful stash-busting project
You can use leftover yarn from previous projects to create the pockets, borders, and tassels.
Materials You Will Need

Before getting started, gather your crochet supplies.
| Material | Recommended choice |
|---|---|
| Main yarn | Bulky weight yarn (category 5 or 6) |
| Main colour | Soft blush pink |
| Secondary colour | Dusty rose |
| Accent colour | Warm cream |
| Crochet hook | 8 mm, or the size needed for your yarn |
| Yarn needle | For sewing pockets and weaving ends |
| Scissors | For trimming yarn |
| Measuring tape | For checking measurements |
| Stitch markers | Optional, for marking pocket positions |
Choosing the Best Yarn
For a sofa organizer, I recommend a yarn that feels soft but has enough structure to support the items stored inside the pockets.
Cotton yarn is a lovely option because it is durable, holds its shape, and is easy to maintain. A cotton-acrylic blend can also work beautifully.
Avoid yarn that is too delicate or stretchy, especially if you plan to store heavier items such as books or tablets.
My Suggested Colour Combination
For a feminine, cozy finish, try these colours:
- Blush pink: The main colour for the organizer body.
- Dusty rose: For the middle pocket.
- Cream: For the side pockets and decorative edging.
- Muted mauve: For a few tassels.
- Soft pink: For additional tassels and finishing details.
You can also use three different shades of pink for a coordinated monochromatic design.
Crochet Skills and Abbreviations
This project uses basic crochet stitches, making it suitable for confident beginners.
You should be comfortable with:
- Making a foundation chain.
- Single crochet.
- Half double crochet.
- Working in rows.
- Changing yarn colours.
- Sewing crochet pieces together.
Crochet Abbreviations (US Terms)
| Abbreviation | Meaning |
|---|---|
| ch | Chain |
| sc | Single crochet |
| hdc | Half double crochet |
| sl st | Slip stitch |
| st | Stitch |
| sts | Stitches |
| BLO | Back loop only |
| rep | Repeat |
| FO | Fasten off |
Important: Turning chains do not count as stitches unless otherwise stated.
Finished Measurements
The suggested finished measurements are:
- Main organizer panel: approximately 15 inches wide × 30 inches long.
- Large pocket: approximately 5 inches wide × 6 inches deep.
- Medium pocket: approximately 4.5 inches wide × 6 inches deep.
- Small pocket: approximately 4.5 inches wide × 6 inches deep.
- Tassels: approximately 5–6 inches long before trimming.
These measurements are flexible. Always measure your sofa arm before beginning so that the organizer hangs comfortably.
How to Crochet a Sofa Organizer
Let’s make this pretty and practical crochet accessory!
Step 1: Measure Your Sofa Arm
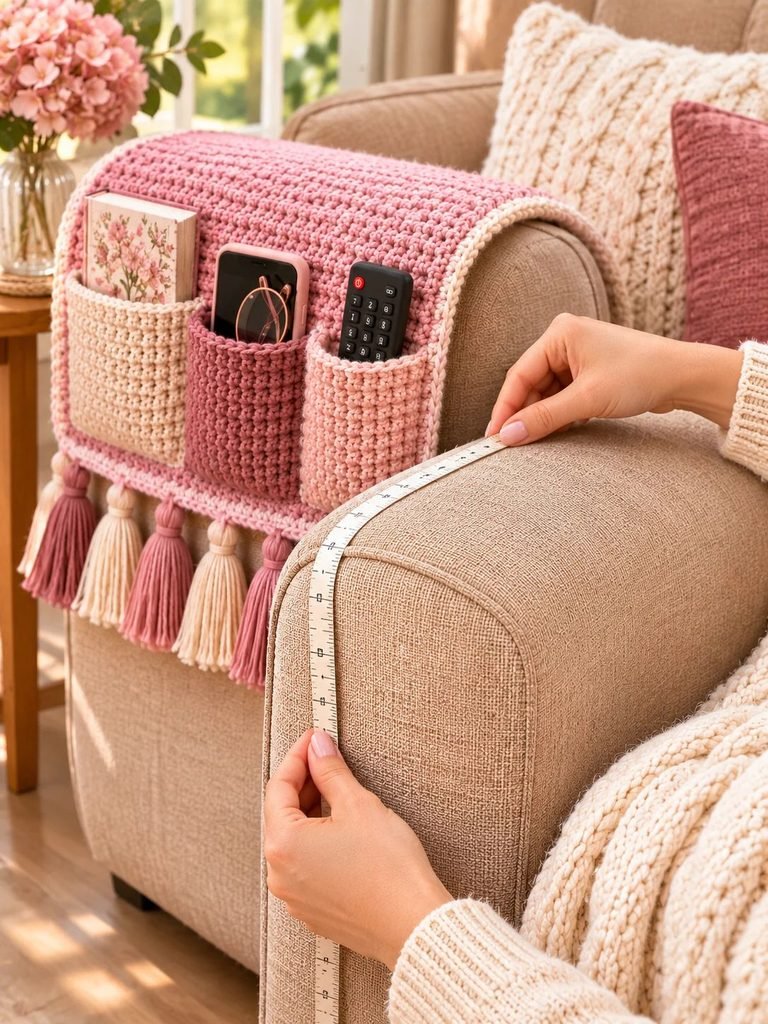
Before picking up your crochet hook, measure the sofa arm carefully.
You will need two measurements:
- The distance from the inside edge of the armrest, across the top, and down the outside.
- The width of the armrest from front to back.
For example, if the distance around your sofa arm is approximately 28–30 inches, you can make your organizer around 30 inches long.
Allow a little extra length if you want the organizer to hang further down the side.
Write down your measurements before starting.
Step 2: Crochet the Main Organizer Panel
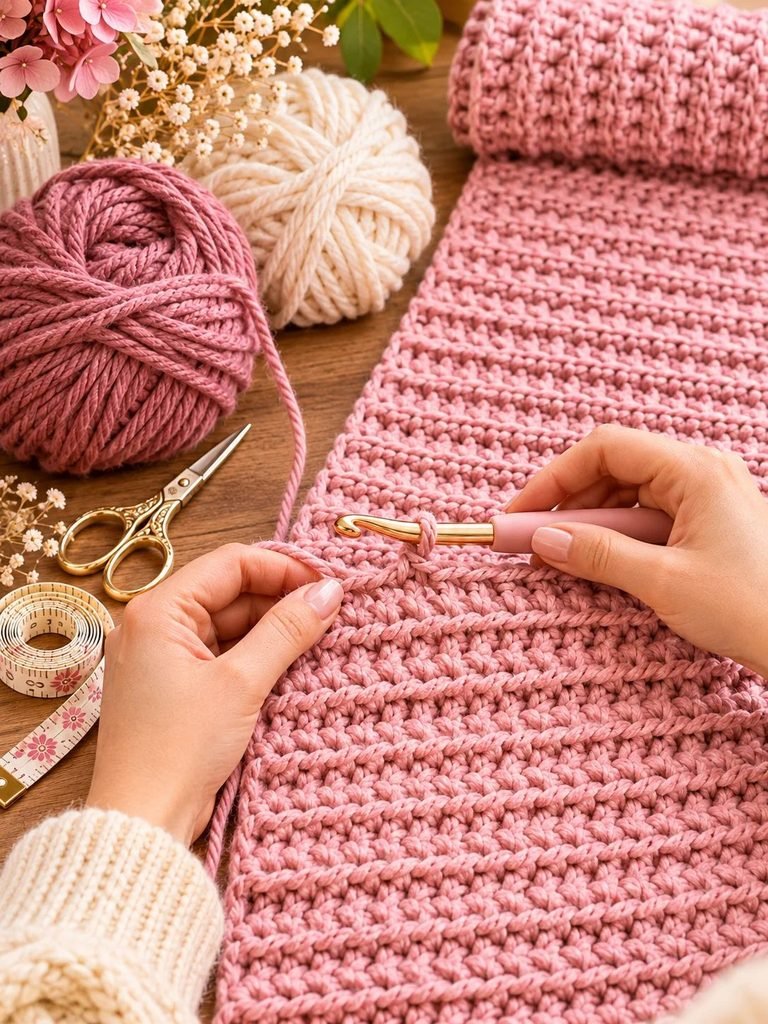
The main panel is the foundation of your sofa organizer. It should be wide enough to cover the armrest comfortably and long enough to drape down the outside.
Using your blush pink yarn:
Foundation chain:
Chain 34.
Row 1: Hdc in the third chain from your hook. Continue working one hdc into each chain across. You should have 32 hdc stitches.
Chain 2 and turn.
Row 2: Work one hdc into each stitch across.
Chain 2 and turn.
Row 3: Continue working hdc across the row.
Repeat Row 3 until your crochet panel reaches approximately 30 inches in length.
For a firmer texture, you can work the half double crochet stitches through the back loop only on every second row. This creates a subtle ribbed appearance.
Fasten off and weave in your ends.
Helpful tip: Lay the panel over your sofa arm while working. This helps you check the fit and make adjustments before adding the pockets.
Step 3: Crochet the Front Pockets

Now comes one of my favourite parts!
The pockets are what make this organizer so useful. Instead of making three identical pockets, you can create slightly different sizes for different belongings.
For this design, we will make three pockets:
- One large pocket for a small book or notebook.
- One medium pocket for your television remote.
- One smaller pocket for your phone or glasses.
Large Pocket – Cream
Using cream yarn:
Chain 14.
Row 1: Hdc in the third chain from your hook and across. You should have 12 hdc.
Chain 2 and turn.
Row 2: Hdc across the row.
Repeat Row 2 until the pocket measures approximately 6 inches tall.
Fasten off.
Medium Pocket – Dusty Rose
Using dusty rose yarn:
Chain 12.
Row 1: Hdc in the third chain from your hook and across. You should have 10 hdc.
Chain 2 and turn.
Row 2: Hdc across.
Continue repeating Row 2 until the pocket measures approximately 6 inches tall.
Fasten off.
Small Pocket – Blush Pink
Using blush pink yarn:
Chain 12.
Row 1: Hdc in the third chain from your hook and across. You should have 10 hdc.
Chain 2 and turn.
Row 2: Hdc across.
Continue repeating until the pocket measures approximately 5 inches tall.
Fasten off.
You can make the pockets slightly deeper if you plan to store larger items.
Step 4: Add a Neat Border Around Each Pocket

A simple border makes the pockets look more finished and helps reinforce their edges.
Attach your yarn to one corner of each pocket.
Work single crochet stitches evenly around all four sides.
At each corner, work 3 sc into the same space to help the fabric turn neatly.
Join with a slip stitch and fasten off.
Repeat for all three pockets.
The border can be made in cream for a delicate contrast or in the same colour as each pocket for a more understated appearance.
Step 5: Attach the Pockets to the Main Panel
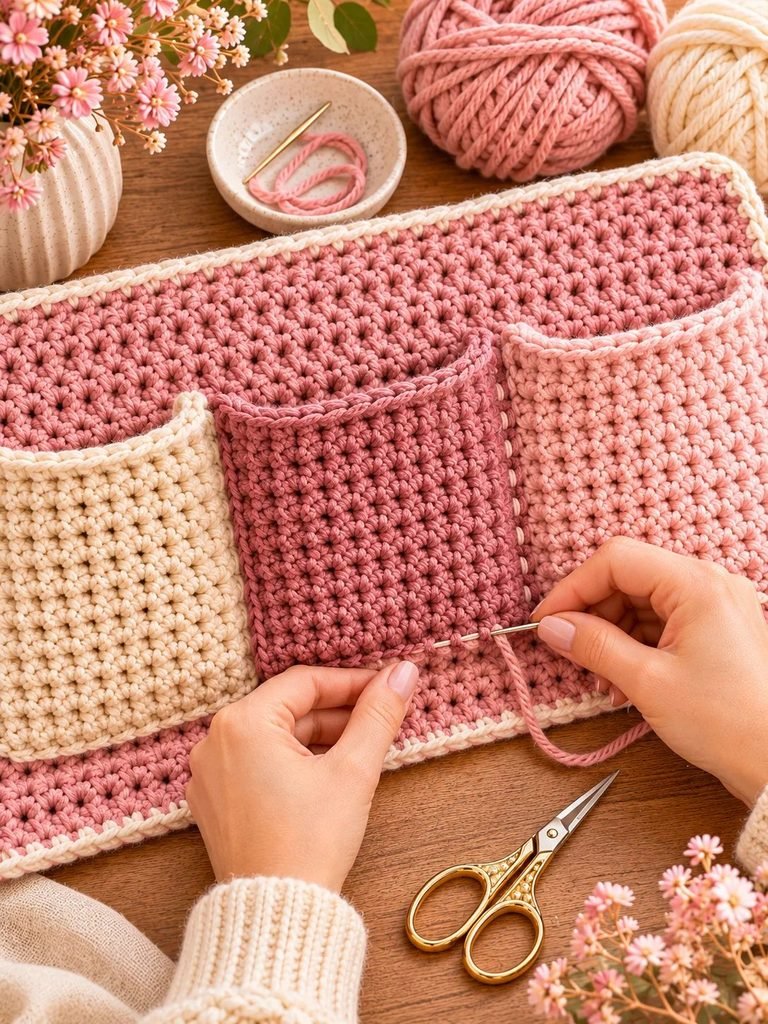
Place your main organizer panel on a flat surface with the side you want facing outward turned upwards.
Arrange the three pockets across the lower hanging section.
I recommend placing the large pocket on the left, the medium pocket in the centre, and the smaller pocket on the right.
Leave a small gap between the pockets so they do not look crowded.
Use stitch markers to hold everything in position.
Thread a yarn needle with matching yarn and carefully sew the sides and bottom edges of each pocket onto the main panel.
Leave the top edges open.
When sewing, keep your stitches small and even. Make sure the pockets are attached securely, especially around the bottom corners.
A little design tip: Before sewing everything permanently, place your remote, phone, and notebook inside the pockets to check that they fit comfortably.
Step 6: Crochet a Decorative Bottom Border
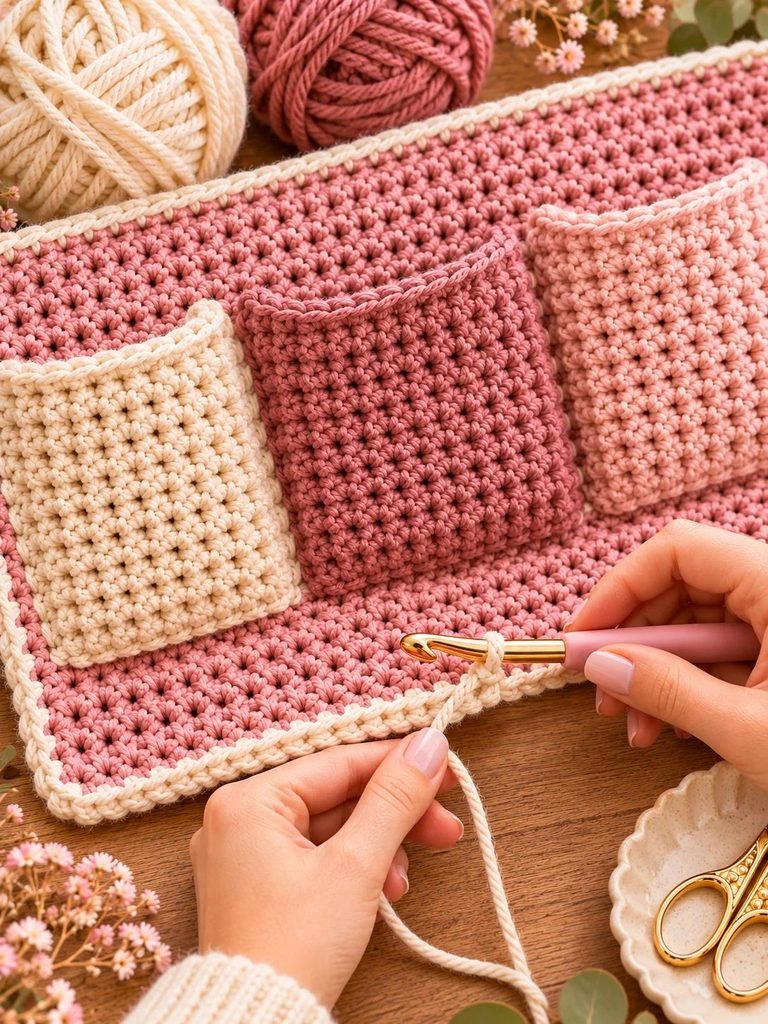
To give the organizer a polished finish, add a simple crochet border along the lower edge.
Attach cream yarn to one corner of the bottom edge.
Work single crochet stitches evenly across.
At the end of the row, chain 1 and turn.
Work one more row of single crochet if you want a slightly thicker finish.
Fasten off and weave in the ends.
This little detail helps frame the organizer beautifully and creates a neat edge for attaching the tassels.
Step 7: Make the Decorative Tassels
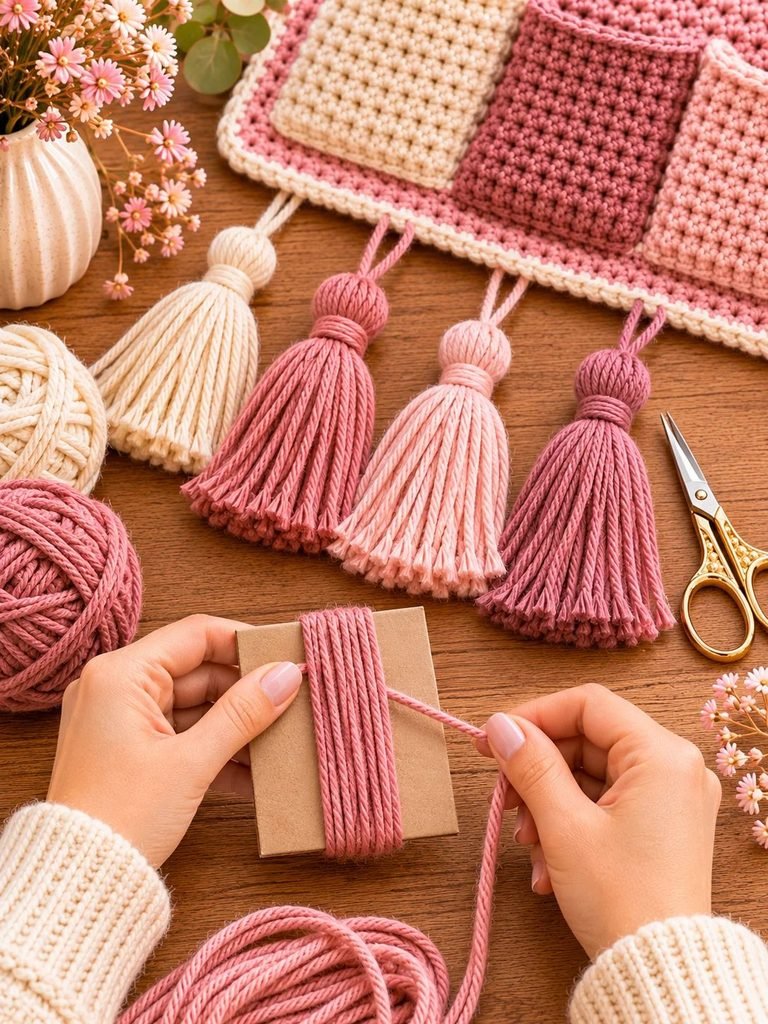
The tassels add a lovely finishing touch to this project.
For a feminine look, use a combination of blush pink, dusty rose, cream, and muted mauve.
How to make a simple yarn tassel:
- Cut a small piece of cardboard approximately 6 inches long.
- Wrap your chosen yarn around the cardboard 20–25 times.
- Carefully slide the wrapped yarn off the cardboard.
- Tie a separate piece of yarn tightly around the top.
- Wrap another piece of yarn around the upper section to create the tassel head.
- Cut through the loops at the bottom.
- Trim the ends evenly.
Make approximately 8–10 tassels, depending on the width of your organizer.
Step 8: Attach the Tassels

Space your tassels evenly along the bottom edge of the organizer.
Alternate the colours to create a soft, coordinated look.
For example:
Blush pink, cream, dusty rose, mauve, cream, blush pink, and dusty rose.
Use a yarn needle to secure each tassel firmly.
Give them a gentle tug to make sure they are attached properly.
Finally, trim any uneven strands so that all the tassels have a neat appearance.
How to Customize Your Crochet Sofa Organizer
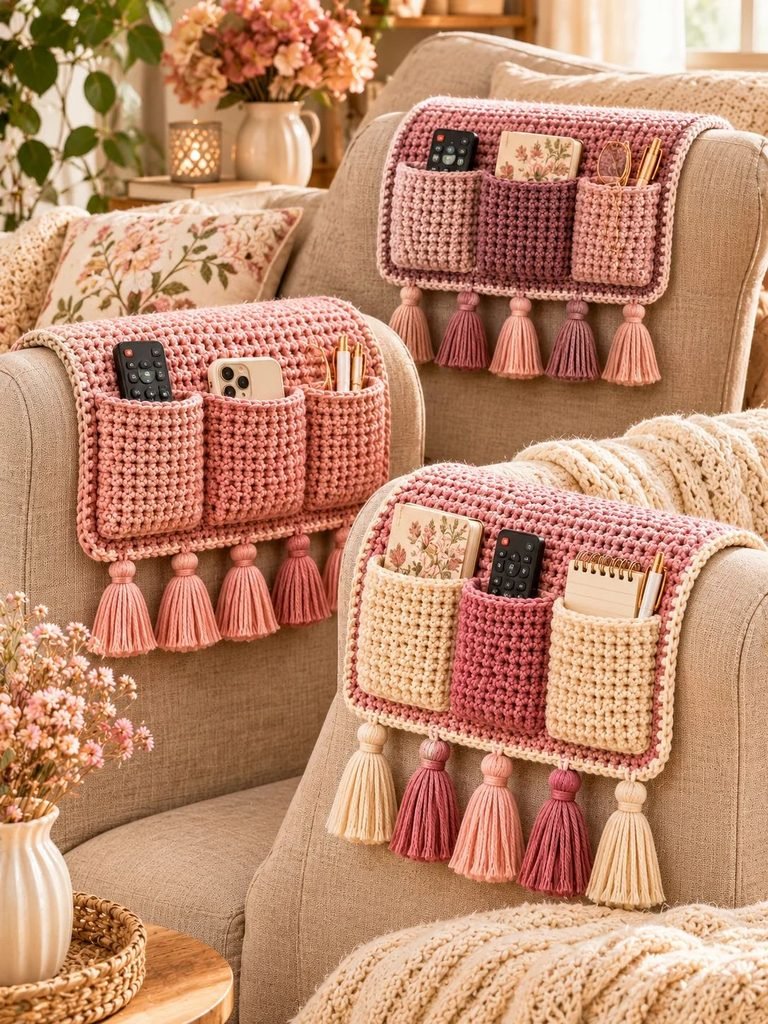
One of the best things about making your own crochet organizer is that you can change the design to suit your home.
Here are a few ideas I love.
1. Create an All-Pink Organizer
Use blush pink for the main panel, dusty rose for the pockets, and a deeper rose shade for the border.
This gives the finished piece a coordinated, feminine appearance without making it too colourful.
2. Add More Storage Pockets
If you have several remotes or small accessories, you can add an extra pocket.
You could also divide one larger pocket into two smaller sections by sewing a vertical line down the centre.
3. Add a Small Tablet Pocket
For a tablet, create a wider and deeper pocket.
Measure your device first and allow a little extra room so it slides in and out comfortably.
Make sure the pocket is securely attached and supported by a sturdy panel.
4. Use Different Crochet Textures
You do not have to use the same stitch throughout the organizer.
Try alternating regular half double crochet rows with back-loop-only rows to create a beautiful ribbed texture.
You could also use single crochet for the pockets if you prefer a firmer fabric.
5. Add Wooden Buttons
A few decorative wooden buttons can create a pretty cottage-style appearance.
You can attach them to the pocket fronts as decoration, keeping them away from areas where they might catch on your belongings.
Tips for Making a Sturdy Crochet Couch Caddy

A sofa organizer needs to be practical, not just pretty. Here are some helpful tips to make yours last.
Choose a sturdy yarn.
Cotton or a durable cotton blend is a great choice because it creates a fabric with good structure.
Keep your tension consistent.
Loose stitches can make the pockets stretch too much when filled. Try to maintain even tension throughout the project.
Reinforce the pocket corners.
The bottom corners experience the most pulling when you place items inside. Sew them securely and consider adding a few extra reinforcing stitches.
Measure before attaching the pockets.
This prevents the pockets from ending up too close together or too near the edge of the panel.
Avoid overfilling the pockets.
A crochet organizer is best for lightweight everyday items. Heavy books and large electronic devices may stretch the fabric over time.
Check the fit regularly.
Before finishing, place the organizer over your sofa arm and check that it sits comfortably without sliding.
Common Crochet Sofa Organizer Mistakes to Avoid
Even a simple crochet project can have a few little challenges. Here are some things to watch out for.
Making the panel too short
If the panel is too short, it may not hang properly over your sofa arm. Measure the full distance around the armrest before starting.
Using yarn that is too stretchy
Very stretchy yarn can cause the pockets to sag when filled. Choose a yarn with enough structure to hold its shape.
Sewing the pockets too close together
Leaving a little space between pockets makes the organizer easier to use and gives it a cleaner appearance.
Making the pockets too shallow
Shallow pockets may not hold remotes or phones securely. Aim for a depth of approximately 5–7 inches, depending on what you want to store.
Forgetting to weave in loose ends
Take your time finishing the yarn ends. This makes the organizer look neater and helps prevent unraveling.
How to Care for Your Crochet Sofa Organizer
With a little care, your handmade sofa organizer can remain beautiful and useful for a long time.
Always check the yarn manufacturer’s washing instructions before cleaning.
For washable cotton yarn, gentle handwashing in cool or lukewarm water is usually a good option.
Avoid twisting or wringing the crochet fabric.
Instead, gently press out excess water using a clean towel and lay the organizer flat to dry.
Reshape the pockets while the piece is still damp and allow everything to dry completely before placing it back on your sofa.
If you notice any loose stitches or tassels, repair them promptly.
Frequently Asked Questions
1. Is a crochet sofa organizer suitable for beginners?
Yes! This design uses basic crochet stitches, including single crochet and half double crochet. If you understand how to crochet in rows and sew pieces together, you can work through this project.
2. What is the best yarn for a crochet sofa organizer?
Cotton yarn and cotton blends are excellent choices because they are durable and provide good stitch definition. Bulky yarn can also work well when you want a thicker, cozier organizer.
3. How many pockets should a sofa organizer have?
Three pockets are a lovely starting point. You can make more or fewer depending on your storage needs and the width of your sofa arm.
4. Can I make this organizer for a recliner?
Absolutely! Measure the armrest carefully and adjust the length and width of your main panel. Make sure the organizer does not interfere with any moving parts or reclining mechanisms.
5. Can I use leftover yarn?
Yes! This is a wonderful project for using leftover yarn. You can create colourful pockets and tassels while keeping the main panel in one coordinating shade.
6. How do I stop the organizer from sliding off the sofa?
Make sure the panel fits snugly over the armrest. A non-slip fabric backing or discreet, removable furniture-safe grip strips can also help, provided they are suitable for your sofa upholstery.
7. Can I sell finished crochet sofa organizers?
You can sell finished items made from your own original design, subject to any applicable pattern or yarn licensing terms. If you purchase someone else’s PDF pattern, always check the designer’s specific terms before selling finished products.
Final Thoughts
A crochet sofa organizer is one of those little home projects that makes everyday living feel a bit more special. I love how something as simple as a rectangular crochet panel and a few pockets can turn an ordinary sofa arm into a useful storage space.
The blush pink and dusty rose colour combination gives this design a soft, feminine finish, while the little tassels add just enough personality to make it feel special.
Whether you make one for your own living room, create a matching set for your favourite armchairs, or crochet one as a thoughtful handmade gift, it is a project that brings together creativity and practicality.
So grab your favourite yarn, choose your prettiest shades of pink, and enjoy making something beautiful that you can use every day!
Happy crocheting! 🧶💕