Interlocking Block Stitch: Reversible Crochet That Looks the Same on Both Sides
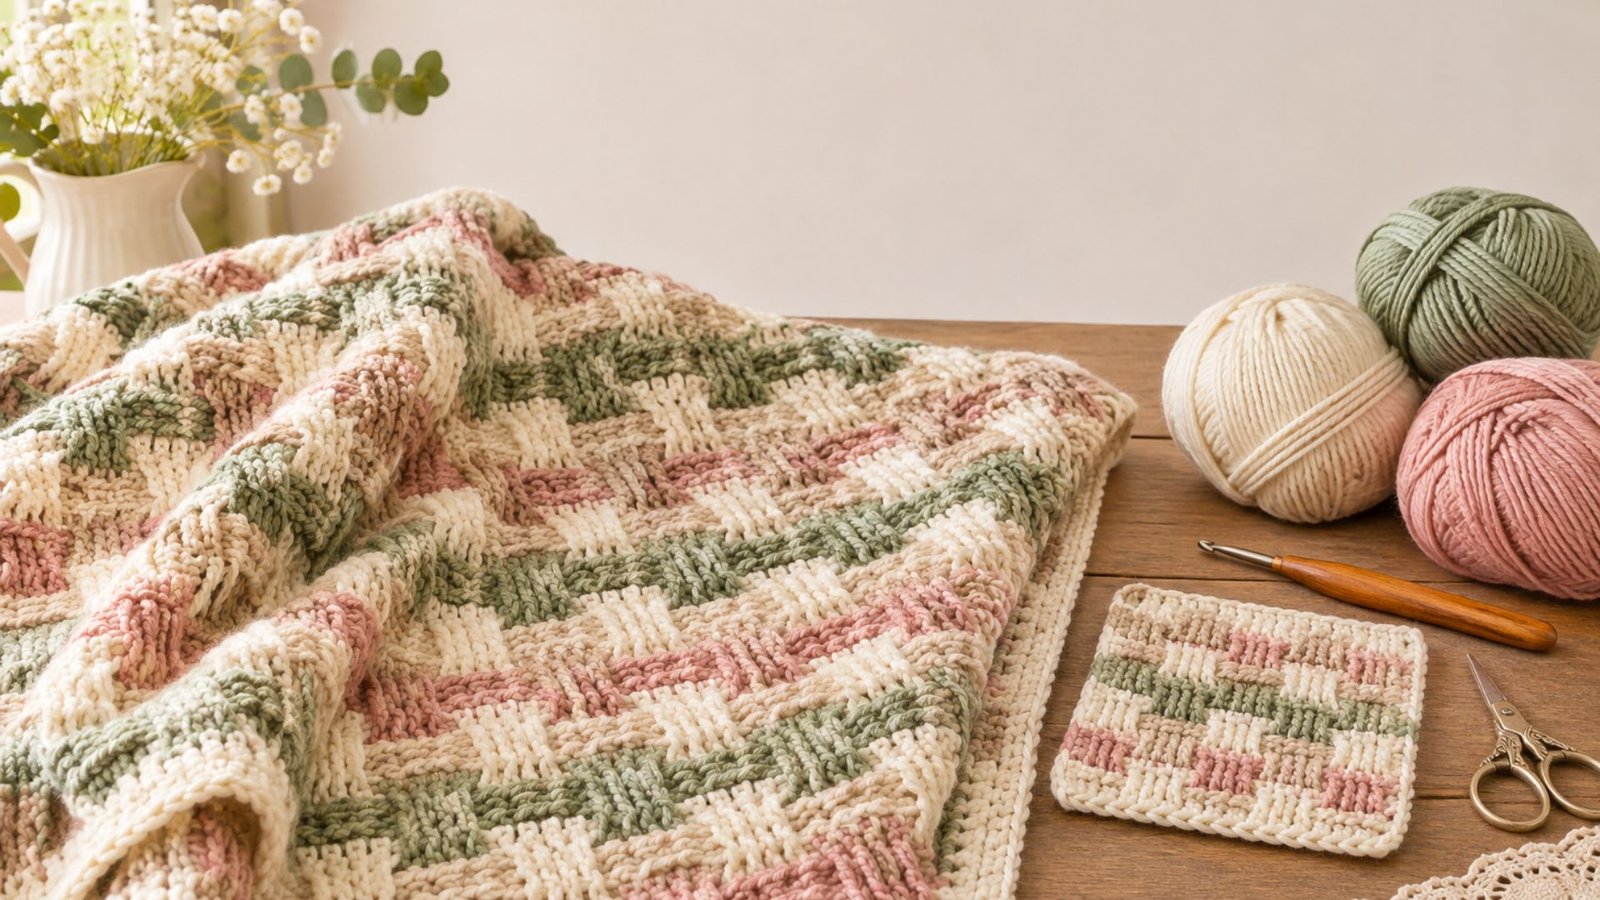
The Interlocking Block Stitch is a beautiful crochet technique that creates a lovely textured fabric with a neat, woven appearance.
What I especially love about this stitch is that both sides look almost identical, which makes it perfect for projects where you want your finished work to look just as pretty from every angle.
Whether you’re making a cozy blanket, a stylish scarf, a cushion cover, or a beautiful handmade gift, this stitch adds a little something special without requiring complicated techniques.
Today, I’ll walk you through everything you need to know, from the materials and basic stitches to the step-by-step instructions and helpful tips.
What Is the Interlocking Block Stitch?

The Interlocking Block Stitch is a crochet stitch pattern that combines simple crochet stitches to create an attractive arrangement of interlocking blocks. The result is a fabric with a lovely woven texture and a balanced appearance on both sides.
Unlike many textured crochet stitches that have a clear right side and wrong side, this pattern is reversible. That means you don’t have to worry about which side is facing out when using your finished project.
The stitch gets its distinctive appearance from the way the blocks are arranged and connected across each row. Depending on the yarn and hook you choose, the texture can look delicate and subtle or more defined and chunky.
It’s a particularly lovely option when you want something more interesting than basic single crochet or double crochet but don’t want to spend hours learning complicated stitch combinations.
Why You’ll Love the Interlocking Block Stitch
There are so many reasons to add this stitch to your crochet collection. Here are a few things that make it worth learning.
- Reversible texture: Both sides have a beautiful, coordinated appearance, making it ideal for blankets, scarves, and other projects that can be viewed from either side.
- Beautiful definition: The interlocking blocks create a structured texture that looks more complicated than it actually is.
- Versatile design: You can use it for home décor, accessories, and thoughtful handmade gifts.
- Great for stash-busting: It’s an excellent opportunity to experiment with different yarn colours and use up some of your favourite leftover yarn.
- Customisable appearance: Changing your yarn weight or colour combination can completely transform the finished fabric.
- Lovely handmade finish: The stitch creates a polished appearance that works beautifully for both everyday projects and special gifts.
The best part is that once you understand the stitch repeat, the pattern becomes much easier to follow.
Materials You’ll Need
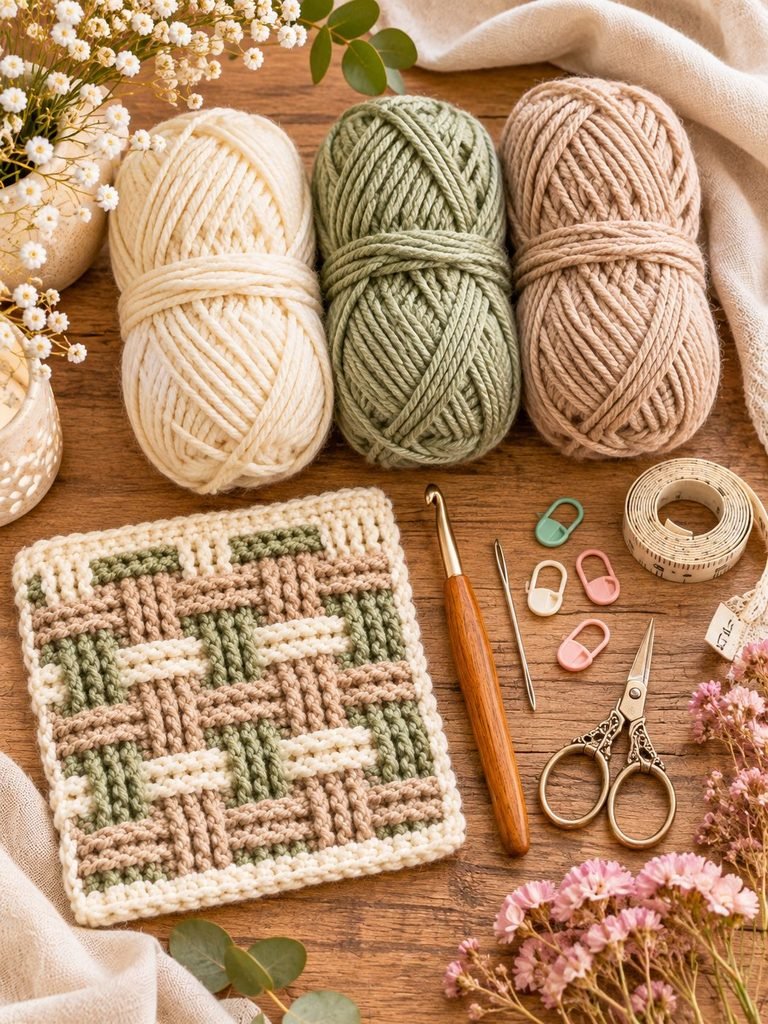
Before getting started, gather your supplies. You don’t need anything particularly fancy for this project.
| Material | Recommendation |
|---|---|
| Yarn | Worsted-weight yarn for a defined texture |
| Crochet hook | Size recommended on your yarn label |
| Scissors | For trimming yarn ends |
| Tapestry needle | For weaving in loose ends |
| Stitch markers | Helpful for marking the beginning and end of rows |
| Measuring tape | For checking your finished dimensions |
My yarn recommendation: I would start with a smooth, medium-weight yarn in a light or neutral shade. Cream, ivory, dusty pink, sage green, and oatmeal are all beautiful choices because they make the stitch definition easy to see.
Avoid very fluffy or heavily textured yarn when learning the pattern, as it can make it harder to identify individual stitches.
Understanding the Interlocking Block Stitch Pattern
Before we begin, there are two important things to understand about this stitch.
First, the Interlocking Block Stitch is worked in a repeating pattern of two rows once the foundation rows are complete.
Second, some of your double crochet stitches will be worked into stitches from two rows below. This is what creates the interlocking appearance and helps produce the distinctive reversible fabric.
The original technique also uses three colours to create a lovely plaid-inspired effect. However, you can use two colours or even one colour if you prefer a more subtle look. Free crochet stitch tutorial+1
How to Crochet the Interlocking Block Stitch Step by Step
Let’s work through the pattern slowly. I’ll explain each row so you can follow along without feeling overwhelmed.
Step 1: Make Your Foundation Chain
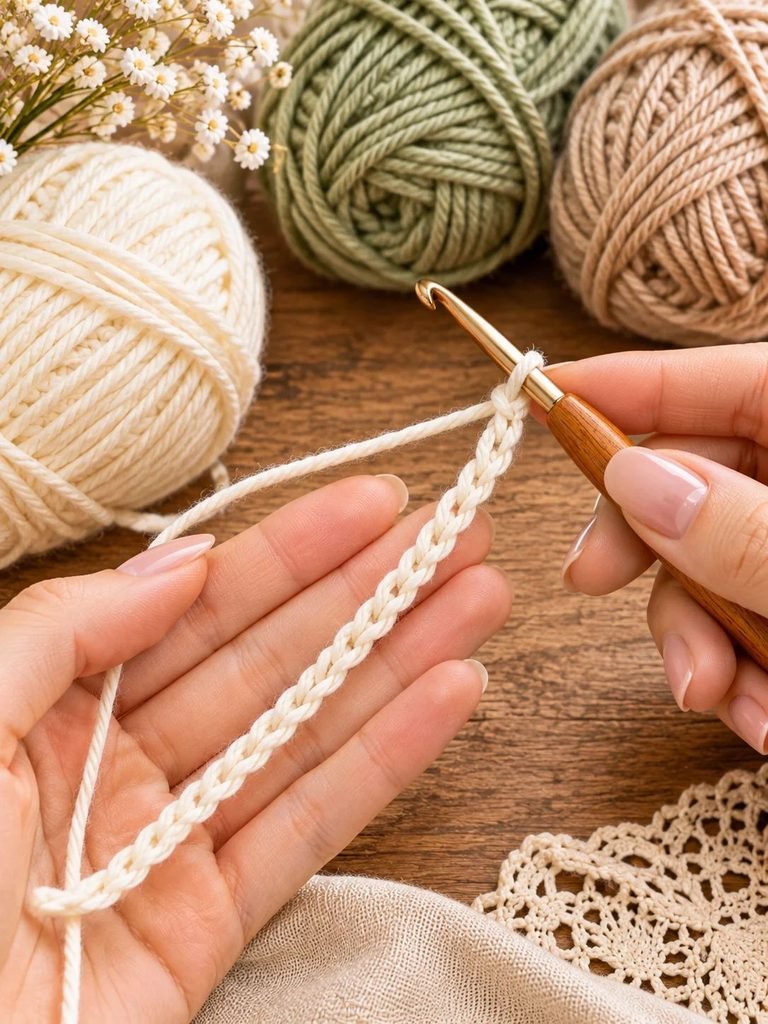
Start with your chosen yarn and crochet hook.
For this pattern, your foundation chain needs to be a multiple of six, plus five extra chains.
Your starting chain formula is:
Multiple of 6 + 5
For example:
- 6 × 3 + 5 = 23 chains
- 6 × 4 + 5 = 29 chains
- 6 × 5 + 5 = 35 chains
- 6 × 6 + 5 = 41 chains
If you’re practising for the first time, I recommend starting with 29 chains. This gives you enough room to see how the blocks form without creating an overly large swatch.
Remember that your foundation chain determines the width of your finished fabric, so choose a multiple that suits your project.
Read How to Crochet a Double-Thick Potholder – Thermal Stitch Single Crochet, Free Pattern
Step 2: Work Row 1
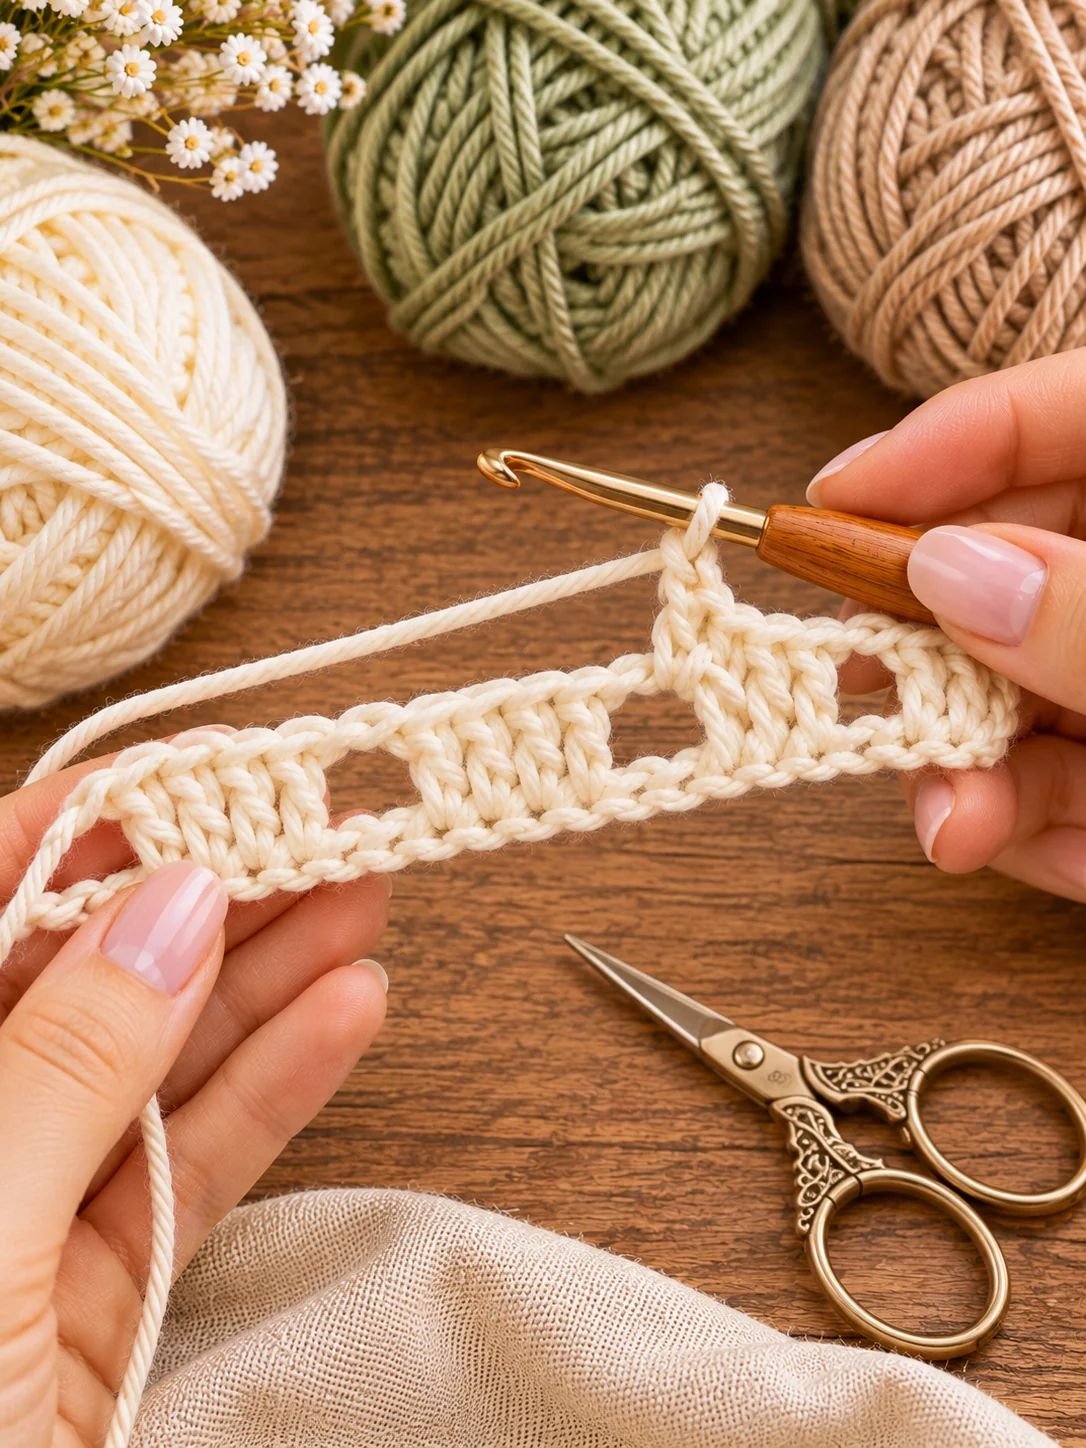
Using your first yarn colour, begin by making a double crochet into the fourth chain from your hook.
Continue with another double crochet in the next chain.
You should now have three double crochets in total when you include the first three chains, which count as your first double crochet.
Next:
- Chain three.
- Skip the next three chains.
- Make one double crochet in each of the next three chains.
- Chain three again.
- Skip the next three chains.
- Make three double crochets in the next three chains.
Continue repeating this sequence across the foundation chain.
Your row should finish with a group of three double crochets.
At the end of the row, introduce your second colour by making a chain with the new yarn. Tighten the yarn gently to secure the colour change.
A little tip: Don’t cut your first colour. You’ll be picking it up again later, which helps reduce the number of loose yarn ends you need to weave in.
Step 3: Work Row 2
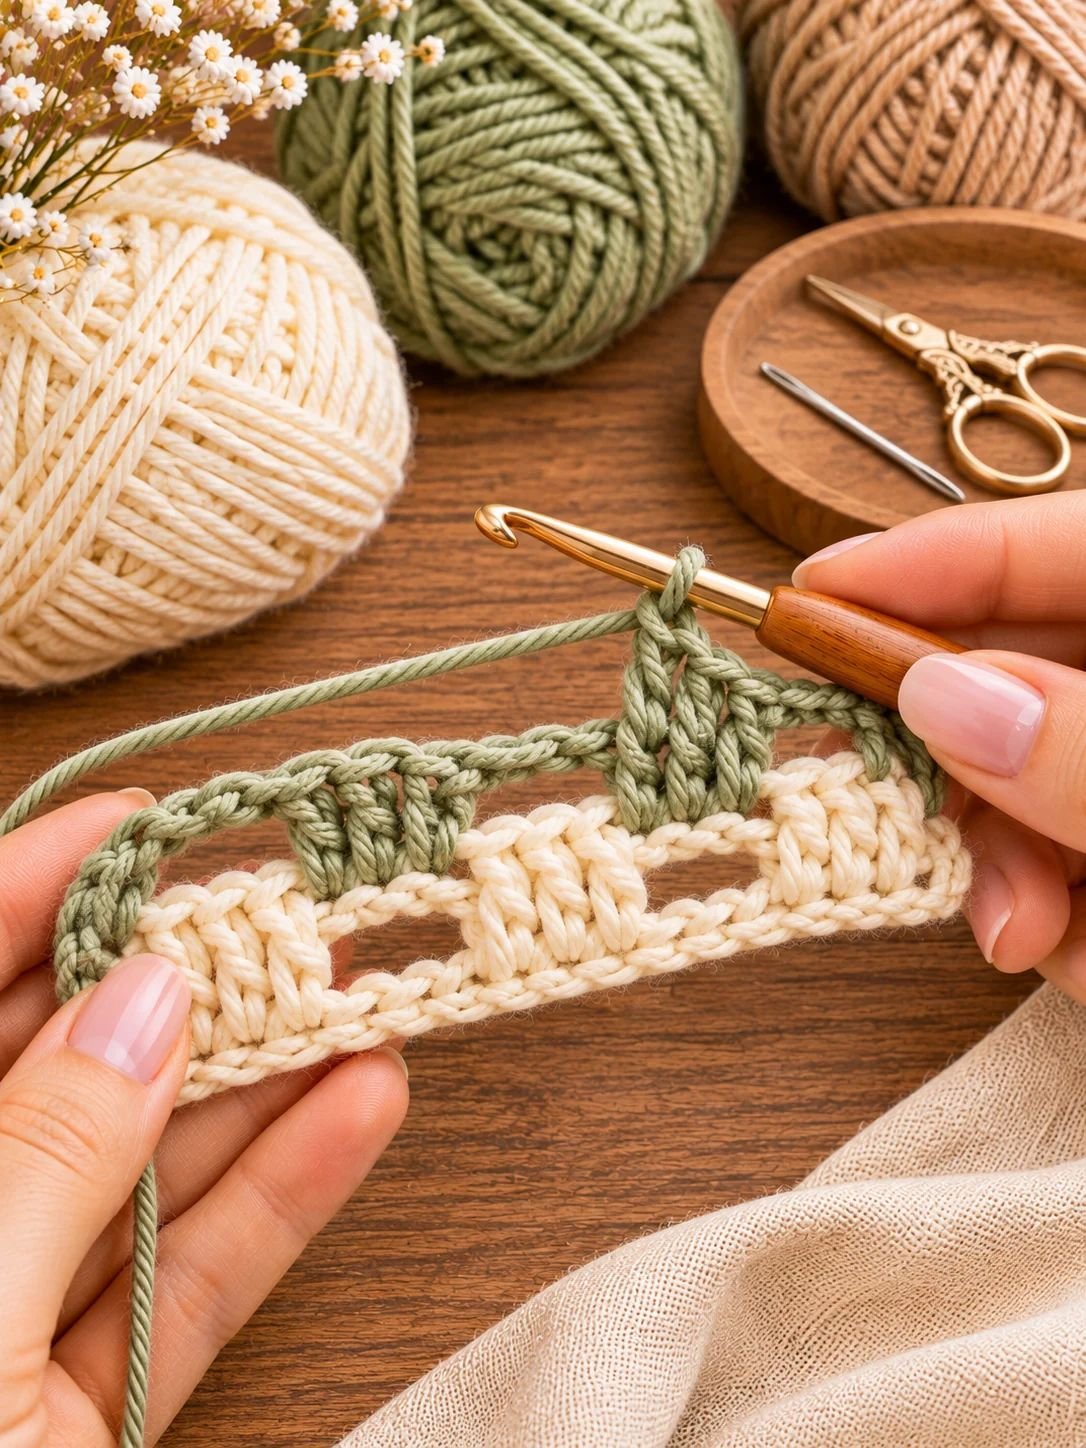
Now it’s time to create the first interlocking effect.
Using your second colour, chain three and turn your work. This turning chain counts as your first double crochet.
You will now work three double crochets into the foundation chain spaces beneath the skipped stitches of the previous row.
Here’s how:
- Skip the group of three double crochets from Row 1.
- Insert your hook into the first of the three skipped foundation-chain stitches beneath that group.
- Make a double crochet.
- Make one double crochet in each of the next two foundation-chain stitches.
- Chain three.
- Skip the next group of three double crochets from Row 1.
- Make three double crochets into the next three foundation-chain stitches.
Continue this sequence across the row.
When you reach the end, make your final group of three double crochets, chain three, and finish with a slip stitch into the turning chain.
Don’t worry if the fabric looks a little unusual at this stage. The beautiful woven appearance becomes much clearer as you add more rows.
Read The All-Purpose Waffle Stitch Crochet Dishcloth Pattern
Step 4: Introduce Your Third Colour and Work Row 3
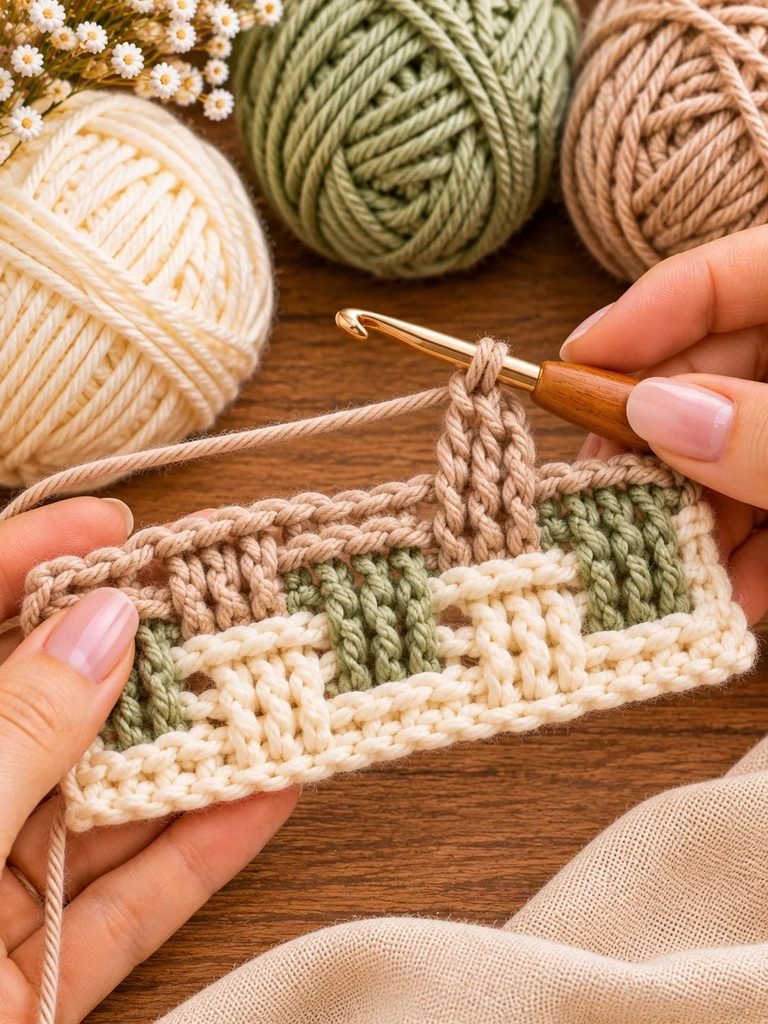
For Row 3, pick up your third yarn colour.
You can do this in the same way you introduced the second colour. Make a chain with the new yarn, gently tighten the previous colour, and leave it attached for later use.
Chain three and turn your work.
This time, instead of working into the foundation chain, you’ll work your double crochet stitches into the corresponding double crochet stitches from Row 1, which is now two rows below your hook.
Follow these instructions:
- Make two double crochets into the first two corresponding double crochet stitches from Row 1.
- Chain three.
- Skip the next group of three double crochets in the row immediately below.
- Make three double crochets into the three corresponding double crochet stitches from Row 1.
- Chain three.
- Repeat the same sequence across the row.
Continue until you reach the end, finishing with three double crochets worked into the final group of stitches two rows below.
At the end of the row, introduce your first yarn colour again.
Why are we working two rows below?
This is the little trick that gives the Interlocking Block Stitch its name. By placing your stitches into the older row, the new blocks sit neatly against the previous colour and create that lovely interwoven appearance.
Step 5: Work Row 4

Now you’re ready for the fourth row.
Pick up your first yarn colour, chain three, and turn your work.
Skip the group of three double crochets from the previous row and work three double crochets into the corresponding group of stitches two rows below.
Next:
- Chain three.
- Skip the next three double crochets in the row immediately below.
- Make three double crochets into the corresponding stitches two rows below.
- Chain three again.
- Repeat the pattern across the row.
At the end, finish with your final group of three double crochets.
Chain three and make a slip stitch into the turning chain to complete the row.
You should now start seeing the interlocking block pattern taking shape.
Step 6: Repeat Rows 3 and 4
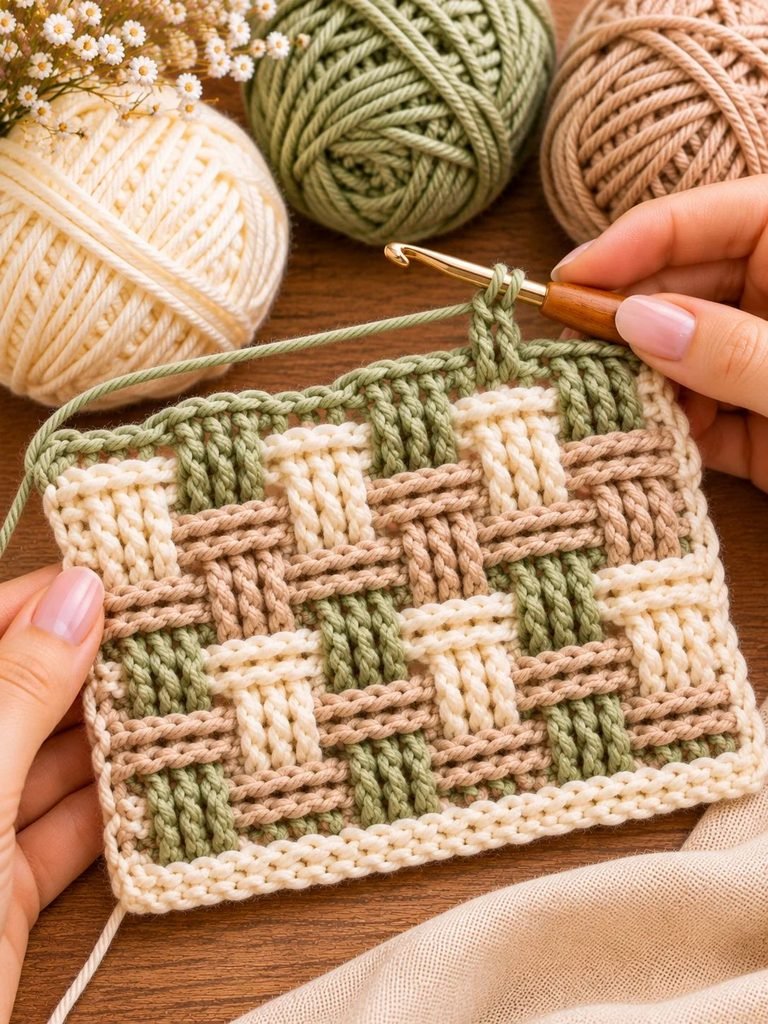
Once you’ve completed the first four rows, the rest of the pattern becomes much easier.
Simply repeat Rows 3 and 4, changing your yarn colour as you go.
The colour sequence is:
- Row 1: Colour A
- Row 2: Colour B
- Row 3: Colour C
- Row 4: Colour A
- Row 5: Colour B
- Row 6: Colour C
- Row 7: Colour A
Continue alternating the colours in the same order until your project reaches the desired length.
You don’t need to cut your yarn after every row. Leave the colours attached and pick them up again when needed, keeping the unused yarn along the side of your work.
This is particularly helpful when making larger projects because it saves time and reduces the number of ends you’ll need to weave in.
How to Finish the Interlocking Block Stitch Neatly
Once you’ve reached your desired length, you’ll need to finish the final row slightly differently.
Instead of leaving chain-three spaces between your blocks, you’ll use single crochet stitches to create a neat, solid edge.
Here’s how to do it:
- Choose the yarn colour you’d like for your final row.
- If your previous row is worked like Row 4, chain one and turn your work.
- Make one single crochet into each of the first three double crochets.
- Work three double crochets into the corresponding stitches two rows below.
- Make three single crochets into the next group of double crochets from the previous row.
- Continue alternating between three single crochets and three double crochets worked two rows below.
- Finish the row following the same sequence that applies to your final pattern repeat.
If your previous row follows the Row 3 arrangement, the finishing sequence begins slightly differently: chain three, work two double crochets into the corresponding stitches two rows below, and then work three single crochets into the next group.
Once you’ve completed the final row, fasten off your yarn and weave in all the loose ends with a tapestry needle.
Take a moment to check the edges and gently straighten the fabric.
And that’s it! You now have a beautiful Interlocking Block Stitch swatch.
Tips for Getting Beautiful, Even Crochet Blocks
Even though this stitch uses basic crochet techniques, a few little details can make a big difference in how your finished fabric looks.
Here are some things I’d recommend paying attention to as you practise.
1. Keep your tension consistent
Try to maintain an even tension throughout every row. If your chain spaces are too tight, your fabric may begin to pull inward. If they’re too loose, the blocks might look uneven.
I like to take my time during the first few rows until I find a comfortable rhythm.
2. Don’t pull your working yarn too tightly
When making double crochet stitches two rows below, allow the loop to come up to a comfortable height. Pulling it too tightly can make the fabric look puckered and affect the shape of your blocks.
3. Use stitch markers when necessary
If you’re new to this technique, place a stitch marker at the beginning and end of your rows. This makes it easier to keep track of your work and avoid accidentally adding or losing stitches.
4. Choose colours that complement each other
The Interlocking Block Stitch is especially beautiful when you use multiple colours. Try combining soft neutrals with gentle accent shades.
Some combinations I particularly love include:
- Cream, dusty pink, and oatmeal.
- Sage green, ivory, and beige.
- Terracotta, warm white, and chocolate brown.
- Dusty blue, soft grey, and cream.
- Mustard yellow, ivory, and warm taupe.
5. Check both sides as you work
One of the lovely things about this stitch is its reversible appearance. Turn your work occasionally to check that both sides look neat and that your blocks are forming consistently.
Common Mistakes When Crocheting the Interlocking Block Stitch
If your first attempt doesn’t look quite like the examples, don’t worry. This stitch has a small learning curve, particularly when you start working into stitches from two rows below.
Here are some common problems and how to fix them.
| Problem | Possible cause | How to fix it |
|---|---|---|
| Uneven blocks | Inconsistent tension | Keep your stitches at a similar height |
| Fabric pulling inward | Chain spaces are too tight | Loosen your chain-three spaces |
| Gaps look too large | Working loops are too loose | Adjust your tension gently |
| Blocks don’t line up | Incorrect stitch placement | Check the stitches two rows below |
| Edges look uneven | Missed or extra stitches | Count your groups regularly |
| Colours look messy | Loose colour changes | Secure and carry yarn neatly |
Why Does My Interlocking Block Stitch Look Different on One Side?
This is a common question, especially when you’re learning the technique.
The stitch is designed to create a reversible fabric, but the two sides may not look perfectly identical if your tension changes or if your stitches aren’t placed correctly.
Make sure you’re following the correct two-row repeat and working into the appropriate stitches from two rows below.
Also, remember that the first few rows are foundation rows. The finished reversible appearance becomes more noticeable as the pattern develops.
Why Are My Blocks Not Lining Up?
If your blocks look scattered rather than neatly interlocked, check where you’re inserting your hook.
It’s important to distinguish between the stitches in the row immediately below and the corresponding stitches two rows below.
This is the main technique behind the pattern. Once you become comfortable identifying those stitches, the arrangement becomes much easier to follow.
Beautiful Projects You Can Make With the Interlocking Block Stitch
One of my favourite things about learning a new crochet stitch is discovering all the different ways I can use it.
The Interlocking Block Stitch creates a solid, durable fabric that isn’t overly thick, making it suitable for several handmade projects. Free crochet stitch tutorial+1
Here are some lovely ideas to inspire your next project.
1. Cozy Crochet Blankets
A crochet blanket is probably one of the best ways to show off this stitch.
The repeating blocks create a beautiful textured appearance, while the reversible design means you don’t have to worry about which side is facing up.
Try using cream, beige, and sage green for a soft, calming blanket that would look lovely in a living room or bedroom.
2. Handmade Crochet Scarves
If you enjoy making handmade accessories, consider using this stitch for a scarf.
Because both sides look beautiful, you can wear the scarf loosely around your neck without worrying about the back showing.
Choose a soft yarn that feels comfortable against your skin, and experiment with two or three complementary colours.
3. Decorative Cushion Covers
This stitch would also make a beautiful cushion cover.
The structured texture gives cushions a lovely handmade finish, while the colour combinations allow you to create something that matches your home décor.
You can make a simple rectangular panel, fold or join it around a cushion insert, and finish the edges neatly.
4. Crochet Washcloths
For a smaller project, try making a washcloth using cotton yarn.
The solid fabric is useful for everyday household items, and you can make several washcloths in different colour combinations.
I would recommend cotton because it’s practical for items that need regular washing and drying.
5. Beautiful Handmade Cardigans
If you’re feeling a little more adventurous, you could use this stitch to create a cardigan.
The woven appearance gives handmade clothing an interesting finish, and the reversible fabric can be useful for garments where both sides might occasionally show.
Just remember to make a generous gauge swatch first so you can calculate the correct measurements.
How to Choose the Best Yarn for This Stitch
Your yarn choice can completely change the appearance of the Interlocking Block Stitch.
Since the pattern creates a structured fabric, I recommend choosing a yarn that allows the stitches to remain visible.
Here are some options to consider:
Cotton yarn: A wonderful choice for washcloths, decorative items, and lightweight accessories. Cotton gives the blocks clear stitch definition.
Acrylic yarn: A practical option for blankets, scarves, and everyday projects. It’s available in many colours and is often easy to care for.
Wool or wool blends: These are lovely for warmer scarves, blankets, and winter accessories. They can give the finished fabric a softer, cozier feel.
Cotton-acrylic blends: These offer a nice balance of stitch definition, softness, and versatility.
One important thing to remember is that this stitch creates a relatively dense fabric. If you want a softer drape, try a slightly larger hook and make a gauge swatch before starting your project.
Frequently Asked Questions
Is the Interlocking Block Stitch beginner-friendly?
Yes! It’s suitable for adventurous beginners who already know how to make single crochet and double crochet stitches.
The only part that may take a little practice is working double crochet stitches into the fabric two rows below. Once you understand where to insert your hook, the repeating pattern becomes much easier.
Is the Interlocking Block Stitch reversible?
Yes. One of its most attractive features is that it looks the same on both sides, making it an excellent choice for blankets, scarves, and other projects where both sides are visible.
How many rows do I need to repeat?
After completing the initial foundation rows, you repeat Rows 3 and 4 throughout the project.
The pattern is based on a simple two-row repeat.
Can I crochet this stitch with one colour?
Absolutely! You don’t have to use multiple colours.
A single colour creates a lovely textured fabric that highlights the interlocking blocks. Using three colours simply gives the stitch a more noticeable plaid appearance.
Can I use more than three colours?
Yes! You can experiment with additional colours if you want a more colourful design.
However, I recommend choosing shades that work well together so the finished fabric doesn’t look too busy.
Is the Interlocking Block Stitch good for blankets?
Definitely. Its dense, durable construction and reversible appearance make it a lovely option for blankets and throws.
Choose a soft yarn and a suitable hook size to achieve a comfortable fabric.
Does this stitch use a lot of yarn?
It creates a fairly solid fabric, so it may use more yarn than an open, lacy stitch.
The exact amount depends on your yarn weight, hook size, tension, and project dimensions. Making a small gauge swatch is the best way to estimate your yarn requirements.
What is the difference between the Interlocking Block Stitch and the regular Block Stitch?
Although their names are similar, they create different fabrics.
The regular Block Stitch generally creates a more open, airy design with chain spaces and groups of double crochet stitches. The Interlocking Block Stitch creates a denser, woven-looking fabric using double crochet stitches worked into rows below. Free crochet stitch tutorial+1
Final Thoughts
The Interlocking Block Stitch is one of those crochet techniques that makes a handmade project feel a little more special.
I love how the blocks come together to create such a beautiful woven appearance, especially when you experiment with different yarn colours. And the fact that both sides look equally lovely makes it even better!
Whether you’re planning a cozy blanket, a handmade scarf, or a pretty cushion cover, this stitch is definitely worth adding to your crochet collection. Take your time with the first few rows, practise placing your stitches two rows below, and don’t be afraid to experiment with colour combinations.
Once you get comfortable with the repeating pattern, you’ll find so many lovely ways to use it. Happy crocheting!