Crochet Holly Garland with Red Berries
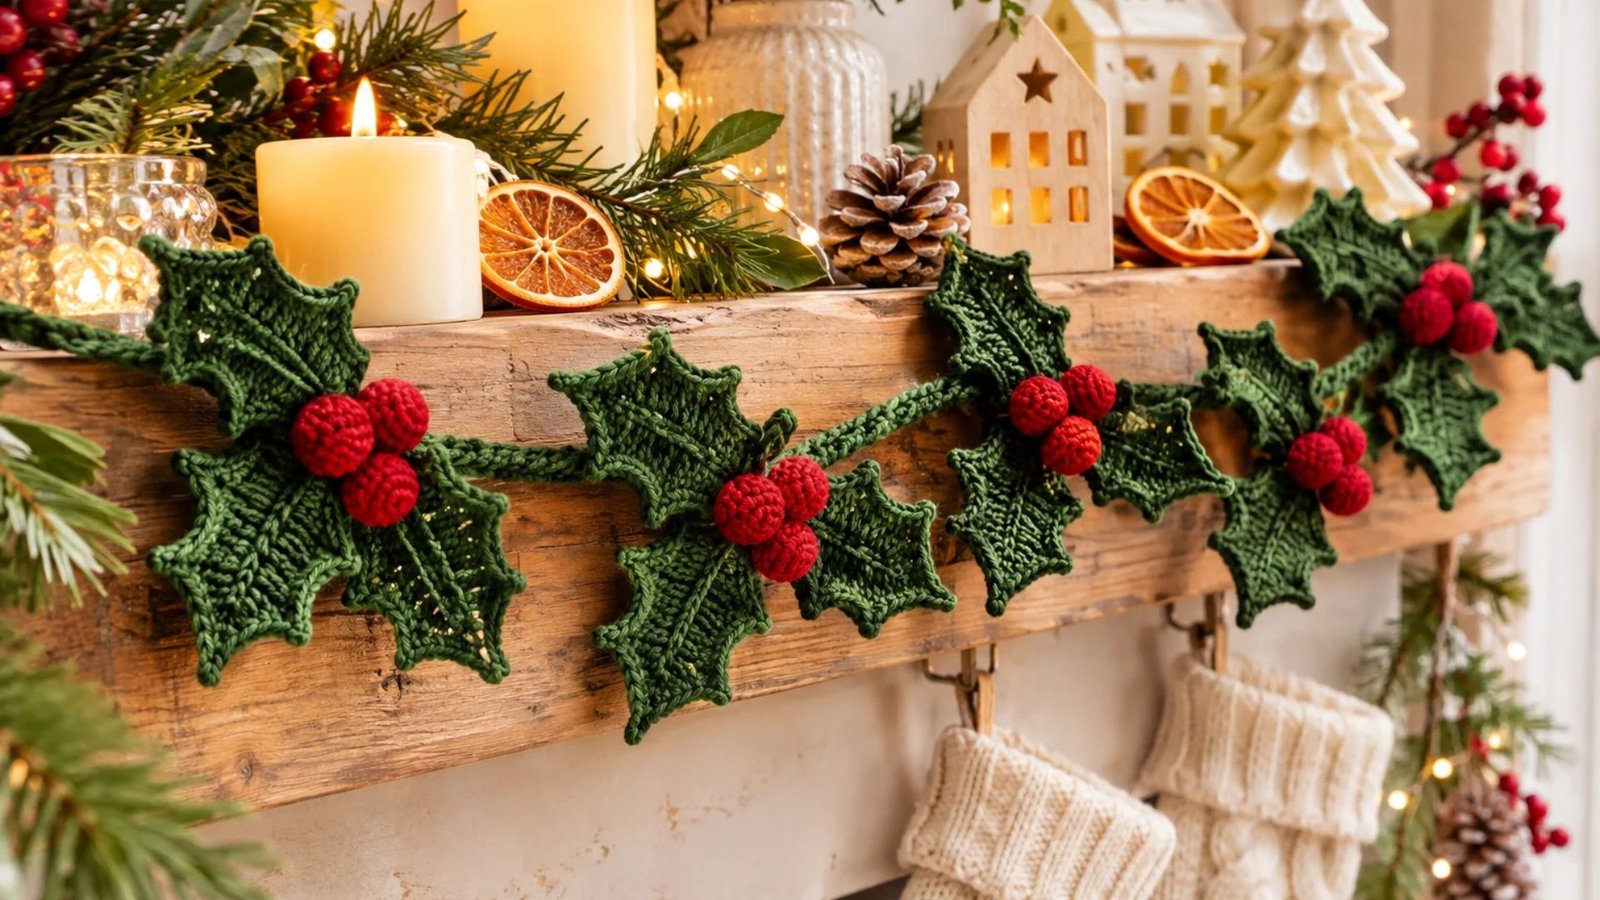
One of my favourite things about Christmas is bringing little handmade touches into my home, especially decorations that feel warm, thoughtful, and a little bit nostalgic.
A crochet holly garland with bright red berries is such a lovely way to add festive charm without spending too much on shop-bought decorations.
I love how the deep green leaves and cheerful red berries come together to create that classic Christmas look.
Whether you drape it across your fireplace, hang it along a staircase, or use it to decorate your Christmas table, this sweet crochet project is a beautiful way to make your home feel extra special for the holidays.
Why You’ll Love This Crochet Holly Garland

If you enjoy making your own Christmas decorations, this crochet holly garland is a project worth adding to your festive crafting list.
Here are a few reasons why I think you’ll love it:
- Beautiful traditional Christmas colours: The combination of rich green leaves and bright red berries creates a timeless festive look.
- Beginner-friendly techniques: You only need basic crochet stitches and a little patience to create the individual pieces.
- Easy to customise: You can make your garland short for a shelf or longer for a fireplace mantel.
- Budget-friendly: It uses relatively small amounts of yarn, making it a lovely stash-busting project.
- Perfect handmade gift: A finished garland makes a thoughtful Christmas present for friends and family.
The best part is that you can make the leaves and berries separately before joining everything together. This means you can crochet a few pieces whenever you have a spare moment and assemble the garland when you’re ready.
Materials You’ll Need

Before getting started, gather your crochet supplies. You don’t need anything particularly complicated for this project.
| Material | Purpose |
|---|---|
| Green DK yarn | Holly leaves |
| Red DK yarn | Holly berries |
| Crochet hook (3.5 mm) | Main crochet work |
| Yarn needle | Sewing and finishing |
| Scissors | Cutting yarn |
| Stitch markers | Keeping track of stitches |
| Polyester stuffing | Optional berry filling |
| Green yarn or cord | Joining the garland |
Choosing your yarn colours
For a traditional Christmas appearance, choose a deep forest green or holly green for the leaves and a rich cherry red for the berries.
You could also experiment with different shades:
- Dark emerald green with burgundy berries for an elegant appearance.
- Sage green with bright red berries for a softer cottagecore style.
- Traditional Christmas green with scarlet red for a classic festive look.
I recommend using a smooth DK-weight cotton or acrylic yarn so that the leaf shapes and berry details are easy to see.
Crochet Abbreviations
This pattern uses US crochet terminology.
| Abbreviation | Meaning |
|---|---|
| ch | Chain |
| sc | Single crochet |
| hdc | Half double crochet |
| dc | Double crochet |
| sl st | Slip stitch |
| inc | Increase (2 stitches in one stitch) |
| st | Stitch |
| sts | Stitches |
| MR | Magic ring |
| FO | Fasten off |
Skill level: Beginner to intermediate.
Finished size: Approximately 5–7 feet, depending on the number of leaves and berries you make.
Construction: Individual crocheted leaves and berries joined together to form a garland.
Step 1: Crochet the Holly Leaves
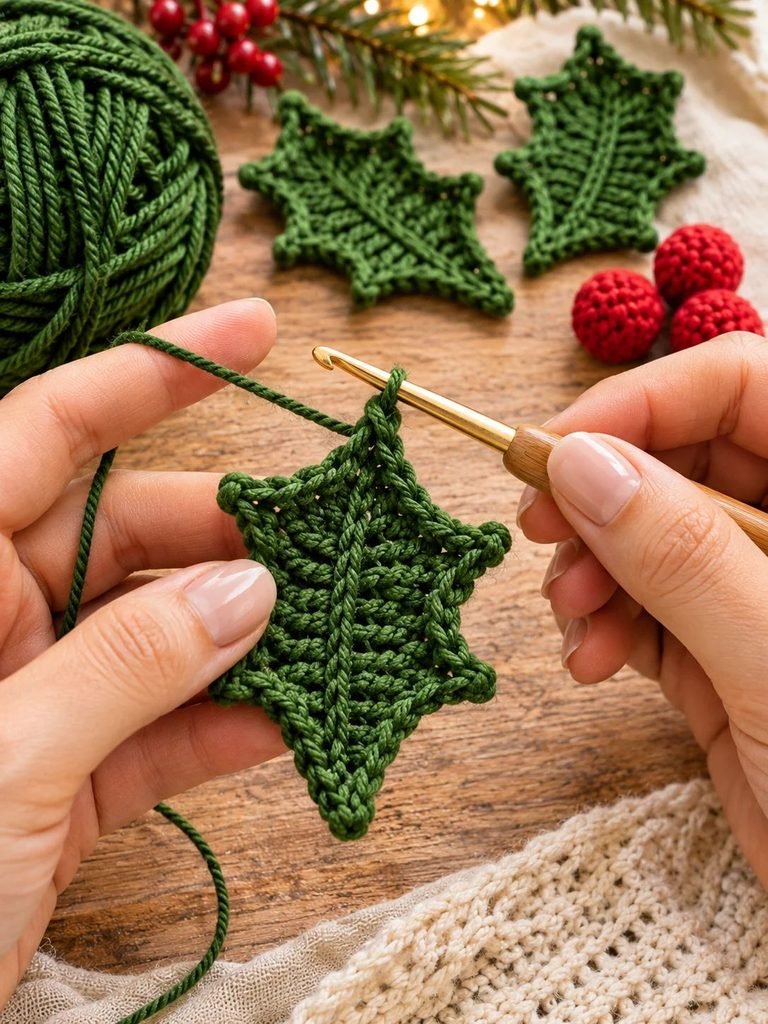
The holly leaves are the main feature of this garland. Their pointed edges give them that recognisable traditional Christmas appearance.
For a beautiful full garland, I recommend making between 12 and 18 leaves, depending on your preferred length.
Holly Leaf Pattern
Using green yarn:
Foundation
Chain 10.
Round 1:
Starting in the second chain from the hook:
- Sl st in the first chain.
- Sc in the next chain.
- Hdc in the next chain.
- Dc in the next 2 chains.
- Hdc in the next chain.
- Sc in the next chain.
- Sl st in the final chain.
You should now have worked along one side of the foundation chain.
Continue around the opposite side:
Work into the free loops on the other side of the foundation chain.
- Sl st in the first available loop.
- Sc in the next loop.
- Hdc in the next loop.
- Dc in the next 2 loops.
- Hdc in the next loop.
- Sc in the next loop.
- Sl st in the final loop.
This creates the basic leaf shape.
Creating the Pointed Holly Edges
To give your leaf a more realistic holly appearance, work a decorative edging around the outside.
At selected points along the leaf, create small pointed tips using a combination of chain stitches and slip stitches.
For example:
- Sl st into the edge.
- Ch 3.
- Sl st into the second chain from the hook.
- Sl st into the next chain.
- Sl st back into the leaf edge.
Repeat along the outer edge, spacing the points evenly to create a decorative holly outline.
Make sure the tips are arranged on both sides of the leaf rather than only along one edge.
Finish with a slip stitch and fasten off, leaving a long tail if you want to sew the leaf onto the garland cord.
Helpful tip: Keep your stitches relatively tight. This helps the leaves maintain their shape and prevents the pointed edges from looking floppy.
Step 2: Add Details to the Holly Leaves

Although the leaves already look pretty, adding a little detail makes them look even more beautiful.
To create a central vein:
- Thread a length of matching green yarn onto your yarn needle.
- Insert the needle at the base of the leaf.
- Bring it through the centre of the leaf.
- Continue stitching small straight stitches along the middle.
- Secure the yarn neatly at the back.
You can also use a slightly lighter shade of green to make the central vein stand out.
I love this little detail because it gives each leaf a more finished, handmade botanical appearance.
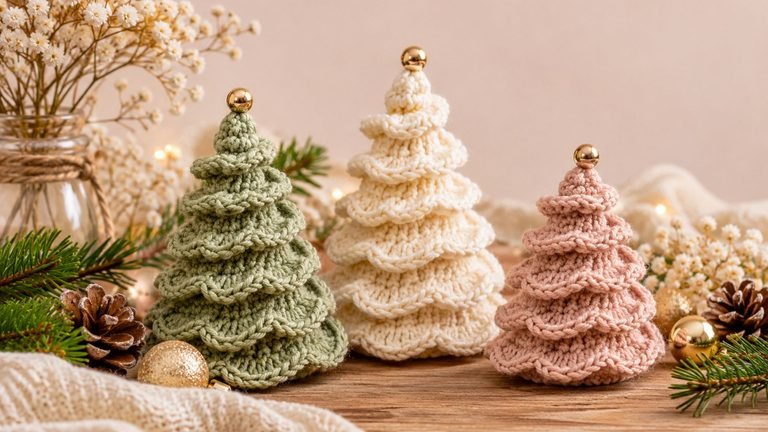
Read Mini Spiral Crochet Christmas Tree for the Holiday Table
Step 3: Crochet the Red Berries

Now for my favourite part: the little red berries!
These are what give the garland its lovely festive character. You can make them flat or slightly rounded. For this project, I recommend making small stuffed berries because they add texture and dimension.
Crochet Berry Pattern
Using red yarn:
Round 1:
- Make a magic ring.
- Work 6 sc into the ring.
- Pull the ring closed.
- Join with a sl st.
Round 2:
- Ch 1.
- Work 2 sc into each stitch around.
- You should have 12 stitches.
Round 3:
- Sc in each stitch around.
- You should have 12 stitches.
Round 4:
- Sc in the first stitch.
- Sc2tog in the next stitch.
- Repeat around.
- You should have 8 stitches.
Before closing, add a small amount of polyester stuffing if you want rounded berries.
Round 5:
– Sc2tog around until the opening closes.
Fasten off and weave in the yarn end securely.
Repeat until you have approximately 18–24 berries.
Helpful tip: Don’t overfill the berries. A little stuffing is enough to create a lovely rounded shape without making them look stretched.
Read How to Crochet a Double-Thick Potholder – Thermal Stitch Single Crochet, Free Pattern
Step 4: Arrange the Holly Leaves and Red Berries

Before joining everything together, arrange your finished leaves and berries on a flat surface.
This is a good opportunity to decide how you want your garland to look.
For a traditional holly arrangement, I recommend:
- Two green leaves placed at slightly different angles.
- Three red berries grouped together near the centre.
- Another leaf positioned underneath or beside the first two.
Repeat this arrangement along the length of your garland.
Try not to make every cluster look exactly the same. Slight variations in the angles of the leaves will make your finished decoration look more natural.
My styling tip: Place the berries close together in small clusters rather than spacing them individually. This gives the garland that recognisable holly-inspired appearance.
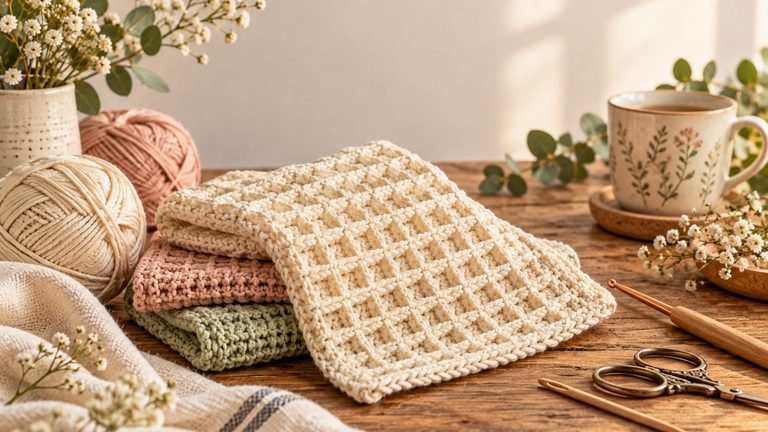
Read The All-Purpose Waffle Stitch Crochet Dishcloth Pattern
Step 5: Make the Garland Base

You have two options for creating the base of your garland.
Option 1: Crochet a simple chain
Using green yarn, make a foundation chain as long as you want your finished garland to be.
For a 5-foot garland, you can start with approximately 150–180 chains, depending on your yarn and tension.
Work a row of slip stitches along the chain if you want a slightly sturdier base.
Option 2: Use a twisted yarn cord
You can also create a simple twisted cord using several strands of green yarn.
This is a lovely option if you want the garland to have a more rustic, natural appearance.
Whichever method you choose, make sure the base is strong enough to support the crocheted leaves and berries.
Step 6: Attach the Holly Leaves and Berries

Now comes the fun part: bringing everything together!
Lay your garland base flat and begin attaching the holly clusters.
- Position your first leaf cluster near one end of the cord.
- Use your yarn needle and matching green yarn to sew the leaf bases securely onto the cord.
- Attach three red berries close to the centre of the leaves.
- Position your next cluster approximately 4–5 inches away.
- Continue along the garland until all your pieces are attached.
Make sure you sew through the base of each leaf rather than the pointed edges. This helps keep the leaves looking neat.
For the berries, use the yarn tails to secure them firmly to the garland.
Important: If you’re planning to hang your garland, make sure all the individual pieces are securely attached. This will help prevent them from falling off during decorating or storage.
Step 7: Finish and Shape Your Garland

Once everything is attached, take a few minutes to tidy up your work.
- Weave in any remaining loose yarn ends.
- Check that all the berries are securely attached.
- Adjust the leaves so their pointed tips are visible.
- Gently shape the leaves with your fingers.
- Make sure the garland hangs evenly.
If some leaves curl slightly, you can gently shape them with your hands.
Avoid using excessive heat, especially if you’ve chosen acrylic yarn.
Your crochet holly garland is now ready to decorate your home!
How to Style Your Crochet Holly Garland for Christmas
One of the things I love most about handmade Christmas decorations is how versatile they can be.
Here are a few lovely ways to display your finished garland.
1. Decorate Your Fireplace Mantel
Drape the garland loosely across your fireplace mantel and allow the leaves to hang naturally.
You can combine it with warm fairy lights, candles, pinecones, and small wooden Christmas decorations.
2. Add It to Your Christmas Staircase
Wrap the garland gently around your staircase railing.
The green leaves and red berries look especially beautiful against natural wood or a white banister.
3. Use It as a Christmas Table Decoration
Lay the garland along the centre of your dining table.
Add a few candles, small ornaments, and natural greenery for a beautiful festive centrepiece.
4. Decorate a Shelf or Window
A shorter garland looks lovely draped across a floating shelf or hanging along the bottom of a window.
It’s a simple way to add Christmas charm without overcrowding your space.
Helpful Tips for Making the Perfect Crochet Holly Garland
Even though this is a fairly straightforward project, a few little tricks can make a big difference to the finished result.
1. Use consistent yarn thickness
Try to use the same yarn weight for all your leaves and berries. This will help everything look balanced.
2. Make extra berries
I recommend making a few additional berries in case you decide that your garland needs more colour.
3. Keep the leaves slightly different
Not every leaf needs to be identical. Small variations make the decoration feel more natural.
4. Secure your stitches properly
Take your time when attaching the leaves and berries. Strong joins will help your garland last for many Christmas seasons.
5. Don’t overcrowd the clusters
Leave a little space between the holly arrangements so that the individual leaves remain visible.
Common Crochet Holly Garland Mistakes to Avoid
Here are a few things to watch out for while working on your project.
| Common mistake | How to avoid it |
|---|---|
| Leaves look too rounded | Add more defined pointed edging |
| Berries look flat | Add a little stuffing |
| Leaves curl too much | Check your tension and stitch count |
| Garland looks uneven | Measure the spacing between clusters |
| Berries become loose | Secure them with several stitches |
| Base stretches | Use a sturdy crochet cord |
Remember, handmade decorations don’t need to look perfectly identical. A little variation is part of their charm.
How to Care for and Store Your Crochet Holly Garland
With proper care, your crochet holly garland can become a Christmas decoration you’ll enjoy bringing out year after year.
Here are a few simple ways to look after it:
- Cleaning: Check the yarn care label before washing. Spot-clean gently when needed.
- Drying: Allow the garland to air-dry completely before storing.
- Storage: Keep it in a clean, dry storage container.
- Preventing tangles: Loosely coil the garland rather than folding it tightly.
- Protecting the shape: Store the leaves without placing heavy decorations on top.
If you’ve used acrylic yarn, avoid high heat when cleaning or shaping your garland.
Frequently Asked Questions
1. Is this crochet holly garland suitable for beginners?
Yes! Beginners who know basic crochet stitches can make this project. The leaves involve a little shaping, but the individual pieces are small and manageable.
2. How many holly leaves do I need?
For a garland measuring approximately 5–7 feet, start with 12–18 leaves and adjust the number depending on how full you want your decoration to look.
3. Can I make the berries without stuffing?
Absolutely! You can crochet flat berry circles if you prefer a simpler decoration. However, lightly stuffed berries create a more rounded and realistic appearance.
4. What yarn is best for crochet holly leaves?
DK-weight cotton or acrylic yarn works beautifully. Cotton gives the leaves a slightly firmer structure, while acrylic is soft, affordable, and available in many festive shades.
5. Can I make this garland longer?
Yes! Simply crochet additional leaf clusters and berries and extend the garland base to your preferred length.
6. Can I use this pattern to make individual Christmas decorations?
Definitely! You can make individual holly leaf and berry clusters to attach to Christmas wreaths, gift wrapping, stockings, napkin rings, and handmade Christmas cards.
Final Thoughts
I hope you enjoy making this crochet holly garland as much as I love the idea of having it as part of a cosy Christmas home. It’s one of those simple handmade decorations that brings so much personality to a space, and I especially love that you can customise the length, colours, and arrangement to suit your own style.
Whether you’re making one for your fireplace, decorating your Christmas table, or creating a thoughtful handmade gift, this little holly garland is a lovely way to bring some festive creativity into the season.
So grab your favourite green and red yarn, make yourself a cosy drink, and enjoy a little Christmas crocheting. Sometimes, it’s the smallest handmade details that make the holidays feel the most magical!