How to Make Candles for Beginners: Easy Step-by-Step Guide
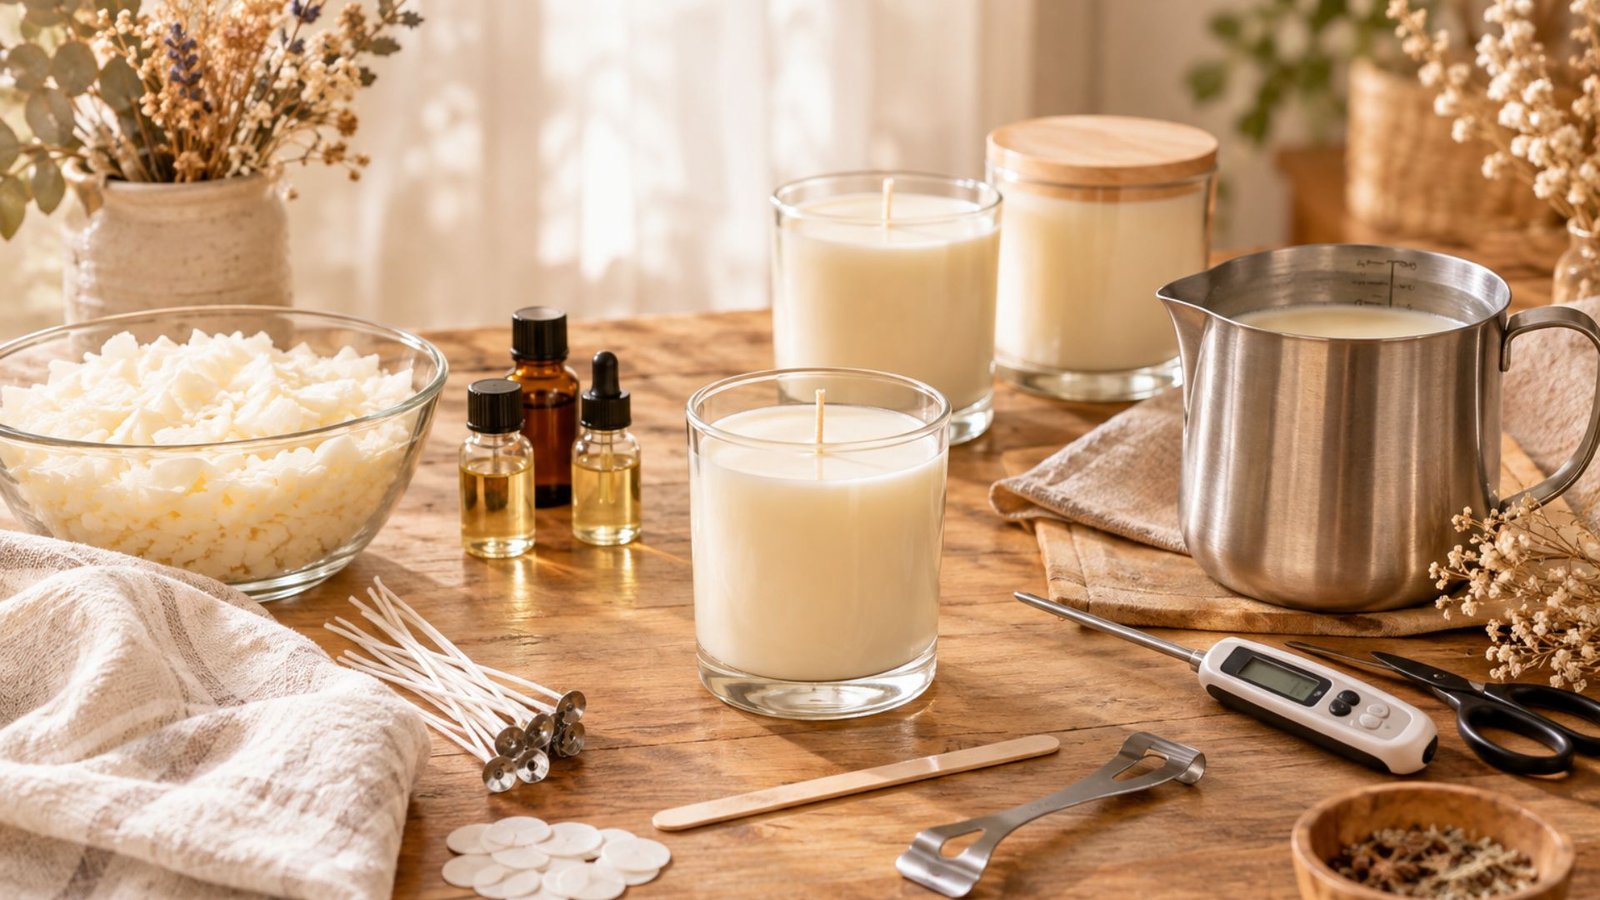
Making your own candles is one of those little DIY projects that feels surprisingly rewarding.
You choose the scent, pick a pretty container, melt the wax, and slowly watch everything come together into something you can actually use or give as a thoughtful handmade gift.
If you have been curious about candle making but worried that it might be complicated, I promise it is much more approachable than it looks.
With a few basic supplies, a little patience, and the right steps, you can make beautiful candles at home even if this is your very first attempt.
In this beginner-friendly guide, I’ll walk you through exactly how to make candles from start to finish, including what supplies you need, how to choose your wax and wick, how much fragrance to use, how to pour your candle, and what to do if something goes wrong.
What You’ll Learn in This Guide
Here’s what we’ll cover:
- What you need to make candles
- Which wax is easiest for beginners
- How to choose the right wick
- How to choose a candle container
- How much fragrance oil to use
- Step-by-step candle-making instructions
- How long to let your candle cure
- Common beginner candle-making mistakes
- How to fix tunneling, frosting, wet spots, and other problems
- Important candle safety tips
- How to make your homemade candles look beautiful
Let’s get started!
What You Need to Make Candles at Home
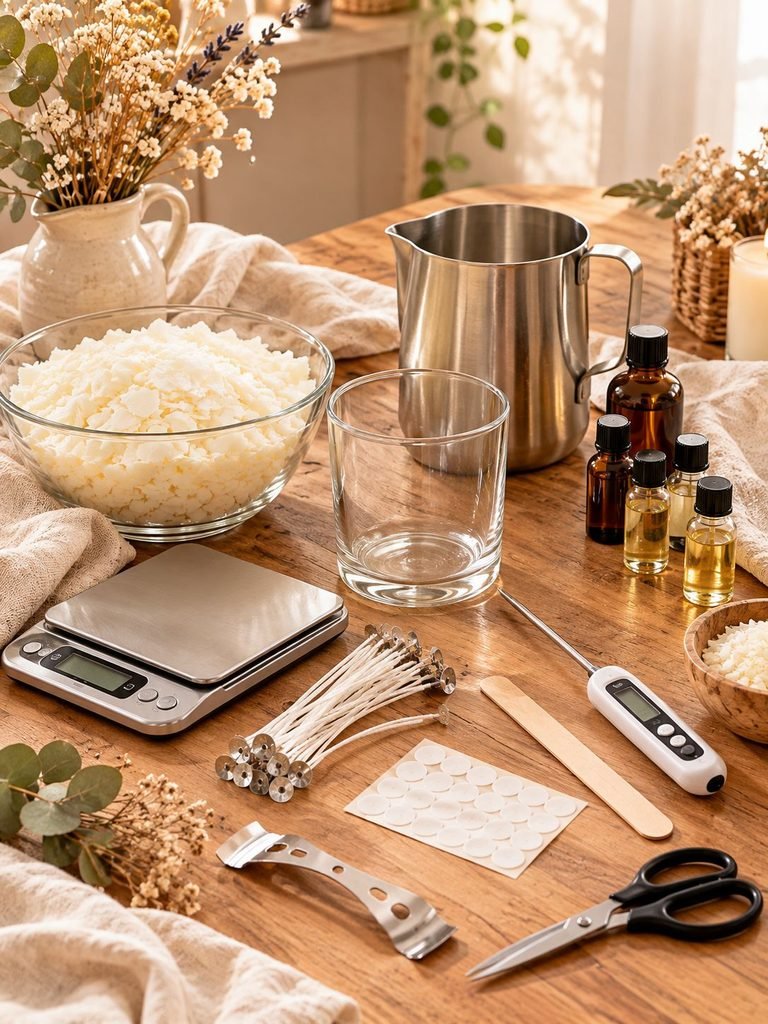
You don’t need a huge collection of equipment to make your first candle. In fact, I recommend keeping your first project simple so you can focus on learning how the wax, fragrance, wick, and container work together.
Basic Supplies
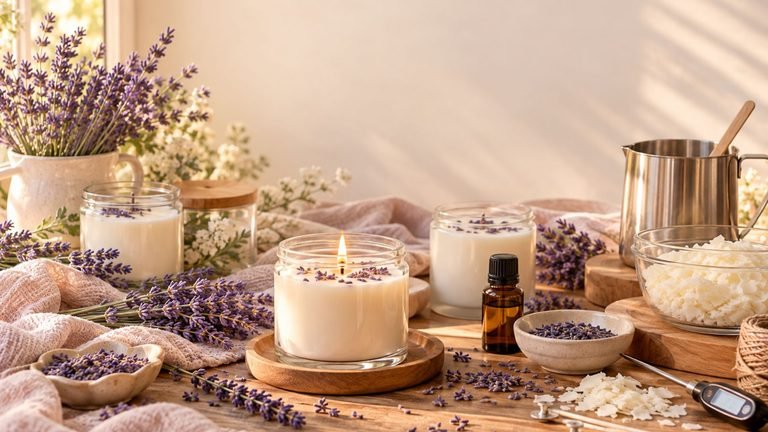
For a simple scented container candle, you will need:
- Soy candle wax
- Candle-safe fragrance oil
- A heat-resistant candle container
- Pre-tabbed candle wick
- Wick sticker or candle-safe adhesive
- Wick centering tool
- Digital kitchen scale
- Digital thermometer
- Wax pouring pitcher
- Double boiler or water-bath setup
- Wooden or silicone stirring stick
- Measuring cup or small container for fragrance
- Scissors or wick trimmer
- Paper towels for cleanup
A digital scale is especially useful because candle making works much better when you measure ingredients by weight rather than guessing by volume.
You don’t need fancy equipment to begin. A simple setup is enough for your first few candles.
Which Wax Is Best for Beginners?
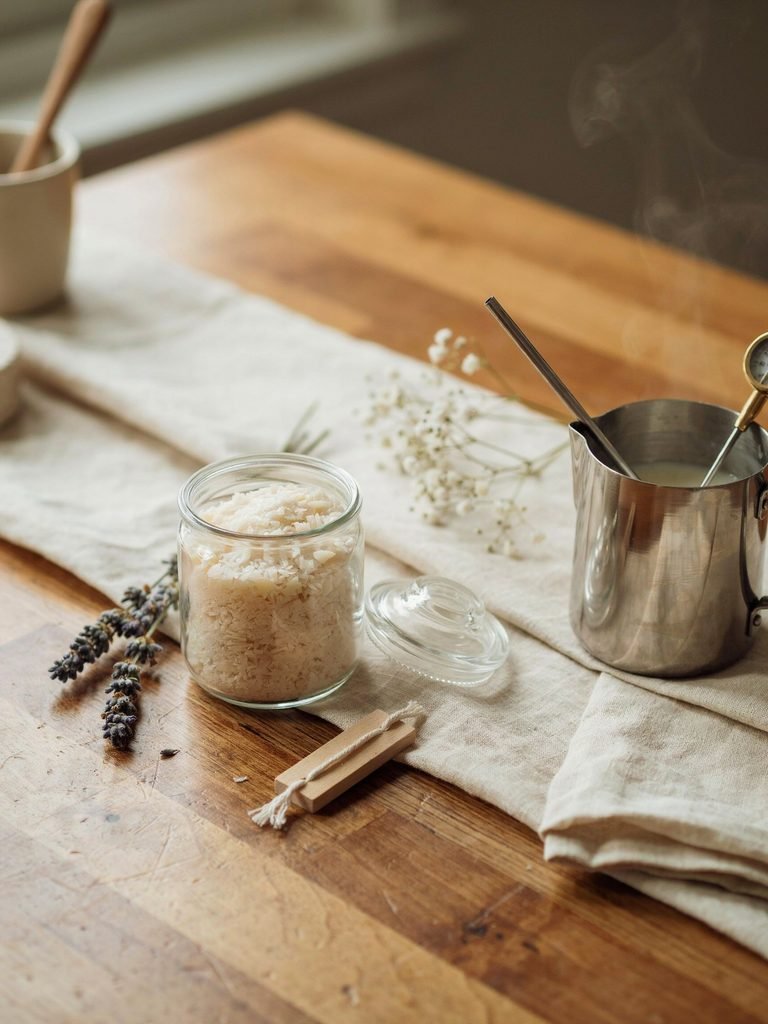
There are several types of candle wax, including soy, paraffin, beeswax, coconut wax, and different wax blends.
For this beginner tutorial, we’re going to use soy wax because it is commonly used for container candles and is relatively easy to work with.
That said, there isn’t one universally “best” candle wax. Different waxes have different melting points, scent performance, appearance, and burning characteristics. The National Candle Association notes that candle performance depends on the formulation rather than simply assuming one wax is inherently superior.
If you’re just starting, buying a wax specifically formulated for container candles will make the process much easier.
Why I Like Soy Wax for Beginners
Soy wax is a lovely option when you’re learning because:
- It is easy to find
- It works well in containers
- It has a soft, creamy appearance
- It can be scented with candle fragrance oils
- It is easy to clean when handled properly
- It gives you a good foundation for learning candle making
Just remember that every wax behaves slightly differently, so always check the instructions provided by the manufacturer of the specific wax you’re using.
How to Choose the Right Candle Wick
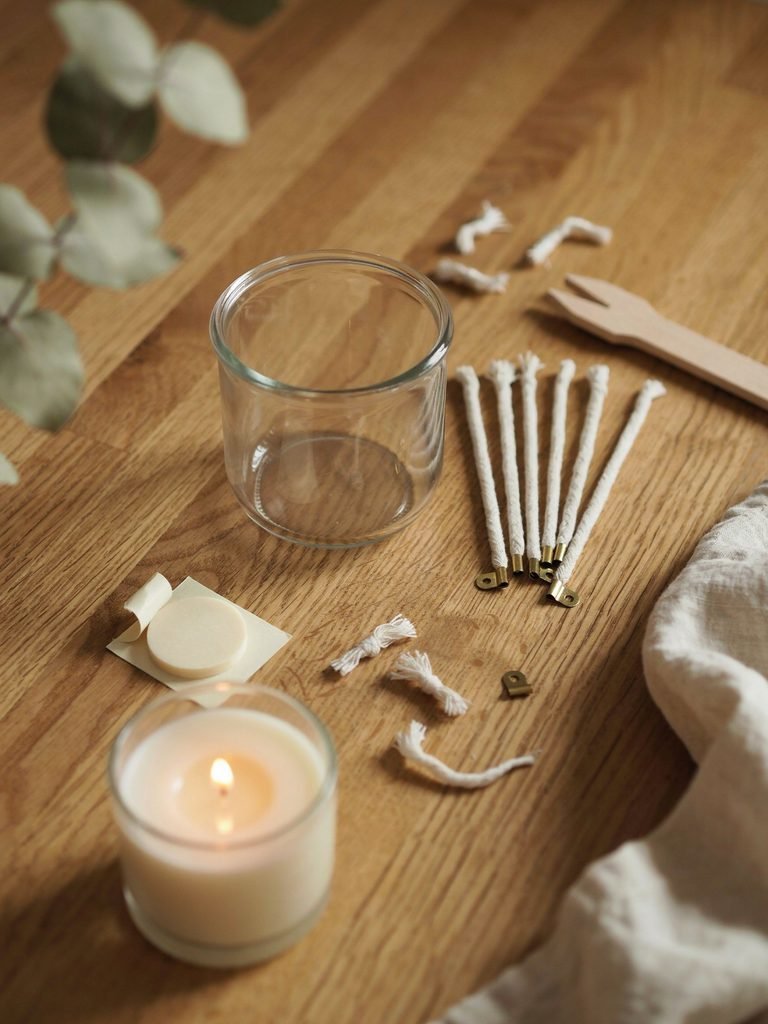
Choosing a wick can feel confusing at first, but it is one of the most important parts of candle making.
The wick needs to create enough heat to melt the wax evenly without producing an excessively large flame.
Wick size depends on several factors, including:
- Candle diameter
- Wax type
- Fragrance load
- Container shape
- Number of wicks
- Wick material
This means you shouldn’t choose a wick simply because it says “medium” or because it worked in somebody else’s jar.
Instead, check the wick manufacturer’s sizing guide and select a wick designed for your candle’s diameter and wax type.
My Beginner Tip
Don’t make 20 candles at once when you’re still experimenting.
Make one or two test candles first.
This gives you the opportunity to see how the wick behaves before committing to a large batch.
Choosing a Candle Container
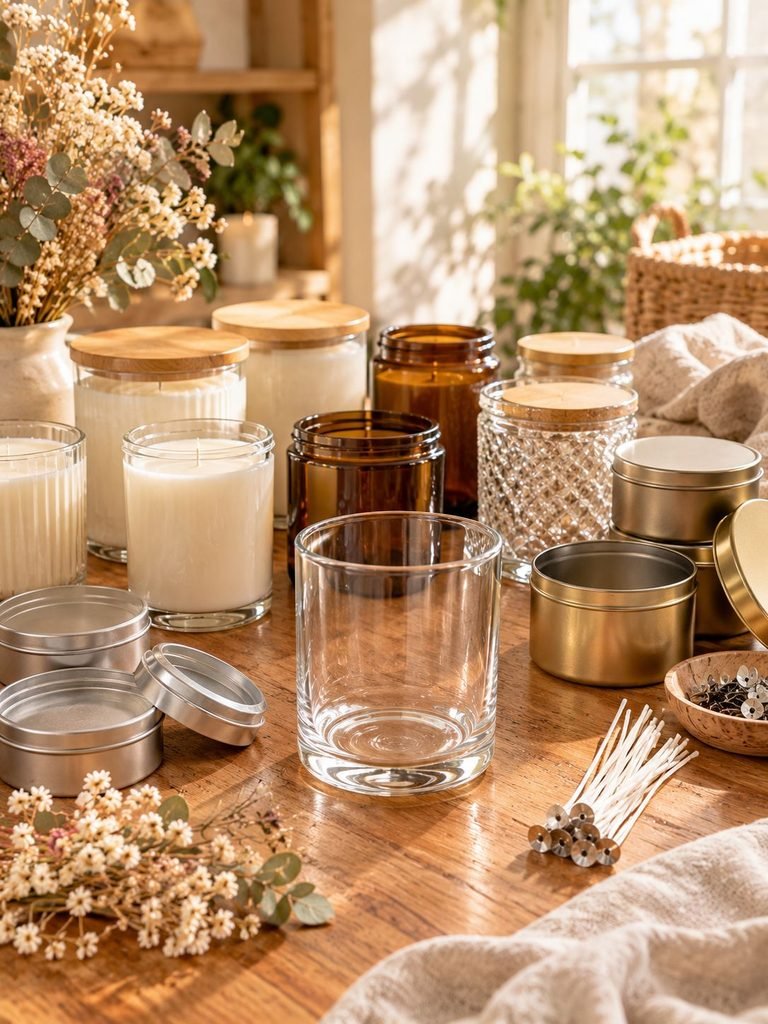
Your container needs to be designed to withstand the heat produced by a candle.
Good choices include candle jars and tins specifically sold for candle making.
Avoid randomly reusing thin drinking glasses, decorative containers, or anything that hasn’t been tested or designed for candle use.
Look for containers that are:
- Heat-resistant
- Free from cracks and chips
- Stable and sturdy
- Suitable for candle making
- Wide enough for the selected wick
A simple glass candle jar is a wonderful place to start.
How Much Wax Do You Need?
For beginners, I recommend making a small candle rather than starting with a huge container.
As an example, you can make a small test candle using approximately:
170 g soy wax + 10–15 g fragrance oil
The exact fragrance amount depends on your wax and fragrance manufacturer’s recommended fragrance load.
Many candle makers work within a fragrance range of around 6–10% by wax weight, but you should never assume that every wax can safely handle the same percentage. Always follow the specifications for your particular wax and fragrance oil.
A Simple Fragrance Calculation
If you’re using an 8% fragrance load:
100 g wax × 8% = 8 g fragrance oil
So:
- 100 g wax → 8 g fragrance
- 200 g wax → 16 g fragrance
- 500 g wax → 40 g fragrance
A kitchen scale makes these calculations much easier.
Step-by-Step: How to Make Candles
Now for the fun part!
Step 1: Prepare Your Workspace
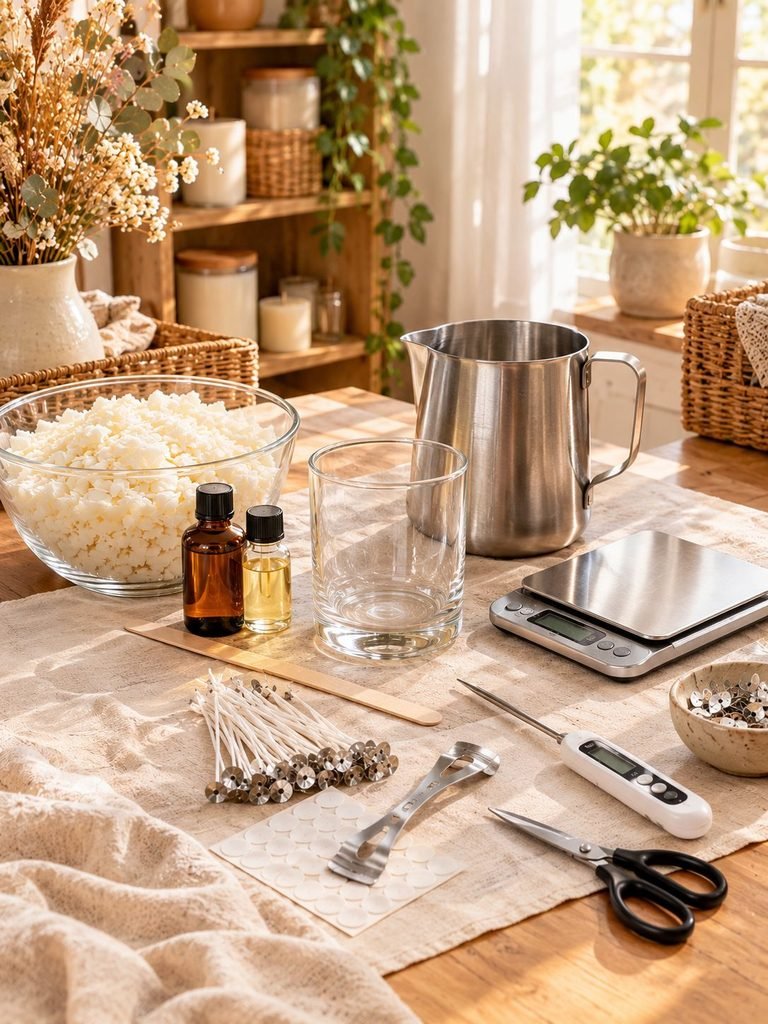
Before melting anything, gather all your supplies.
Cover your work surface with something that can protect it from spills, and make sure you have enough room to safely work with hot wax.
Keep children and pets away from the workspace while you’re making candles.
I also recommend having everything ready before you start heating your wax. Once the wax is melted, you don’t want to be searching through drawers for your thermometer or wick stickers.
Step 2: Prepare Your Candle Jar
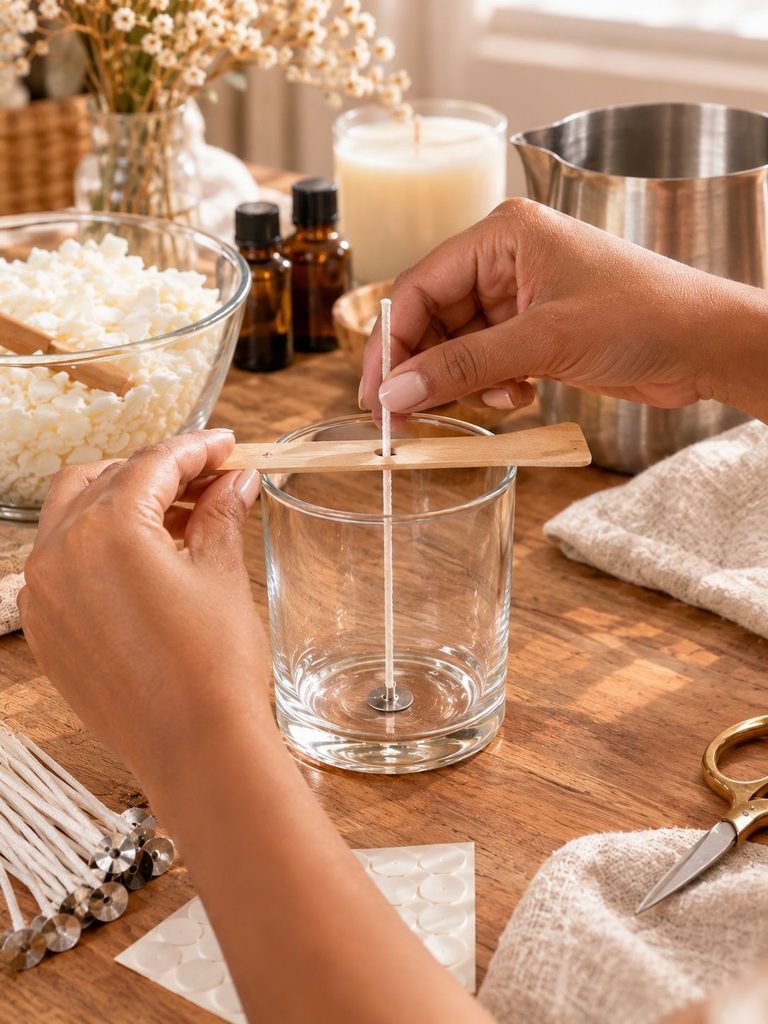
Make sure your candle container is clean and completely dry.
Take your pre-tabbed wick and attach a wick sticker to the bottom of the metal wick tab.
Place the wick directly in the center of the container.
This step is important because a centered wick helps the candle burn more evenly.
Use a wick centering tool, chopsticks, or another suitable method to hold the wick upright while the wax cools.
Step 3: Weigh Your Wax
Place your pouring pitcher on your digital scale and zero the scale.
Add the amount of wax you need.
For your first candle, something around 150–200 g of wax is a comfortable amount to work with.
Don’t rely on cups for measuring wax. Wax flakes can have different densities, so weighing your ingredients gives you much more consistent results.
Step 4: Melt the Wax
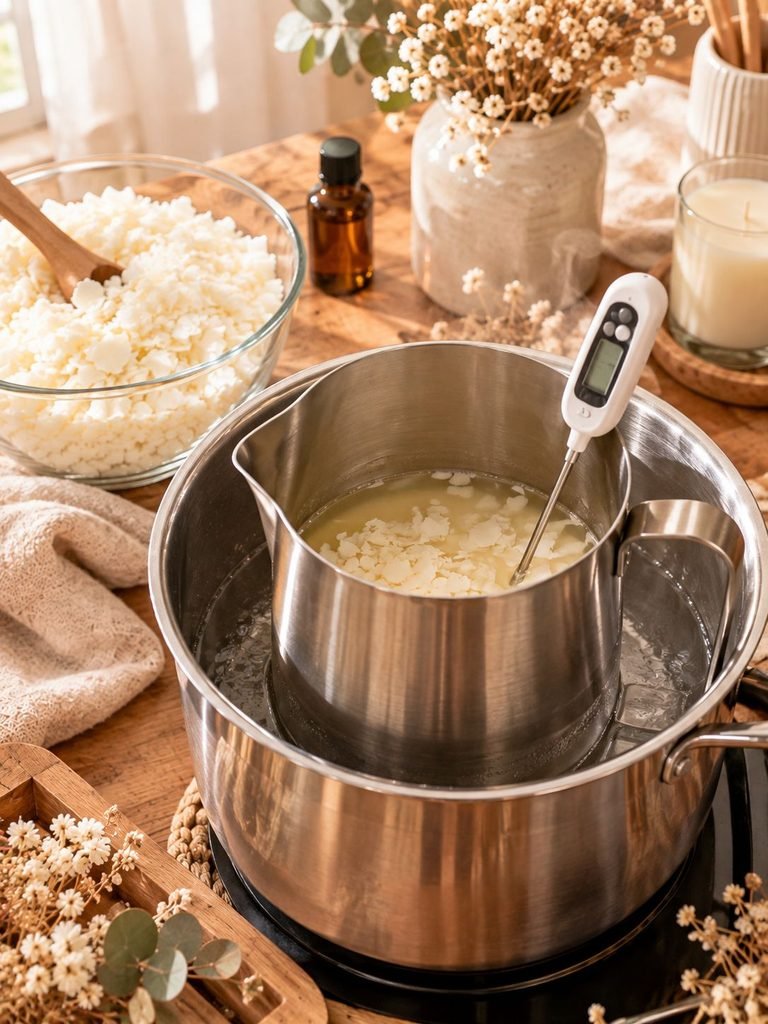
Place your wax in a heat-safe pouring pitcher and use a double-boiler or water-bath method to gently melt it.
Heat the wax according to the manufacturer’s instructions.
For one common beginner soy-wax method, CandleScience heats the wax to around 185°F (85°C) before adding fragrance. However, your particular wax may have different recommendations, so use the temperature supplied by your wax manufacturer whenever available.
Use your thermometer rather than guessing.
You want the wax to be completely melted and free of visible flakes.
Step 5: Add Your Fragrance Oil
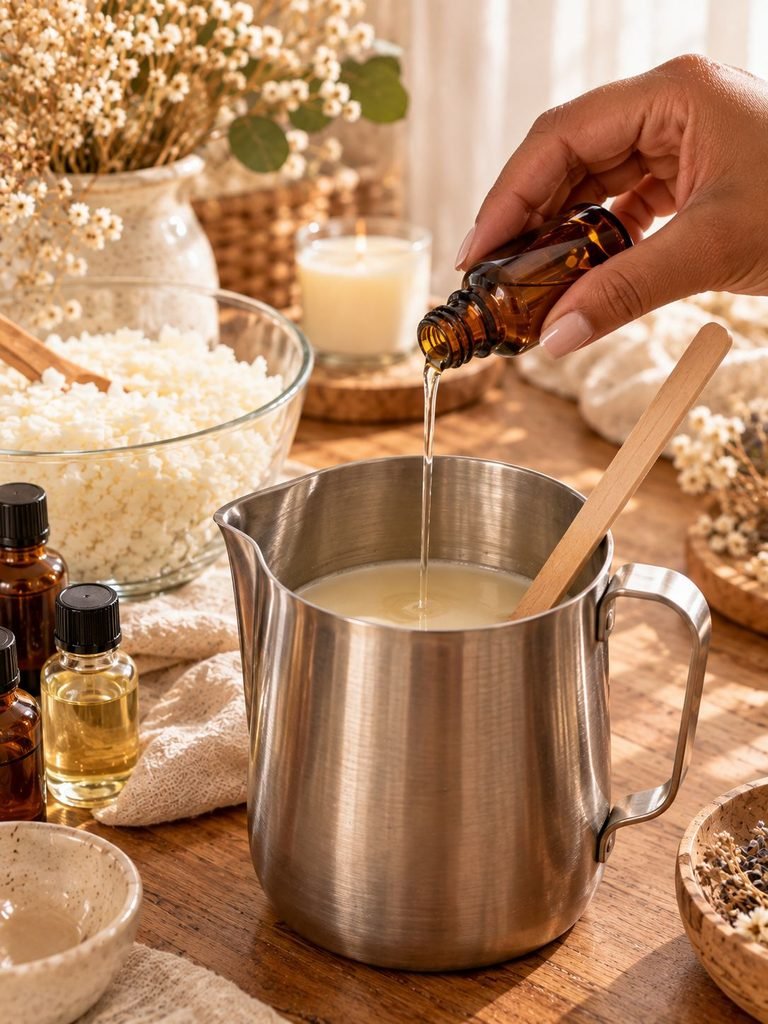
Once your wax reaches the recommended fragrance-addition temperature, remove it from the heat if instructed by your wax supplier.
Slowly add your measured candle fragrance oil.
Then stir gently and consistently.
For the CandleScience beginner soy method, fragrance is added at approximately 185°F/85°C and mixed gently for about 1–2 minutes.
Don’t aggressively whisk the wax.
Slow, thorough stirring is all you need.
What Fragrance Should You Use?
Use fragrance oil specifically formulated and tested for candle making.
You can experiment with scents such as:
- Vanilla
- Lavender
- Rose
- Sandalwood
- Fresh linen
- Coconut
- Citrus
- Coffee
- Apple
- Cinnamon
For your first candle, I recommend choosing one fragrance rather than creating a complicated blend.
Once you understand how your wax behaves, you can start experimenting with your own scent combinations.
Step 6: Let the Wax Cool to the Recommended Pouring Temperature
After adding the fragrance, allow the wax to cool to the manufacturer’s recommended pouring temperature.
For example, CandleScience’s beginner soy candle method pours at approximately 135°F (57°C).
The exact temperature isn’t universal.
Different waxes can require different temperatures, which is why following the instructions for your specific wax is more reliable than following one temperature for every candle.
Step 7: Pour the Candle
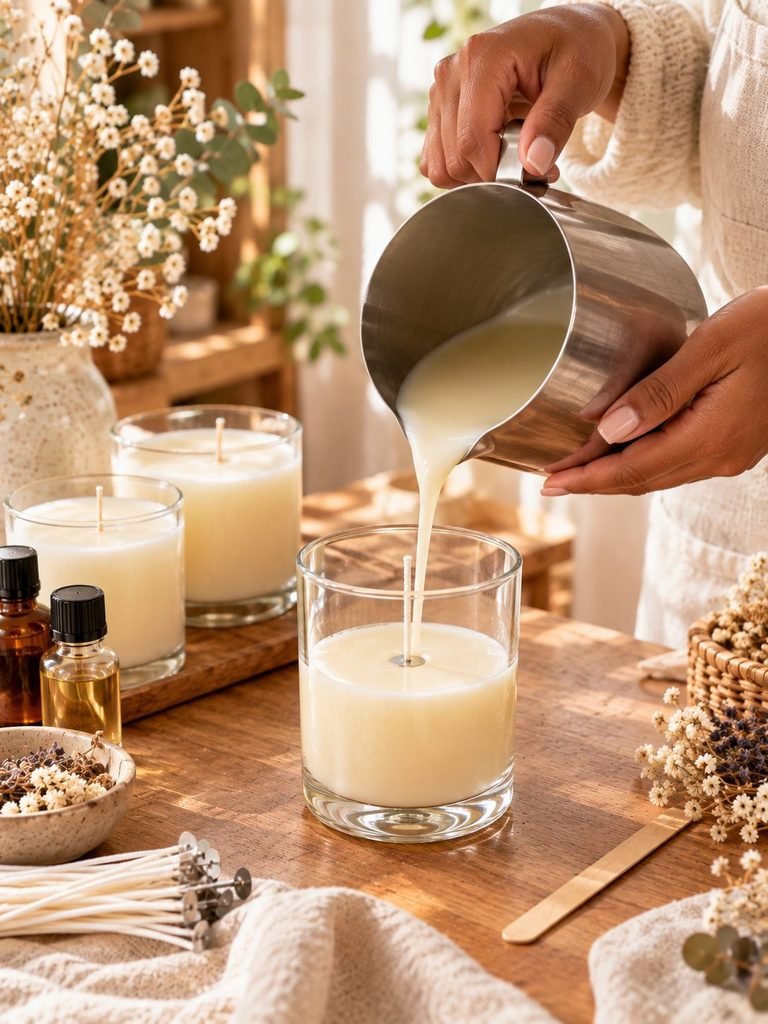
Slowly pour the scented wax into your prepared container.
Try not to splash or pour too aggressively.
Leave a little space at the top rather than filling the container completely.
If the wax starts to form bubbles or looks uneven, don’t panic. Some surface imperfections are completely normal with handmade candles.
Step 8: Secure the Wick
Double-check that your wick is still centered.
If it has moved during pouring, gently reposition it while the wax is still liquid.
Then place your wick centering tool across the top of the container to keep the wick upright.
This is one of those tiny steps that makes a huge difference to the finished candle.
Step 9: Let the Candle Cool
Now comes the hardest part for an impatient crafter like me:
Leave it alone.
Allow the candle to cool naturally at room temperature.
Don’t put a freshly poured candle in the refrigerator or freezer just because you want it to harden faster.
Rapid cooling can contribute to unwanted surface problems.
Keep the candle somewhere level and away from drafts while it sets.
Step 10: Trim the Wick
Once the candle has completely cooled and hardened, trim the wick.
For a finished candle that is ready to burn, the National Candle Association recommends trimming the wick to about ¼ inch before lighting.
Remove any loose wick pieces from the surface of the wax.
Your candle is now looking like a real candle!
Step 11: Let Your Candle Cure
Don’t rush straight to the first burn.
Many soy wax candles benefit from a curing period so the wax and fragrance have time to settle and develop.
The exact cure time varies by wax and formulation. Some soy-wax guides recommend approximately one to two weeks, but always check the instructions supplied with your wax.
Think of curing as giving your candle a little beauty rest.
It’s worth the wait.
How to Test Your Homemade Candle
Before making a large batch, test your candle.
Light it in a safe location and observe:
- Flame height
- Melt pool
- Soot
- Smoke
- Container temperature
- How evenly the wax melts
- Fragrance performance
- Whether the wick mushrooms
- Whether the candle tunnels
Keep notes.
Write down the wax you used, wick size, fragrance percentage, container diameter, temperatures, and your observations.
This turns every test candle into a learning experience.
Common Candle-Making Problems and How to Fix Them
Don’t be discouraged if your first candle isn’t perfect.
Candle making is a little bit of science and a little bit of experimentation.
1. My Candle Is Tunneling
Tunneling happens when the candle burns down the middle while leaving a thick ring of unmelted wax around the sides.
This can happen when the wick isn’t producing enough heat for the container or when the candle hasn’t been burned long enough during its early use.
Wick selection is one of the key things to investigate.
2. My Candle Has a Rough or Uneven Top
A rough, bumpy, or uneven surface can occur because of cooling conditions and the characteristics of the wax.
Don’t assume your candle has failed.
The candle can still burn properly even if the surface isn’t perfectly smooth.
As you gain experience, you can experiment with pouring temperature and cooling conditions to improve the appearance.
3. My Candle Has White Spots
Soy wax can develop a cloudy or frosted appearance.
This is a common cosmetic characteristic of soy wax and doesn’t automatically mean the candle is unusable.
Keeping your cooling environment consistent can help, although some frosting can still occur.
4. My Candle Has Wet Spots
“Wet spots” are areas where the wax appears to have pulled away from the inside of the container.
They are often caused by how the wax contracts and interacts with the container as it cools.
They can be frustrating because the candle may look imperfect even when it burns properly.
5. My Candle Doesn’t Smell Strong Enough
Before adding more fragrance, check your fragrance load and make sure you’re staying within the recommended limit for your wax.
More fragrance isn’t automatically better.
Too much fragrance can negatively affect candle performance and may create other problems.
Also remember that curing can affect scent performance.
6. My Flame Is Too Large
A large flame can indicate that your wick is too large, the wick is too long, or other factors are affecting the burn.
Trim the wick to approximately ¼ inch before burning and test the candle carefully.
If the flame remains excessively large, stop testing and reassess the wick selection.
Important Candle Safety Tips
This part is especially important.
Candles involve an open flame, so beautiful DIY results should always come with responsible candle care.
The National Candle Association recommends keeping burning candles within sight, away from anything that can catch fire, and out of reach of children and pets.
Always:
- Keep a burning candle within sight.
- Keep it away from curtains, paper, bedding, furniture, and other flammable objects.
- Keep candles away from children and pets.
- Place candles on stable, heat-resistant surfaces.
- Keep candles away from drafts, fans, and strong air currents.
- Trim the wick before burning.
- Remove wick trimmings and other debris from the wax.
- Never move a candle while it is burning or while the wax is hot.
- Never use water to extinguish a candle.
- Extinguish the candle if the flame becomes unusually large or unstable.
- Allow the candle to cool completely before handling it.
The National Candle Association also generally advises against burning a candle for more than four hours at a time and recommends allowing it to cool before relighting.
A Note About Dried Flowers and Decorative Add-Ins
Dried flowers, herbs, leaves, and other decorative materials can look gorgeous in handmade candles, but you should be extremely careful about putting flammable materials close to a candle flame.
The National Candle Association has specifically raised safety concerns about candles containing flammable botanical materials embedded in wax near the flame.
For your first candles, I recommend keeping the wax surface simple.
You can create a beautiful candle without adding anything that could become fuel near the flame.
How to Make Your Homemade Candles Look Beautiful
Once you’ve mastered the basic process, you can have so much fun with the creative side.
Try:
Neutral Minimalist Candles
Use creamy white or beige wax with simple glass jars and minimalist labels.
Cozy Autumn Candles
Experiment with warm fragrances such as vanilla, cinnamon, apple, or sandalwood.
Floral-Inspired Candles
Try scents inspired by rose, lavender, jasmine, or fresh flowers.
Gift Candles
Create small candles in matching containers and package them with ribbon, handmade tags, or simple gift boxes.
Personalized Candles
Add a simple label with a person’s name, a meaningful date, or a special message.
You can even create seasonal candle collections for birthdays, holidays, weddings, housewarming gifts, or handmade markets.
My Biggest Beginner Tips
If I could go back and give myself advice before making my first candles, these are the things I’d focus on:
Measure everything.
Don’t guess your wax or fragrance amounts.
Use a thermometer.
Temperature makes a real difference.
Choose the wick carefully.
The prettiest wax and fragrance won’t matter if your wick isn’t suitable for the container.
Don’t rush the cooling process.
Let your candle cool naturally.
Give your candle time to cure.
Patience can improve your final results.
Make test candles.
Don’t immediately make a large batch.
Keep notes.
Your notes will become your personal candle-making recipe book.
Don’t be discouraged by cosmetic imperfections.
A slightly imperfect top doesn’t necessarily mean a bad candle.
Most importantly, enjoy the process.
Frequently Asked Questions
Is candle making difficult for beginners?
Not at all. The basic process is quite simple once you understand the relationship between wax, wick, fragrance, container, and temperature.
The trickiest part is usually getting consistent results, which comes with testing.
Can I make candles without a thermometer?
You technically can, but I wouldn’t recommend it.
A thermometer makes it much easier to follow your wax manufacturer’s recommended temperatures and produce repeatable results.
Can I use essential oils in candles?
Not all essential oils are suitable for candle making, and their performance can vary significantly. For beginners, a fragrance oil specifically formulated for candles is often the simpler option.
Always follow the supplier’s usage and safety instructions.
How long should homemade candles cure?
It depends on the wax and formulation.
Some soy candle makers recommend one to two weeks, but your wax manufacturer’s instructions should take priority.
Why is my candle burning down the middle?
This is usually called tunneling. Possible causes include an unsuitable wick, an insufficient first burn, or other formulation factors.
Check your wick selection and burning technique before changing your fragrance or wax.
Can I sell the candles I make at home?
You can potentially turn candle making into a small business, but selling candles means taking product safety, testing, labeling, local requirements, and insurance seriously.
Don’t assume that a candle that burns nicely once is automatically ready to sell.
Test your formulations thoroughly before offering them to customers.
Final Thoughts
Making your own candles is such a lovely DIY skill to learn because you get to combine creativity with a little bit of science. Your first candle may not have the perfectly smooth top you imagined, and that’s completely okay. Every small mistake teaches you something about your wax, wick, fragrance, and pouring technique.
Start with one simple container, one fragrance, and one wick. Keep your measurements and temperatures consistent, take notes, and give yourself permission to experiment.
Before long, you’ll be creating candles that feel completely personal to you—and honestly, there is something incredibly satisfying about lighting a candle and knowing that you made it with your own hands.
So gather your supplies, choose a scent you love, and enjoy your first candle-making afternoon. Your next favorite handmade candle might be the one you make yourself.