How to Make a Christmas Oil Candle Lamp at Home
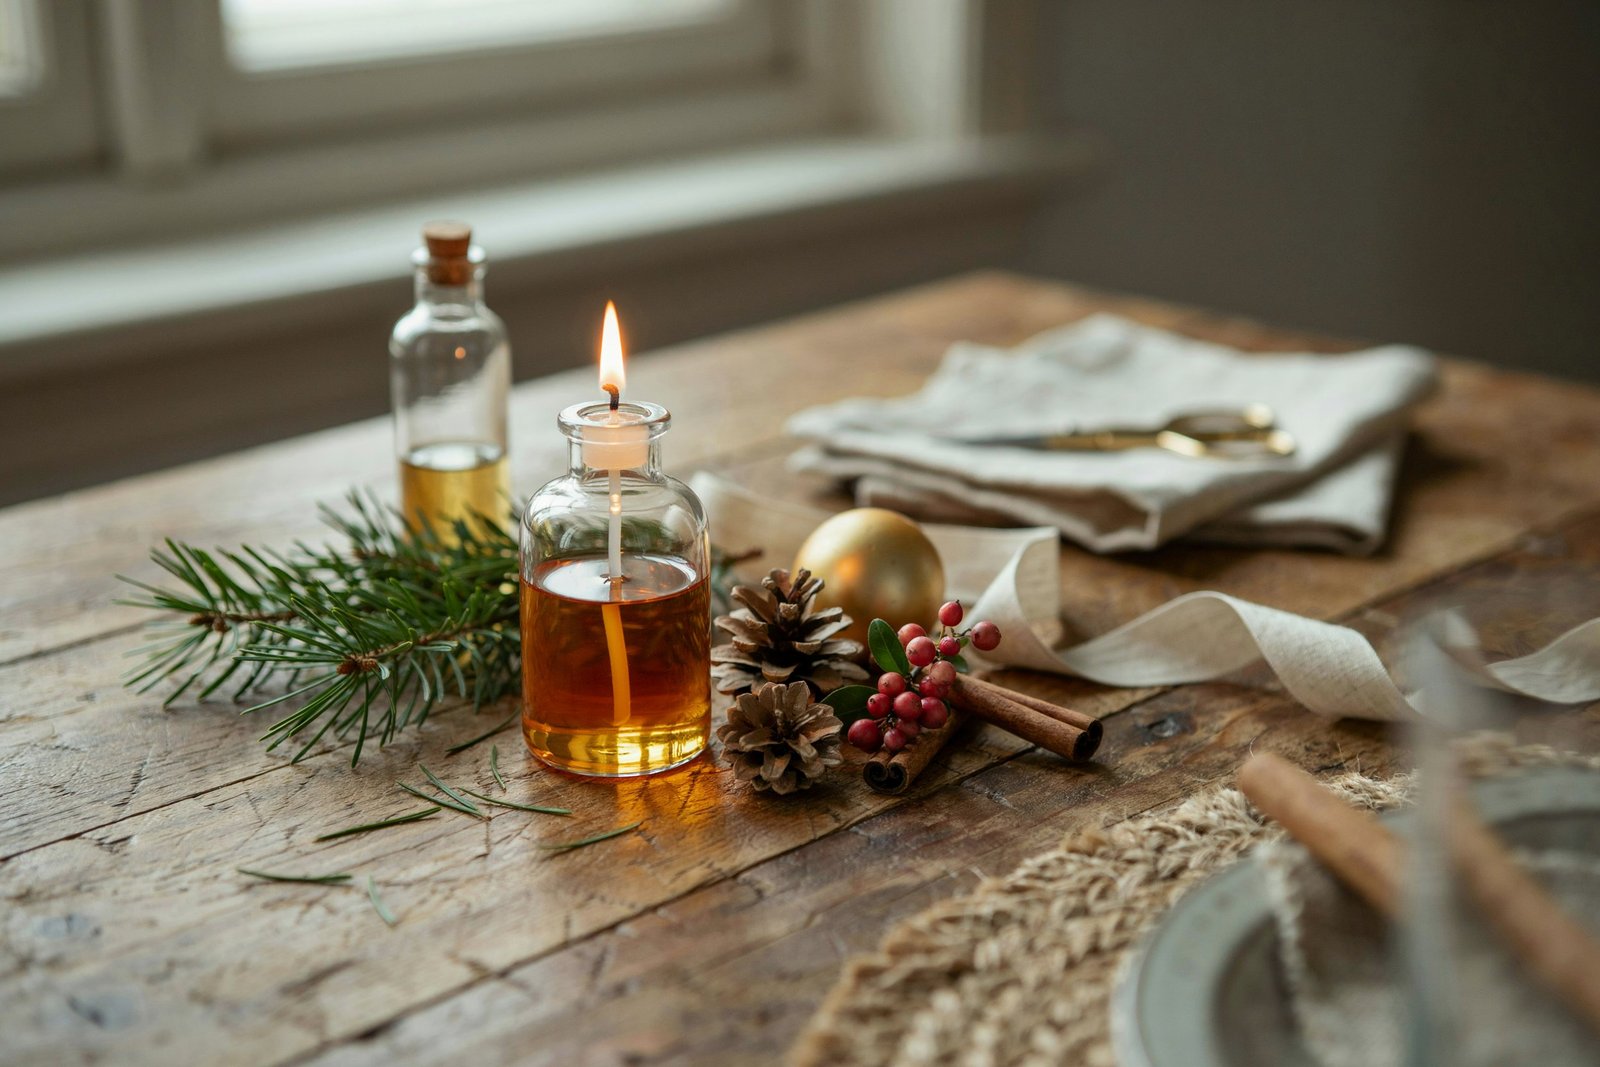
I love the little details that make Christmas evenings feel warm and magical, and homemade candlelight has always been one of my favorites.
Last Christmas, I wanted something a little different from ordinary jar candles, so I decided to make a simple oil candle lamp using a few inexpensive supplies I already had at home.
The soft glow was beautiful, especially when paired with greenery and festive decorations. What I loved most was how easy it was to personalize. In this guide, I’ll show you how to make your own Christmas oil candle lamp safely, beautifully, and without spending much money at all.
What Is a Christmas Oil Candle Lamp?
A Christmas oil candle lamp is a small decorative oil-burning lamp designed to create a warm, cozy flame during the holiday season. Instead of using a traditional candle made from wax, it uses liquid lamp oil and a wick.
The basic idea is wonderfully simple:
- A heat-safe container holds the oil.
- A wick absorbs the oil.
- The exposed end of the wick is lit.
- The oil travels through the wick and provides fuel for the flame.
- Christmas decorations can be arranged around the outside of the lamp to create a festive display.
You can make your lamp look rustic, elegant, farmhouse-inspired, minimalist, or traditional depending on the container and decorations you choose.
For a Christmas centerpiece, I especially love using clear glass because the warm flame shines beautifully through it.
Materials You’ll Need
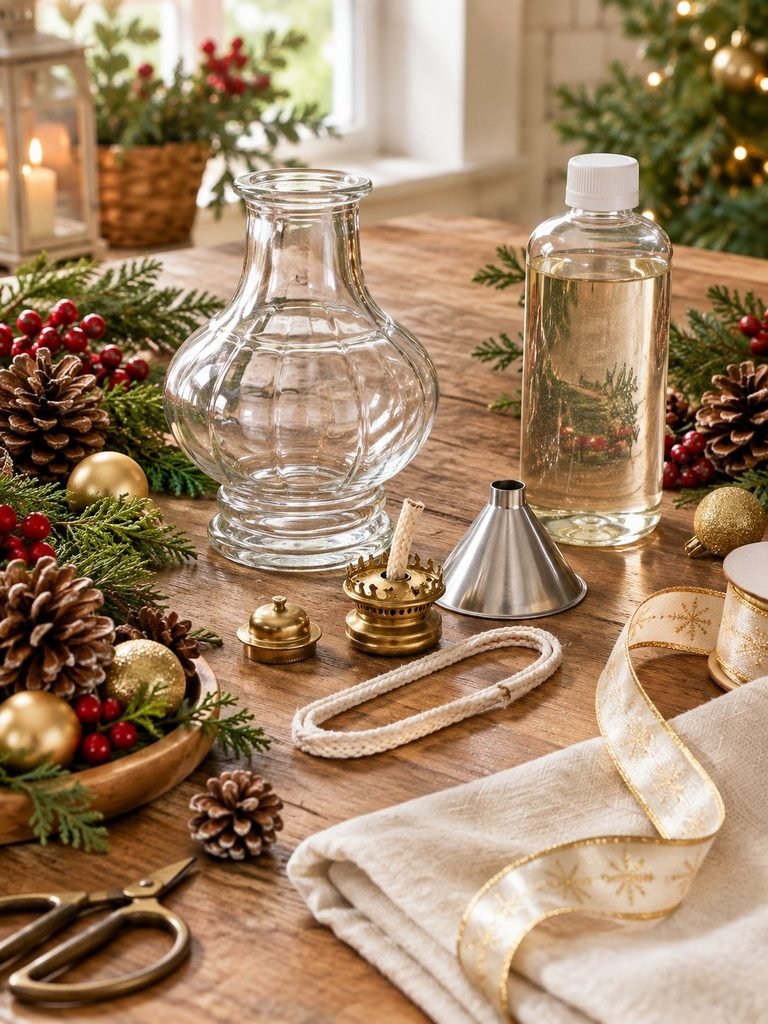
You don’t need a long shopping list for this project. Most of the beauty comes from choosing simple materials and styling them thoughtfully.
1. A Heat-Safe Glass Container
Choose a sturdy glass container designed to tolerate heat. A small glass oil-lamp container is ideal, but a purpose-made oil-lamp vessel is preferable to an ordinary decorative jar.
Avoid thin, cracked, chipped, or unknown glass.
A container with a wide, stable base is especially helpful because it is less likely to tip over.
2. Lamp Oil
Use lamp oil specifically intended for indoor oil lamps and follow the manufacturer’s instructions.
Avoid experimenting with gasoline, kerosene blends, alcohol, solvents, or other flammable liquids that are not intended for this type of lamp.
I also recommend avoiding homemade mixtures containing essential oils. Essential oils are not automatically suitable as lamp fuel, and adding fragrances or other ingredients to lamp oil can affect how it burns.
3. A Suitable Wick
Use a wick made specifically for an oil lamp.
Cotton wicks are commonly used, but the most important thing is that the wick and burner are compatible with each other.
A properly sized wick helps create a controlled flame rather than a large, smoky one.
4. Wick Holder or Burner
A wick holder keeps the wick positioned correctly and provides a secure connection between the wick and the oil container.
If you’re purchasing a complete oil-lamp burner, choose one designed for the type and size of container you’re using.
5. Funnel
A small funnel makes filling the container much easier and helps prevent oil from getting onto the outside of the lamp.
6. Christmas Decorations
This is where you can have fun.
Consider:
- Small pinecones
- Artificial berries
- Christmas ribbon
- Tiny ornaments
- Dried orange slices
- Cinnamon sticks
- Evergreen branches
- Mini bells
- Star ornaments
- Red or cream ribbon
- Small wooden Christmas decorations
Important: Keep flammable decorations well away from the flame and burner. For the safest design, decorate around the lamp rather than placing flammable objects inside the oil container or close to the flame.
7. A Tray or Decorative Base
A small ceramic, metal, stone, or glass tray gives your finished oil lamp a beautiful home.
It also makes the arrangement easier to move as one piece.
Choosing the Right Container
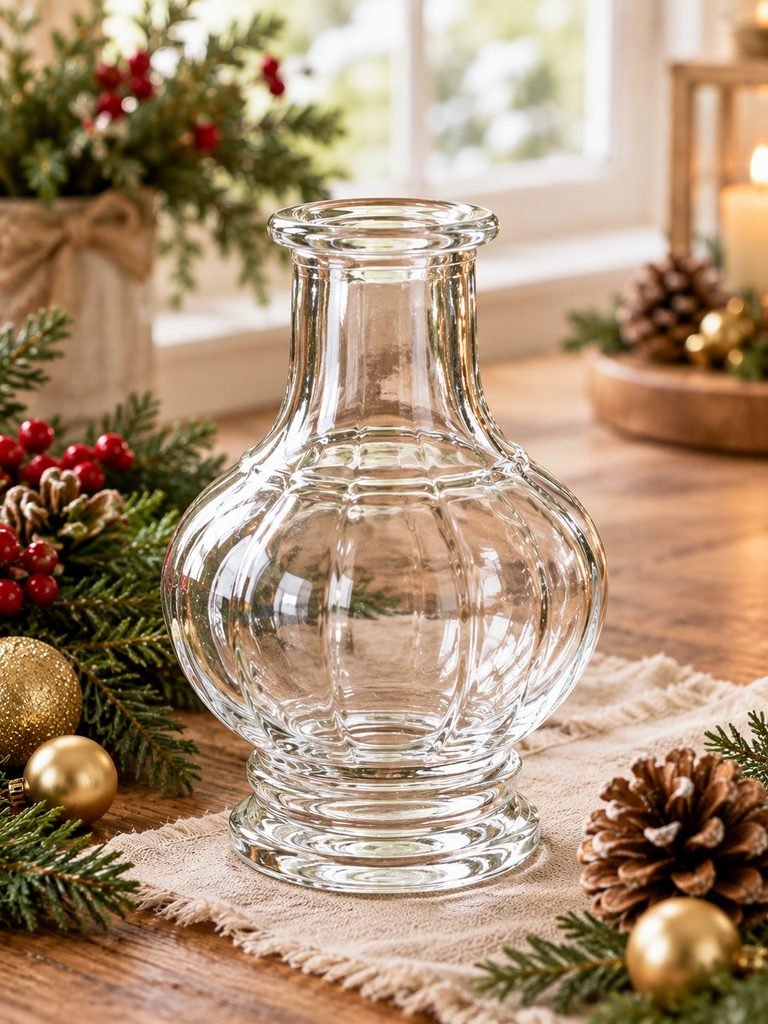
The container is one of the most important parts of this project.
When choosing one, think about both appearance and safety.
A Christmas oil lamp should have:
- A stable bottom
- Heat-resistant construction
- Enough room for the correct amount of oil
- A suitable opening for the burner
- No cracks or chips
- A design that keeps the oil securely contained
A small purpose-built oil lamp is generally the easiest option for beginners because the burner, wick, and container are designed to work together.
I love clear glass for Christmas because it allows the golden flame to become part of the decoration.
For a more rustic look, you can pair the lamp with a wooden tray and neutral Christmas accents.
For something more elegant, try a simple glass lamp surrounded by cream ribbon, gold ornaments, and subtle greenery.
How to Make a Christmas Oil Candle Lamp
Step 1: Prepare Your Workspace

Before assembling your lamp, choose a clean, stable, heat-resistant surface away from curtains, paper, Christmas garlands, clothing, and other flammable materials.
Make sure children and pets cannot easily reach the lamp.
I like working on a clear table first and adding the Christmas decorations only after the lamp itself is completely assembled.
This keeps the process organized and reduces the chance of accidentally getting oil on decorations.
Step 2: Inspect the Container
Before adding anything, carefully inspect your container.
Look for:
- Cracks
- Chips
- Loose fittings
- Damaged glass
- Unstable bases
- Anything that could interfere with the burner
If the container is damaged, don’t use it.
Give the outside a gentle clean and allow it to dry completely.
The inside should also be clean and free from water or other liquids before adding lamp oil.
Step 3: Install the Wick
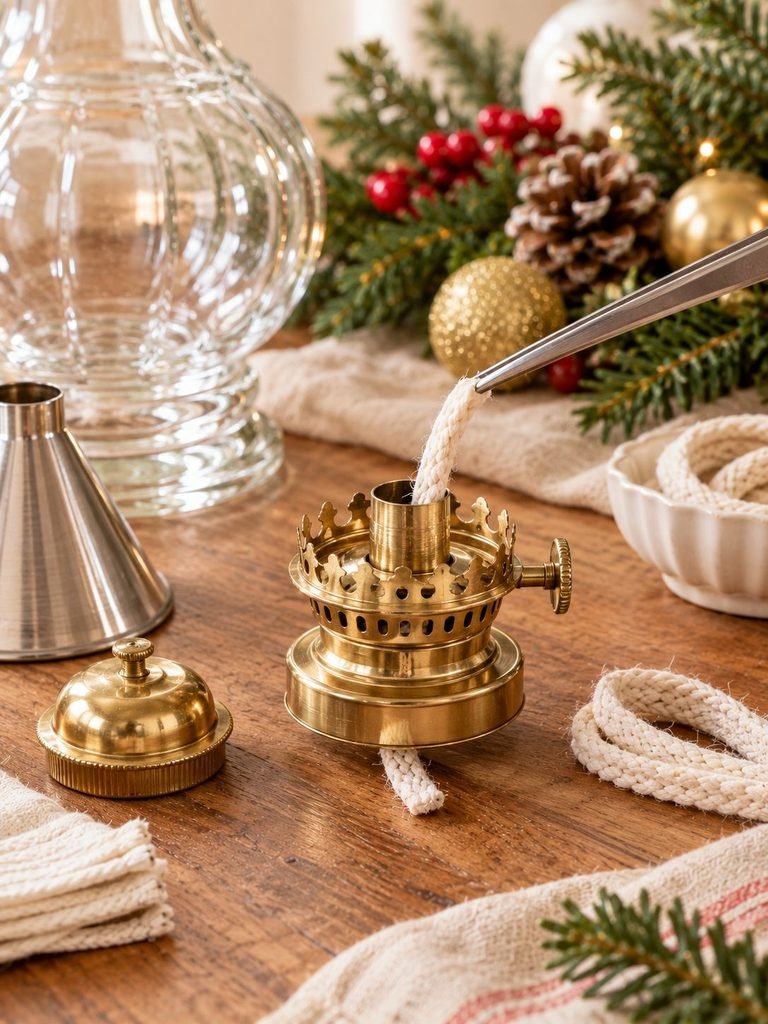
Insert the correct wick into the wick holder or burner according to the manufacturer’s instructions.
The wick should sit securely without being excessively long.
A common beginner mistake is assuming that a larger flame is better.
It isn’t.
A smaller, controlled flame is usually much more attractive for a decorative Christmas lamp and can help reduce smoke and soot.
If your wick is adjustable, start with only a small amount exposed.
You can adjust it later if the manufacturer’s instructions allow.
Step 4: Add the Lamp Oil
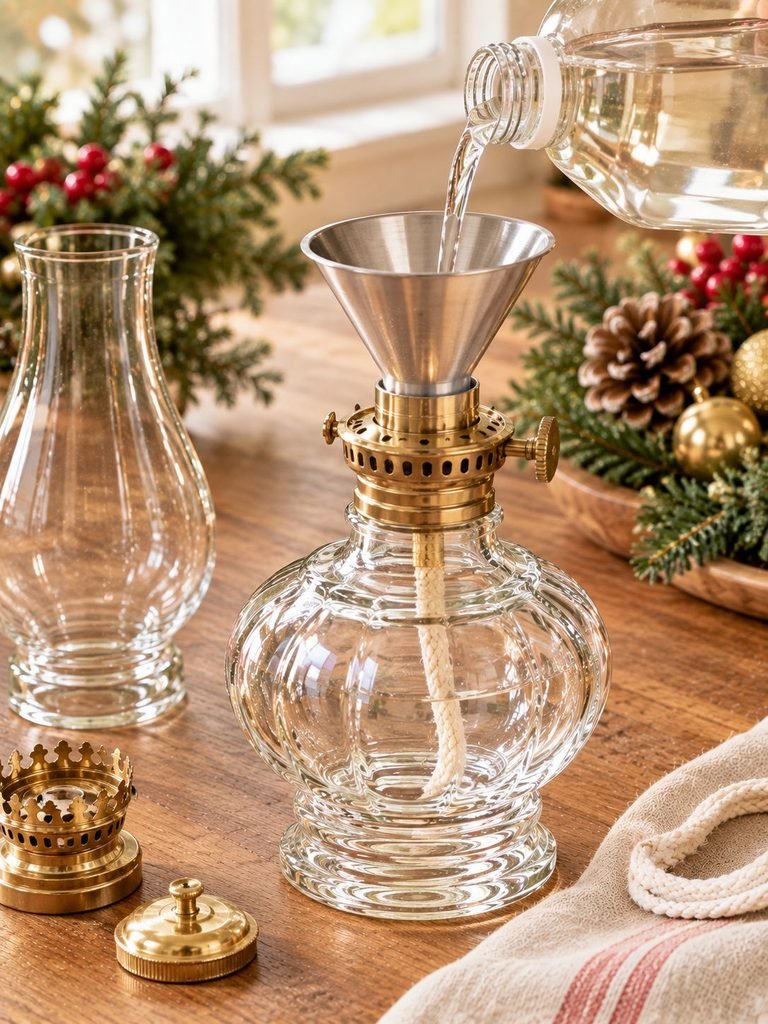
Place the container on a stable surface.
Using a small funnel, carefully add the recommended amount of lamp oil.
Don’t overfill the container.
Leave the appropriate amount of space recommended by the lamp or fuel manufacturer.
If you accidentally spill oil, stop and clean it up completely before lighting anything.
This is especially important around Christmas decorations because ribbons, paper ornaments, dried foliage, and other materials can catch fire easily.
Step 5: Allow the Wick to Soak
This is a small step, but it’s very important.
Before lighting the lamp, give the wick enough time to absorb the oil.
The exact soaking time depends on the wick and lamp design, so follow the manufacturer’s instructions.
A dry wick should not be lit.
Allowing the wick to become properly saturated helps it burn as intended.
Step 6: Test the Lamp Before Decorating

Before turning your lamp into a Christmas centerpiece, test it by itself.
Place it on a clear, stable surface away from anything flammable.
Light it carefully using a long lighter or match designed for lighting candles and lamps.
Observe the flame.
You want a controlled flame that doesn’t produce excessive smoke.
If the flame is unusually large, flickering excessively, or producing significant black smoke, extinguish it and check the wick, burner, fuel level, and manufacturer’s instructions.
Never leave the lamp unattended while testing it.
Step 7: Create Your Christmas Look
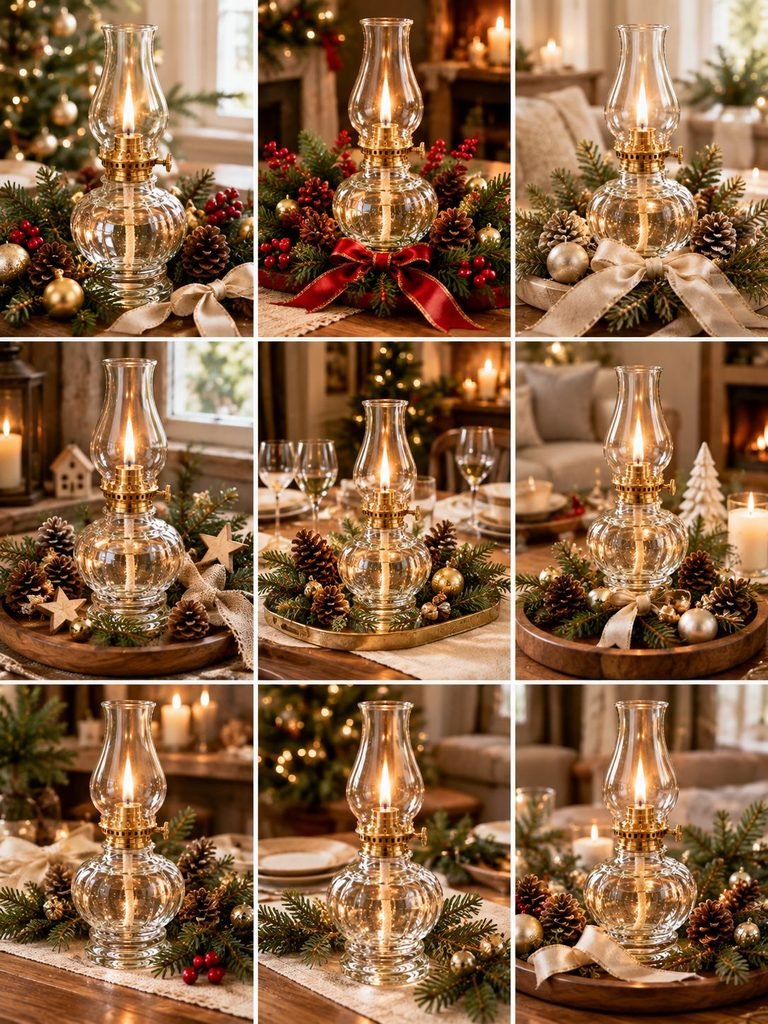
Once you’ve confirmed that the lamp works properly, it’s time for my favorite part: decorating.
You can create almost any Christmas style you like.
Cozy Traditional Christmas
Try combining:
- Red ribbon
- Pine greenery
- Small gold ornaments
- Red berries
- Pinecones
The result feels classic and warm.
Elegant Neutral Christmas
For a softer look, use:
- Cream ribbon
- Champagne or gold ornaments
- Natural pinecones
- Beige accents
- Warm wood
- Subtle greenery
This style works beautifully with modern Christmas interiors.
Rustic Christmas
Use:
- Wooden stars
- Burlap ribbon
- Pinecones
- Natural greenery
- Small bells
- A wooden tray
This gives your centerpiece a charming handmade appearance.
Winter Wonderland
Try:
- White accents
- Silver ornaments
- Clear glass
- Frosted-looking decorative pieces
- White ribbon
Keep the decorations outside the lamp and away from the flame.
Step 8: Arrange the Decorations Safely
This step deserves special attention.
Don’t place Christmas decorations around the wick simply because they look pretty in photographs.
Anything flammable should be kept well away from the flame.
That includes:
- Dried flowers
- Dried orange slices
- Pine needles
- Paper decorations
- Ribbon
- Fabric
- Wood
- Artificial greenery
- Cotton
- Tissue paper
- Pinecones
Instead, create a decorative arrangement around the outside of the lamp.
For example, place the oil lamp in the center of a large heat-resistant tray and arrange pinecones and ornaments around the outer edges.
This gives you the festive look without crowding the flame.
Step 9: Trim and Adjust the Wick
If the lamp has a wick that can be trimmed, follow the manufacturer’s instructions.
A wick that is too long can create a larger flame and may produce more soot.
A properly maintained wick generally produces a cleaner, more controlled flame.
Before every use, check that the wick is in good condition and that the burner is secure.
Step 10: Light Your Christmas Oil Lamp
When you’re ready to enjoy your finished decoration, place it somewhere stable and clear of anything that could catch fire.
Light the wick carefully.
Never move the lamp while it is burning.
Don’t carry it from one room to another while the flame is lit.
And never leave it burning while you’re sleeping or when you leave the room.
The beautiful thing about an oil lamp is that you don’t need a huge flame to create atmosphere. A small golden glow can make an entire room feel warmer.
How to Make Your Oil Lamp Look More Expensive
One of my favorite things about DIY decorating is that you don’t need expensive supplies to create an elegant result.
The secret is keeping the styling simple.
Instead of filling your table with lots of decorations, choose two or three complementary elements.
For example:
Clear glass lamp + cream ribbon + greenery
or
Glass lamp + gold ornaments + pinecones
or
Oil lamp + wooden tray + neutral Christmas decorations
A limited color palette instantly makes a homemade project look more polished.
Cream, warm white, natural green, soft brown, gold, and muted red all work beautifully for Christmas.
Christmas Oil Lamp Centerpiece Ideas
1. Dining Table Centerpiece
Place the lamp in the middle of a long heat-resistant tray.
Surround it with Christmas decorations while maintaining a generous clear area around the flame.
You can then add matching greenery along the table.
2. Christmas Coffee Table Display
Place the oil lamp on a decorative tray with a few ornaments and pinecones.
Keep the arrangement compact but uncluttered.
The soft flame creates a lovely evening glow.
3. Fireplace Mantel Decoration
If you use your lamp on a mantel, make sure it is positioned well away from curtains, stockings, paper decorations, garlands, and other combustible materials.
A nonflammable decorative arrangement is the safest choice.
4. Outdoor Christmas Table
If the lamp is specifically rated for outdoor use, it can make a lovely evening table decoration.
However, don’t assume that an indoor oil lamp is automatically suitable outdoors.
Wind can also affect the flame, so always follow the product instructions.
How Long Can a Christmas Oil Lamp Burn?
The burn time depends on several factors, including:
- Container size
- Amount of fuel
- Wick size
- Flame size
- Lamp design
- Type of lamp oil
Rather than estimating based on another lamp, check the instructions supplied with your particular oil lamp and fuel.
Never allow the lamp to burn completely dry.
It’s also important not to treat the lamp like a candle that can simply be left burning for hours without checking it.
Keep an eye on the flame throughout use.
Common Mistakes to Avoid
Using the Wrong Fuel
One of the biggest mistakes is assuming every flammable liquid can be used as lamp fuel.
Don’t substitute random household liquids.
Use fuel intended for your lamp and follow the manufacturer’s instructions.
Making the Wick Too Long
A very long wick can create a larger flame and more smoke.
Start conservatively and follow the instructions for your burner.
Overfilling the Container
Overfilling can increase the chance of spills.
Always leave the recommended headspace.
Adding Decorations to the Oil
Don’t place Christmas decorations, dried flowers, herbs, glitter, or other decorative materials directly into lamp oil unless the lamp manufacturer specifically designed the product for that purpose.
Keep the fuel clean and the burner unobstructed.
Decorating Too Close to the Flame
This is particularly important at Christmas.
A beautiful arrangement isn’t worth creating a fire hazard.
Keep combustible materials away from the flame.
Moving the Lamp While Lit
Even if the lamp looks stable, moving a lit oil lamp can cause hot oil or flame-related accidents.
Extinguish it first and allow it to cool.
Christmas Oil Lamp Safety Tips
Because this project involves an open flame and liquid fuel, safety should always come before decoration.
Keep these tips in mind:
- Never leave a burning oil lamp unattended.
- Keep it away from children and pets.
- Keep it away from curtains, paper, fabric, dried foliage, and Christmas garlands.
- Place it on a stable, heat-resistant surface.
- Never move the lamp while it is burning.
- Don’t overfill the oil reservoir.
- Don’t add fuel while the lamp is lit or hot.
- Allow the lamp to cool before handling or refilling.
- Use only the recommended fuel.
- Keep the fuel container securely closed and stored safely.
- Don’t use a damaged container or burner.
- Keep an appropriate fire extinguisher accessible in your home.
- Don’t use water to try to extinguish a burning oil or fuel fire; follow the appropriate fire-safety guidance for the fuel and situation.
- If the flame behaves unexpectedly, extinguish it immediately and investigate the problem before using the lamp again.
For the safest experience, always follow the instructions supplied with your particular oil lamp and fuel.
How to Extinguish an Oil Candle Lamp
Don’t blow aggressively on an oil lamp.
Instead, use the lamp’s designated snuffer or extinguishing mechanism if it has one.
If your lamp has manufacturer instructions for extinguishing the flame, follow those instructions carefully.
After extinguishing it, allow the lamp to cool completely before touching the burner, adding fuel, moving it, or storing it.
Never refill a hot lamp.
Can You Add Christmas Fragrance to the Oil?
I recommend keeping your lamp fuel exactly as it was manufactured.
It can be tempting to add peppermint, cinnamon, orange, pine, or vanilla essential oils to create a Christmas scent, but homemade fuel mixtures aren’t necessarily safe for an oil lamp.
If you want fragrance, use a separate candle, wax warmer, or diffuser designed specifically for fragrance.
That way, your oil lamp can focus on providing the beautiful warm glow while another product handles the scent.
How to Make Your Christmas Oil Lamp a Beautiful Gift
A handmade oil lamp can also become part of a lovely Christmas gift.
Instead of giving only the lamp, create a small Christmas decorating set.
You could include:
- A purpose-built oil lamp
- A suitable wick
- Manufacturer-approved lamp oil
- A small decorative tray
- Christmas ornaments
- A ribbon
- A handwritten care card
Keep fuel in its original, properly labeled container rather than transferring it to a decorative bottle.
If you’re gifting the lamp, include clear safety instructions and make sure the recipient understands that it uses liquid fuel and an open flame.
How to Care for Your Oil Lamp
A little maintenance will help keep your lamp looking beautiful.
After the lamp has completely cooled, wipe the exterior with a suitable soft cloth.
Inspect the burner and wick regularly.
If the wick becomes damaged, excessively sooty, or otherwise unsuitable, replace it according to the manufacturer’s instructions.
Don’t continue using a lamp simply because it still lights if the burner, glass, or other component appears damaged.
Store the lamp somewhere dry and secure when you’re not using it.
Frequently Asked Questions
Can I use olive oil in a Christmas oil lamp?
Only if the lamp is specifically designed and approved for olive oil. Different oil lamps are designed for different fuels, so don’t assume ordinary cooking oil is suitable.
Can I use essential oils?
Essential oils shouldn’t simply be added to lamp fuel. They can change how the fuel burns and may create unwanted safety issues.
For Christmas fragrance, use a separate fragrance product designed for that purpose.
Can I use a mason jar?
A regular mason jar should not automatically be treated as an oil-lamp container. For safety, use a purpose-built oil lamp or a container specifically rated and designed for use with an oil-lamp burner.
How do I stop my oil lamp from smoking?
First extinguish it and allow it to cool. Then check the wick length, burner, fuel, and other components against the manufacturer’s instructions.
A wick that is too long can contribute to excessive smoke.
Can I put Christmas greenery around the lamp?
Yes, but keep combustible greenery safely away from the flame and hot parts of the lamp.
Never allow leaves, pine needles, ribbon, or other flammable materials to touch the burner.
Can I leave my Christmas oil lamp burning overnight?
No. An open-flame oil lamp should not be left burning while you’re sleeping or when the room is unattended.
Final Thoughts
Making a Christmas oil candle lamp is such a lovely way to bring a little handmade warmth into your holiday decorating. I especially love that you can make the finished display feel completely personal simply by changing the tray, colors, greenery, and ornaments around it.
The most important thing is to remember that the flame should always be the center of attention—not something crowded by decorations. Choose a suitable lamp, use the correct fuel, keep the wick properly maintained, and give the flame plenty of clear space.
Once you’ve created your lamp safely, turn down the lights, add your favorite Christmas music, and let that soft golden glow become part of your holiday atmosphere. Sometimes the simplest handmade decorations end up being the ones I enjoy the most.