DIY Peppermint Mason Jar Candles
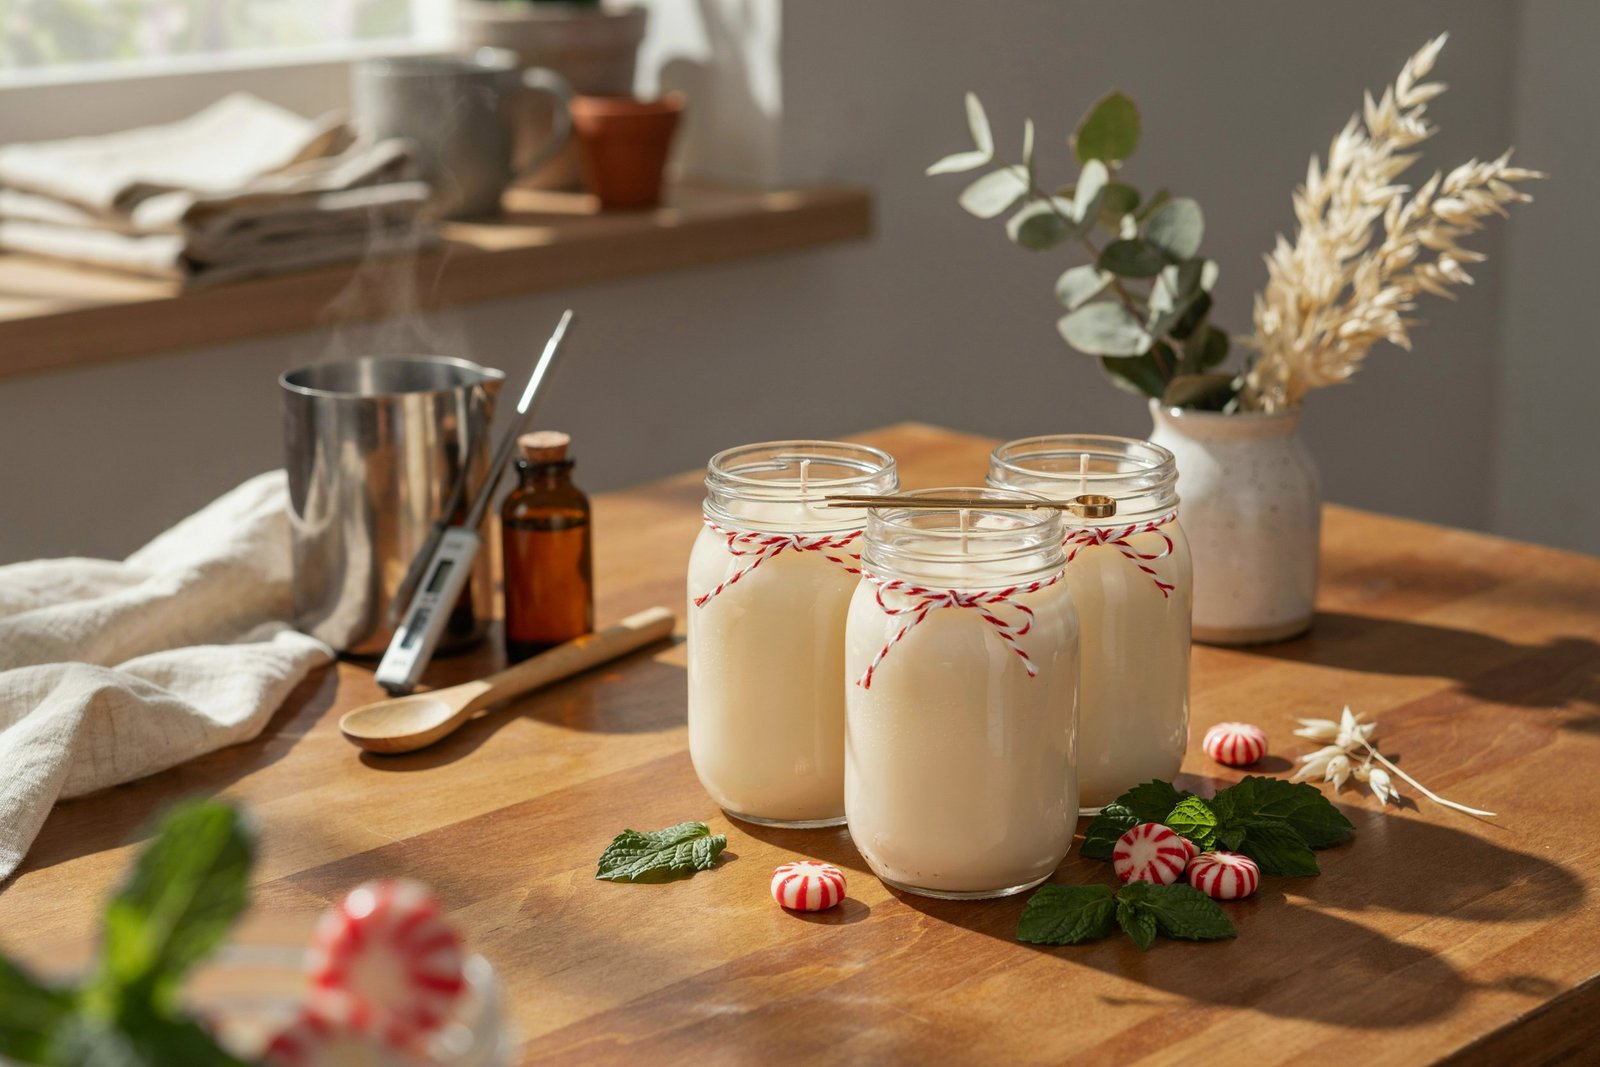
Peppermint candles have always been one of my favorite little ways to make a home feel extra cozy during the holidays.
I love the crisp, sweet scent filling the room while the soft candlelight makes everything feel warm and inviting.
Making these peppermint mason jar candles is also much easier than I expected when I first tried candle making.
With a few simple supplies, you can create beautiful homemade candles that look lovely on a shelf, dining table, or wrapped as a thoughtful handmade gift. In this guide, I’ll walk you through every step so you can make them confidently at home.
Why Make Peppermint Mason Jar Candles?

Homemade candles are one of those crafts that look much more complicated than they actually are. Once you understand the basic process, you can make several candles in one afternoon.
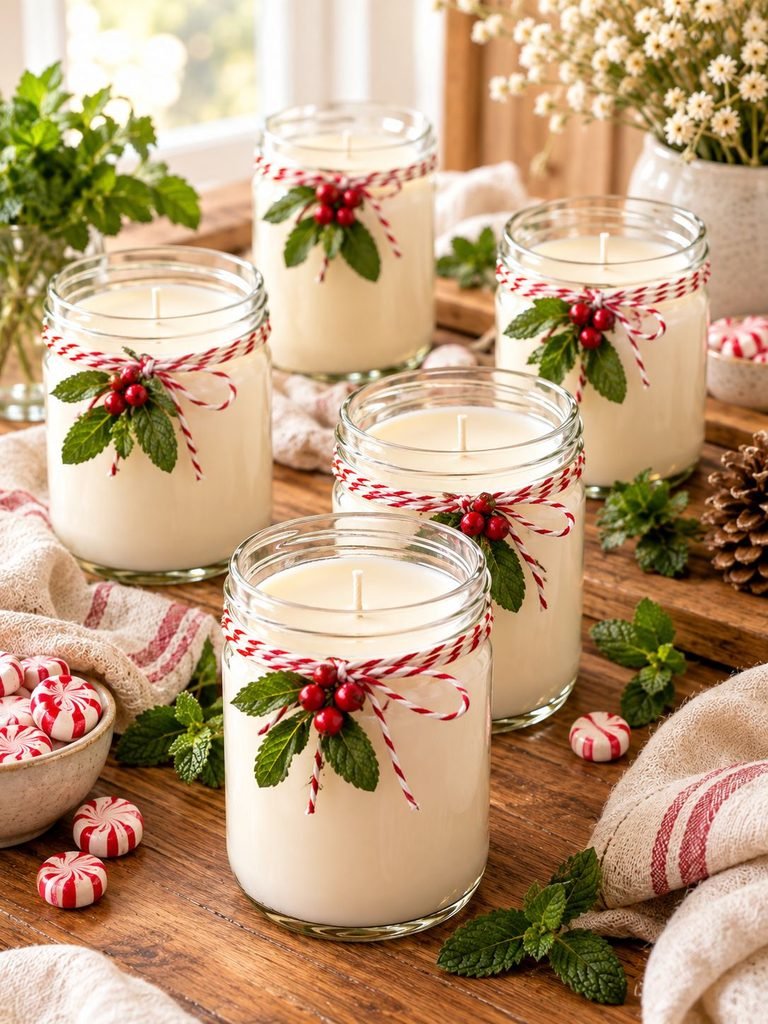
Peppermint is especially lovely for homemade candles because its fresh, cool scent works beautifully during the holiday season. You can keep the candles simple with creamy white wax and a minimalist label, or decorate the jars with ribbons, greenery, candy-cane-inspired details, or festive tags.
Mason jars also make wonderful candle containers because they are inexpensive, easy to find, and naturally give the candles a charming homemade appearance.
The best part is that you can customize almost everything:
- The size of your candle
- The type of wax
- The peppermint fragrance strength
- The jar style
- The wick
- The color
- The decorations
- The label
- The packaging
If you are completely new to candle making, don’t worry. You don’t need a huge collection of equipment to get started.
What You’ll Need
Before you begin, gather everything you need and prepare your workspace. Having everything ready makes the actual candle-making process much smoother.
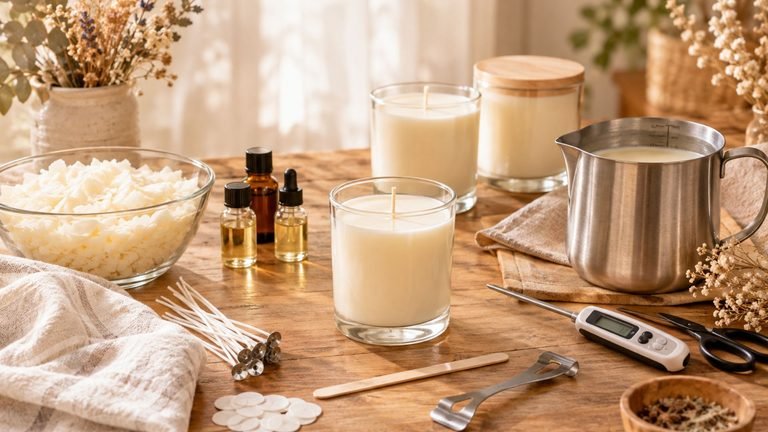
Materials
For approximately 2 medium 8-ounce mason jar candles, you’ll need:
- 1 pound of soy candle wax flakes
- Candle-safe peppermint fragrance oil
- 2 candle wicks suitable for your jar diameter
- 2 heat-safe mason jars or candle jars
- 2 wick stickers or a small amount of candle adhesive
- 2 wick-centering devices or wooden craft sticks
- Heat-safe pouring pitcher
- Digital kitchen or candle thermometer
- Kitchen scale
- Double boiler or wax-melting setup
- Wooden spoon or silicone spatula
- Scissors or wick trimmer
- Paper towels
- Optional candle dye
- Optional festive labels
- Optional ribbon or twine for decorating
Important: Use Candle Fragrance Oil
One detail I really recommend paying attention to is the fragrance.
Use a fragrance oil specifically made and tested for candle making. Avoid simply adding peppermint extract from your kitchen cupboard. Food extracts are not formulated for burning in candles and can affect the candle’s performance and safety.
You can also use peppermint essential oil if the specific product is appropriate for candle making, but fragrance oils formulated for candles generally make it easier to achieve a consistent scent throw.
Always follow the fragrance manufacturer’s recommended usage rate.
Step 1: Choose the Right Mason Jars
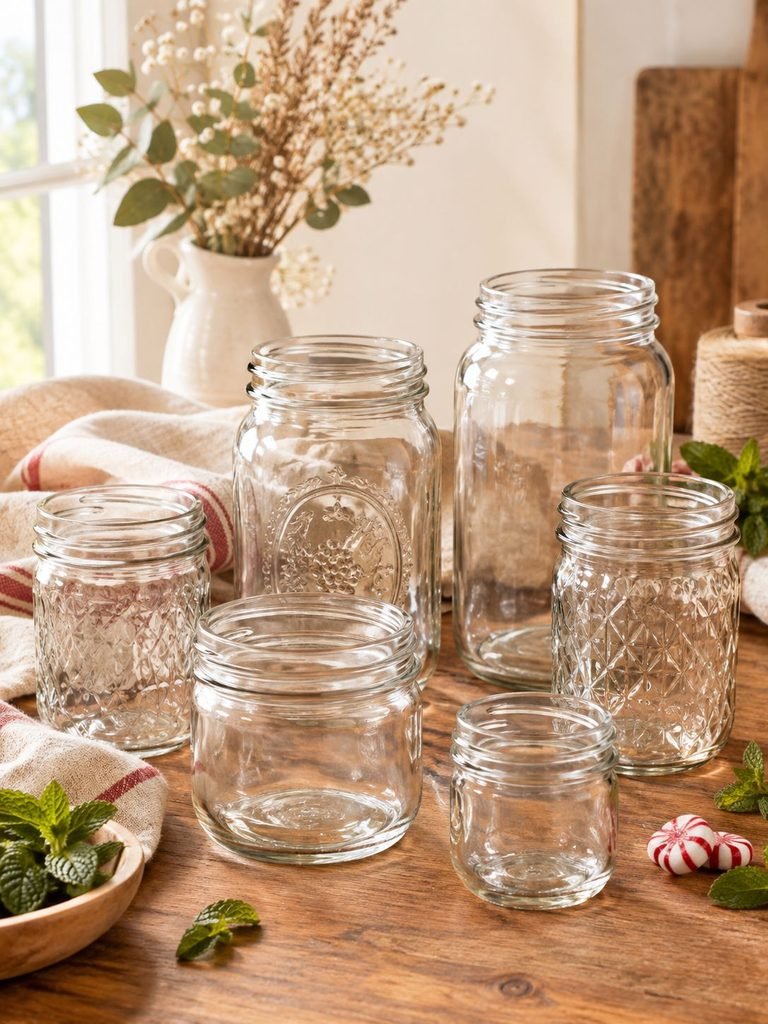
The jar you choose matters more than you might think.
For this project, I love using small or medium mason jars with straight or slightly rounded sides. They give the finished candles that classic homemade look while making it easier for the candle to burn evenly.
Look for jars that are:
- Clean and completely dry
- Free from cracks or chips
- Designed to tolerate heat
- Wide enough for your chosen wick
- Stable enough to sit securely on a flat surface
Avoid using thin decorative glass containers that aren’t intended to handle heat.
Before adding wax, inspect every jar carefully. If you notice a crack, chip, or other damage, don’t use it as a candle container.
Step 2: Measure Your Wax
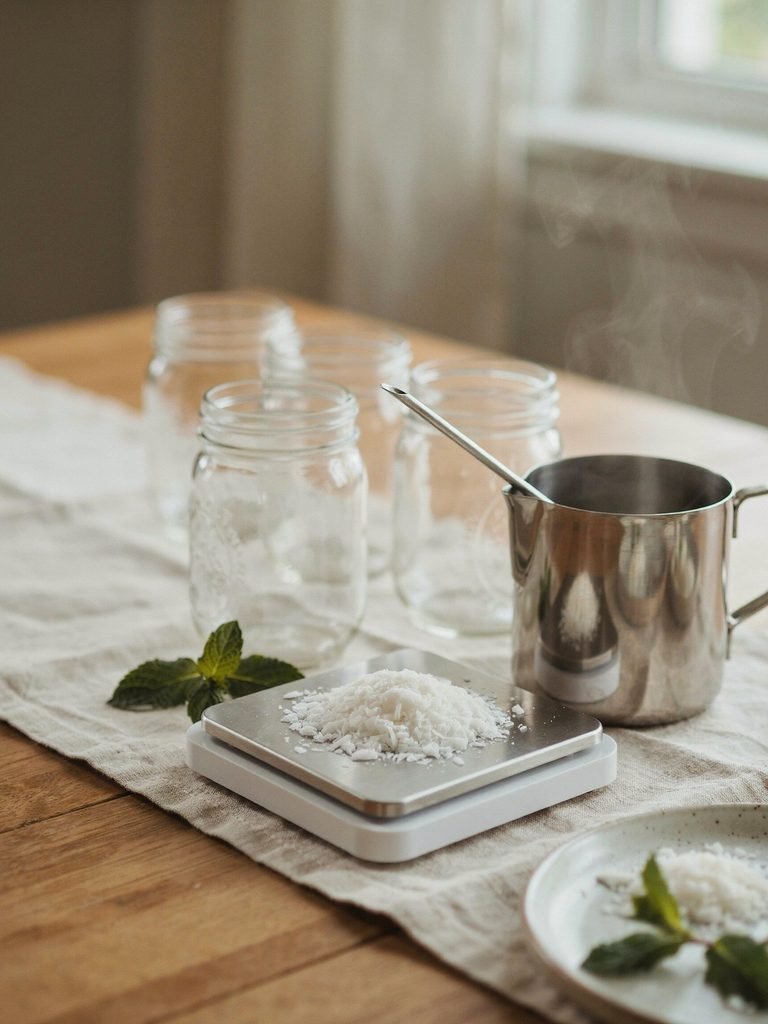
Accurate measurements make a big difference when you’re making candles.
For two medium candles, start with approximately 1 pound of soy wax flakes, although the exact amount will depend on the size of your jars.
The easiest way to determine how much wax you need is to weigh your containers and calculate their approximate fill capacity.
Don’t fill the jars completely to the top. Leave some space above the wax so the candle can burn comfortably without the flame sitting too close to the rim.
I usually prefer leaving around 1/2 inch of space between the surface of the wax and the top of the jar.
Measure your wax using a digital scale rather than relying on cups or handfuls. Wax flakes can vary in volume, so weight gives you much more consistent results.
Step 3: Prepare Your Workspace

Candle making is simple, but melted wax can become very hot, so take a few minutes to prepare your workspace.
Cover your work surface with newspaper, parchment paper, or another protective covering.
Place your jars, wick supplies, thermometer, pouring pitcher, scale, fragrance oil, and other materials within easy reach.
I also recommend keeping your workspace free from clutter. You don’t want to be searching for a wick sticker while holding a pitcher of hot wax.
Keep children and pets away from the candle-making area while the wax is being heated and poured.
Step 4: Attach the Wicks
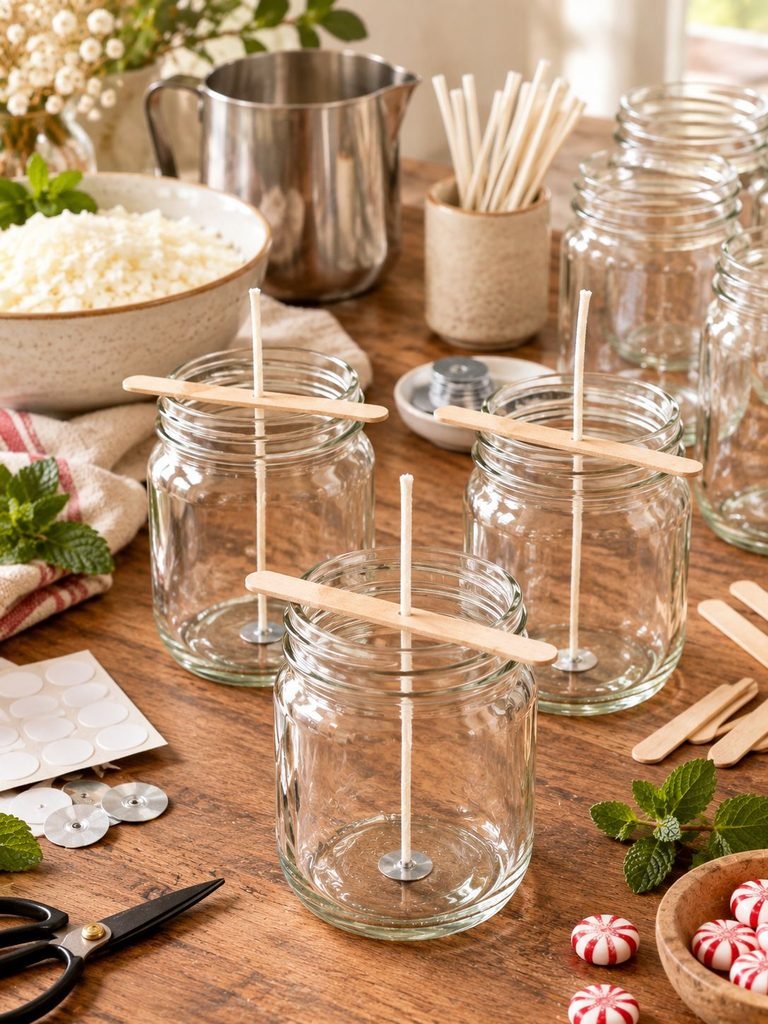
Before melting your wax, prepare your jars.
Place one wick in the center of each jar using a wick sticker or candle-safe adhesive.
Press the wick firmly against the bottom of the jar so it stays in place when the hot wax is poured.
Next, keep the wick standing upright and centered.
You can use:
- A wick-centering tool
- Two wooden sticks
- Chopsticks
- A clothespin-style wick holder
- Another suitable wick support
The important thing is keeping the wick centered while the wax cools.
Why Wick Size Matters
Wick selection is one of the most important parts of candle making.
A wick that is too small may create a weak flame and leave a thick ring of unmelted wax around the edges.
A wick that is too large can create excessive heat, a very large flame, soot, or an overly hot container.
The correct wick depends on factors such as:
- Jar diameter
- Wax type
- Fragrance load
- Wick material
- Fragrance characteristics
For that reason, don’t choose a wick based only on the volume of wax. Follow the wick manufacturer’s sizing recommendations and test your candle before making a large batch.
Step 5: Melt the Soy Wax
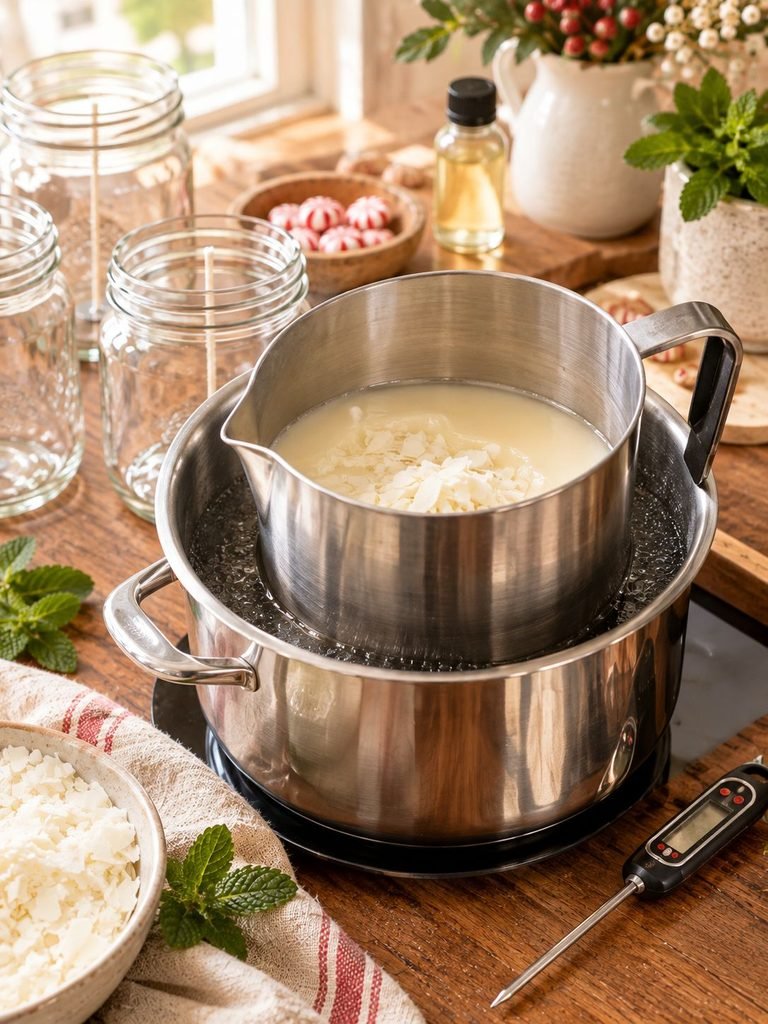
Place your measured soy wax into a heat-safe pouring pitcher.
Set up a double boiler by placing the pitcher in a pot containing a small amount of water.
Warm the water gently and allow the wax to melt gradually.
Stir occasionally using a clean silicone spatula or wooden utensil.
Keep an eye on the temperature with your thermometer.
The ideal melting temperature varies by wax manufacturer, so use the temperature instructions provided with your particular soy wax. Many soy waxes are melted in the general range of approximately 170–180°F (77–82°C), but always follow your wax supplier’s instructions rather than treating one temperature as universal.
Never leave melting wax unattended.
Step 6: Add Your Peppermint Fragrance
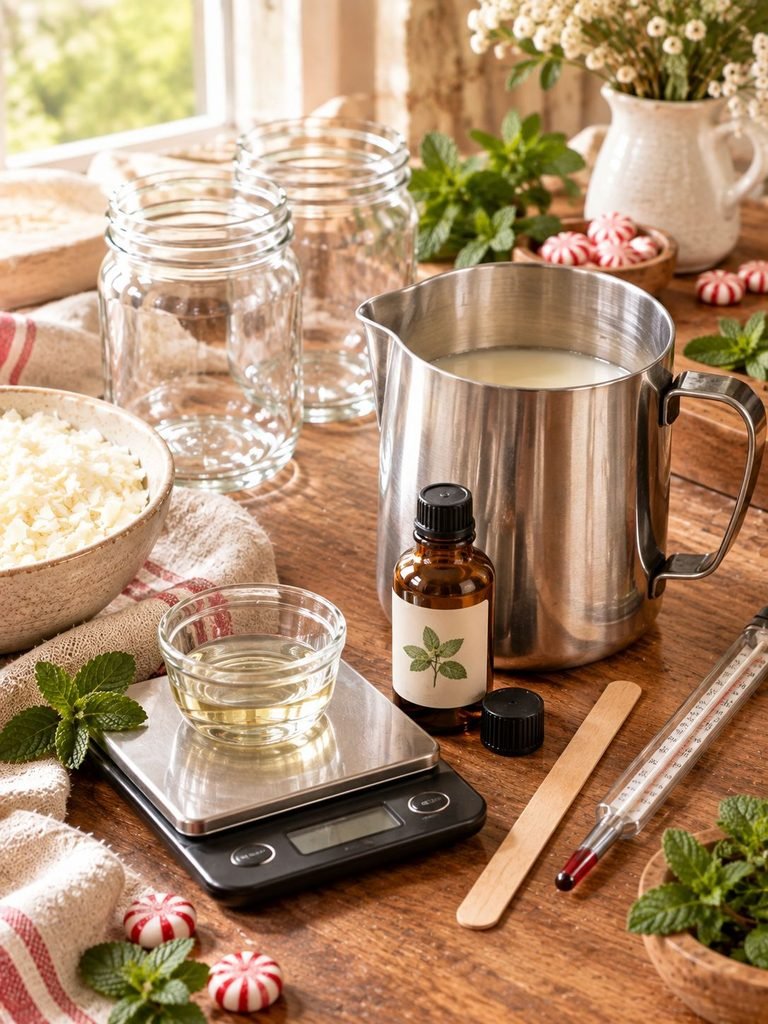
Once your wax has melted, allow it to cool to the temperature recommended by your wax manufacturer for fragrance addition.
This is an important step because adding fragrance at the wrong temperature can affect how well it combines with the wax and how the finished candle performs.
For fragrance quantity, follow the fragrance oil manufacturer’s recommended maximum fragrance load for your particular wax.
As a general example, if your wax manufacturer recommends a 6% fragrance load, you would calculate the fragrance based on the weight of the wax, not the size of the jar.
For example:
450 g wax × 6% = 27 g fragrance oil
Always use a scale for accurate measurements.
Add the peppermint fragrance slowly to the melted wax and stir gently for the amount of time recommended by your wax supplier.
Avoid vigorously stirring because excessive agitation can introduce unnecessary air bubbles.
Step 7: Add a Little Color if You Want
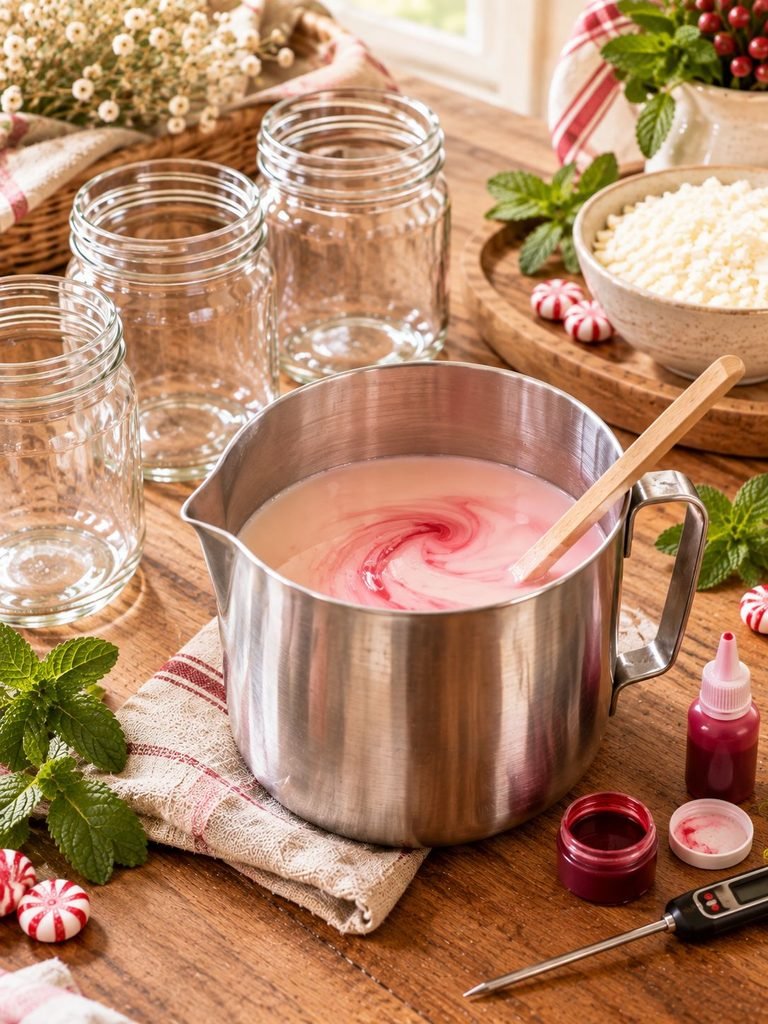
Peppermint candles look beautiful in their natural creamy-white color, so you don’t need dye at all.
In fact, I personally love the simple white look because it feels clean, elegant, and wintery.
If you want to add color, use a candle-specific dye and follow the manufacturer’s recommended amount.
A soft pink, pale red, or very subtle green can give the candle a festive appearance.
Avoid using food coloring because it isn’t designed to mix properly with candle wax.
For a sophisticated look, I would keep the color very subtle rather than making the wax extremely bright.
Step 8: Pour the Wax Into the Mason Jars
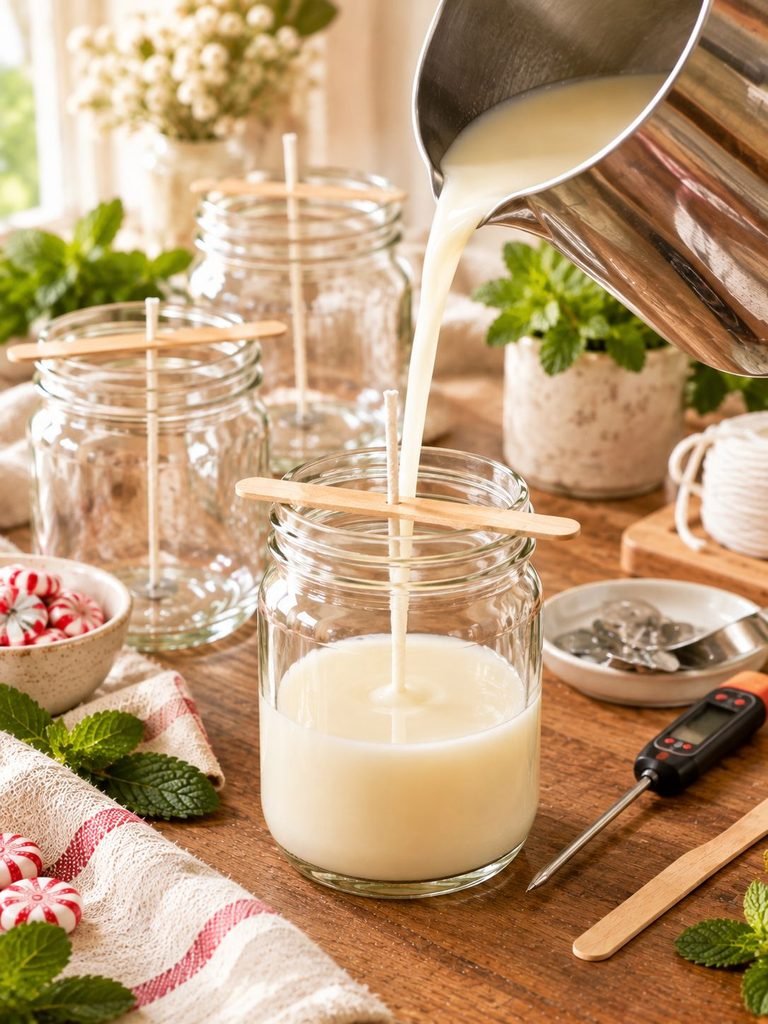
Now comes my favorite part.
Make sure your jars are sitting on a stable, level surface.
Slowly pour the scented wax into each jar.
Try to pour gently and steadily rather than quickly. A slow pour can help minimize bubbles and splashing.
Leave approximately 1/2 inch of space at the top.
Once you’ve filled the jars, check the wick position.
If the wick has moved off-center, gently reposition it while the wax is still liquid.
Don’t disturb the jars after this point.
Place them somewhere safe where they won’t be bumped, moved, or exposed to drafts while cooling.
Step 9: Let the Candles Cool Completely
This part requires patience.
It can be tempting to touch the candles, move them, or test them as soon as the wax appears solid.
Don’t.
Allow the candles to cool naturally at room temperature.
Rapid temperature changes can contribute to cracking, frosting, uneven surfaces, or other cosmetic problems.
Soy wax can sometimes develop a slightly textured or frosted appearance as it cools. This is a normal characteristic of soy wax and doesn’t necessarily mean the candle has gone wrong.
Keep the candles away from:
- Open windows
- Fans
- Air-conditioning vents
- Direct sunlight
- Very cold surfaces
- Areas with frequent movement
Allow them to fully solidify before moving on to trimming and curing.
Step 10: Trim the Wick
Once the wax has completely hardened, trim the wick.
For most candles, a starting wick length of approximately 1/4 inch is a good place to begin, but follow the wick manufacturer’s recommendations.
Use a proper wick trimmer or sharp scissors.
Don’t leave an extremely long wick because it can produce a larger flame and excess soot.
You also don’t want to cut the wick too short because the candle may struggle to maintain a stable flame.
Step 11: Let Your Candles Cure
One of the biggest mistakes beginners make is lighting a candle immediately after making it.
I know it’s tempting, especially when the candle smells amazing, but allowing the candle to cure gives the wax and fragrance time to settle.
For soy candles, curing time can vary depending on the wax and fragrance combination. A period of approximately 1–2 weeks is commonly used for testing and achieving better fragrance performance, although your wax supplier’s recommendations should take priority.
During curing, keep the candles covered or stored somewhere clean, cool, and dry.
The longer curing period can help the fragrance integrate more thoroughly with the wax.
How to Get a Stronger Peppermint Scent
If your finished candle doesn’t smell as strong as you expected, don’t immediately add more fragrance.
First, check whether:
- The candle has cured long enough.
- You used a candle-safe fragrance oil.
- The fragrance was added at the recommended temperature.
- The fragrance was measured accurately.
- The wick is appropriate for the jar.
- The candle is being tested in an appropriately sized room.
More fragrance isn’t automatically better.
Adding more than the wax is designed to hold can negatively affect the candle and may create safety or performance problems.
Always stay within the manufacturer’s recommended fragrance load.
How to Perform the First Burn
Your first burn is important because it helps you evaluate how the candle performs.
Place your candle on a stable, heat-resistant surface away from anything flammable.
Before lighting it, make sure the wick is trimmed to the recommended length.
Light the candle and observe the flame.
For many container candles, the first burn is allowed to continue long enough for the melted wax pool to approach the edges of the container. However, never leave a candle unattended and follow the safety recommendations for your specific wax, wick, and container.
Avoid burning a container candle for excessively long periods. Many candle makers use approximately 2–4 hours as a general maximum range, but always follow the safety guidance supplied with your materials.
Never burn a candle all the way to the bottom of the jar.
Common Problems and How to Fix Them
My Candle Has a Hole or Sinkhole
Sometimes candles develop a small depression as they cool.
This can happen because wax contracts during cooling.
For a cosmetic fix, you can carefully use a heat gun to smooth the surface, following proper heat-tool safety precautions.
Alternatively, a small amount of reserved melted wax can sometimes be used to fill the depression.
My Candle Has a Rough or Frosted Surface
Soy wax is particularly known for frosting and can sometimes cool with a slightly uneven appearance.
This doesn’t necessarily affect how the candle burns.
To reduce cosmetic issues:
- Avoid extreme temperature changes.
- Let the candle cool slowly.
- Avoid moving the jar while the wax is setting.
- Follow your wax supplier’s pouring recommendations.
- Experiment with pouring temperatures during testing.
The Candle Has Tunneling
Tunneling occurs when the candle burns down the middle while leaving a thick wall of unmelted wax around the sides.
Possible causes include:
- An undersized wick
- Insufficient first burn
- Incorrect wick selection
- Candle being extinguished too quickly
The best solution is usually testing a different wick size rather than simply burning the candle longer.
The Flame Is Too Large
A very large flame may indicate that the wick is too large or too long.
Extinguish the candle safely, allow it to cool completely, and trim the wick before the next burn.
If the flame remains unusually large, test a different wick size.
Never ignore an unsafe-looking flame.
The Candle Doesn’t Smell Strong Enough
This is often called weak hot throw or cold throw.
Check your fragrance measurement, curing time, fragrance compatibility, wax type, and wick.
The fragrance oil itself also makes a difference. Some scents naturally perform more strongly in candles than others.
Peppermint can be quite noticeable, so you may find that a moderate fragrance load is enough.
Beautiful Ways to Decorate Your Peppermint Mason Jar Candles
Once the candle itself is finished, you can make the presentation just as special.
Add a Simple Label
A small cream or white label can give your candle a beautiful handmade appearance.
You could write:
Peppermint
or
Hand-Poured Peppermint Candle
Keep the design simple with elegant lettering.
Add a Ribbon
Tie a narrow velvet, cotton, or satin ribbon around the top of the jar.
For a cozy winter look, cream, soft blush, burgundy, or muted green can work beautifully.
Use Twine
For a rustic cottage-style appearance, wrap natural twine around the jar and attach a small kraft-paper gift tag.
Add a Small Gift Tag
A handwritten note makes the candle feel much more personal.
For example:
Made with love
or
A little peppermint comfort
Create a Candy-Cane-Inspired Theme
Use white labels with subtle red accents and a red-and-white ribbon.
You don’t need to put candy or loose decorations directly into the wax. Keeping the candle surface clear helps maintain a clean and safer candle design.
DIY Peppermint Candle Gift Ideas
These candles make lovely homemade gifts for:
- Teachers
- Friends
- Coworkers
- Neighbors
- Family members
- Hostess gifts
- Holiday gift baskets
- Secret Santa exchanges
- Christmas stocking gifts
For a beautiful gift set, place one candle inside a small gift box with crinkle paper and a handwritten card.
You could also create a cozy winter basket containing:
- One peppermint candle
- A soft pair of socks
- Hot chocolate
- A small mug
- A handwritten note
The candle becomes part of a whole cozy experience rather than just a single gift.
Candle Safety Tips You Should Never Skip
Even though these candles are homemade and decorative, they are still candles and should be treated carefully.
Always:
- Burn candles on a stable, heat-resistant surface.
- Keep candles away from curtains, paper, bedding, and other flammable objects.
- Keep burning candles away from children and pets.
- Never leave a burning candle unattended.
- Keep the wick trimmed.
- Don’t move a candle while the wax is liquid.
- Stop burning the candle before the flame gets too close to the bottom of the container.
- Don’t burn a damaged or cracked jar.
- Don’t place loose dried flowers, herbs, paper, or other flammable decorations in the wax or directly around the flame.
- Follow the safety instructions supplied with your wax, wick, fragrance, and container.
If you’re planning to sell your candles rather than simply make them for personal use, you’ll also want to research the applicable candle-labeling, testing, fire-safety, and consumer-product requirements where you live.
How to Make These Candles in a Larger Batch
Once you’ve successfully tested one or two candles, you can make several at once.
For a larger batch, multiply your wax and fragrance measurements carefully.
For example, if your tested formula makes two candles, don’t simply estimate the ingredients for ten candles. Calculate the total wax weight and fragrance weight based on your tested formula.
Keep a simple candle-making notebook with:
- Wax brand
- Wax quantity
- Fragrance name
- Fragrance percentage
- Fragrance weight
- Wick type
- Wick size
- Jar diameter
- Pouring temperature
- Fragrance-addition temperature
- Cure time
- First-burn results
This makes it much easier to recreate a candle you love.
A Simple Peppermint Mason Jar Candle Formula
For a beginner-friendly starting point, your formula can look like this:
Wax: Soy container wax
Fragrance: Candle-safe peppermint fragrance oil
Fragrance amount: Follow the wax manufacturer’s maximum recommended fragrance load
Container: Heat-safe 8-ounce mason-style candle jar
Wick: Correctly sized for the jar diameter and wax
Color: Optional candle dye
Cure: Follow the wax manufacturer’s recommendation; approximately 1–2 weeks is a useful testing period for many soy candles
The exact formula may need adjustment depending on your specific wax, wick, fragrance, and container combination.
Final Thoughts
Making DIY peppermint mason jar candles is one of those crafts that feels especially rewarding because you get something beautiful and useful at the end. The combination of creamy soy wax, a refreshing peppermint fragrance, and a simple glass jar creates a candle that feels perfect for cozy winter evenings.
My favorite part is how customizable the project is. You can keep the candles minimal and elegant, decorate them with festive ribbons, or turn them into thoughtful handmade gifts for friends and family.
Don’t worry if your first candle isn’t absolutely perfect. Candle making is a little bit of experimenting. Once you learn how your particular wax, wick, fragrance, and jar work together, you’ll become much more confident.
Take your time, measure carefully, let your candles cure properly, and always prioritize candle safety. Before long, you’ll have your own little collection of beautiful peppermint candles ready to light, display, or give to someone special.