17+ Cute Mini Clay Figure Ideas for Easy DIY Projects
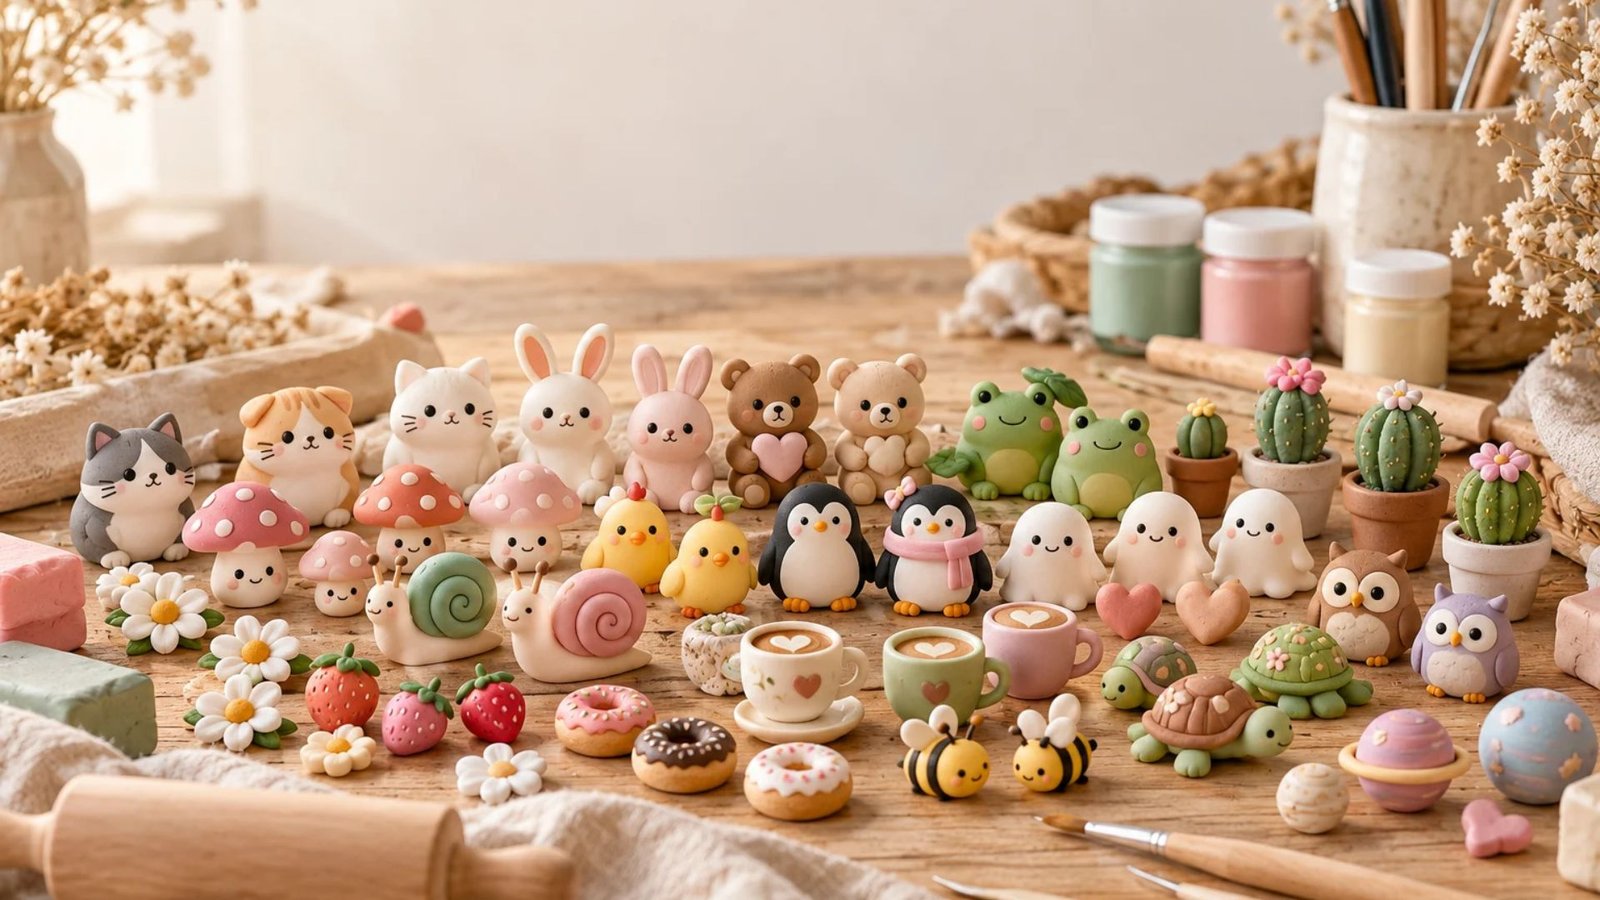
I have always loved little handmade things that make a space feel a bit more personal, and mini clay figures are one of my favorite crafts to try when I want something cute without spending a lot of money.
From tiny smiling mushrooms to adorable little cats and sweet miniature food, these projects are full of charm and surprisingly easy to make at home.
You do not need to be an expert sculptor or own fancy tools to get started. In this guide, I am sharing lovely mini clay figure ideas, simple tips, and helpful steps to inspire your next cozy crafting afternoon.
Why Make Mini Clay Figures?
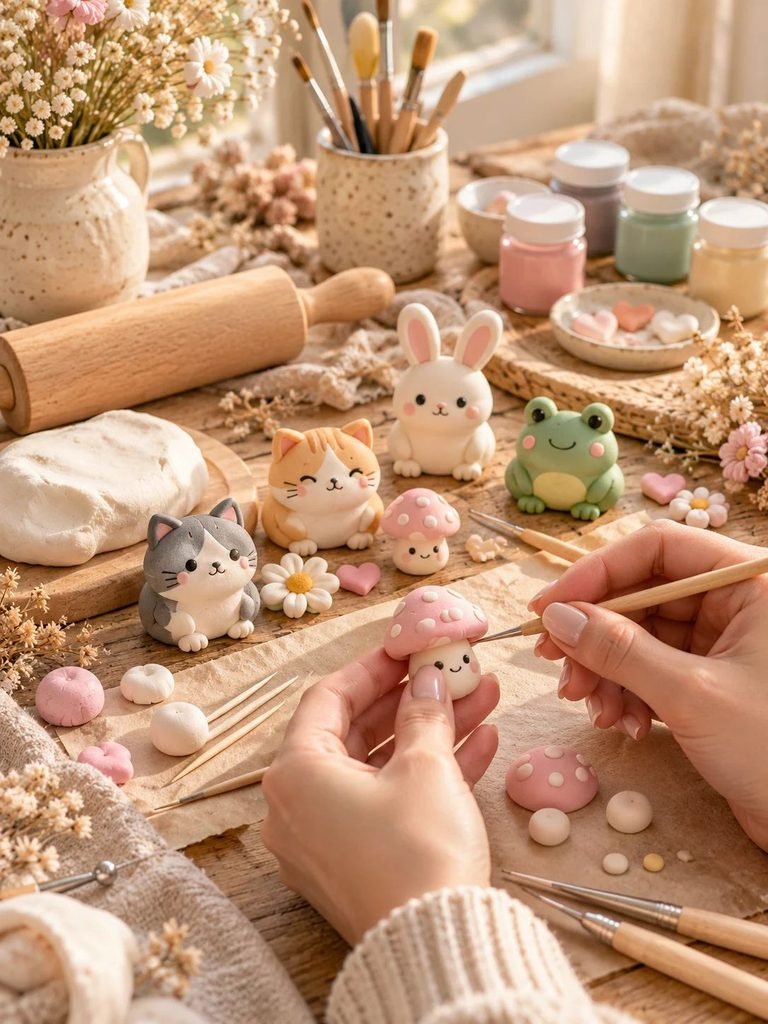
Mini clay figures are a wonderful way to explore your creativity without committing to a large or complicated project. Most designs can be made from a few basic shapes, such as balls, teardrops, and small cylinders.
They are also easy to personalize. You can change the colors, add little faces, create different expressions, or make a whole collection of tiny characters that reflect your personality.
Here are a few reasons to give this craft a try:
- Beginner-friendly: Many figures use simple shapes and minimal sculpting.
- Budget-friendly: You only need a small amount of clay for most projects.
- Lovely handmade gifts: Tiny animals, flowers, and characters make thoughtful gifts.
- Perfect for decorating: Display your creations on desks, shelves, bookcases, or decorative trays.
- A creative activity: Making miniature figures is a relaxing way to spend an afternoon.
You can use air-dry clay if you prefer not to bake your creations, or polymer clay if you want a durable miniature that can be cured in an oven according to the manufacturer’s instructions.
Supplies You Will Need
Before starting, gather a few simple supplies. You probably already have some of these at home.
- Air-dry clay or polymer clay
- A clean, smooth work surface
- A small rolling pin or smooth glass bottle
- Toothpicks or basic clay sculpting tools
- A small cup of water for smoothing air-dry clay
- Acrylic paints in your favorite colors
- Fine paintbrushes for tiny details
- A damp cloth or paper towels
- Fine-grit sandpaper for smoothing fully dried air-dry clay
- Suitable clear varnish or sealer, if needed
You do not have to purchase every item on this list. A toothpick can create small details, and your fingertips are often enough to shape simple figures.
Important tip: Keep your tools clean, especially when switching between dark and light clay colors. If you are using polymer clay, follow its safety instructions and use dedicated tools and surfaces that will not be used for food preparation.
17+ Cute Mini Clay Figure Ideas to Try
1. Mini Clay Cats
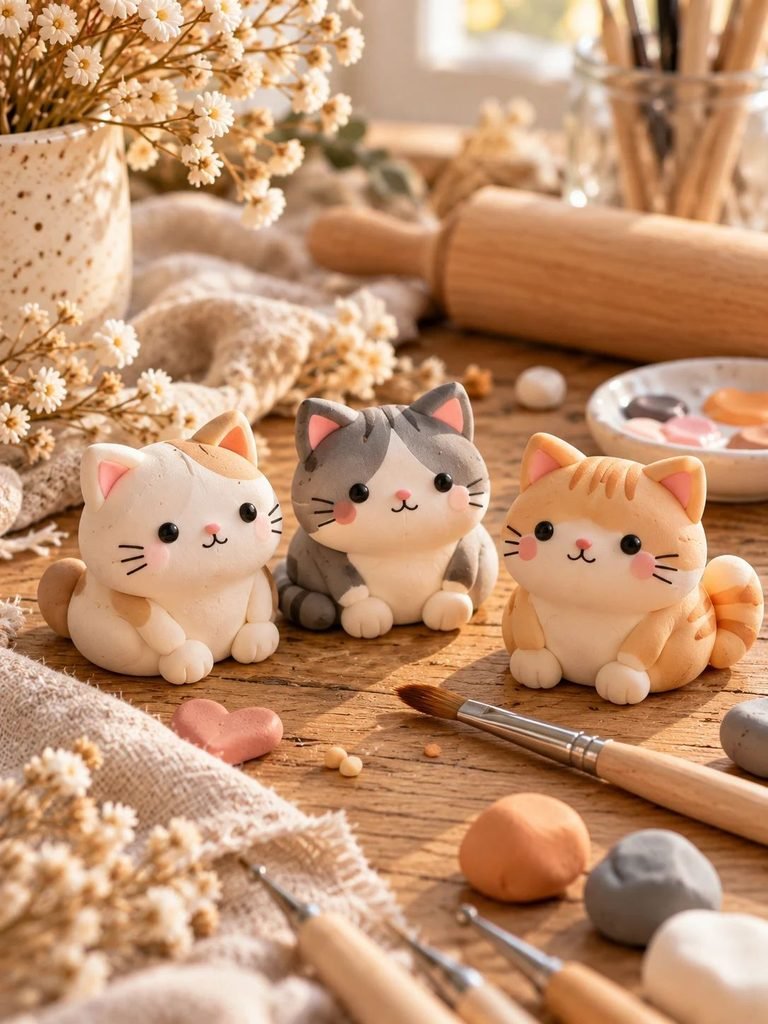
Mini clay cats are perfect for anyone who loves adorable animal figures. Their rounded bodies, little ears, and tiny faces make them especially suitable for beginners.
What you will need:
- White, cream, gray, or brown clay
- Black and pink acrylic paint, if needed
- A toothpick or fine sculpting tool
How to make them:
- Roll a small piece of clay into a smooth ball.
- Gently shape it into a rounded oval, keeping the bottom flat so the cat can stand.
- Pinch two small triangles at the top to create ears.
- Smooth the ear edges with your fingers.
- Allow air-dry clay to dry completely, or cure polymer clay as directed.
- Add two tiny eyes, a little nose, and a simple mouth.
You can make a white kitten, a gray cat with darker ears, or a tiny orange tabby with painted stripes.
Cute finishing idea: Make three cats in different sizes and arrange them together on a small wooden tray.
2. Tiny Mushroom Figures
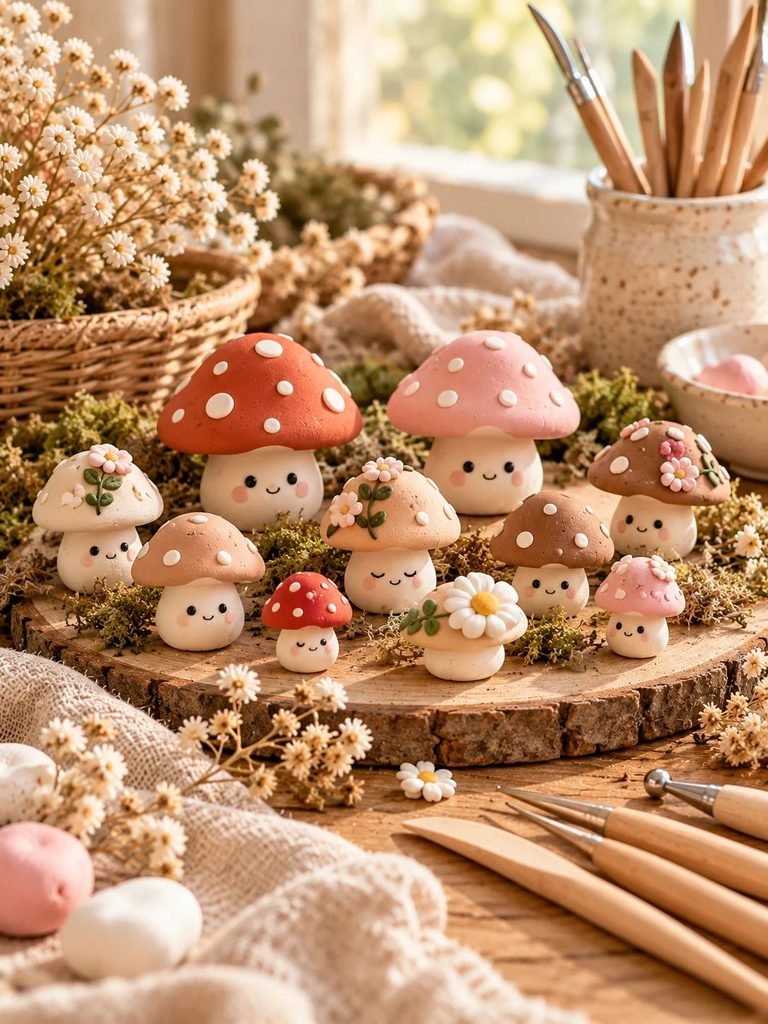
If you love cottagecore crafts and woodland decorations, miniature mushrooms are a lovely project to try.
Their simple shape makes them easy to create, even if you have never sculpted before.
How to make them:
- Roll a small piece of clay into a short cylinder for the stem.
- Shape another piece into a rounded dome for the cap.
- Flatten the bottom of the stem so the mushroom stands upright.
- Attach the cap carefully, smoothing the join.
- Let the clay dry or cure according to the product instructions.
- Paint the cap red, blush pink, or warm brown.
- Add tiny cream spots and a simple smiling face if you like.
You could also make an entire mushroom family with different cap colors.
For a softer look, choose muted terracotta, ivory, and sage green instead of bright colors.
Read How to Make Air-Dry Clay Christmas Ornaments by Embossing Them
3. Mini Clay Bunnies
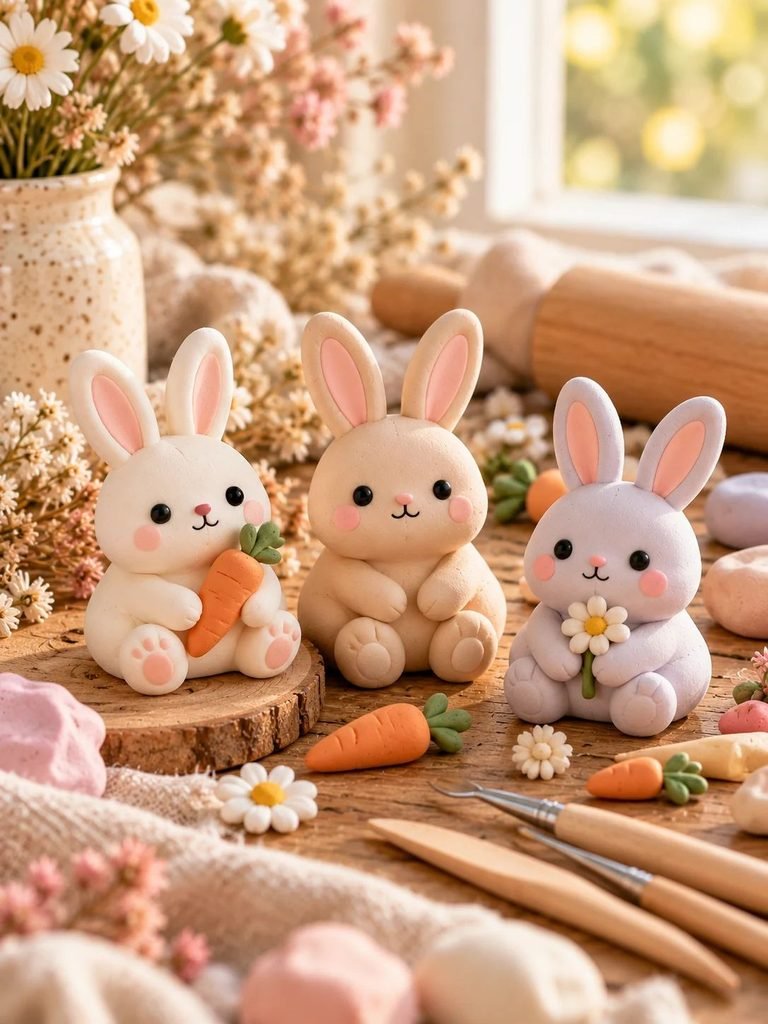
Tiny bunnies look especially sweet in pastel colors and are wonderful for spring decorations or Easter gifts.
How to make them:
- Shape a small ball of clay into a rounded body.
- Roll two narrow pieces of clay for the ears.
- Attach the ears to the top of the body, blending the joins gently.
- Add two tiny front paws if desired.
- Create small eyes and a nose using a toothpick or fine paintbrush.
- Add a little pink to the inner ears after the figure has dried, if you prefer painted details.
Keep the ears short and thick if you want a sturdy figure that is less likely to break.
A miniature bunny holding a tiny carrot makes an especially cute addition to your collection.
4. Cute Mini Clay Bears
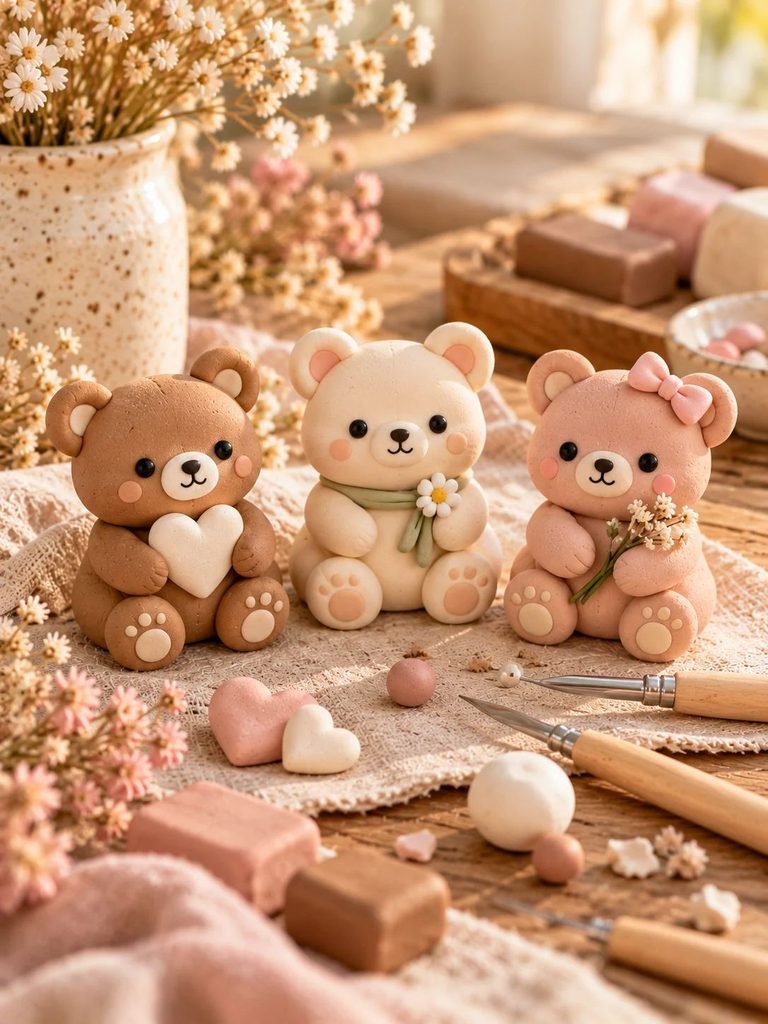
Miniature bears are another easy project because their features can be made from small balls of clay.
Choose brown, cream, caramel, or blush clay for a soft, cozy appearance.
Steps to follow:
- Form one larger ball for the body.
- Shape a smaller ball for the head.
- Make two tiny rounded ears and attach them to the head.
- Add small arms and feet.
- Join the head to the body, scoring and blending the contact points as needed.
- Once dry or cured, paint a tiny nose and two eyes.
You can make a teddy bear sitting down, holding a little heart, or wearing a miniature scarf.
For a beginner, a simple round bear with tiny ears and a painted face is more than enough.
Read 16 Elegant Clay Candle Holder Ideas for a Handmade Luxury Look
5. Tiny Clay Frogs

A little frog figure is a fun way to experiment with bright colors and expressive faces.
Green is the classic choice, but pale mint, olive, and sage also look beautiful.
How to make one:
- Roll green clay into a small, rounded body.
- Flatten the bottom slightly to help it sit securely.
- Add two small balls of clay at the top for raised eyes.
- Use a toothpick to make a shallow curved smile.
- Add tiny feet on either side of the body.
- Allow the figure to dry or cure properly.
Once finished, paint tiny black pupils and a soft blush on the cheeks.
You could make a frog sitting on a miniature lily pad or holding a tiny flower.
Read 15 Functional Air Dry Clay Projects You’ll Actually Use
6. Mini Clay Chickens
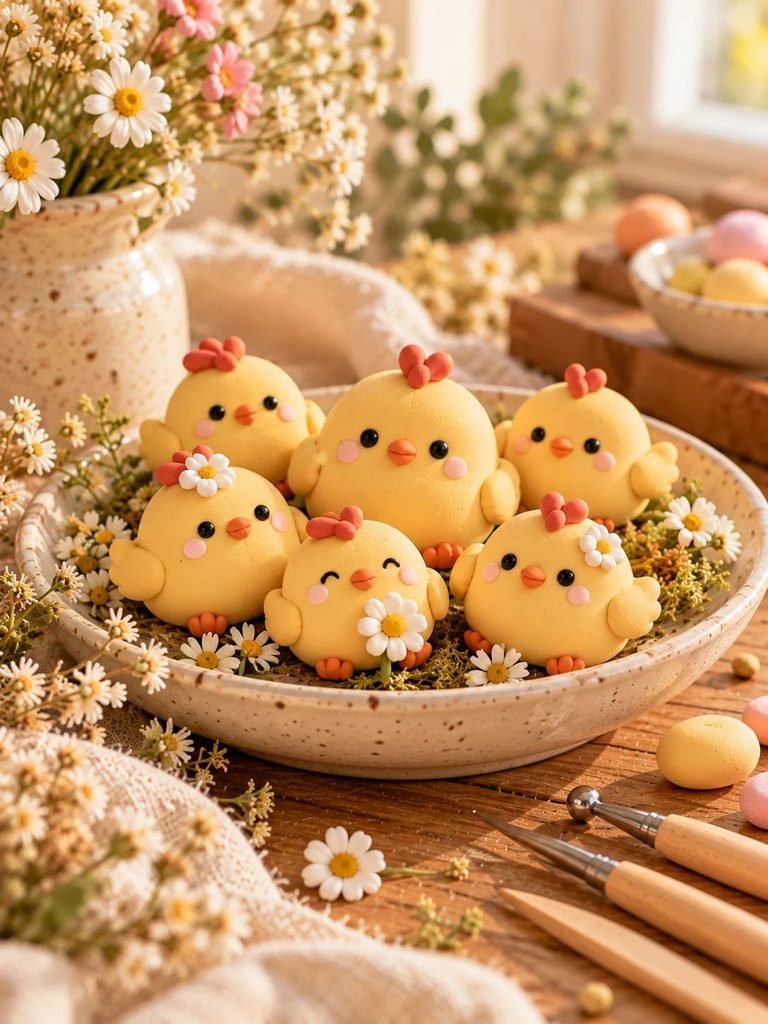
Tiny chickens are cheerful little figures that work well for spring crafts, farmhouse decorations, and handmade gifts.
How to make them:
- Roll yellow or white clay into a plump oval.
- Pinch a small amount of clay into a short beak.
- Add two tiny wings to the sides.
- Create a small comb on top of the head using red clay or paint.
- Add tiny eyes and two little feet.
For a simpler version, make a round yellow chick with an orange beak and two black eyes.
A collection of chicks in different sizes would look adorable displayed in a shallow bowl or on a shelf.
7. Tiny Clay Snails
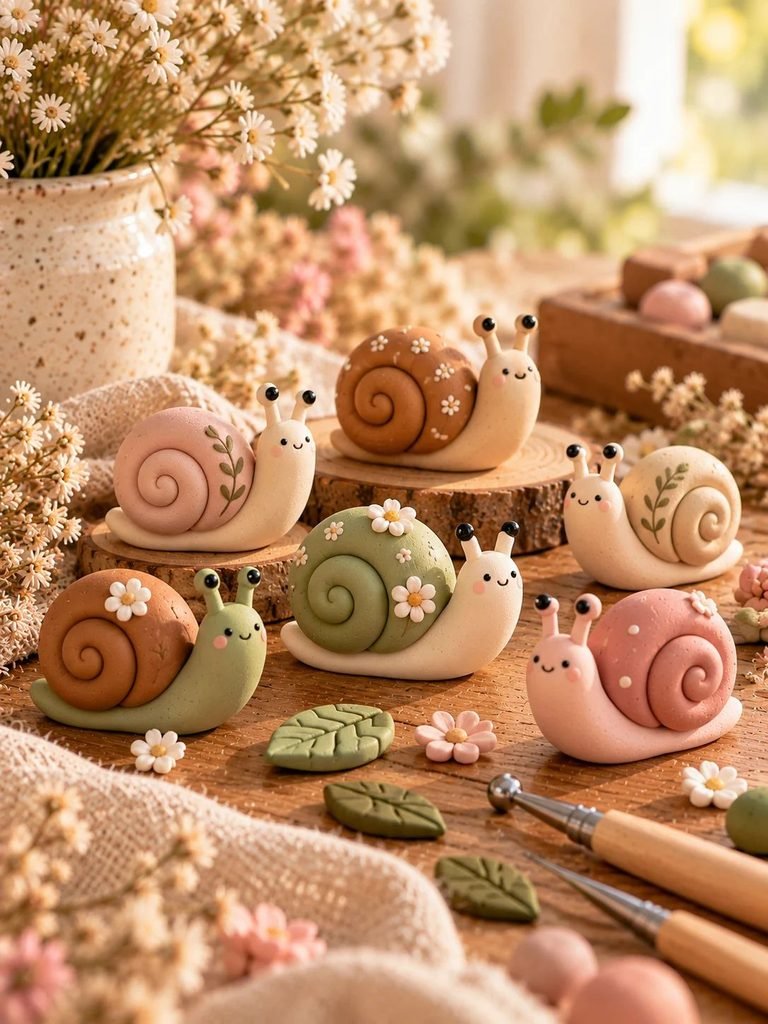
Mini clay snails are perfect for anyone who enjoys whimsical garden-inspired crafts.
Their most recognizable feature is the spiral shell, which is also one of the easiest details to create.
How to make them:
- Roll clay into a short, slightly curved cylinder for the body.
- Flatten the bottom so it sits securely.
- Roll another thin piece of clay into a coil for the shell.
- Carefully curl the coil into a spiral.
- Attach the shell to the upper part of the body.
- Add small eye stalks and a smiling face.
Try a cream body with a blush shell, or use terracotta and sage green for a natural look.
Press the shell gently into the body and blend the contact area so it stays attached after drying.
8. Mini Clay Penguins

Penguins are a great choice if you enjoy making simple figures with contrasting colors.
Their rounded shape is easy to sculpt, and you only need a few details to make them recognizable.
How to make them:
- Form black or dark gray clay into an upright oval.
- Flatten the bottom so the penguin stands.
- Add a small white oval to the front for the belly.
- Attach two tiny wings to the sides.
- Add a little orange beak and two small feet.
- Paint the eyes after the figure has dried, if necessary.
For a cute variation, make a tiny penguin wearing a blush-pink scarf or holding a miniature snowflake.
9. Mini Clay Ghosts

Tiny ghosts are simple, playful, and perfect for Halloween decorations.
You can make them in just a few minutes, depending on the clay you use.
How to make them:
- Roll white clay into a ball.
- Gently pull the top upward to create a rounded ghost shape.
- Widen the bottom slightly.
- Flatten the base so the figure can stand.
- Use a toothpick to create two shallow eye marks, or add painted eyes after drying.
- Add a tiny curved mouth if you want a surprised expression.
Try making several ghosts with different faces. One can look happy, another sleepy, and another a little mischievous.
You can also add tiny clay stars around them for a whimsical display.
10. Tiny Clay Hearts

If you want a quick project that does not require much sculpting, miniature clay hearts are a wonderful choice.
They are ideal for gift decorations, desk accessories, and little handmade keepsakes.
How to make them:
- Roll a small ball of clay.
- Shape it into a rounded teardrop.
- Use your fingers to form the two upper curves.
- Press a shallow notch between the curves.
- Refine the point at the bottom.
- Smooth the edges and allow the heart to dry or cure.
Choose blush pink, ivory, terracotta, or red.
You could also stamp initials into the surface before drying, making each heart feel more personal.
11. Mini Clay Flowers
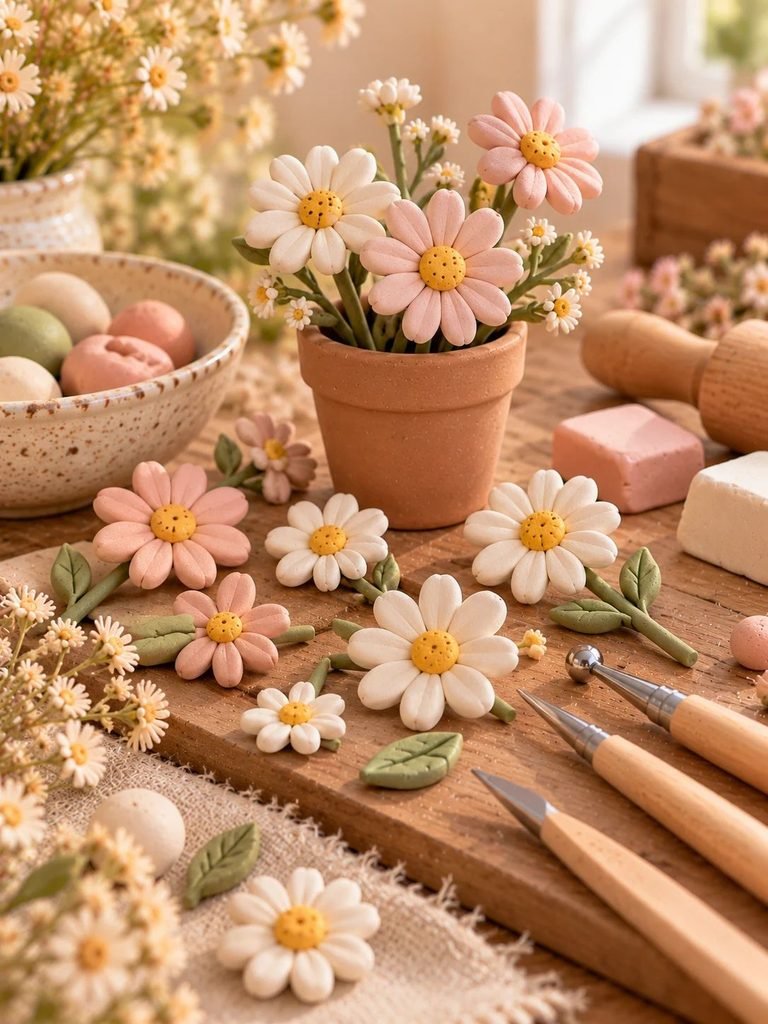
Tiny clay flowers are beautiful for cottagecore displays and make a lovely addition to other miniature scenes.
Daisies are especially beginner-friendly because their petals can be made from small teardrop shapes.
How to make them:
- Roll a small ball of clay for the flower center.
- Make five to eight tiny teardrops.
- Flatten each teardrop slightly.
- Arrange the petals around the center.
- Press the pieces together gently and smooth the joins.
- Add a small stem if you want an upright flower.
Use cream petals with a yellow center, or try blush pink and lavender.
For a miniature flowerpot, place several tiny blooms together in a small clay container.
Remember that very thin petals are fragile, so keep them slightly thicker when working with air-dry clay.
12. Mini Clay Strawberries
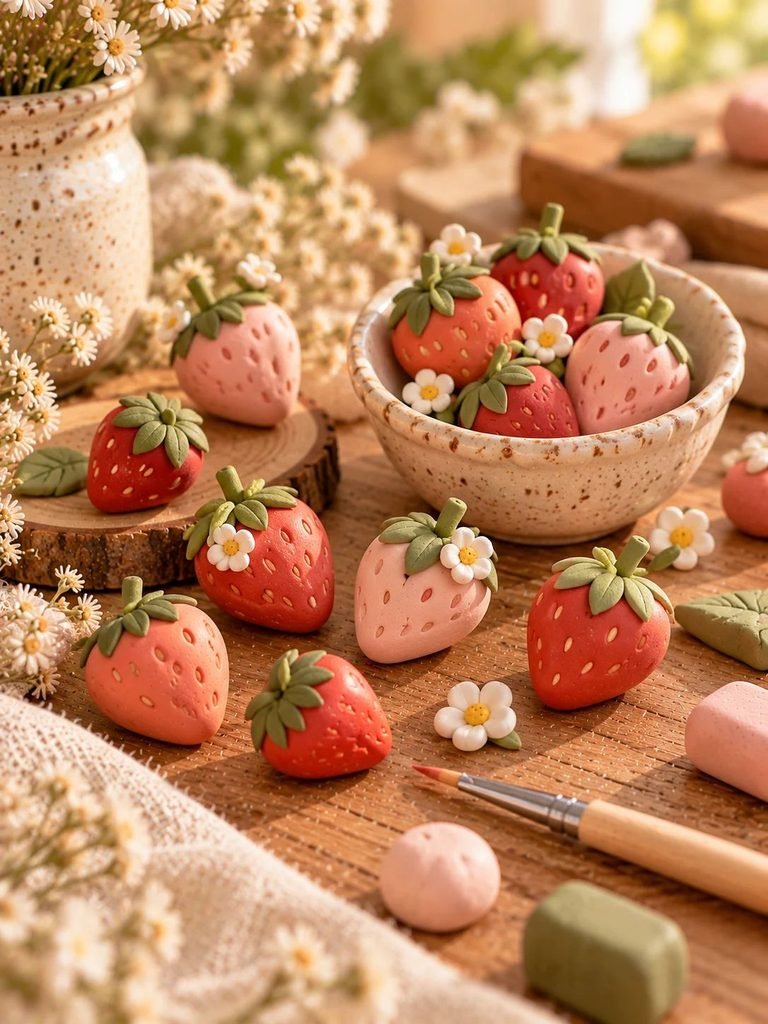
Strawberries are among the sweetest miniature food figures to make because their shape is simple and their color is instantly recognizable.
How to make them:
- Roll red or pink clay into a small ball.
- Gently pinch one end to create a rounded teardrop.
- Flatten the top slightly.
- Add a tiny green star-shaped leaf at the top.
- Use a toothpick to press small indentations across the surface.
Once dry or cured, you can paint tiny cream or pale yellow seeds into the indentations.
Make a few different sizes and place them beside miniature clay flowers for a charming little display.
13. Tiny Clay Mushrooms With Faces
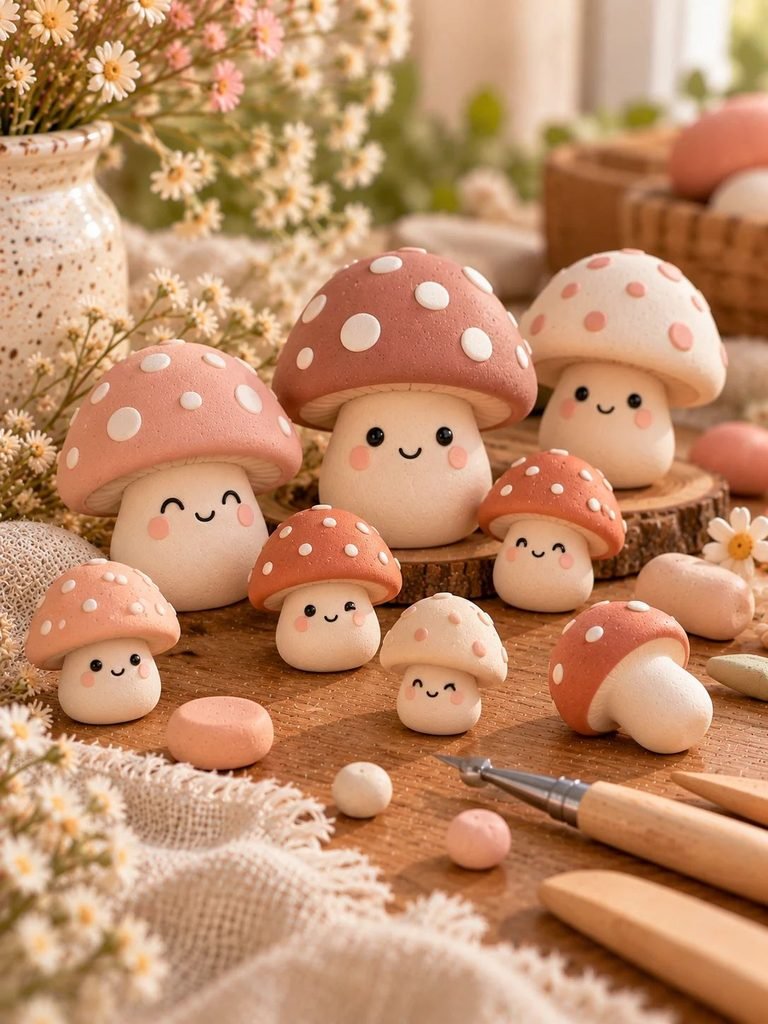
If you liked the mushroom idea above, try making a more characterful version with little faces.
These are slightly different from traditional mushrooms because the face becomes the main feature.
How to make them:
- Shape a short stem and a rounded cap.
- Join the pieces securely.
- Add two tiny eye indentations to the front of the stem.
- Create a small curved smile.
- Paint the cap in a soft color.
- Add little dots or hearts as decoration.
Try pale pink caps with white dots, or cream caps with tiny brown speckles.
These figures look particularly cute when arranged beside small clay leaves or miniature stones.
14. Mini Clay Cacti
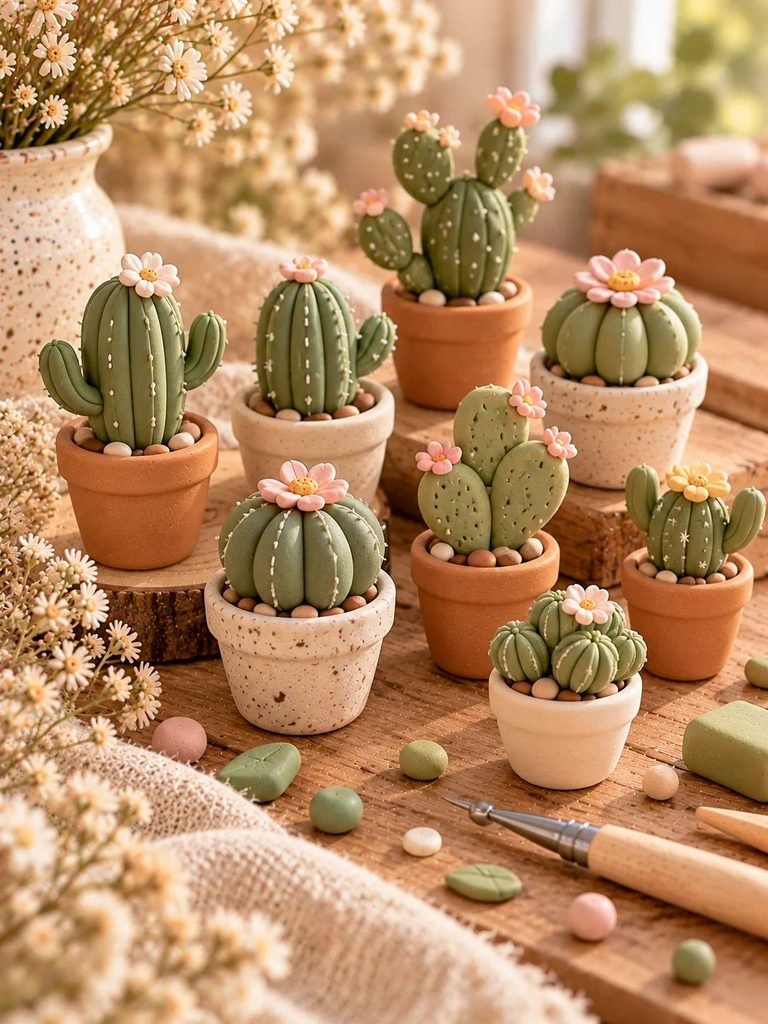
A tiny cactus is a lovely project for plant lovers who want to create miniature greenery without worrying about watering.
You can make a single cactus in a pot or a small collection of different cactus shapes.
How to make one:
- Roll green clay into a short cylinder or rounded oval.
- Flatten the bottom slightly.
- Add a few tiny raised arms if you want a classic cactus silhouette.
- Create shallow lines or dots using a toothpick to suggest spines.
- Shape a tiny flower from pink or yellow clay.
- Place the cactus in a miniature clay pot.
Use different shades of green to make a little collection.
Avoid making the spines too thin, since small projecting details can break easily.
15. Mini Clay Coffee Cups
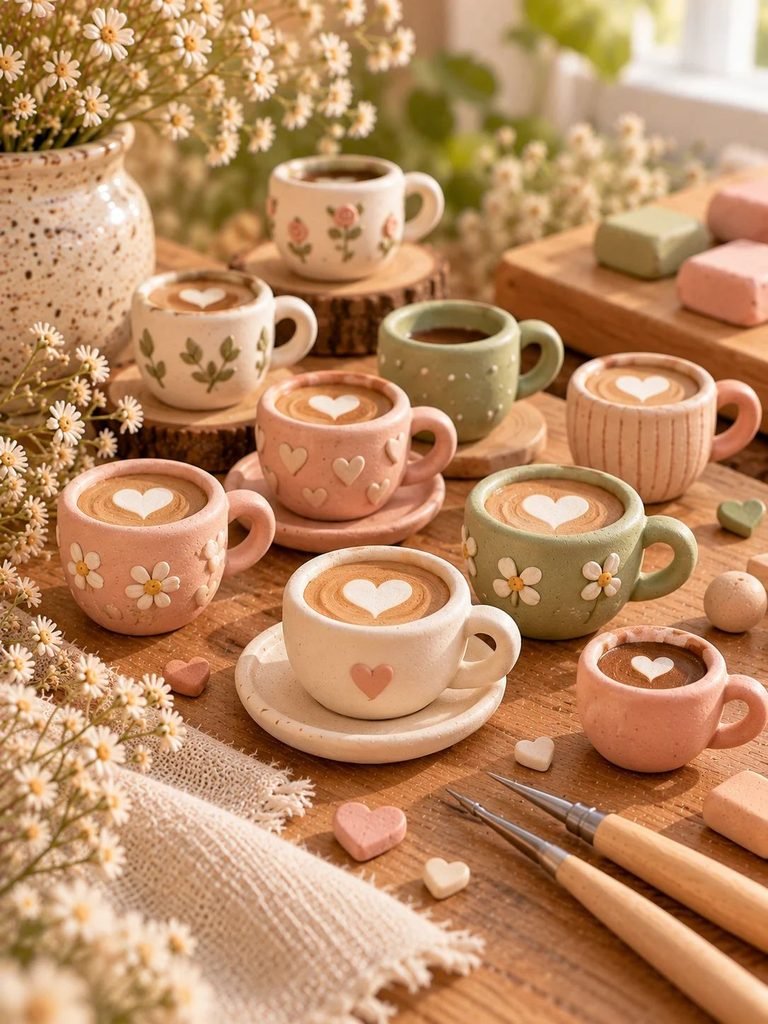
Tiny coffee cups are perfect for miniature kitchen scenes, dollhouse accessories, and cute desk displays.
They are also a great way to practice creating hollow shapes.
How to make them:
- Roll a small piece of clay into a thick cylinder.
- Gently press into the center to form a shallow hollow.
- Widen the opening slightly with a rounded tool.
- Shape a small curved handle from a thin coil of clay.
- Attach the handle carefully, blending the connection points.
- Add a tiny circular piece of cream clay on top to represent milk foam.
For extra charm, paint a little heart on the front of the cup.
Remember that tiny handles are fragile. Keep them thick enough to withstand gentle handling, especially when working with air-dry clay.
16. Mini Clay Donuts
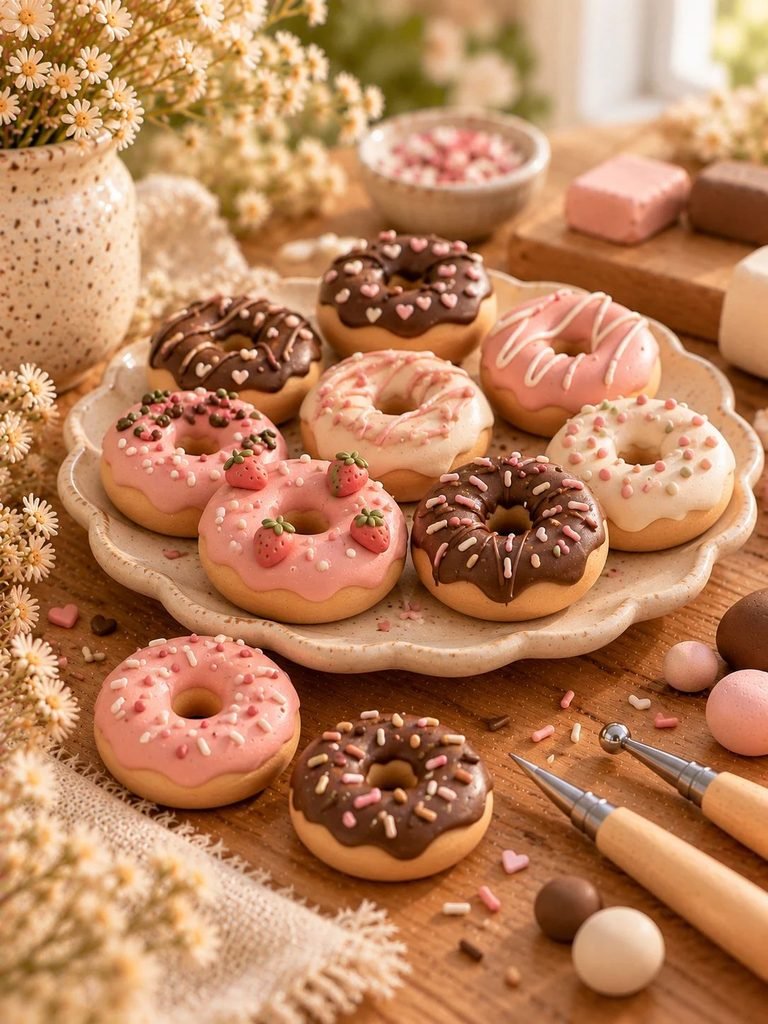
Miniature donuts are adorable for anyone who enjoys making tiny food decorations.
Their basic shape is simple, and you can experiment with different icing colors and toppings.
How to make them:
- Roll clay into a small, thick ring.
- Use a rounded tool to create a hole in the center.
- Smooth the outer edges.
- Add a flattened piece of pink, cream, or brown clay as icing.
- Press tiny colored clay pieces into the icing for sprinkles.
- Allow the figure to dry or cure according to the clay instructions.
Try a strawberry donut, a chocolate donut, or a vanilla donut with pastel sprinkles.
If you want a realistic bakery-style collection, vary the shapes slightly instead of making every donut identical.
17. Tiny Clay Bees
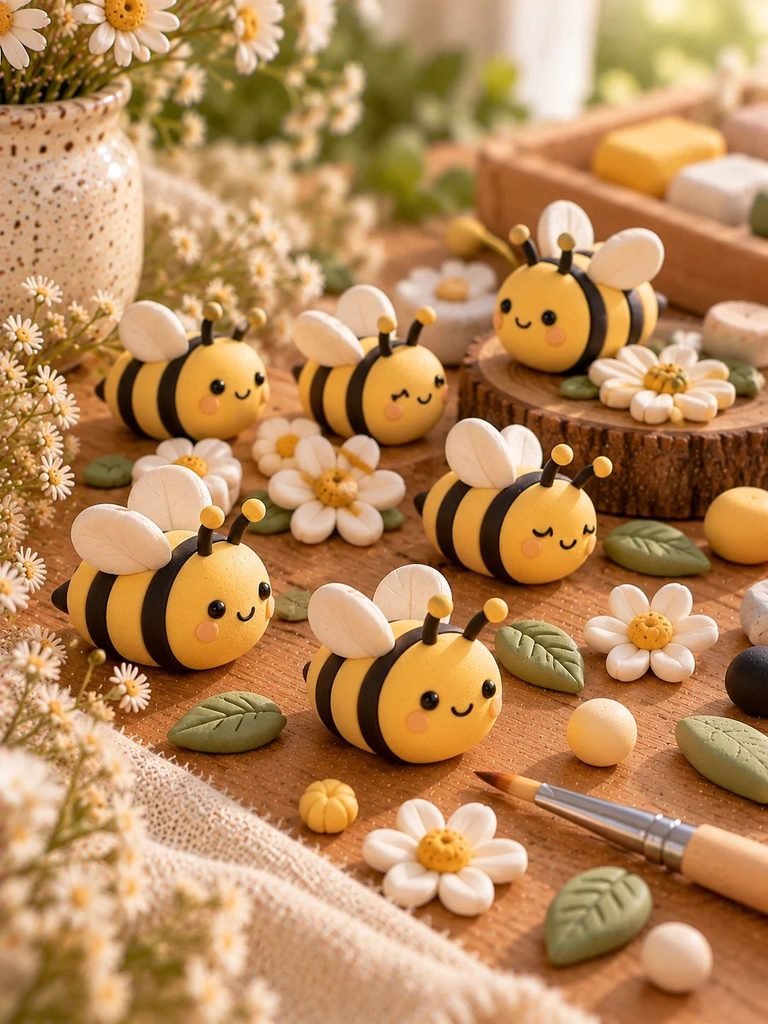
Miniature bees are cheerful little figures that look lovely beside flowers, plant pots, and spring-themed decorations.
Their rounded bodies and simple stripes make them easy to recognize.
How to make them:
- Shape yellow clay into a small oval.
- Add two or three thin black stripes.
- Create a tiny head at the front if you prefer a more defined shape.
- Attach two small white wings to the upper body.
- Add tiny eyes and a little smile.
You can also make a simple round bee with painted stripes if you want to keep the project very easy.
For a cute finishing touch, sculpt a tiny flower for the bee to sit beside.
18. Mini Clay Owls
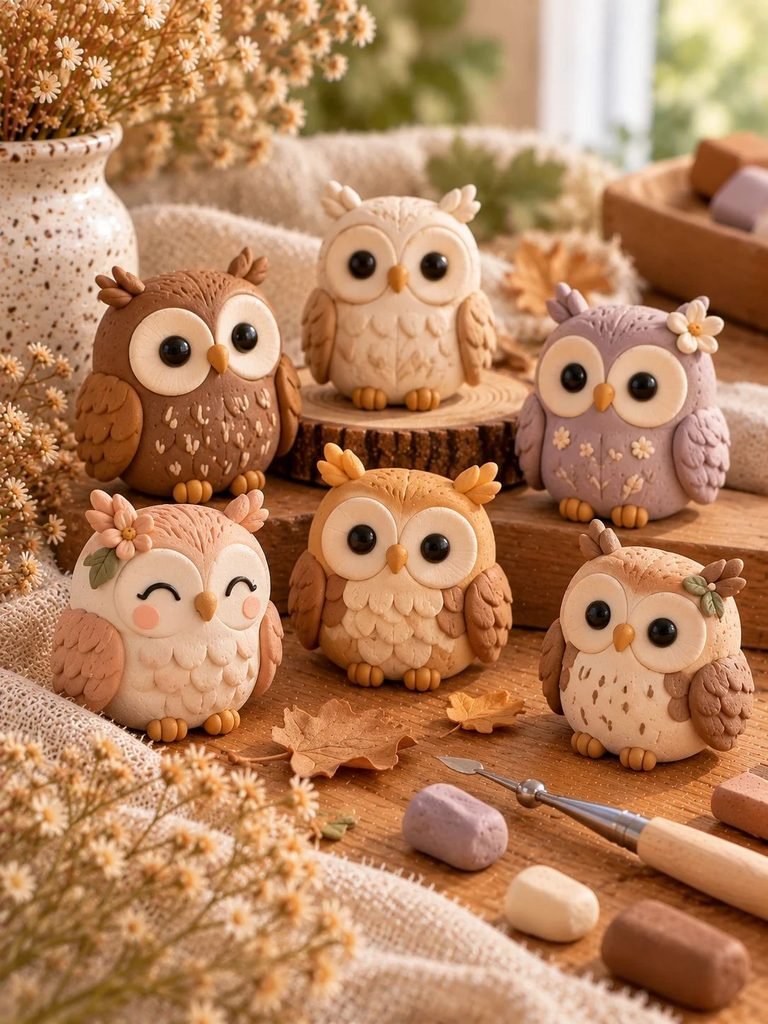
Owls are wonderful miniature figures because their round bodies and large eyes give them plenty of personality.
They can be decorated in natural shades or soft pastel colors.
How to make them:
- Roll clay into a rounded oval.
- Flatten the bottom so the owl can stand.
- Pinch two small points at the top to create feather tufts, if desired.
- Add two circular pieces of clay to the front for the eye areas.
- Press tiny circles into the eye areas.
- Add a small triangular beak and little feet.
After drying, paint the eyes and add small feather marks with a toothpick or fine brush.
Try cream, caramel, and brown for a woodland look, or lavender and pale pink for a softer style.
19. Mini Clay Turtles
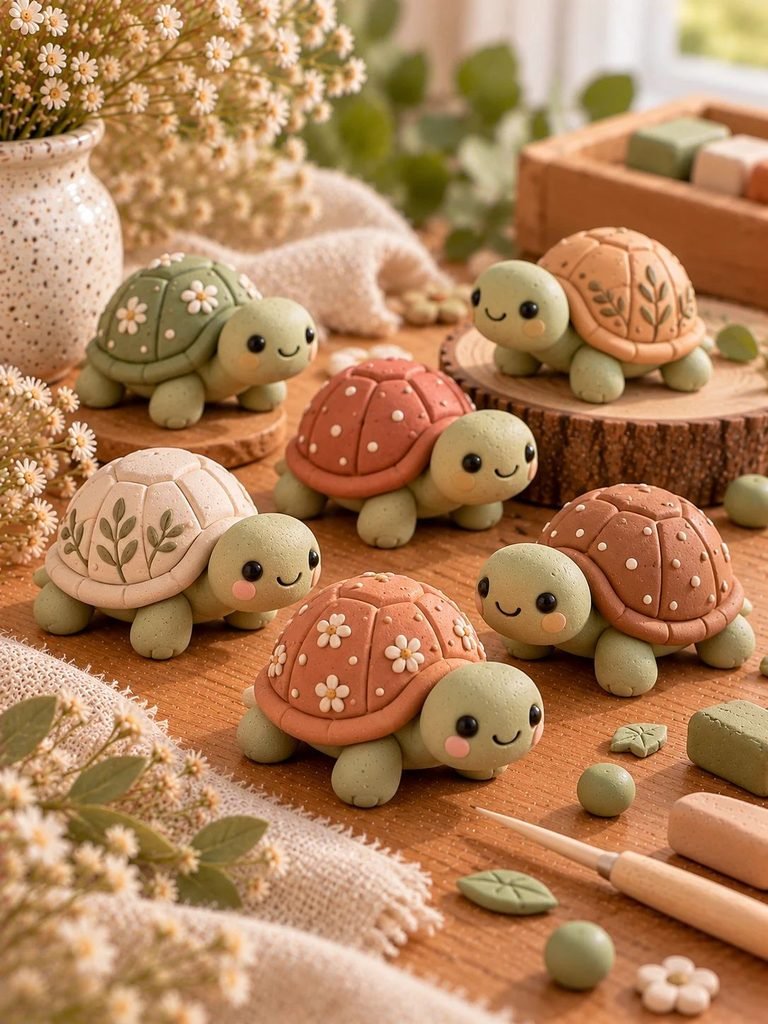
If you want to try something a little different, miniature turtles are a fun project that combines rounded shapes with simple surface details.
How to make them:
- Form a small oval body from green clay.
- Add four short legs and a tiny tail.
- Roll a rounded piece of contrasting clay for the shell.
- Place the shell on top of the body and attach it securely.
- Use a toothpick to create a simple shell pattern.
- Add two tiny eyes to the head.
You can use sage green with a terracotta shell or bright green with a cream shell.
Keep the legs thick and short so the turtle remains stable.
20. Mini Clay Planets
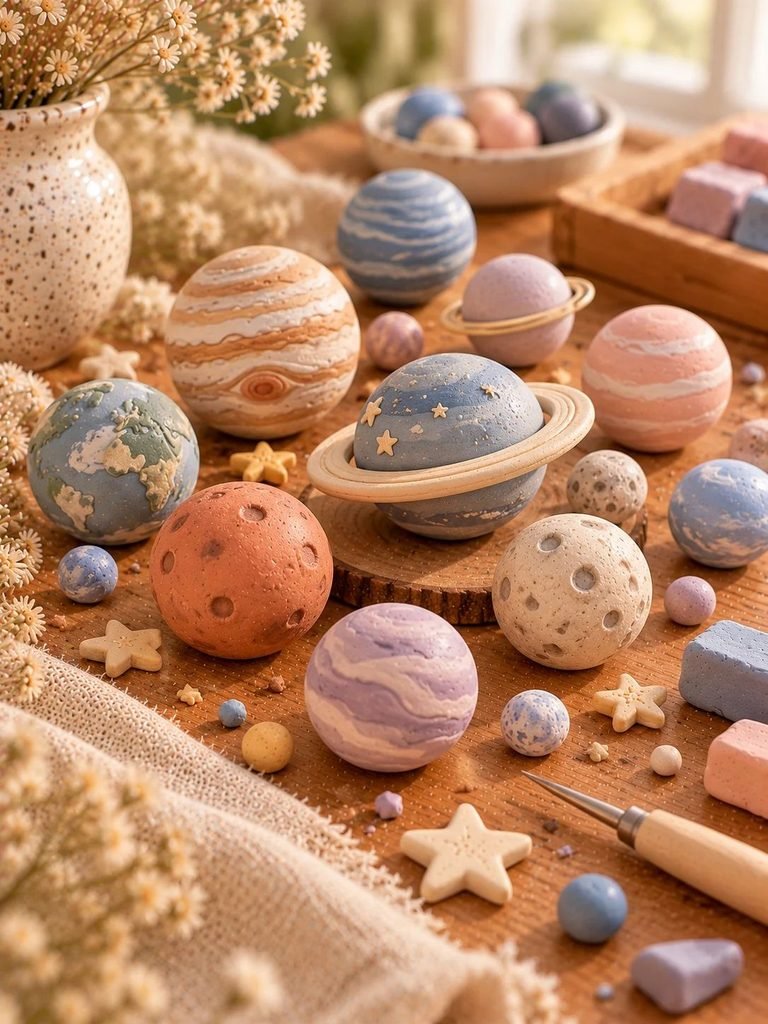
For a creative project that looks different from animals and food, try making tiny planets.
These are especially fun for decorating a study desk or creating a little solar-system display.
How to make them:
- Roll small balls of clay in different sizes.
- Smooth the surfaces gently.
- Add thin clay rings around selected planets.
- Blend small patches of contrasting colors into the surface.
- Let the figures dry or cure according to the clay instructions.
- Add tiny painted dots or swirls if desired.
Try a pale blue planet, a blush-pink planet, a cream planet with gold-colored details, and a terracotta planet.
If you are making a ringed planet, attach the ring carefully and support it while the clay dries or cures.
Tips for Making Mini Clay Figures Look Better
Even the simplest clay figure can look beautiful when you pay attention to a few small details.
Start With Basic Shapes
Most miniature figures can be built from balls, ovals, cones, cylinders, and teardrops. Learn to make these shapes smoothly before attempting complicated designs.
For example, a cat can start as an oval with two small ears, while a mushroom needs only a stem and a rounded cap.
Keep Your Figures Proportional
Miniature crafts look especially charming when the proportions are consistent.
If you are making a bear, make sure the head is not so heavy that the body tips forward. If you are creating a flower, keep the petals thick enough to hold their shape.
You do not need perfect symmetry. A little variation can make handmade figures feel more natural.
Make Strong Connections
One of the most common problems with mini clay figures is that small pieces fall off.
When joining separate pieces of air-dry clay, lightly score the contact surfaces, apply a small amount of water or clay slip as appropriate for the product, and press the pieces together. Smooth the join carefully.
For polymer clay, follow the manufacturer’s recommended joining method. Water is not a substitute for the appropriate bonding technique.
Whenever possible, make delicate features slightly thicker and shorter.
Smooth the Surface
Fingerprints, crumbs, and rough edges can make a miniature look unfinished.
Use clean fingers or a suitable sculpting tool to smooth the surface before drying or curing. With air-dry clay, use only a little water if the manufacturer permits it. Too much moisture can weaken the surface or make it sticky.
Once air-dry clay is fully dry, gently sand rough spots if needed.
Use Simple Facial Features
You do not need to paint complicated expressions to make your figures adorable.
Two small eyes and a tiny curved mouth can give a mushroom, cat, or frog plenty of personality.
A toothpick works well for marking small details, while a fine brush gives you more control when painting.
If the face looks uneven, try again on a spare piece of clay before adding details to your finished figure.
Choose a Coordinated Color Palette
A collection of mini figures often looks more polished when the colors work together.
For a cozy, feminine style, try:
- Warm ivory and cream
- Blush pink and dusty rose
- Sage green and muted olive
- Soft lavender
- Terracotta and warm brown
You can also use brighter colors if you prefer playful, cheerful decorations.
How to Dry, Paint, and Seal Mini Clay Figures
Finishing your figures properly is just as important as sculpting them.
Step 1: Let the Clay Dry or Cure Properly
Air-dry clay must dry completely before painting or sealing. Drying time depends on the thickness of the figure, the type of clay, and the humidity in your room.
Place your figures in a well-ventilated area away from direct heat. Turn them carefully when appropriate so the bottoms can dry evenly.
Polymer clay must be baked according to the temperature and time stated on its packaging. Do not substitute air-drying for baking.
Step 2: Paint the Details
If your clay is not already colored, use acrylic paint suitable for the surface.
Apply thin coats and allow each coat to dry before adding another. Thin layers generally provide a neater finish than one thick coat.
Use a fine brush for eyes, smiles, stripes, and small decorations.
Step 3: Apply a Suitable Sealer
If your finished figure needs additional protection, choose a clear varnish compatible with the clay and paint you used.
A matte finish gives a soft, natural look, while a gloss finish creates a shiny appearance.
Test the sealer on a spare piece first, since some finishes may change the color or texture of the surface.
Please remember: Air-dry clay is generally not waterproof, and sealing does not automatically make a figure waterproof, food-safe, or suitable for outdoor use. Keep delicate creations dry unless the product manufacturer specifically states otherwise.
Common Mini Clay Figure Problems and How to Fix Them
My Clay Keeps Cracking
Cracking can happen when air-dry clay dries unevenly, when the clay is too thick, or when the material is not properly prepared.
Try making your figures a little smaller, avoiding sudden temperature changes, and following the drying instructions supplied with your clay.
For small cracks in compatible air-dry clay, a little fresh clay mixed with water may help fill the damaged area. Let the repair dry completely before sanding or painting.
The Small Pieces Keep Falling Off
This often happens when ears, arms, wings, or handles are attached without enough contact between the pieces.
Score the joining surfaces and use the appropriate joining method for your clay. Make the connection broad enough to hold securely, and support delicate pieces while the figure dries or cures.
My Figure Will Not Stand Upright
A figure may tip over if its base is too narrow or its upper body is too heavy.
Flatten the bottom gently before the clay dries. Keep the center of gravity low, and make sure both feet or the entire base touch the work surface.
If you are planning a collection, test each figure’s stability before painting.
The Painted Face Looks Messy
Tiny faces can be difficult to paint freehand.
Let the base color dry completely, then use the end of a toothpick or a small dotting tool for the eyes. Start with very small dots and add more paint only when necessary.
Practice on a scrap piece first. A simple face often looks better than one with too many details.
Creative Ways to Display Your Mini Clay Figures
Once your little creations are finished, there are plenty of ways to enjoy them.
- On a desk: Place a few tiny animals beside a pen holder or notebook.
- On a bookshelf: Arrange mushrooms, owls, and snails together for a woodland-inspired display.
- In a decorative tray: Group miniature food figures or tiny flowers in a shallow dish.
- Beside houseplants: Place a cactus figure or tiny frog near a plant pot, keeping the clay protected from moisture.
- As handmade gifts: Package a small collection in a gift box with tissue paper.
- In a miniature scene: Build a tiny garden, bakery, forest, or imaginary planet display.
For a cohesive look, choose a theme and make several related figures. A tiny woodland collection could include mushrooms, snails, owls, and little leaves, while a miniature café could feature coffee cups, donuts, and strawberries.
Keep small clay figures away from young children and pets if they could pose a choking hazard.
Frequently Asked Questions
What Is the Best Clay for Mini Clay Figures?
Both air-dry clay and polymer clay can work well. Air-dry clay is convenient if you want to avoid baking, while polymer clay is useful for small, detailed figures that can be cured according to the manufacturer’s directions.
Your choice depends on the finish you want, the amount of detail involved, and how you plan to display the finished pieces.
Can Beginners Make Mini Clay Figures?
Absolutely! Start with simple projects such as hearts, mushrooms, cats, or round chicks. These designs rely on basic shapes and do not require advanced sculpting skills.
Once you become comfortable shaping and joining clay, you can move on to more detailed figures.
How Long Do Mini Clay Figures Take to Make?
Simple figures can often be sculpted in around 10–30 minutes, depending on their size and detail. However, drying, baking, painting, and sealing can add considerably more time.
Always allow air-dry clay to dry completely and follow the manufacturer’s instructions for polymer clay.
Can I Make Mini Clay Figures Without Special Tools?
Yes. Your fingers, a toothpick, and a smooth bottle or small rolling pin are enough for many beginner projects.
As you become more experienced, you may want to add a few inexpensive sculpting tools, but they are not essential for getting started.
Can I Sell Handmade Mini Clay Figures?
You can consider selling original handmade designs through craft markets or online shops. Before doing so, check the rules of your chosen selling platform and make sure your products are accurately described.
If you plan to sell figures as toys, jewelry, or functional items, additional safety or product requirements may apply. Clearly describe decorative items as such when they are not intended for play or other functional use.
Final Thoughts
Mini clay figures are such a lovely way to turn a small amount of clay into something personal, cheerful, and completely your own. Whether you start with a tiny mushroom, a sweet little bunny, or a miniature coffee cup, you do not need expensive supplies or perfect sculpting skills to enjoy the process.
My advice is to choose one design that makes you smile and start with the simplest version. Focus on getting the shape right, add a few little details, and give yourself permission to experiment. You might be surprised by how quickly one tiny figure turns into a whole collection.
Gather your clay, choose your favorite colors, and enjoy creating something lovely with your own hands. Happy crafting!