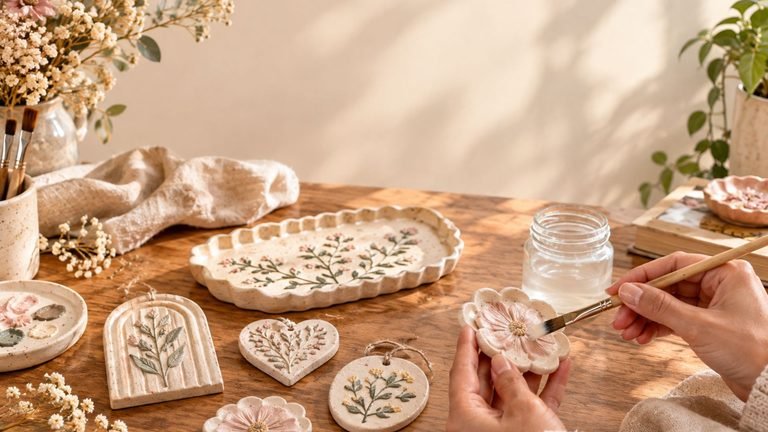

How to Make Coffee Clay at Home
I started making coffee clay after looking at a container of used coffee grounds I normally would have thrown away.
I wondered if they could become something useful instead of ending up in the bin, so I experimented with a simple homemade clay recipe.
The result surprised me: soft, slightly textured dough with a warm coffee color and a lovely rustic finish. It is inexpensive, beginner-friendly, and perfect for making ornaments, tags, little decorations, and nature-inspired crafts.
What Is Coffee Clay?
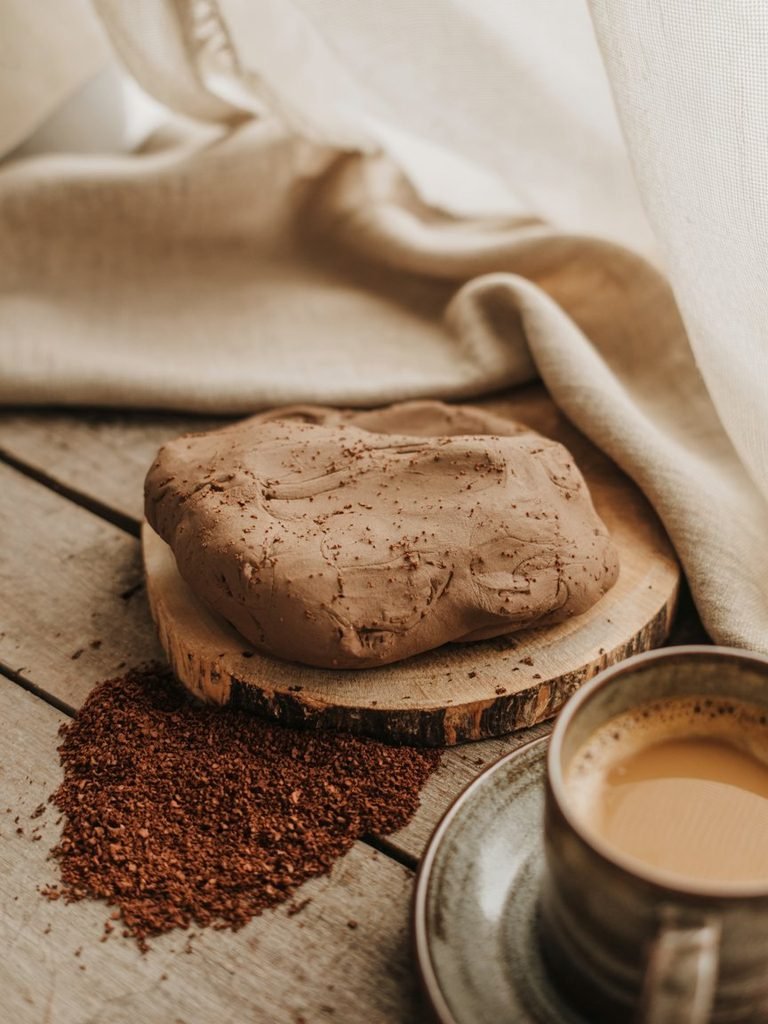
Coffee clay is a homemade modeling dough made by combining used coffee grounds with simple ingredients such as flour, salt, and water. The coffee grounds give the clay its distinctive brown color and slightly grainy, natural texture.
Unlike traditional pottery clay, this isn’t ceramic clay that you fire in a kiln. Think of it more like a homemade air-dry modeling dough that you can shape into small decorative projects and allow to harden.
One of the best things about making coffee clay is that it gives your used coffee grounds a second purpose. Instead of immediately throwing them away, you can turn them into something decorative.
The finished pieces have a wonderfully earthy appearance, especially when you leave some of the natural coffee texture visible.
Coffee-ground clay recipes vary considerably. Some use only flour, salt, coffee grounds, and water, while others add ingredients such as sand, cornstarch, cream of tartar, or glue.
For this tutorial, we’re keeping things simple.
Why You’ll Love This Coffee Clay Recipe

There are plenty of reasons to try this little DIY project.
It’s inexpensive
Most of the ingredients are pantry staples you may already have at home.
It reuses coffee grounds
If you regularly make coffee, this is a fun way to repurpose some of those leftover grounds.
It has a naturally rustic appearance
The tiny coffee particles create a speckled, earthy surface that can make finished pieces look almost stone-like.
It’s beginner-friendly
You don’t need a pottery wheel, kiln, or specialist equipment.
It’s versatile
You can roll it, press it into molds, cut it with cookie cutters, stamp it with leaves, or sculpt simple shapes.
It’s a fun sensory material
The coffee grounds give the dough a noticeably different texture from ordinary homemade clay. Coffee-ground dough is also commonly used for sensory activities and nature-print projects.
What You’ll Need

For one manageable batch of coffee clay, gather:
- 1 cup used coffee grounds
- 1¼ cups all-purpose flour
- ½ cup table salt
- ½ to 1 cup water or cooled brewed coffee
- Large mixing bowl
- Wooden spoon or spatula
- Measuring cups
- Parchment paper or a clean work surface
- Rolling pin, optional
- Cookie cutters, optional
- Small bowl or mold, optional
- Toothpick, skewer, or clay tool for details
- Airtight container or zip-top bag for storing unused dough
The liquid is intentionally given as a range because coffee grounds can contain different amounts of moisture. Start with less and add more gradually rather than pouring the entire amount in at once.
A similar established coffee-clay recipe combines flour, salt, used coffee grounds, and approximately ½–1 cup of liquid, with the recommendation to adjust the liquid until the dough becomes pliable without becoming sticky.
Before You Start: Prepare Your Coffee Grounds
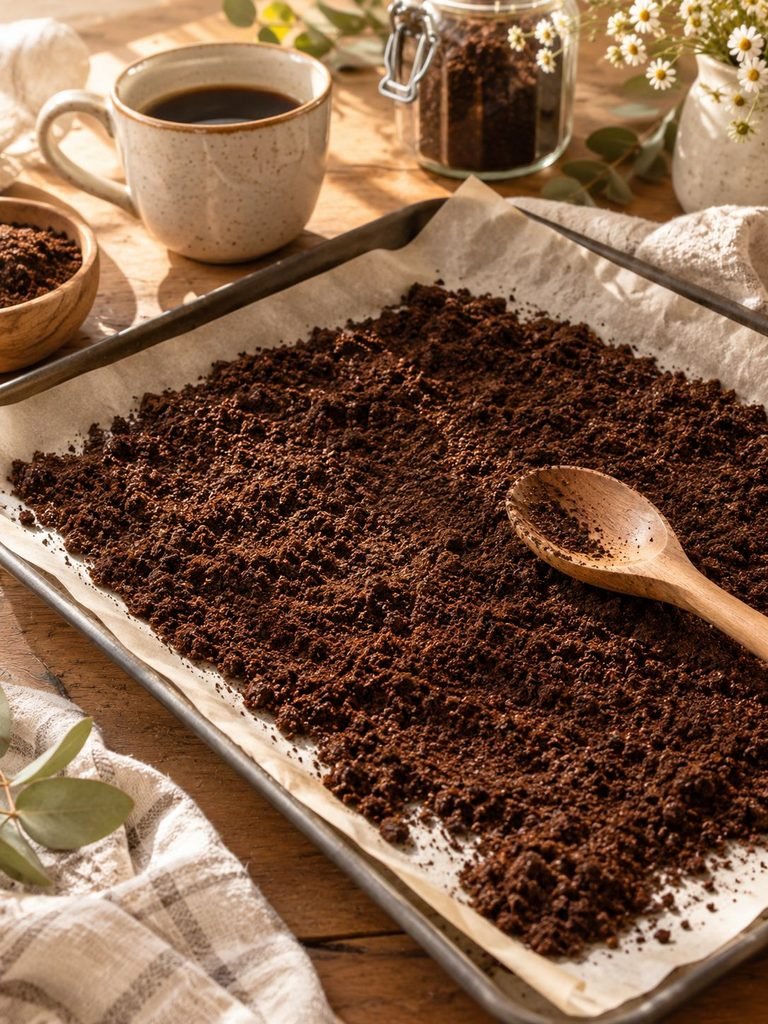
This is one of the most important parts of the project.
If your coffee grounds are extremely wet, don’t add them straight into the recipe.
Spread the used grounds in a thin layer on a baking tray or plate and allow them to dry thoroughly.
You can also dry them in a low oven. One published coffee-clay recipe recommends drying grounds at around 200°F for approximately 30 minutes, while another recommends a low-temperature oven for 15–20 minutes.
The exact drying time will depend on how wet your grounds are and how thickly they are spread.
Why does drying matter?
Too much moisture makes it difficult to judge how much water your clay actually needs. It can also make the finished dough more difficult to dry evenly.
Tip: Let the grounds cool completely before mixing them into your flour.
How to Make Coffee Clay at Home
Now let’s make the clay.
Step 1: Measure Your Ingredients
Measure:
- 1 cup dried coffee grounds
- 1¼ cups flour
- ½ cup salt
Keep your water or cooled coffee nearby, but don’t add it yet.
Starting with the dry ingredients gives you more control over the final texture.
Step 2: Combine the Dry Ingredients
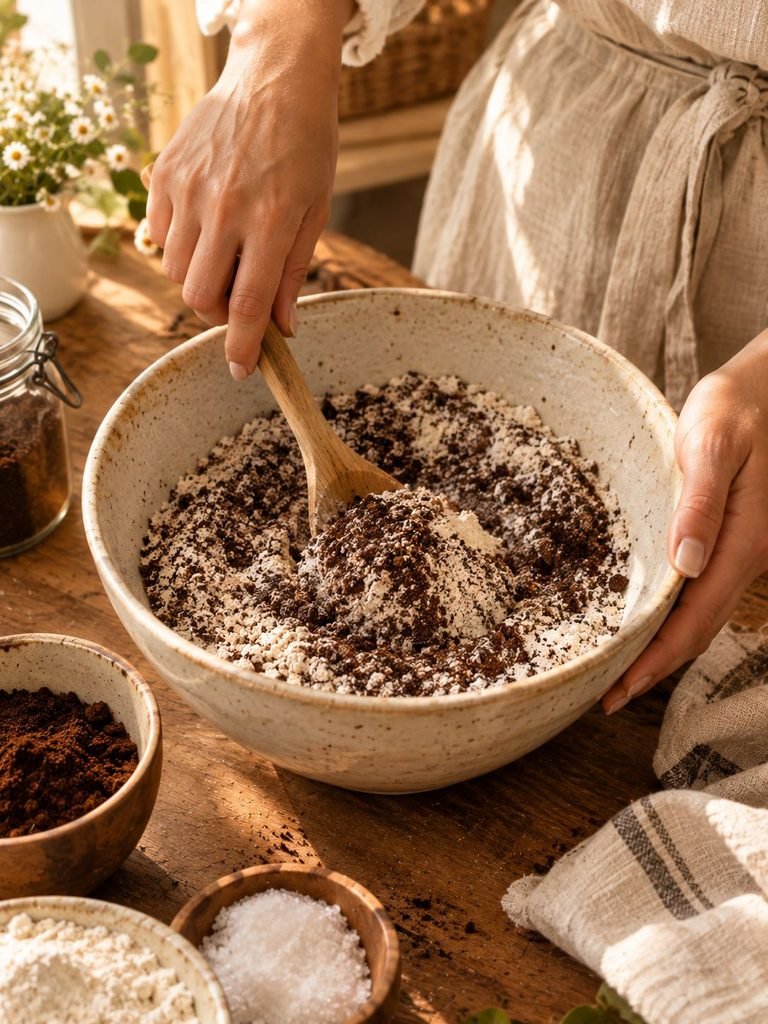
Add the flour, salt, and dried coffee grounds to a large mixing bowl.
Use a spoon or whisk to mix everything thoroughly.
Try to distribute the coffee grounds evenly through the flour and salt.
You should have a dry mixture with an even brown-speckled appearance.
Take a moment to break up any obvious clumps before adding liquid.
Step 3: Add the Liquid Slowly
Start with approximately ½ cup of water or cooled brewed coffee.
Pour it into the dry mixture gradually while stirring.
Don’t worry if the dough doesn’t come together immediately.
Continue mixing until the ingredients begin forming a rough dough.
If the mixture still looks very dry and crumbly, add another tablespoon of liquid at a time.
This gradual approach is important because adding too much liquid can leave you with sticky dough that requires a lot more flour to correct.
Step 4: Check the Consistency
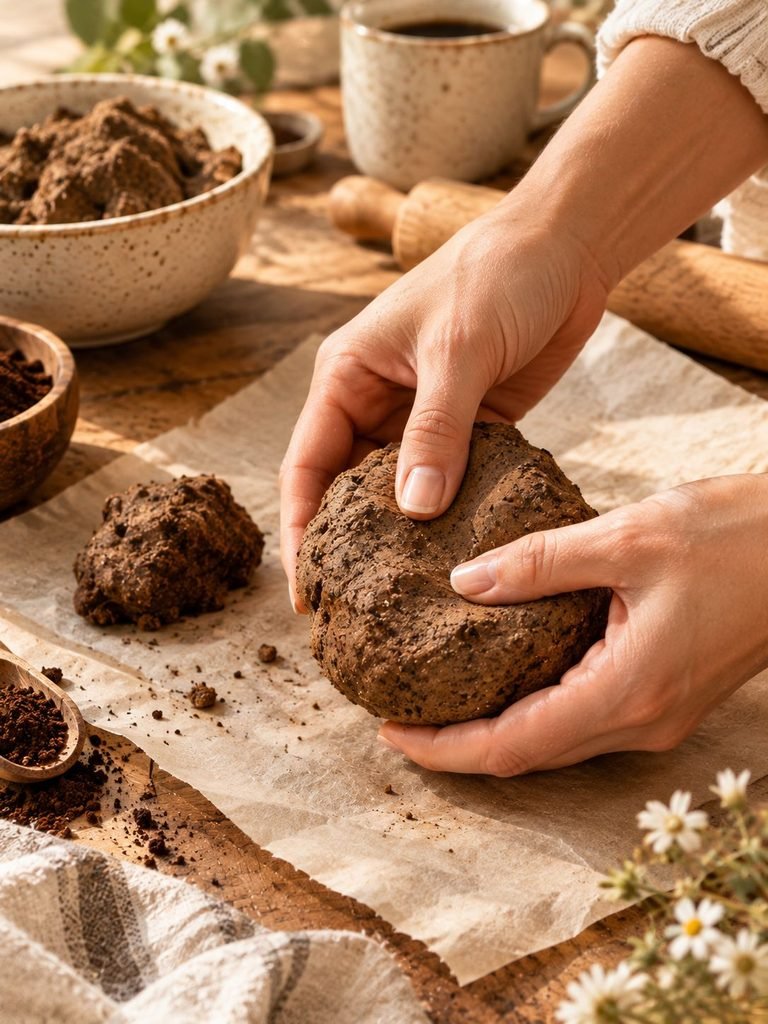
Your coffee clay should feel similar to a firm modeling dough.
It should be:
- Soft enough to knead
- Firm enough to hold its shape
- Slightly moist
- Easy to press
- Not runny
- Not sticky enough to coat your fingers
Pick up a small piece and squeeze it.
If it holds together without crumbling, you’re close.
If it immediately falls apart, it needs a little more moisture.
If it sticks heavily to your fingers, add a small amount of flour and knead again.
Step 5: Knead the Coffee Clay
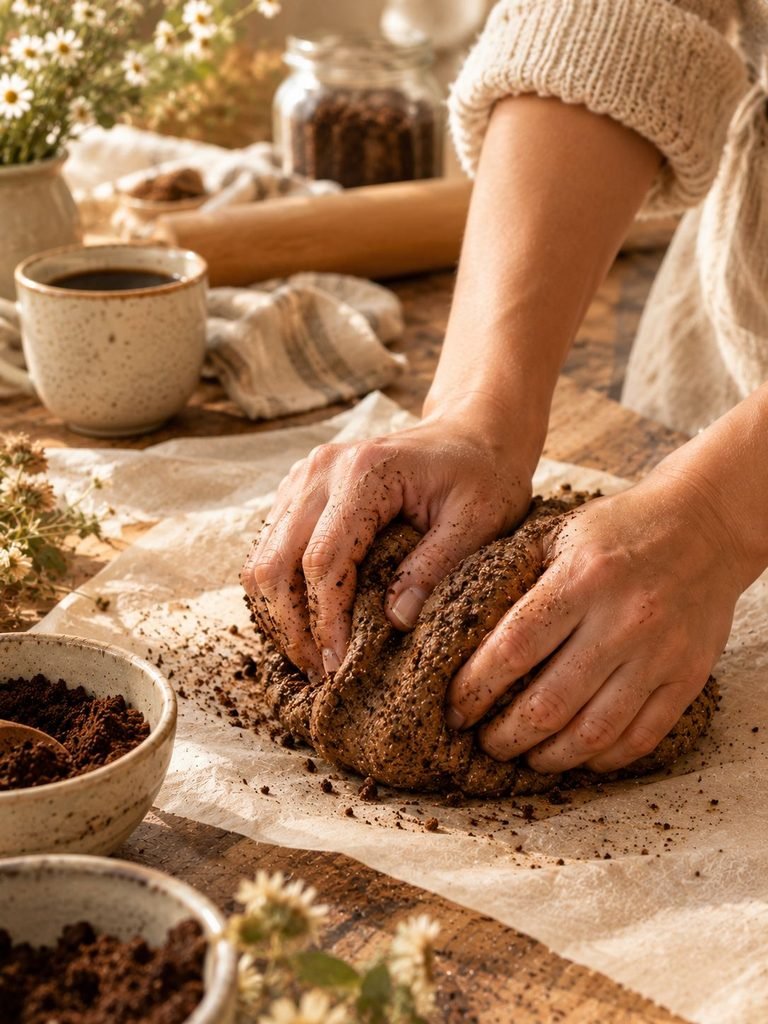
Transfer the mixture onto a sheet of parchment paper or a lightly floured work surface.
Knead it with your hands for approximately 3–5 minutes.
Turn it.
Fold it.
Press it.
Repeat.
Kneading helps distribute the moisture throughout the mixture and brings the ingredients together into a more workable dough.
Don’t worry if the coffee grounds make the clay feel slightly textured. That is part of its charm.
You aren’t trying to make it perfectly smooth like commercial polymer clay.
Step 6: Let the Dough Rest
Once your clay has come together, allow it to rest for about 10–15 minutes.
This isn’t absolutely necessary, but it can make the dough easier to work with.
If the mixture feels slightly dry after resting, knead in a few drops of water.
If it feels too sticky, add a little flour.
Step 7: Roll Out Your Coffee Clay
If you’re making ornaments, tags, plaques, or flat decorations, place the dough between two sheets of parchment paper.
Roll it out evenly.
Aim for approximately ¼ inch thickness for smaller decorative pieces.
Avoid making pieces extremely thin because thin clay can become fragile as it dries.
Very thick pieces, on the other hand, can take considerably longer to dry and may be more prone to cracking.
For that reason, try to keep the thickness relatively even throughout your project.
Step 8: Cut or Shape Your Clay

Now comes the fun part.
You can make almost any small decorative shape you like.
Try:
- Hearts
- Stars
- Flowers
- Leaves
- Circles
- Christmas ornaments
- Gift tags
- Wall decorations
- Small hanging plaques
- Initials
- Miniature mushrooms
- Simple animal shapes
- Rustic magnets
Use cookie cutters for clean shapes.
For a handmade appearance, simply shape the pieces with your fingers.
Step 9: Add Texture

This is where coffee clay becomes especially fun.
Before the clay dries, press different objects into the surface.
Try:
- Dried leaves
- Small flowers
- Lace
- Fabric
- A fork
- A textured stamp
- Buttons
- Pine needles
- Wooden stamps
- Small shells
- Twine
For a nature-inspired design, place a leaf on top of the clay and gently press it down.
Carefully lift it away.
You should be left with a natural impression.
Coffee-ground clay is particularly suited to nature prints because the grounds already give the surface an earthy appearance.
Step 10: Don’t Forget the Hole!
If you’re making an ornament or hanging decoration, make the hanging hole before the clay dries.
Use a straw, skewer, chopstick, or the end of a small paintbrush.
Push it straight through the clay near the top.
Make the hole slightly larger than you think you’ll need because the clay can change slightly as it dries.
This simple step is easy to forget, and trying to drill or force a hole into a fully dried piece can cause it to crack.
Step 11: Dry Your Coffee Clay
Place your finished pieces on parchment paper.
Leave them somewhere dry and well ventilated.
For small pieces, allow approximately 48 hours as a starting point.
Larger or thicker pieces may take longer.
One established coffee-clay recipe recommends approximately 48 hours of air drying, while other versions note that thicker sculptures can require several days.
Turn the pieces while drying
If possible, gently turn your pieces after several hours so that both sides can dry more evenly.
Don’t rush this stage.
The outside can feel hard while the inside is still holding moisture.
How Do You Know When Coffee Clay Is Completely Dry?
Your piece should feel:
- Hard
- Firm
- Significantly lighter than the wet dough
- Dry throughout
- No longer cool or damp in the center
If the piece feels noticeably soft when pressed, give it more drying time.
For thicker creations, patience is particularly important.
What If My Coffee Clay Cracks?
Don’t panic.
Small cracks can happen as homemade clay loses moisture.
Here are some things that can help.
Keep the pieces evenly thick
Very thin edges beside thick centers can dry at different speeds.
Don’t add too much water
Excess moisture means more water has to evaporate during drying.
Dry slowly
Avoid placing your clay directly beside a strong heat source.
Repair small cracks
Mix a tiny amount of your remaining coffee clay with a few drops of water until you have a paste.
Press it gently into the crack.
Smooth the surface with a damp fingertip and allow it to dry again.
What If My Clay Is Too Crumbly?
If the dough breaks apart when you try to shape it, it probably needs a little more moisture.
Don’t pour in a large amount of water.
Instead, add ½–1 teaspoon at a time, kneading after each addition.
Continue until the dough holds together.
Remember: it’s much easier to add more liquid than to rescue an overly wet mixture.
What If My Coffee Clay Is Too Sticky?
This is an easy fix.
Sprinkle a little flour onto the dough and knead it in.
Add flour gradually until the clay becomes workable.
Avoid adding a large amount at once because you can quickly make the clay too dry.
Can You Bake Coffee Clay?
Some coffee-clay recipes are designed to be baked rather than air-dried.
For example, an older published coffee-clay formula using instant coffee, flour, salt, and water recommends baking finished creations at approximately 300°F for about an hour or until hard.
However, baking time depends heavily on the recipe, thickness, moisture level, and oven.
For the used-coffee-ground recipe in this tutorial, air drying is the simplest option.
If you decide to experiment with oven drying, use a low temperature and monitor the piece carefully rather than assuming a fixed baking time will work for every project.
Coffee Clay Project Ideas
Once you’ve made your first batch, there are so many ways to use it.
1. Rustic Coffee Clay Ornaments
Cut stars, hearts, circles, or Christmas shapes.
Make a hole at the top before drying.
Once completely dry, add ribbon or twine.
These would make lovely handmade decorations or small gifts.
2. Botanical Imprint Plaques
Roll out the clay.
Place a leaf or flower over the surface.
Press gently.
Remove the plant material and allow the clay to dry.
You can leave the natural coffee color or paint the raised details afterward.
3. Gift Tags
Cut small rectangles or circles.
Stamp a name or simple design into each one.
Punch a hole.
Once dry, thread through a piece of twine.
These would look especially pretty attached to kraft-paper packages.
4. Rustic Wall Art
Create several small shapes with different botanical impressions.
Let them dry completely.
Arrange them together in a frame or on a small wooden board.
The natural brown color works beautifully with neutral, earthy, and cozy decor.
5. Coffee-Themed Decorations
You can make tiny coffee cups, coffee beans, hearts, or simple kitchen-themed shapes.
These would be particularly cute as part of a coffee corner or kitchen display.
Can You Paint Coffee Clay?
Yes.
Once the clay is completely dry, you can experiment with acrylic paint or other craft paints suitable for decorative surfaces.
You don’t have to cover the entire piece.
In fact, leaving some of the natural coffee color visible can make the project look more rustic.
Try painting only:
- The raised leaf pattern
- The edges
- Small dots
- Lettering
- Flowers
- Borders
A diluted brown or cream paint can also create a subtle vintage effect.
How to Seal Coffee Clay
If you’re making decorative pieces that you want to keep for a longer time, a suitable craft sealer can help protect the finished surface from everyday handling.
Allow the clay to become completely dry first.
Then apply your chosen sealer according to the manufacturer’s instructions.
Remember that homemade coffee clay is not waterproof pottery.
A sealer can provide additional surface protection, but it does not transform the material into ceramic.
For this reason, keep finished coffee-clay pieces away from prolonged water exposure.
Can Coffee Clay Be Used for Food?
No.
Do not use homemade coffee clay to make plates, cups, bowls, spoons, or other objects intended to hold food or drinks.
This recipe contains non-food craft ingredients and is intended for decorative and creative projects.
Even after drying, treat your finished pieces as crafts rather than kitchenware.
How Should You Store Leftover Coffee Clay?
If you make more clay than you need, wrap the unused dough tightly in plastic wrap or place it inside an airtight container.
Keep it refrigerated if you’re saving it for later.
One published coffee-clay recipe notes that the dough can be kept in an airtight container for up to about a week.
Before using stored clay, let it come back toward room temperature and knead it again.
If it has dried out, you may be able to restore some flexibility by adding a tiny amount of water and kneading thoroughly.
Important Tips for Better Results
1. Dry your coffee grounds first
This gives you much better control over the amount of liquid in your recipe.
2. Add liquid slowly
Never assume you need the entire amount.
Humidity, flour type, and moisture in your coffee grounds can change the consistency.
3. Don’t make your pieces extremely thin
Thin pieces can become fragile during drying.
4. Let them dry completely
Touching or moving pieces too much while they are still soft can cause dents or cracks.
5. Keep your thickness consistent
Even thickness encourages more uniform drying.
6. Experiment with texture
The coffee grounds are one of the most interesting parts of this recipe, so don’t feel like you need to make the surface perfectly smooth.
7. Start with a small project
If this is your first time making coffee clay, try a few ornaments or small botanical shapes before attempting a large sculpture.
Frequently Asked Questions
Does coffee clay smell like coffee?
It can have a noticeable coffee aroma when freshly mixed, particularly if you use brewed coffee as part of the liquid. The scent can become less noticeable as the clay dries.
Can I use instant coffee instead of coffee grounds?
Yes, but that creates a somewhat different recipe.
Some traditional coffee-clay recipes dissolve instant coffee into warm water before combining it with flour and salt.
If you specifically want the grainy, speckled appearance associated with coffee-ground clay, use actual spent coffee grounds.
Can I use fresh coffee grounds?
You can experiment with them, but used grounds are the better choice for this particular project because they are already a by-product of brewing.
If using fresh grounds, remember that they can have different moisture and oil characteristics.
Can children make coffee clay?
Coffee clay can be used as a supervised craft or sensory activity, and coffee-ground dough recipes are used in educational sensory projects.
However, supervise young children and make sure they understand that the clay is not edible.
Why is my finished clay cracking?
Cracking can happen when the piece dries unevenly, is too thin, contains excess moisture, or dries too quickly.
Try making evenly thick pieces and allowing them to dry gradually.
How long does coffee clay take to dry?
Small pieces may take around 48 hours, while thicker pieces can take longer. One coffee-clay recipe specifically recommends 48 hours of air drying, while other DIY versions advise several days for thicker home-decor pieces.
Can I make coffee clay without salt?
Salt plays an important role in many homemade clay and dough recipes, so removing it changes the texture and preservation characteristics of the mixture.
If you’re looking for a completely different homemade clay recipe, it’s better to use a recipe specifically formulated without salt rather than simply leaving it out of this one.
My Favorite Way to Use Coffee Clay
If you’re trying coffee clay for the first time, I’d start with small botanical ornaments.
They’re simple enough for beginners but still show off what makes this material special.
Roll the clay to an even thickness, press a small leaf into the surface, carefully remove it, and use a straw or skewer to create a hanging hole.
Once the piece has dried completely, you can leave it in its natural coffee-brown color or add a little paint to highlight the texture.
Tie a piece of twine through the hole, and you have a simple handmade decoration made from ingredients that cost very little.
Final Thoughts
Making coffee clay is one of those DIY projects that feels much more complicated than it actually is. With a bowl, some flour, salt, leftover coffee grounds, and a little patience, you can create a surprisingly beautiful material for small handmade decorations.
The most important thing is not to obsess over getting the measurements absolutely perfect. Coffee grounds vary in moisture, and homemade dough behaves differently depending on your environment. Add your liquid slowly, adjust the flour when necessary, and pay attention to the texture of the dough.
Most importantly, give your pieces plenty of time to dry.
Once you get comfortable with the basic recipe, start experimenting with leaves, flowers, stamps, cookie cutters, paint, and different shapes.
Your morning coffee doesn’t have to end when the cup is empty. Those leftover grounds can become the beginning of your next little handmade project.
Save this recipe for your next DIY day and give your used coffee grounds a creative second life.
Quick Recipe Card
Prep time: 10–15 minutes
Kneading: 3–5 minutes
Drying time: Approximately 48 hours or longer for thick pieces
Difficulty: Beginner
Best for: Ornaments, decorations, gift tags, nature prints, small sculptures
Ingredients
- 1 cup dried used coffee grounds
- 1¼ cups all-purpose flour
- ½ cup salt
- ½–1 cup water or cooled brewed coffee
Instructions
- Dry your used coffee grounds completely.
- Mix the flour, salt, and coffee grounds.
- Slowly add about ½ cup liquid.
- Stir until a rough dough forms.
- Knead for 3–5 minutes.
- Adjust with small amounts of flour or liquid as needed.
- Rest for 10–15 minutes.
- Roll, cut, press, or sculpt your desired shapes.
- Add texture and hanging holes while the clay is still soft.
- Place the finished pieces on parchment paper.
- Air-dry for approximately 48 hours or until completely hard.
- Paint or seal only after the pieces are fully dry.
Important: Coffee clay is a craft material, not food-safe pottery. Keep finished pieces dry and use them for decorative purposes only.