Homemade Christmas Gift for Anyone Who Loves to Cook

Christmas is one of my favorite times to make thoughtful handmade gifts, especially for the people who love spending time in the kitchen.
If you have a friend, mother, sister, or family member who enjoys cooking, a handmade potholder is a simple gift they can use every day.
I love how a little fabric, a few basic sewing supplies, and some creativity can become something both beautiful and practical. In this tutorial, I’ll show you how to make a lovely homemade Christmas potholder that feels personal, looks festive, and is easy enough for beginners to sew.
Why a Handmade Potholder Makes a Lovely Christmas Gift
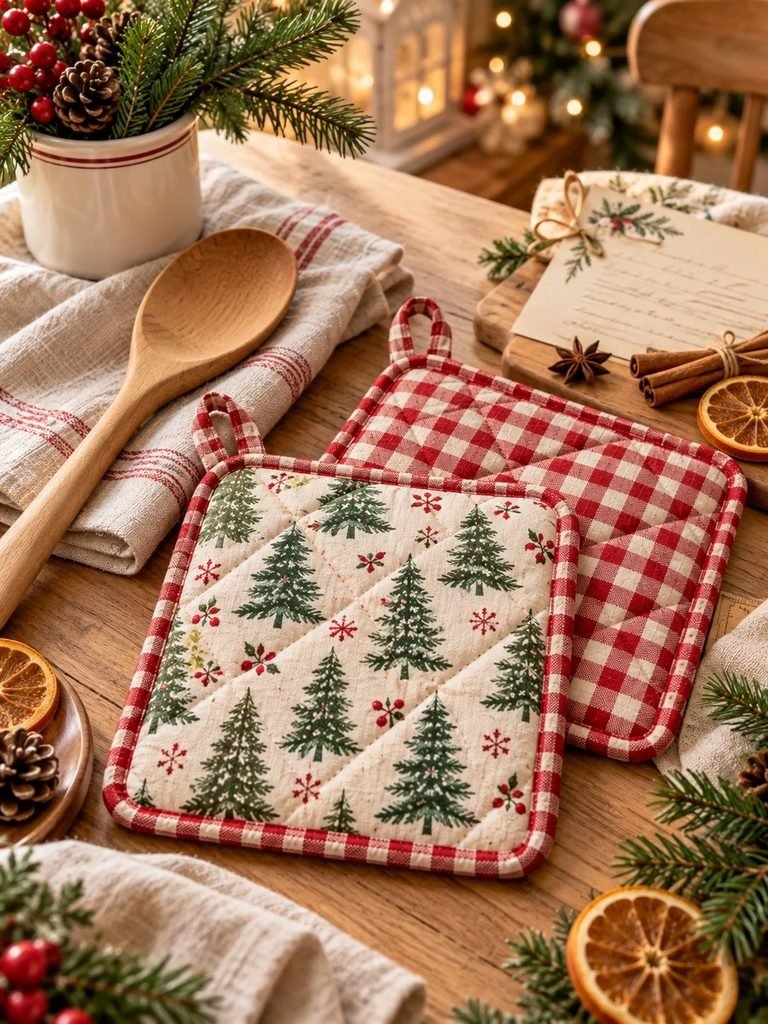
Finding the right Christmas gift can sometimes be difficult, especially when you want something meaningful without spending too much money. A handmade potholder is a wonderful option because it combines beauty with everyday usefulness.
Anyone who enjoys cooking or baking can appreciate having a fresh potholder in the kitchen. It can help protect hands when handling hot cookware, and choosing a pretty Christmas fabric makes it feel extra special during the holiday season.
Here are a few reasons to make one this Christmas:
- Practical and useful: It is an everyday kitchen accessory that cooks and bakers can enjoy using.
- Budget-friendly: You can make it with a small amount of fabric and a few basic sewing supplies.
- Easy to personalize: Choose fabric that matches the recipient’s kitchen or favorite colors.
- Beginner-friendly: The basic design requires only straight stitching and simple fabric layering.
- Perfect for gift baskets: Pair it with a wooden spoon, a recipe card, or homemade cookies for a thoughtful present.
You can make one potholder for a small gift or sew a matching pair for a more complete Christmas present.
Shop my amazon essentials
- Christmas cotton quilting fabric
- Heat-resistant batting (Insul-Bright)
- Sewing machine
- Fabric scissors
- Rotary cutter and cutting mat
- Quilting ruler
- Sewing pins and clips
- Cotton sewing thread
- Fabric marking chalk
Materials You Will Need

Before you begin, gather everything you need. Having your supplies ready will make the sewing process easier and more enjoyable.
Fabric and sewing supplies
- Two 9 x 9-inch squares of 100% cotton fabric
- Two 9 x 9-inch pieces of heat-resistant batting designed for potholders
- One 5 x 2-inch rectangle of cotton fabric for the hanging loop
- Matching cotton sewing thread
- Sewing machine
- Fabric scissors or rotary cutter
- Quilting ruler and cutting mat
- Sewing pins or clips
- Iron and ironing board
- Fabric marker or tailor’s chalk
A note about batting: Choose batting specifically intended for heat protection, such as Insul-Bright or a comparable heat-resistant product. Ordinary cotton batting alone may not provide enough protection from hot cookware. Follow the batting manufacturer’s instructions for layering and use.
For the outer fabric, quilting cotton is an excellent choice because it is easy to sew, comes in many beautiful patterns, and is widely available.
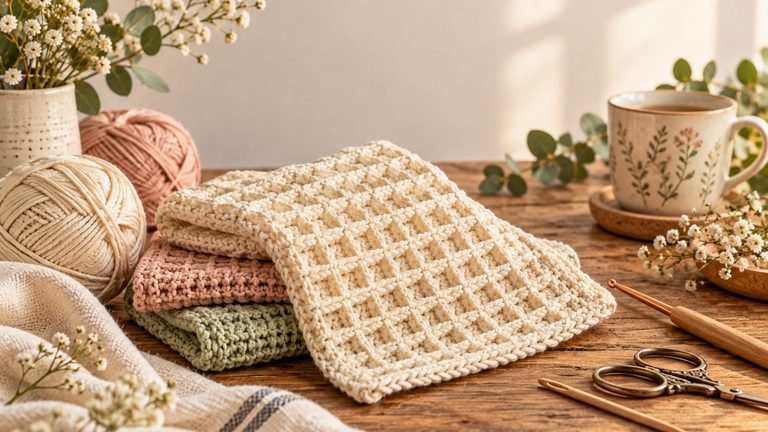
Read The All-Purpose Waffle Stitch Crochet Dishcloth Pattern
How to Choose the Best Christmas Fabric

The fabric is what makes this homemade Christmas gift feel personal. You can choose traditional holiday prints or something more subtle that the recipient can use throughout the year.
Here are a few ideas I love.
1. Traditional Christmas prints
Choose red and green fabric featuring Christmas trees, stars, holly leaves, or tiny ornaments. These prints give your potholder a cheerful holiday look.
2. Neutral farmhouse fabric
Cream, beige, and soft brown fabrics with simple botanical or checked patterns are lovely for someone who prefers a calm, cozy kitchen.
3. Festive red and white
Red gingham, white snowflakes, and small candy-cane prints create a classic Christmas appearance without making the project complicated.
4. Fabric that matches their kitchen
If your recipient loves a particular color, consider choosing a print that complements their kitchen towels, curtains, or apron. This makes the gift feel even more thoughtful.
5. A reversible design
Use one print on the front and another on the back. For example, you could pair a Christmas tree print with a coordinating red gingham fabric. This gives your potholder two attractive sides.
For the best result, choose cotton fabric suitable for kitchen accessories and avoid decorative materials that may melt or scorch when exposed to heat.
Step-by-Step: How to Sew a Homemade Christmas Potholder
This simple square potholder is a great project for beginners. You do not need an elaborate pattern, and you can complete the basic design with straight seams.
Step 1: Wash and prepare your fabric
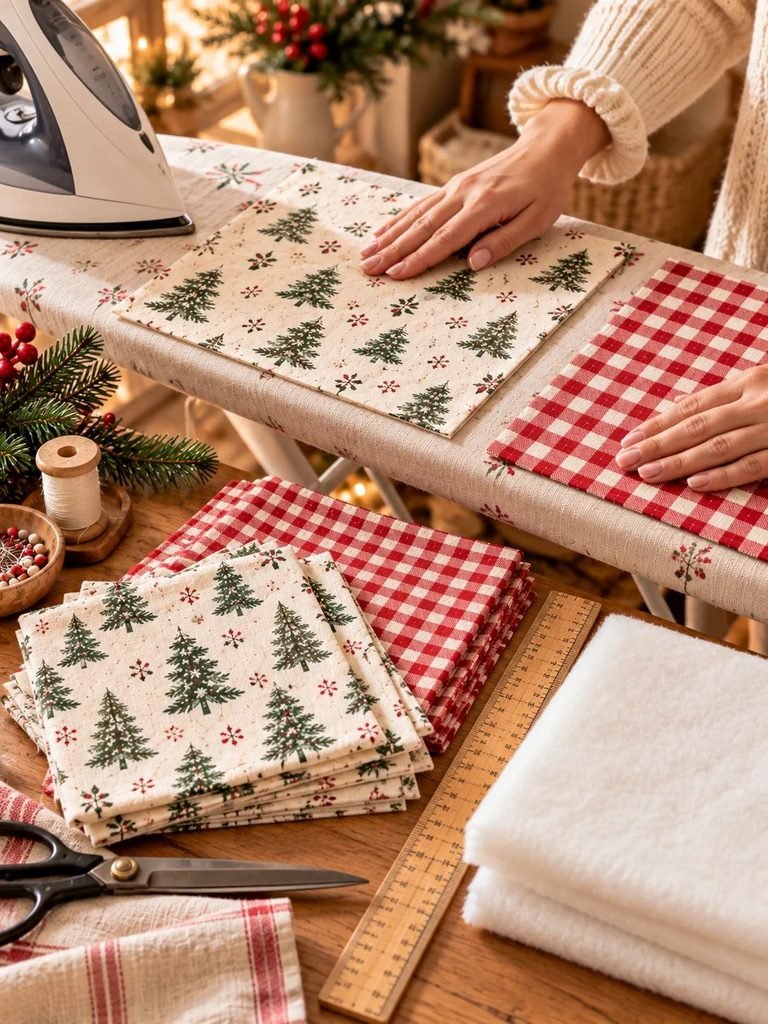
If your fabric is washable, prewash and dry it according to the care instructions. This helps remove finishes and reduces the risk of shrinkage after sewing.
Iron the fabric until it is smooth and flat. Wrinkled fabric can make measuring and cutting less accurate, so take a little time with this step.
Place the fabric on your cutting mat and measure carefully.
Cut the following pieces:
- Two 9 x 9-inch cotton squares
- Two 9 x 9-inch heat-resistant batting squares
- One 5 x 2-inch cotton rectangle for the hanging loop
Trim away any loose threads and set the pieces aside.
Step 2: Make the hanging loop

The hanging loop allows the finished potholder to be stored on a kitchen hook.
Take your 5 x 2-inch cotton rectangle and place it on your ironing board.
- Fold the rectangle in half lengthwise, with the wrong sides together, and press.
- Open it again and fold both long raw edges toward the center crease.
- Fold it in half along the original crease so the raw edges are enclosed.
- Press the folded strip flat.
- Stitch along both long edges, close to the edge, to hold the folds in place.
You should now have a narrow, neat fabric strip.
Fold this strip in half to create a loop and set it aside. You will attach it to one corner of the potholder in a later step.
Step 3: Layer the fabric and batting
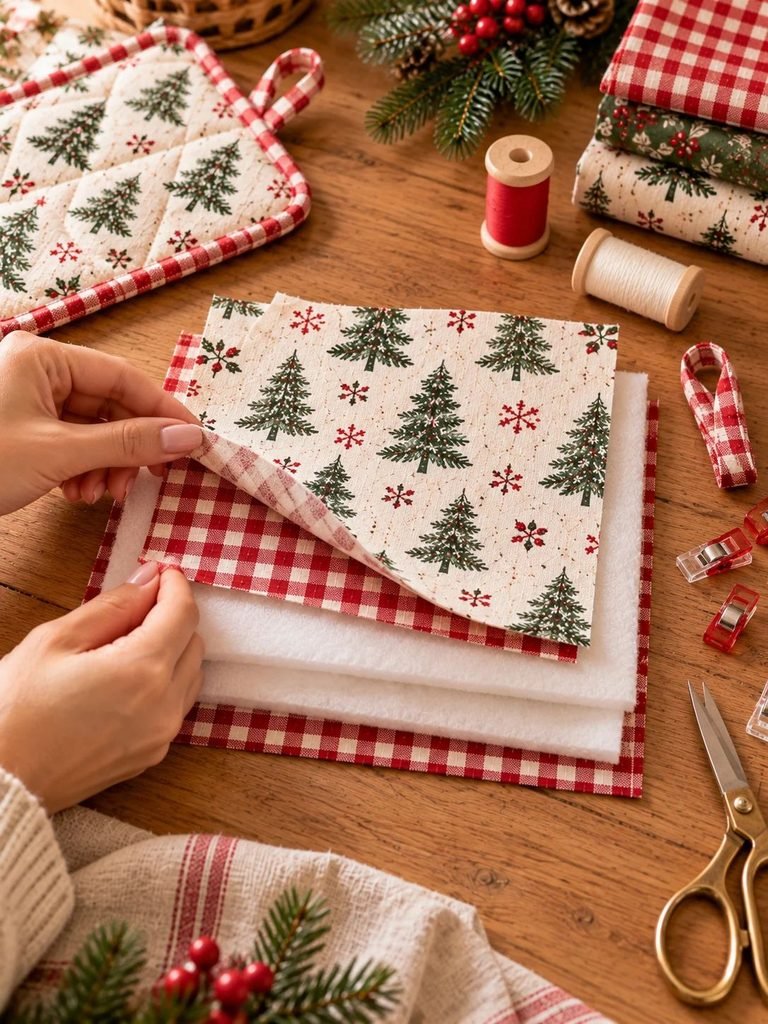
Lay one piece of heat-resistant batting on your work surface.
Place the first cotton square on top of it with the right side of the fabric facing upward.
Next, place the second cotton square on top, with its right side facing downward. The two right sides should face each other.
Place the second batting square on top of the fabric stack.
Your layers should be arranged like this:
- Heat-resistant batting
- Cotton fabric, right side facing up
- Cotton fabric, right side facing down
- Heat-resistant batting
Smooth the layers carefully so there are no wrinkles.
Check that all four pieces line up along their edges. Pin or clip them together, leaving enough room around the edges to sew comfortably.
Step 4: Position the hanging loop

Choose one corner of the potholder for the hanging loop.
Place the folded loop between the two cotton fabric layers, with its raw ends aligned with the raw edge of the corner. The folded end should point toward the center of the potholder.
Make sure the loop is tucked between the fabrics rather than sticking out across the top.
Pin it securely in place.
When you sew around the potholder, the loop’s raw ends will be caught in the seam. This creates a neat finish and keeps the loop attached.
Step 5: Sew around the edges

Take your layered fabric to the sewing machine.
Using approximately a 1/2-inch seam allowance, sew around all four sides of the potholder.
Start on one side and sew toward the first corner. Stop with the needle down, lift the presser foot, and turn the fabric to continue along the next side.
Continue around the square, but leave an opening of approximately 2 to 3 inches on one side.
This opening is important because you will use it to turn the potholder right side out.
Sew slowly through the thicker layers, especially where the hanging loop is positioned. Backstitch at the beginning and end of the seam to help secure your stitches.
Before moving on, check that you have not accidentally sewn the opening closed.
Step 6: Trim the corners
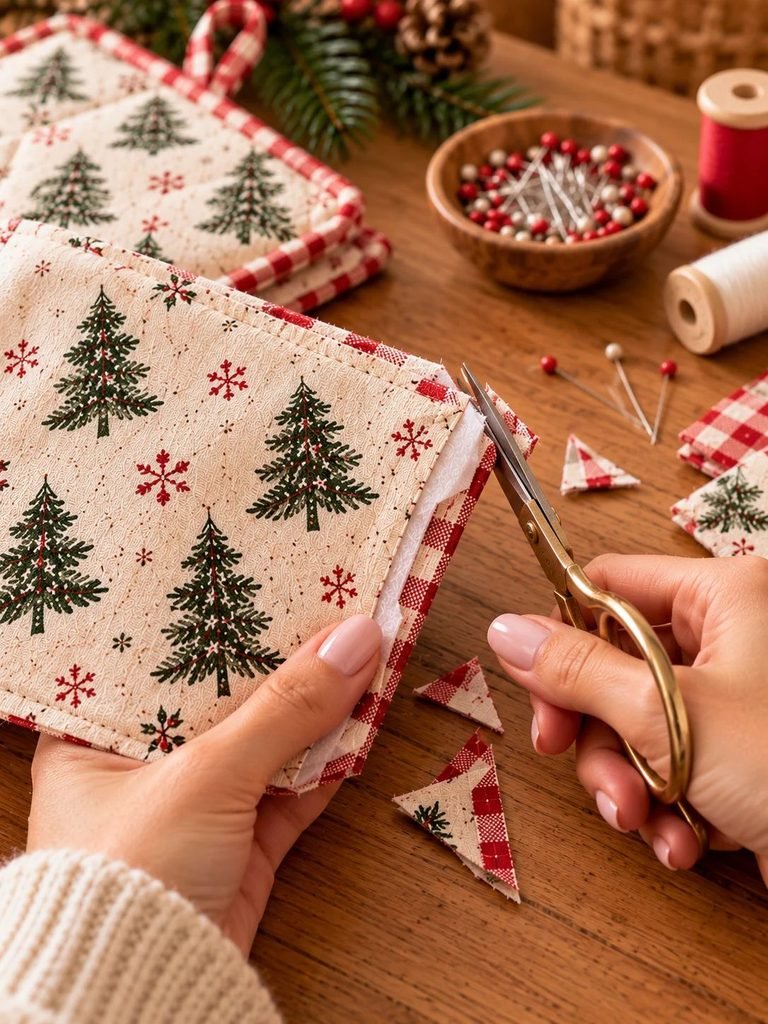
Carefully trim the excess fabric at each corner, cutting diagonally across the seam allowance without cutting through your stitches.
This removes some of the bulk and helps the corners look neater when the potholder is turned right side out.
If necessary, trim away a little excess batting from the seam allowance as well, following the manufacturer’s guidance and taking care not to damage the stitching.
Do not cut too close to the seam. Leaving a little fabric around the stitching helps prevent the corners from coming apart.
Step 7: Turn the potholder right side out

Reach through the opening and gently pull the fabric through until the potholder is right side out.
Work slowly so you do not strain the seams or hanging loop.
Use your fingers or a blunt point turner to gently shape the corners. Avoid sharp objects that could puncture the fabric or damage the batting.
Once the potholder is turned, check that both fabric sides look neat and that the loop is sitting correctly at the corner.
Fold the raw edges of the opening inward so they line up with the rest of the seam. Press the potholder flat with your iron, following the fabric and batting care instructions.
Step 8: Close the opening
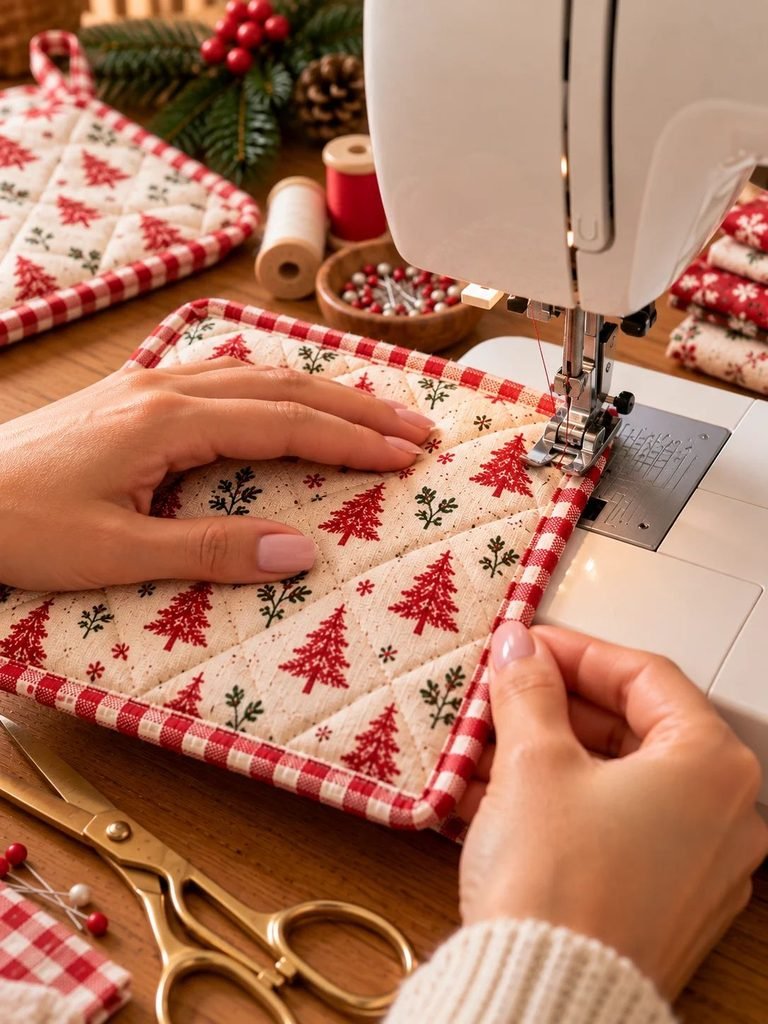
Take the potholder back to the sewing machine.
Sew around the outside edge, approximately 1/4 inch from the edge, to close the opening and create a neat border.
This is called topstitching.
Try to keep your stitching an even distance from the edge. Take your time at the corners, turning the fabric carefully so the border looks tidy.
Backstitch at the beginning and end to secure the seam.
The topstitching also helps keep the layers together and gives the potholder a more finished appearance.
Step 9: Quilt the center
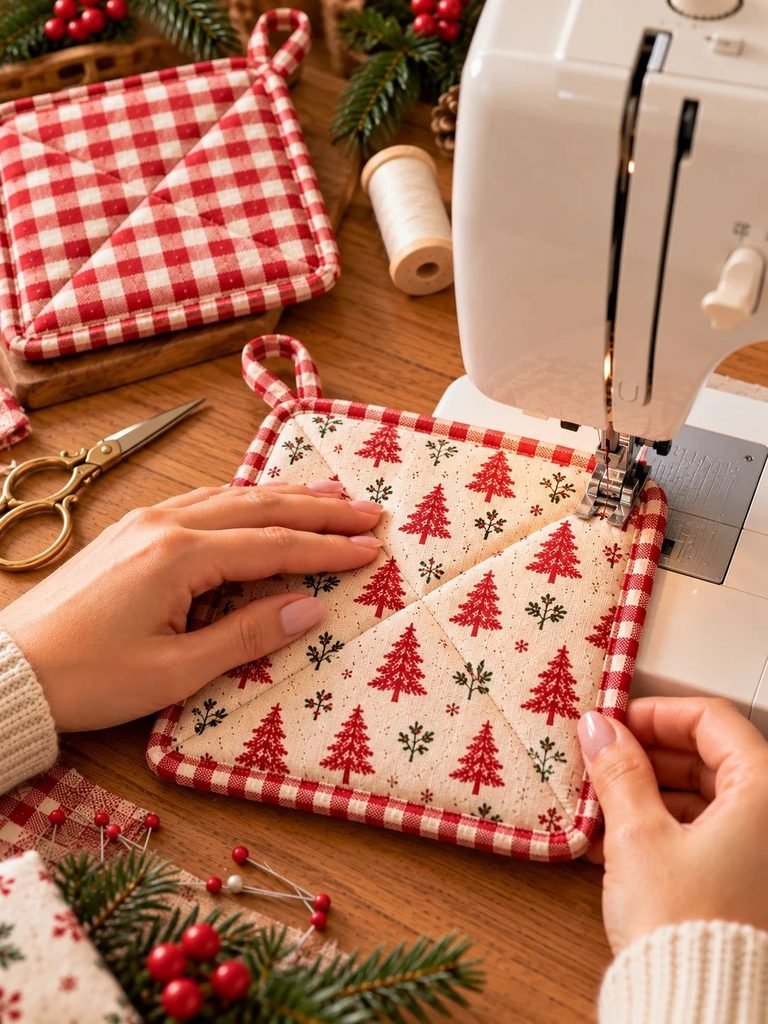
Quilting helps hold the layers in place and gives the potholder a decorative finish.
For a simple beginner-friendly design, sew a diagonal line from one corner to the opposite corner. Sew another diagonal line across the other direction to form an X.
You can also stitch parallel lines across the square or create a simple grid.
If you prefer a more decorative appearance, use a contrasting thread that complements your fabric. For example, cream thread looks lovely on red fabric, while red thread adds a festive touch to a neutral print.
Keep your quilting simple and avoid adding so many stitches that the potholder becomes stiff or difficult to handle.
Once you finish quilting, trim away loose threads and inspect the edges.
Important: This tutorial is a basic sewing project, not a certified heat-protection product. Test and use the finished potholder cautiously, and always follow the insulation manufacturer’s instructions.
How to Make Your Potholder Look More Special
The simplest project can become a beautiful Christmas gift with a few thoughtful details.
Add a matching second potholder
A pair makes a more complete gift and gives the recipient a coordinated set for the kitchen. You can use the same fabric for both or reverse the prints to create a matching pair with a little variety.
Choose a pretty fabric combination
Combine a small Christmas print with a coordinating solid color. This keeps the design balanced and makes even inexpensive fabric look lovely.
Add a handmade gift tag
Write a short message on a kraft paper tag, such as “Made with love for your kitchen.” Tie it around the potholder with cotton ribbon or natural twine.
Make a matching kitchen set
If you have enough fabric, create a small coordinated collection. You could sew a potholder, a simple fabric napkin, and a matching gift wrap band for a cookbook.
Only use the potholder for its intended purpose, and keep decorative ribbons, tags, and other non-heat-safe details away from the area that will contact hot cookware.
More Homemade Christmas Gift Ideas for Someone Who Loves to Cook
If you want to make the gift even more personal, pair your potholder with something small that suits the recipient’s cooking style.
Here are a few easy ideas.
1. A wooden cooking spoon
A simple wooden spoon pairs beautifully with a handmade potholder. Tie the two together with ribbon and add a small gift tag.
2. A handwritten recipe card
Write down a favorite family recipe or a dish the recipient has always wanted to try. A handwritten recipe adds a personal touch that a store-bought gift often lacks.
3. Homemade cookie mix
Layer the dry ingredients for cookies in a clean jar, attach a recipe card with the additional ingredients and baking instructions, and decorate the lid with a small fabric square.
Make sure the ingredients are clearly labeled, especially if the recipient has food allergies.
4. A personalized apron
If you enjoy sewing, a simple apron in coordinating fabric can turn your potholder into part of a thoughtful kitchen gift set.
5. A small baking-themed gift basket
Place the potholder, a wooden spoon, a recipe card, and a few packaged baking ingredients in a basket or reusable gift box.
Keep the colors coordinated for a beautiful presentation.
How to Package Your Homemade Christmas Potholder
Presentation can make a simple handmade gift feel extra thoughtful. You do not need expensive wrapping materials to make it look beautiful.
Start by making sure your potholder is clean, dry, and free of loose threads.
Fold it neatly and wrap it in kraft paper or place it inside a small gift box. Add a cream ribbon, a simple gift tag, and a small evergreen sprig for a festive touch.
For a cozy, feminine look, use neutral wrapping paper with a blush ribbon and a handwritten note. If you prefer a traditional Christmas style, choose red ribbon and a green gift tag.
You can also place the potholder inside a reusable gift bag alongside a recipe card or wooden spoon.
A short personal message makes the gift feel even more meaningful. Something as simple as “Wishing you a Christmas filled with love, laughter, and delicious meals” is a lovely finishing touch.
Common Mistakes to Avoid
Even an easy sewing project can have a few challenges. Here are some simple tips to help you get a neat result.
Using unsuitable batting: Choose a product specifically designed for heat-resistant kitchen accessories. Ordinary craft batting is not necessarily suitable for protecting your hands from hot cookware.
Choosing synthetic outer fabric: Some synthetic fabrics can melt or be damaged by heat. Cotton is generally a suitable choice for the outer fabric, provided it is used with appropriate insulation.
Skipping the pressing step: Pressing the fabric before sewing and after turning it helps the potholder lie flat and gives it a more professional finish.
Forgetting the turning opening: Leave a 2 to 3-inch gap in the seam so you can turn the potholder right side out.
Trimming too close to the stitches: Cutting through the seam can weaken the potholder. Trim excess fabric carefully without damaging your stitching.
Making the hanging loop too loose: Secure the loop between the fabric layers and stitch it firmly into the seam.
Assuming thick fabric is automatically heat-safe: Thickness alone does not guarantee protection. The materials, construction, and manufacturer’s instructions all matter.
Frequently Asked Questions
Is this homemade Christmas potholder suitable for beginners?
Yes. The basic design uses simple square pieces, straight stitching, and a small hanging loop. If you can sew a straight line with a sewing machine, you can try this project.
Can I make this potholder without a sewing machine?
You can hand-sew a simple potholder, but stitching through multiple layers of fabric and heat-resistant batting can be difficult. If you hand-sew it, use strong stitches and make sure every seam is secure. Do not use it with hot cookware unless you can establish that the finished construction provides suitable protection.
Can I use leftover fabric?
Absolutely. Fabric scraps are perfect for this project, as long as they are suitable for kitchen use and large enough to cut the required pieces. You can even combine two coordinating prints for a unique design.
How long does it take to make one?
For someone familiar with basic sewing, the project may take around 30 to 60 minutes. Beginners may need longer, especially when cutting, pressing, and sewing through the layered materials.
Can I wash a handmade potholder?
That depends on the fabric and batting you choose. Check the manufacturer’s care instructions before washing. If the finished potholder becomes stained, worn, damaged, or compressed, replace it rather than relying on it for heat protection.
Is one potholder enough for a Christmas gift?
Yes. A single potholder makes a lovely small gift, especially when paired with a handwritten recipe card or wooden spoon. A matching pair is another wonderful option if you want to make the present feel more complete.
Final Thoughts
Making a homemade Christmas gift for someone who loves to cook is a lovely way to share a little creativity during the holiday season. This simple fabric potholder is practical, easy to personalize, and a wonderful project for using up beautiful fabric scraps.
Choose a print that suits the recipient, take your time with the stitching, and finish the project with a thoughtful gift tag. You can make a single potholder or create a matching pair to give as part of a small kitchen gift basket.
The best part is that you do not need complicated sewing skills or expensive supplies to make something meaningful. With a little care and creativity, you can turn a few basic materials into a handmade Christmas gift that feels personal and special.
Happy sewing, and Merry Christmas from The Crafty Fix!