18+ Festive Christmas Clay Ideas for Easy DIY Ornaments
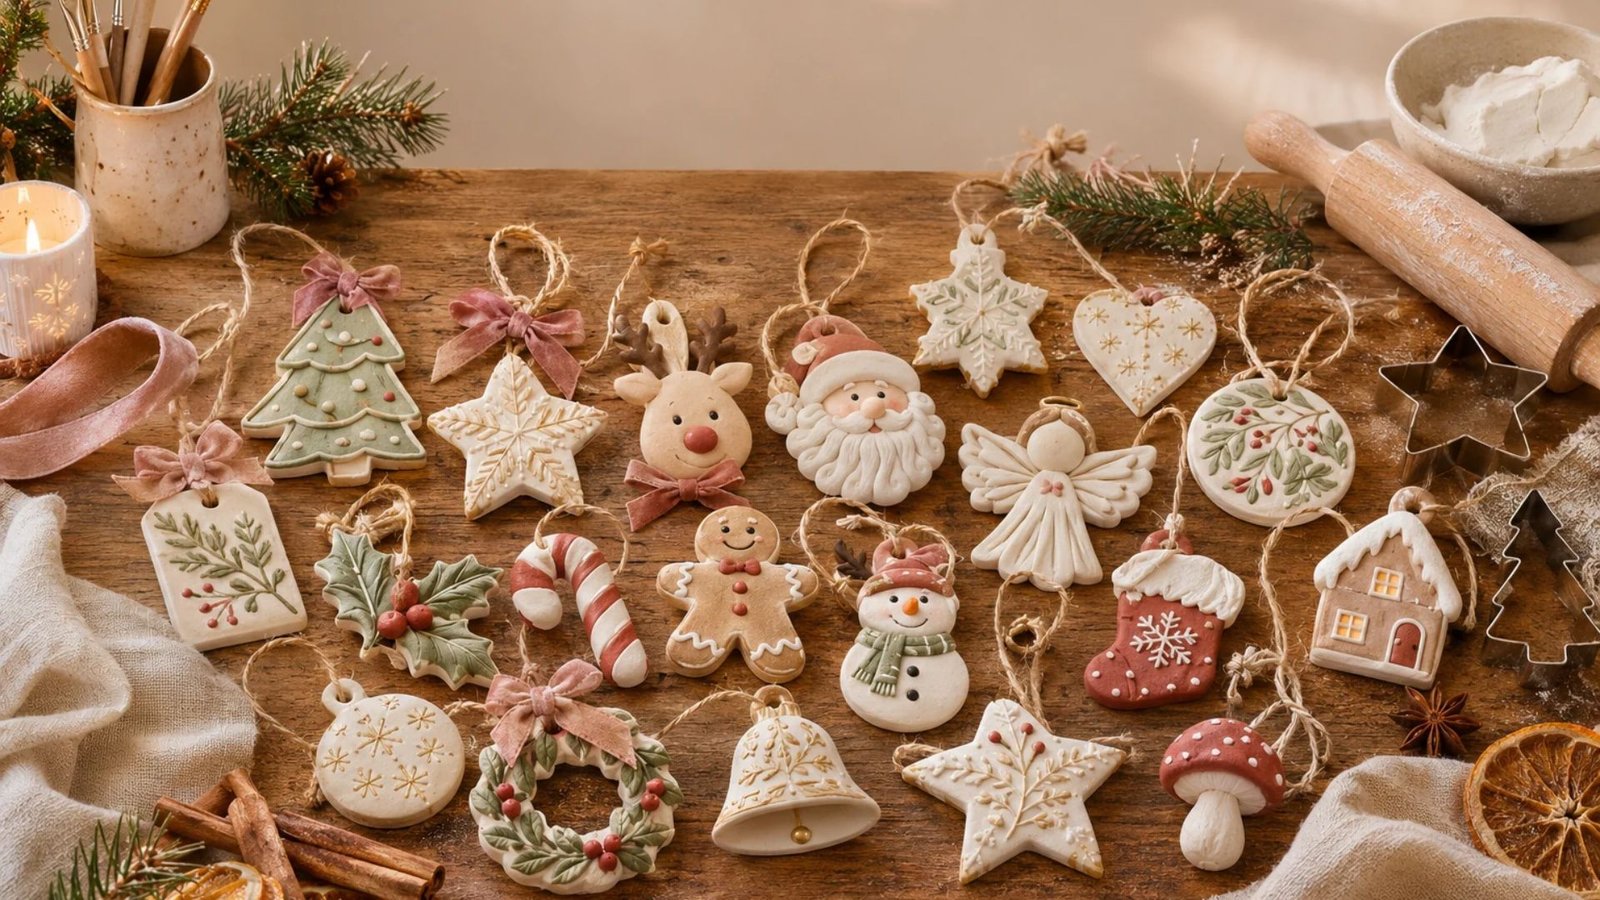
Christmas is one of my favourite times to get creative, especially when it comes to making little handmade decorations that bring warmth and personality into the home.
I love how a simple piece of clay can become something so beautiful with just a few tools, a little imagination, and some festive details.
Whether you enjoy decorating your Christmas tree, making thoughtful handmade gifts, or creating cosy seasonal decorations, these Christmas clay ideas are such a lovely place to start.
The best part is that you don’t need to be an experienced crafter to make something you’ll treasure for years.
Why Make Christmas Ornaments with Clay?
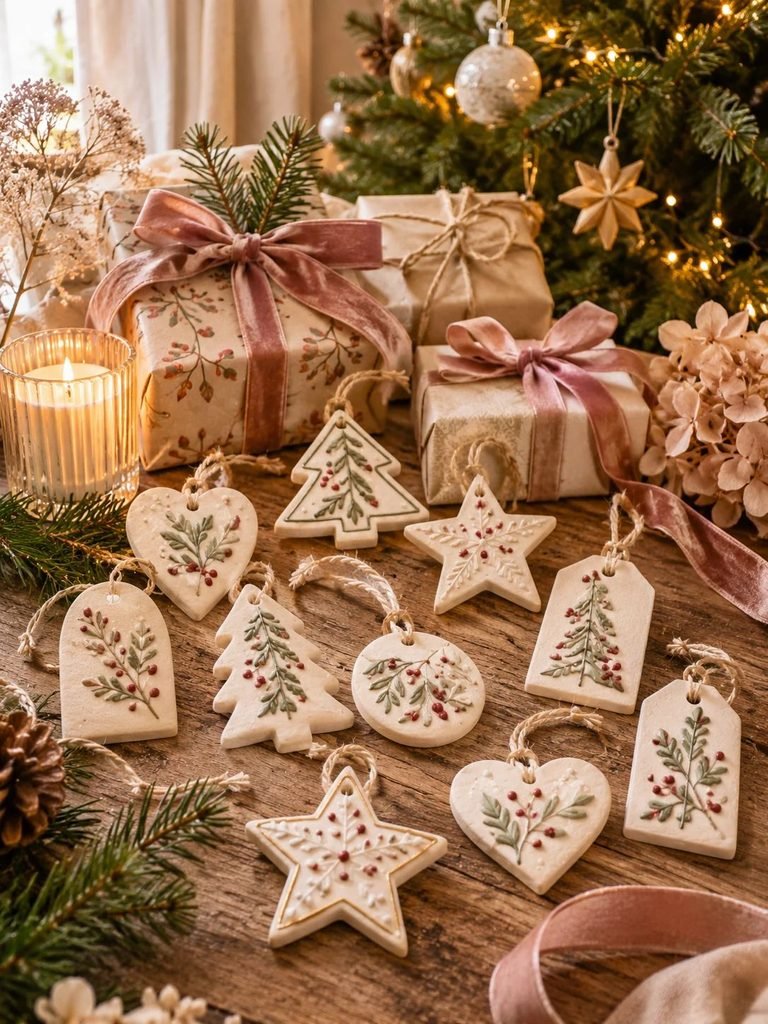
Clay ornaments are a wonderful way to add a personal touch to your Christmas decorations without spending a fortune. You can make them in almost any shape, colour, or style, which makes them suitable for everything from traditional Christmas trees to modern farmhouse and Scandinavian-inspired homes.
Here are a few reasons I love this kind of Christmas craft:
- Budget-friendly: A small packet of air-dry clay can make several ornaments, gift tags, and decorative pieces.
- Beginner-friendly: Most designs use simple shapes, cookie cutters, and basic modelling techniques.
- Easy to personalise: Add names, dates, initials, patterns, or little messages to make each piece special.
- Lovely handmade gifts: Clay decorations make thoughtful gifts for friends, family, teachers, and neighbours.
- Great for family crafting: Many of the simpler designs are suitable for making together with children under adult supervision.
You can also experiment with different finishes, from natural white clay and rustic beige to traditional red, green, gold, and snowy winter shades.
What You Need to Make Christmas Clay Ornaments
Before getting started, gather a few basic supplies. You don’t need every tool available in a craft shop. A simple collection of materials will be enough for most of these projects.
| Supplies | What they are used for |
|---|---|
| Air-dry clay | Making ornaments without an oven |
| Polymer clay | Making detailed pieces that require baking |
| Rolling pin | Flattening clay evenly |
| Christmas cookie cutters | Creating festive shapes |
| Drinking straw | Making holes for hanging |
| Acrylic paints | Adding colourful details |
| Fine paintbrushes | Painting small patterns |
| Twine or ribbon | Hanging and decorating ornaments |
| Sandpaper | Smoothing dried edges |
| Clay modelling tools | Adding texture and details |
| Clear clay-compatible sealer | Protecting finished decorations |
A quick note about clay: Air-dry clay and polymer clay are not interchangeable. Air-dry clay hardens naturally as moisture evaporates, while polymer clay needs to be baked according to its manufacturer’s instructions. Always follow the product directions, particularly for drying, curing, and sealing.
18+ Festive Christmas Clay Ideas for Easy DIY Ornaments
These Christmas clay crafts range from simple cookie-cutter decorations to more detailed little characters. You can make them in traditional festive colours or use soft neutrals for a more understated, cosy Christmas look.
1. Classic Christmas Tree Clay Ornaments
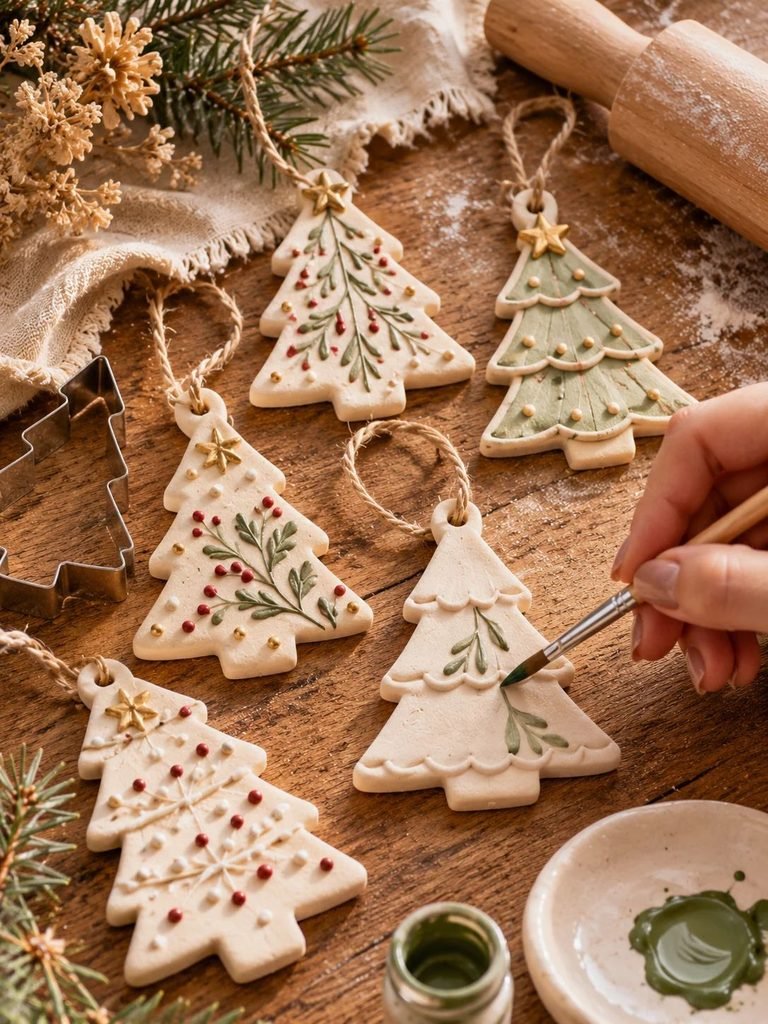
Christmas tree ornaments are one of the easiest projects to start with, especially if you are new to working with clay. Their simple shape makes them easy to cut, decorate, and personalise.
What you need:
- White or natural air-dry clay
- Christmas tree cookie cutter
- Rolling pin
- Drinking straw
- Acrylic paints in red and green
- Fine paintbrush
- Jute twine
How to make them:
- Knead your clay gently until it feels smooth and pliable.
- Roll it out to approximately ¼ inch (6 mm) thick.
- Press a Christmas tree cookie cutter into the clay and carefully remove the excess.
- Use a straw to make a small hanging hole near the top.
- Smooth the edges with a slightly damp fingertip.
- Leave the ornament to dry completely, turning it occasionally if the clay instructions recommend it.
- Once dry, paint tiny red berries, green stars, or simple white dots onto the surface.
- Finish with a suitable clear sealer if desired and thread twine through the hole.
Pretty finishing idea: Make a small collection using different shades of green, cream, and white. Hang them together for a coordinated handmade Christmas tree.
Read How to Transfer Images onto Polymer Clay (Step-by-Step DIY Guide)
2. Personalised Christmas Clay Gift Tags

Why settle for ordinary paper gift tags when you can make something that becomes a little keepsake? Clay gift tags are beautiful additions to Christmas presents and can be reused as decorations afterwards.
What you need:
- White air-dry clay
- Round or rectangular cookie cutter
- Rolling pin
- Letter stamps
- Small leaf or botanical stamp
- Drinking straw
- Twine
- Acrylic paint
How to make them:
- Roll your clay into an even slab, about ¼ inch thick.
- Cut out small circles, rectangles, or rounded gift-tag shapes.
- Press a name, initial, or short Christmas message into the clay.
- Add a small botanical impression or decorative border.
- Make a hole near the top for the hanging string.
- Allow the tags to dry completely before gently sanding the edges.
- Add a little colour to the stamped details if desired.
- Seal with a compatible protective finish and attach twine.
Helpful tip: Leave enough room around the name so the letters remain easy to read. Test your letter stamps on a spare piece of clay before decorating your finished tags.
Read How to Make a Clay Photo Ornament: An Easy DIY Keepsake
3. Evergreen Leaf Imprint Ornaments

If you love natural Christmas decorations, evergreen imprint ornaments are such a lovely choice. They capture the delicate details of real leaves and bring a little outdoor beauty into your festive decorating.
What you need:
- White air-dry clay
- Fresh evergreen sprigs or fern leaves
- Rolling pin
- Round cookie cutter
- Straw
- Gold acrylic paint
- Fine paintbrush
- Twine
How to make them:
- Roll out your clay to an even thickness.
- Place a clean evergreen sprig on the surface.
- Gently roll over the sprig to transfer its natural texture.
- Carefully remove the greenery.
- Cut around the impression using a round cookie cutter.
- Create a hanging hole and smooth the edges.
- Let the ornament dry fully.
- Lightly brush gold paint over selected raised or recessed details, depending on the finish you prefer.
- Add twine once everything is dry.
Styling idea: Make several different botanical impressions using pine, rosemary, and fern leaves. Their natural patterns will give every ornament a slightly different appearance.
4. Mini Santa Face Ornaments
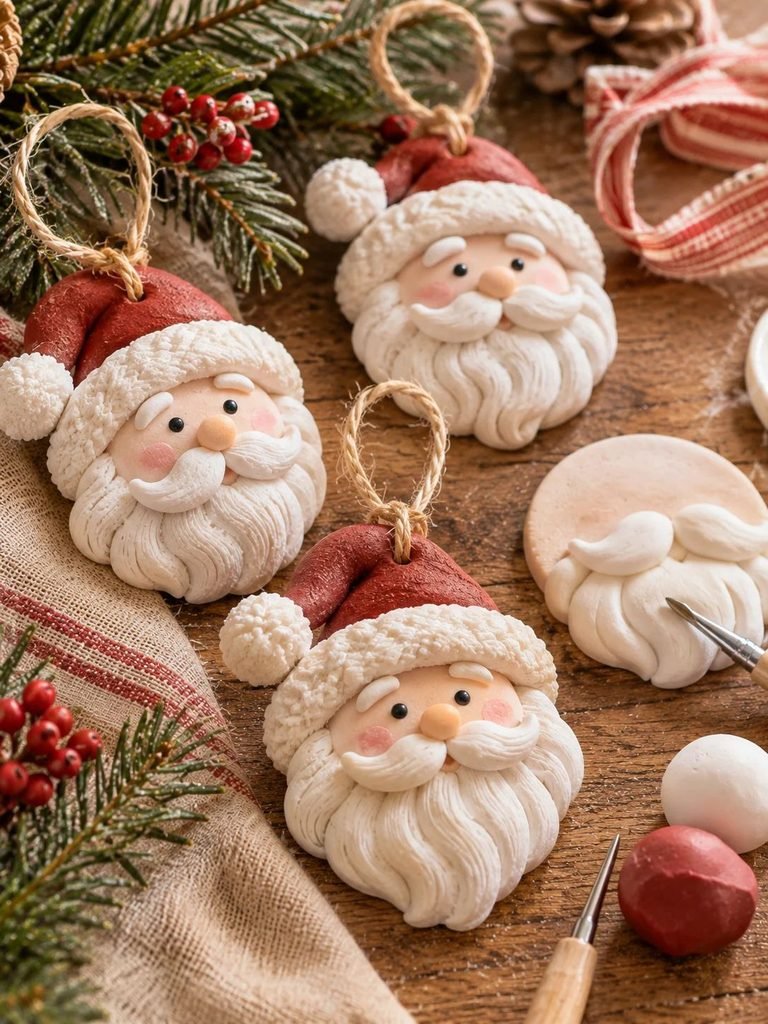
These little Santa faces are full of Christmas charm. They look especially sweet hanging on a tree, attached to a festive wreath, or included in a handmade Christmas gift box.
What you need:
- Beige, red, and white polymer clay
- Small black clay pieces
- Clay modelling tool
- Needle tool
- Pink pastel
- Metal eye pins
- Red ribbon
How to make them:
- Roll beige clay into a small ball and flatten it into an oval face.
- Shape red clay into a little hat and attach it to the top.
- Roll white clay into a thin strip and place it along the bottom of the hat.
- Add a fluffy texture to the white strip using a needle tool.
- Shape a white beard and attach it to the lower half of the face.
- Add a tiny white moustache and a small beige nose.
- Use black clay to create two little eyes.
- Dust the cheeks lightly with pink pastel.
- Insert an appropriate hanging eye pin and bake according to the polymer clay manufacturer’s instructions.
- Allow the ornament to cool before adding ribbon.
Helpful tip: Clean your hands and tools between working with red and white clay. This helps prevent colour transfer and keeps Santa’s beard looking bright.
Read DIY Clay Gnome
5. Cute Reindeer Clay Ornaments
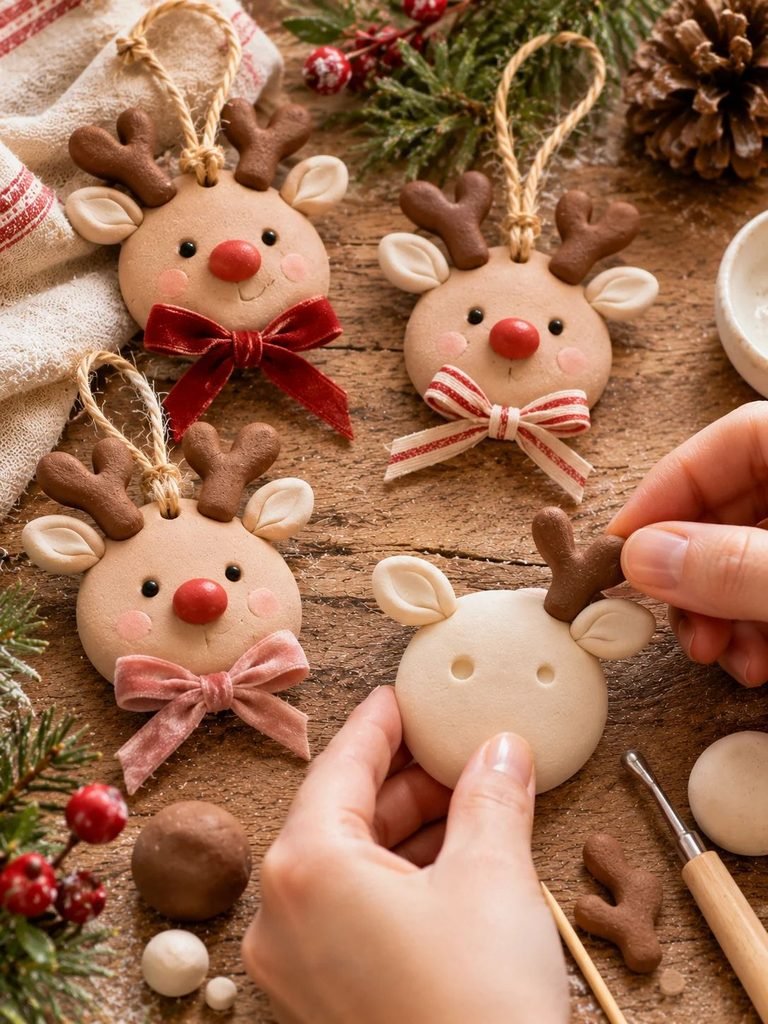
A Christmas tree never feels quite complete without a reindeer or two! These adorable decorations are easy to customise, and you can make each one look a little different.
What you need:
- White or beige air-dry clay
- Brown clay or acrylic paint
- Red clay or paint
- Small modelling tools
- Toothpick
- Ribbon
- Twine
How to make them:
- Roll the clay into a smooth ball and flatten it into a rounded face shape.
- Create two small ears using teardrop-shaped pieces of clay.
- Add a tiny red nose to the centre.
- Make two small indentations for the eyes.
- Shape two brown antlers and attach them securely.
- Create a hanging hole before drying if using air-dry clay.
- Allow the decoration to dry fully.
- Paint the eyes and other details if needed.
- Finish with a tiny ribbon bow and a twine hanger.
Make it special: Give each reindeer a different expression or scarf colour. They also make lovely handmade place-setting decorations for Christmas dinner.
Read How to Make Air-Dry Clay Waterproof: Easy Ways to Protect Your Clay Projects
6. Snowman Button-Belly Ornaments

Snowmen are perfect for anyone who loves traditional winter decorations. Their rounded shapes are simple to create, and the little details make them especially charming.
What you need:
- White air-dry or polymer clay
- Black clay or small decorative details
- Orange clay
- Toothpick
- Twine
- Small ribbon or fabric scraps
How to make them:
- Create one larger ball of clay for the body and a smaller one for the head.
- Flatten both slightly and join them together.
- Smooth the joining area so the snowman looks like one connected figure.
- Add a tiny orange carrot nose.
- Press small black buttons onto the body.
- Add two little eyes and a dotted smile.
- Wrap a thin piece of ribbon or twine around the neck to create a scarf.
- Make a hanging hole or add suitable polymer clay hanging hardware.
- Dry or bake according to the clay instructions.
Decorating idea: Use soft blush, dusty blue, or sage green scarves for a gentle winter colour palette.
7. Gingerbread People with Faux Icing

Gingerbread decorations bring back that lovely nostalgic feeling of Christmas baking. These clay versions look just like little gingerbread cookies but can be kept and reused every festive season.
What you need:
- Brown air-dry or polymer clay
- Gingerbread cookie cutter
- White acrylic paint or white clay
- Red and green paint
- Small paintbrush
- Twine
How to make them:
- Roll the brown clay into an even sheet.
- Cut out gingerbread people using a cookie cutter.
- Make a hanging hole near the top of the head.
- Smooth the edges and leave the pieces to dry completely if using air-dry clay.
- Add white icing-style lines around the arms, legs, and body.
- Paint tiny eyes, a smile, and red or green buttons.
- Add a thin protective finish once the paint has dried.
- Thread twine through the hanging hole.
Helpful tip: For a more realistic cookie appearance, gently press a clean toothbrush against the surface before the clay dries to create a subtle textured finish.
8. Clay Snowflake Ornaments
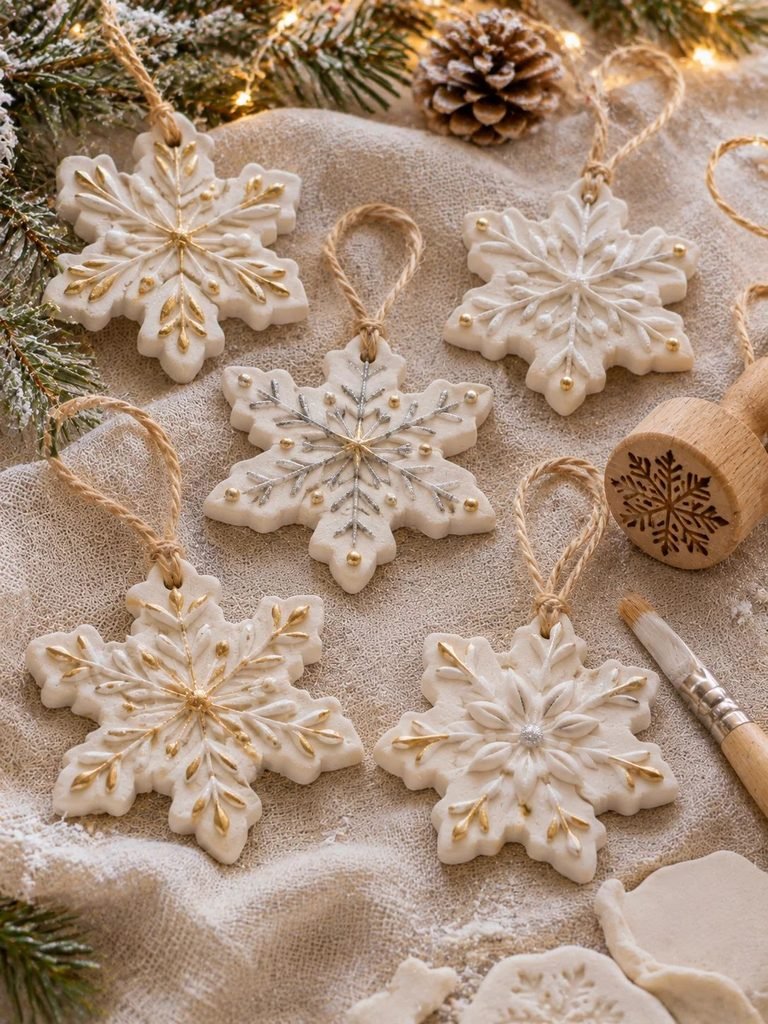
Snowflake ornaments are beautiful if you prefer a winter-inspired Christmas theme. Their delicate designs look lovely against green tree branches and work particularly well with white, silver, and soft blue decorations.
What you need:
- White air-dry clay
- Snowflake cookie cutter
- Rolling pin
- Snowflake stamp
- Fine sandpaper
- Silver acrylic paint
- Twine
How to make them:
- Roll out the clay to approximately ¼ inch thick.
- Cut out snowflake shapes.
- Press a snowflake stamp gently into the surface for added detail.
- Create a hanging hole near one of the upper points.
- Smooth any rough edges carefully.
- Allow the ornaments to dry completely.
- Add silver paint to the raised details or brush a little across the surface.
- Seal with a compatible finish if desired.
Styling idea: Hang several snowflakes at different heights around your tree for a soft, snowy effect.
9. Mini Clay Christmas Wreaths
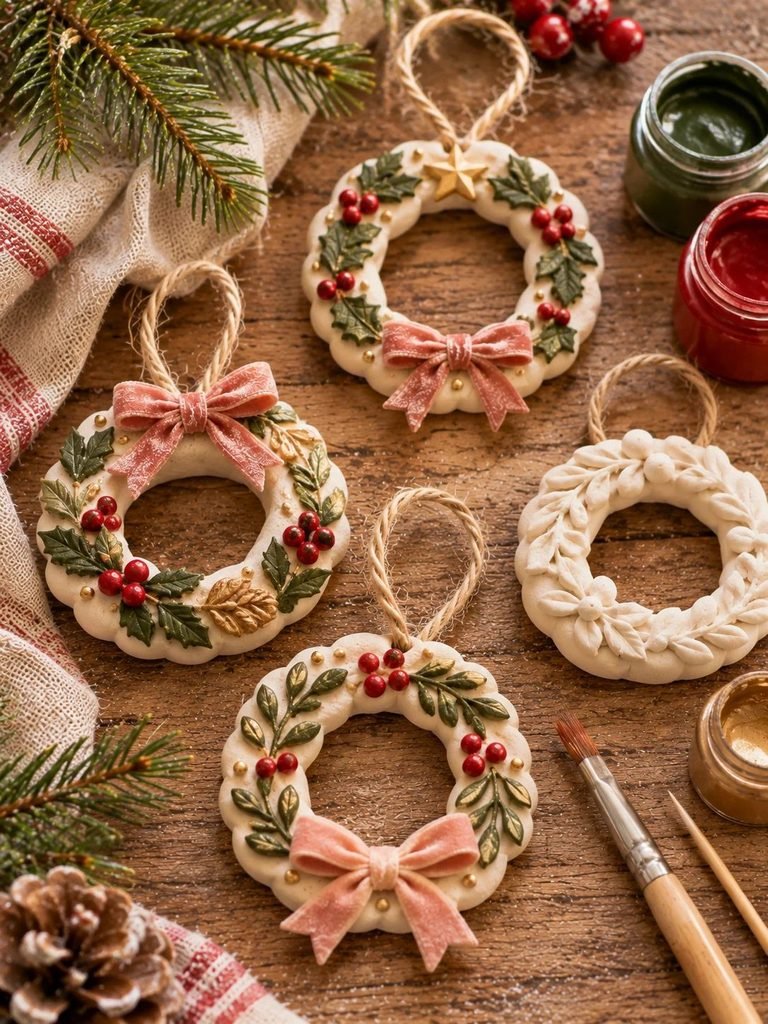
Miniature wreaths are a lovely way to bring classic Christmas greenery into your handmade decorations. They look detailed without requiring complicated modelling techniques.
What you need:
- White or natural air-dry clay
- Green and red acrylic paints
- Small round modelling tool
- Toothpick
- Fine paintbrush
- Twine
How to make them:
- Roll a small piece of clay into a thin, even rope.
- Bend it into a circle and gently join the ends.
- Smooth the joining area using a little water.
- Use a toothpick to create small leaf-shaped impressions around the circle.
- Make a hanging hole at the top if you want to use it as a tree decoration.
- Allow it to dry fully.
- Paint the leaves in shades of green.
- Add tiny red berry dots and a small decorative bow.
- Finish with twine.
Extra detail: Use two shades of green to give the wreath a more natural, layered appearance.
10. Rustic Clay Star Ornaments

Stars are one of those decorations that never go out of style. Their simple shape makes them ideal for beginners, and they can be decorated in countless ways.
What you need:
- Air-dry clay
- Star cookie cutter
- Rolling pin
- Gold acrylic paint
- Small paintbrush
- Twine
How to make them:
- Roll out your clay evenly.
- Cut out stars using a cookie cutter.
- Create a small hole near the top of each star.
- Smooth the points gently with your fingers.
- Allow the clay to dry completely.
- Paint the edges with gold acrylic paint.
- Add tiny dots, stars, or stamped patterns to the centre.
- Attach twine to finish.
Beautiful variation: Make a few stars in different sizes and leave some completely natural while decorating others with gold details.
11. Mini Clay Christmas Bells
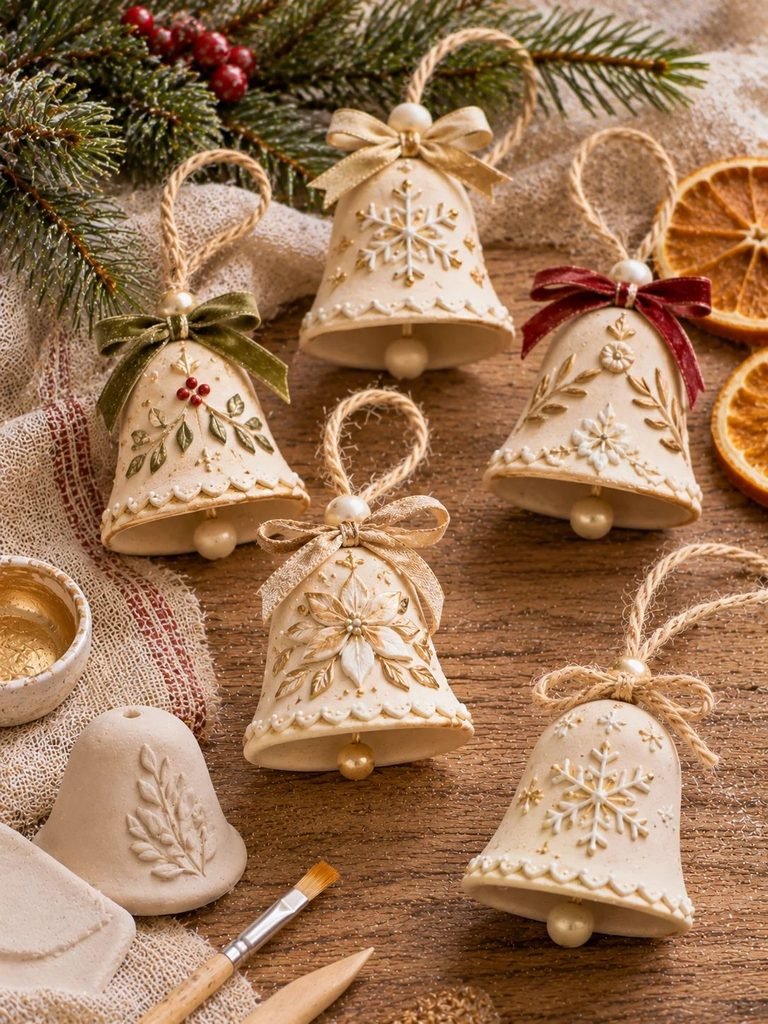
These little bells are perfect for a traditional Christmas tree. You can make them in cream, white, terracotta, or soft gold tones.
What you need:
- Air-dry clay
- Small bell-shaped mould or modelling tools
- Toothpick
- Acrylic paint
- Twine
- Small decorative beads
How to make them:
- Shape a small piece of clay into a rounded bell form.
- Gently widen the bottom to create the bell opening.
- Use a modelling tool to refine the shape.
- Create a hole at the top for hanging.
- Add small decorative patterns around the bell.
- Leave it to dry completely.
- Paint it in your chosen Christmas colours.
- Add a small decorative bead or ribbon detail.
Note: These are decorative bells and won’t necessarily produce a ringing sound unless you incorporate suitable separate hardware.
12. Candy Cane Clay Ornaments
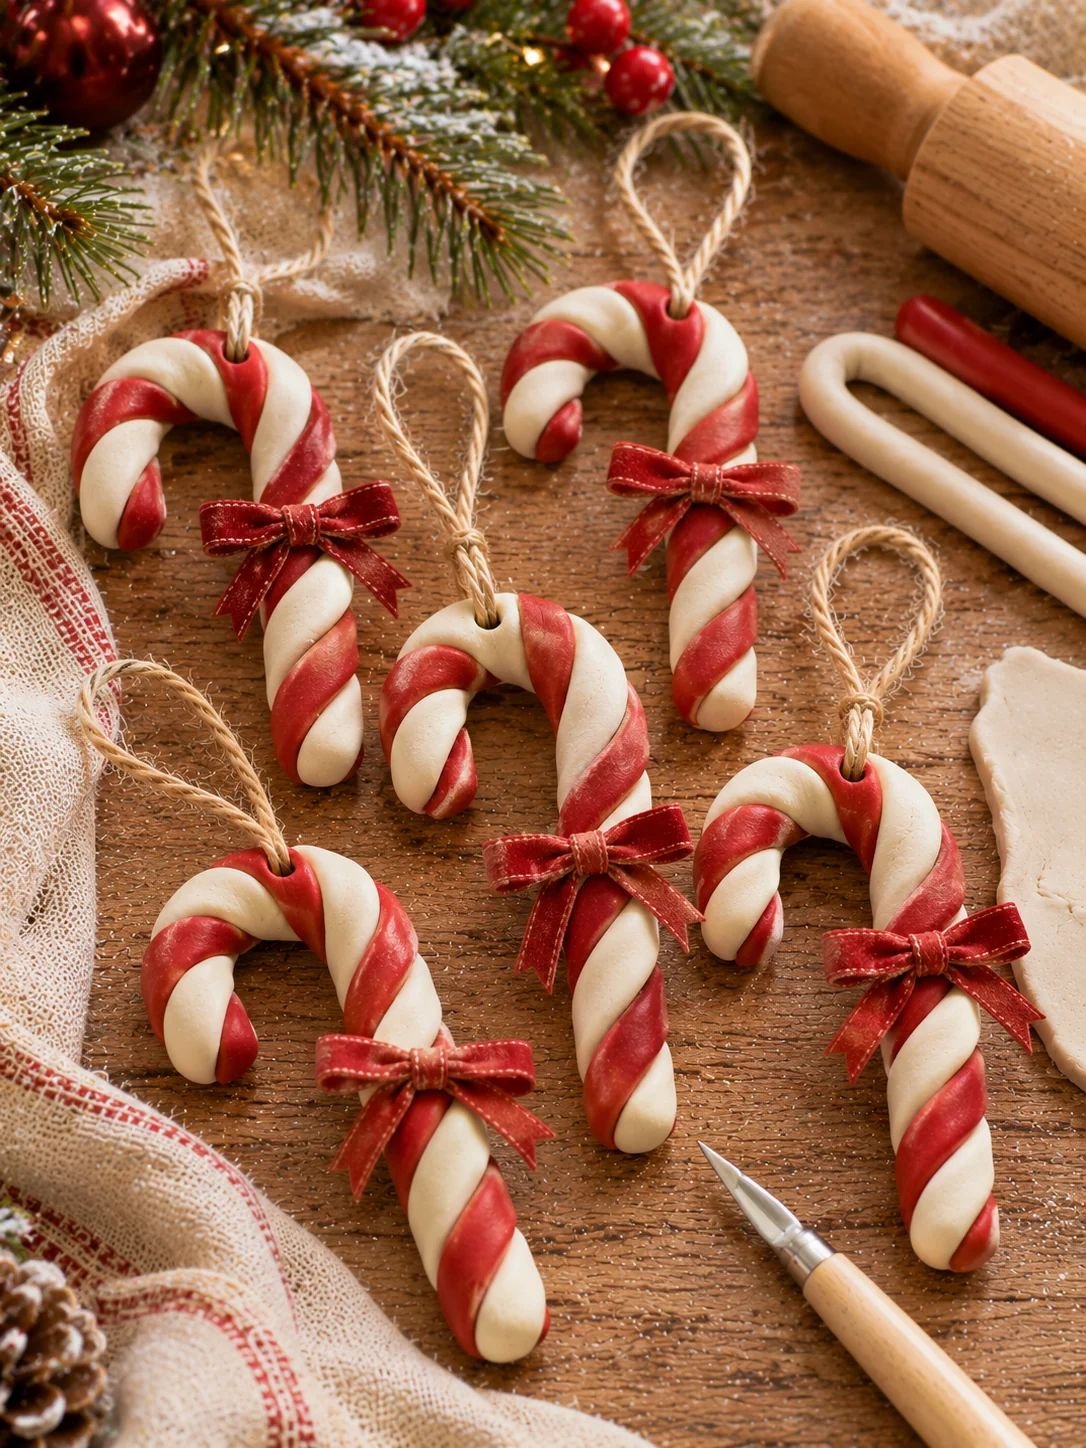
Candy canes are such a cheerful Christmas symbol, and their familiar striped pattern makes them easy to recreate using clay.
What you need:
- White polymer clay or air-dry clay
- Red clay or acrylic paint
- Rolling pin
- Clay modelling tools
- Twine
How to make them:
- Roll a piece of white clay into a thin, even rope.
- Roll a second rope using red clay of a similar thickness.
- Place the two ropes side by side and twist them gently.
- Bend the top into a candy cane shape.
- Smooth any rough areas without losing the striped pattern.
- Make a hanging hole near the curved end.
- Dry or bake according to your clay instructions.
- Add a little clear finish if appropriate and attach twine.
Helpful tip: Avoid twisting the clay too tightly, as this can make the stripes uneven and distort the shape.
13. Mini Clay Christmas Stockings

Stocking ornaments are a sweet addition to a traditional Christmas tree. You can even personalise them with initials or names to make each one meaningful.
What you need:
- Red or white air-dry clay
- Stocking cookie cutter or template
- White clay
- Toothpick
- Acrylic paints
- Twine
How to make them:
- Roll out your clay evenly.
- Cut out stocking shapes using a template or cookie cutter.
- Smooth the edges and make a hanging hole.
- Create a small strip of white clay for the stocking cuff.
- Attach the cuff and add a little texture using a toothpick.
- Dry the ornament completely.
- Add tiny snowflakes, dots, or initials with acrylic paint.
- Attach a ribbon or twine hanger.
Personalisation idea: Make one stocking for every member of your family and add their initials.
14. Clay Holly Leaf Ornaments
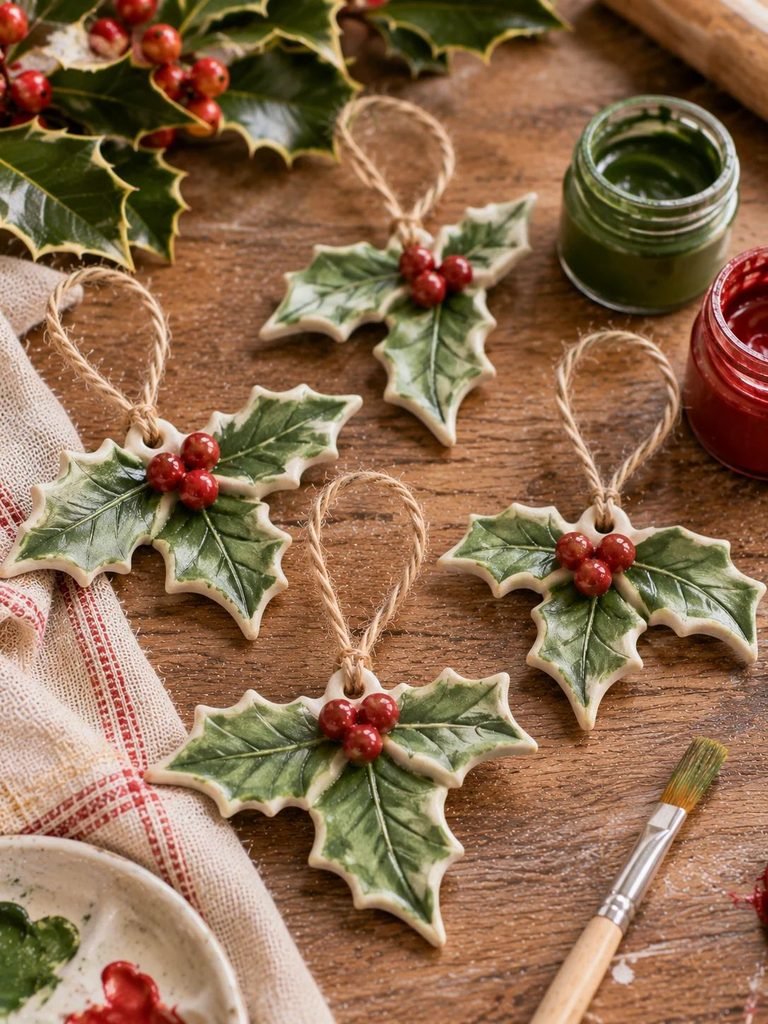
Holly leaves are perfect for creating elegant Christmas decorations inspired by nature. Their distinctive pointed edges and little red berries make them instantly recognisable.
What you need:
- White or natural air-dry clay
- Holly leaf template
- Small modelling knife
- Toothpick
- Green and red paint
- Twine
How to make them:
- Roll the clay into a thin, even sheet.
- Place a holly leaf template over the clay and carefully cut around it.
- Use a toothpick to draw the central vein and smaller leaf veins.
- Make a small hanging hole near the stem.
- Smooth the edges and dry the ornament completely.
- Paint the leaf green.
- Add three or four small red berries.
- Seal with a suitable finish once everything is dry.
Variation: Create a small group of holly leaves joined together to make a fuller decoration for your Christmas tree.
15. Clay Angel Ornaments
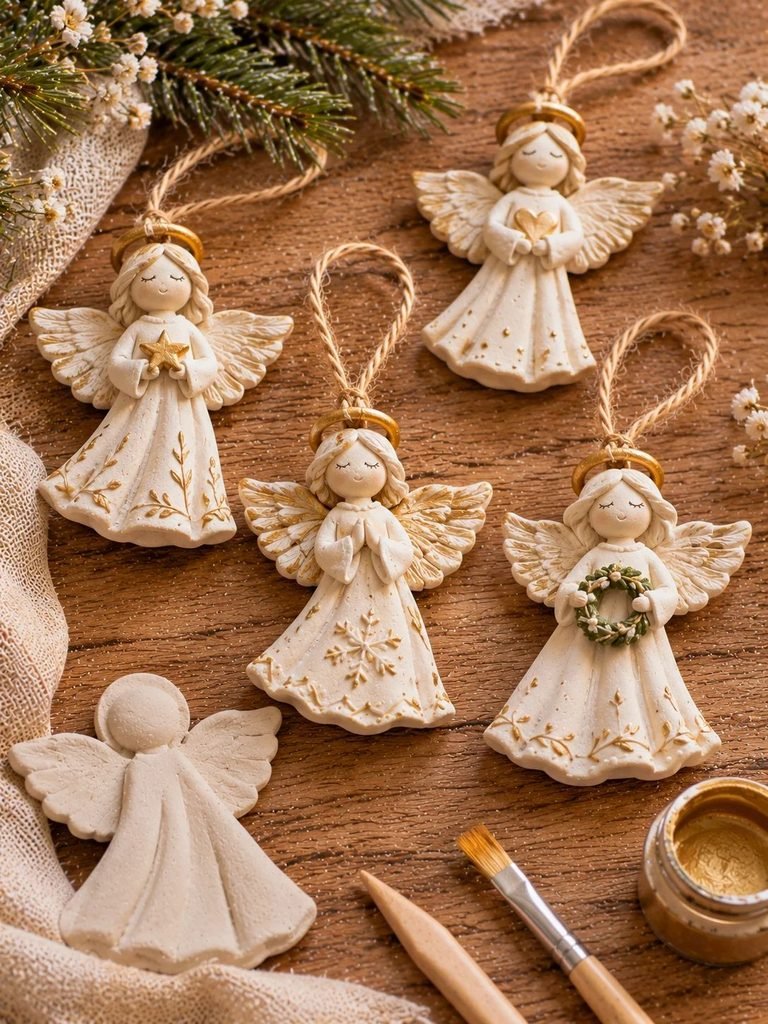
Angels add a gentle, traditional touch to Christmas decorations. This project is especially lovely if you prefer understated ornaments with soft details.
What you need:
- White or cream air-dry clay
- Small round cutter
- Modelling tools
- Toothpick
- Gold acrylic paint
- Twine
How to make them:
- Shape a small piece of clay into a rounded body.
- Flatten another piece and cut or shape it into two wings.
- Attach the wings to the back of the body.
- Create a small head using a rounded piece of clay.
- Add a little texture to the wings and dress.
- Make a hanging hole before the clay dries.
- Allow the ornament to dry fully.
- Paint a delicate gold halo and small decorative details.
- Add twine to finish.
Pretty finishing idea: Keep the body and wings ivory, then add just a little gold to the halo for an elegant appearance.
16. Clay Christmas House Ornaments

If you love cosy winter villages, these little clay houses are a wonderful project. They can be hung on a tree or arranged together on a mantelpiece.
What you need:
- Air-dry clay
- Small house template
- Craft knife
- Toothpick
- Acrylic paint
- Twine
How to make them:
- Roll your clay into a flat slab.
- Cut out simple house shapes using a paper template.
- Use a toothpick to mark the windows and door.
- Add small lines or dots to represent roof tiles or snow.
- Create a hanging hole near the roof.
- Dry the pieces thoroughly.
- Paint the roofs white and the doors and windows in your chosen colours.
- Finish with a suitable sealer and twine.
Creative idea: Make a collection of houses in different sizes and colours to create your own miniature Christmas village.
17. Pressed Cinnamon Stick Clay Ornaments

This is a lovely idea for anyone who enjoys rustic Christmas decorations. Cinnamon sticks and natural textures create a warm, cosy appearance that looks beautiful with neutral festive styling.
What you need:
- Cream or white air-dry clay
- Rolling pin
- Cinnamon sticks
- Pine sprigs
- Round cutter
- Twine
How to make them:
- Roll out your clay to an even thickness.
- Press a small pine sprig or cinnamon stick gently into the surface.
- Remove the natural material carefully.
- Cut out your chosen ornament shape.
- Make a hanging hole.
- Smooth the edges and allow the clay to dry fully.
- Sand any rough edges gently.
- Thread twine through the hole.
Important: Use cinnamon sticks and greenery for decorative impressions rather than leaving bulky pieces attached to ornaments that will hang from tree branches.
18. Clay Christmas Heart Ornaments
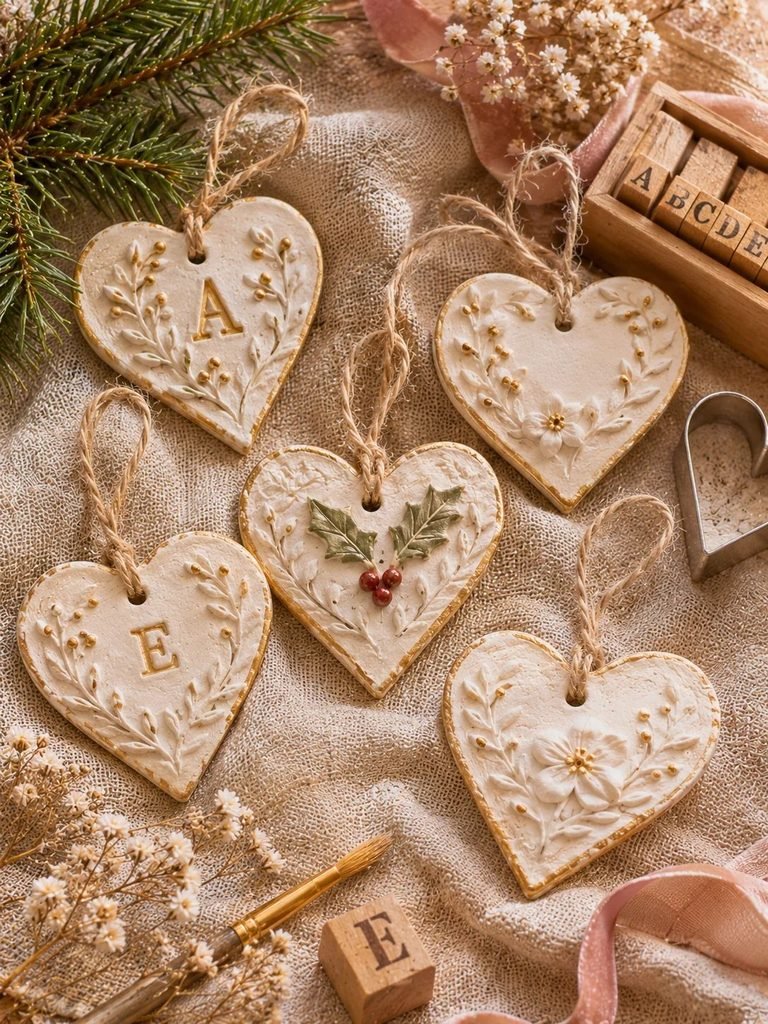
Heart ornaments are simple, beautiful, and full of meaning. They are particularly lovely for handmade gifts, family decorations, or keepsakes to hang on your tree.
What you need:
- White or beige air-dry clay
- Heart cookie cutter
- Rolling pin
- Botanical stamps
- Acrylic paint
- Twine
How to make them:
- Roll out the clay into an even sheet.
- Cut out heart shapes.
- Press a botanical stamp or small decorative pattern into the centre.
- Add a hanging hole near the top.
- Smooth the edges with a damp fingertip.
- Allow the hearts to dry completely.
- Add tiny gold details or a painted border.
- Seal if desired and attach twine.
Personal touch: Stamp a year, initial, or short word into each heart to make a memorable Christmas keepsake.
19. Mini Clay Mushroom Ornaments
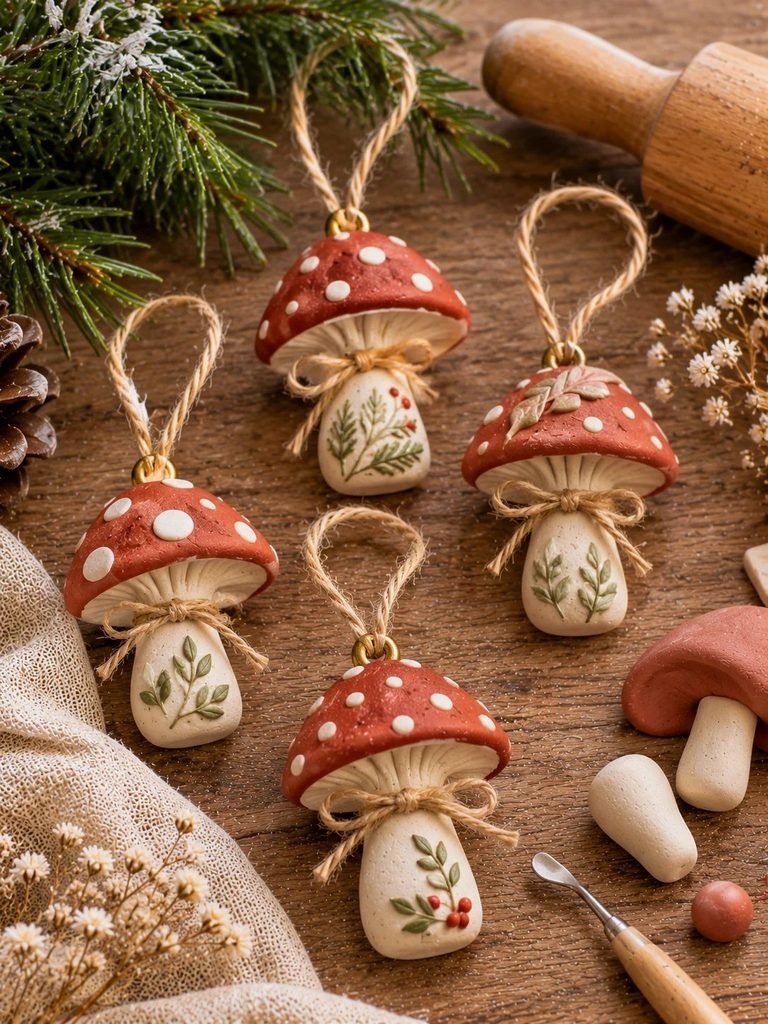
For a whimsical cottagecore Christmas tree, little mushroom ornaments are absolutely adorable. They look especially pretty in muted red, cream, beige, and forest green.
What you need:
- Red, cream, or white clay
- Clay modelling tools
- Toothpick
- Small hanging eye pins if using polymer clay
- Twine or ribbon
How to make them:
- Shape a small piece of clay into a rounded mushroom cap.
- Roll another piece into a short, slightly tapered stem.
- Join the cap and stem securely.
- Add small white dots to the cap.
- Create subtle texture around the stem using a toothpick.
- Insert appropriate hanging hardware if using polymer clay.
- Bake or dry according to the clay instructions.
- Add ribbon or twine once the piece is completely finished.
Decorating idea: Make several mushrooms in different sizes and use them alongside little stars and botanical ornaments.
20. Clay Christmas Bauble Ornaments
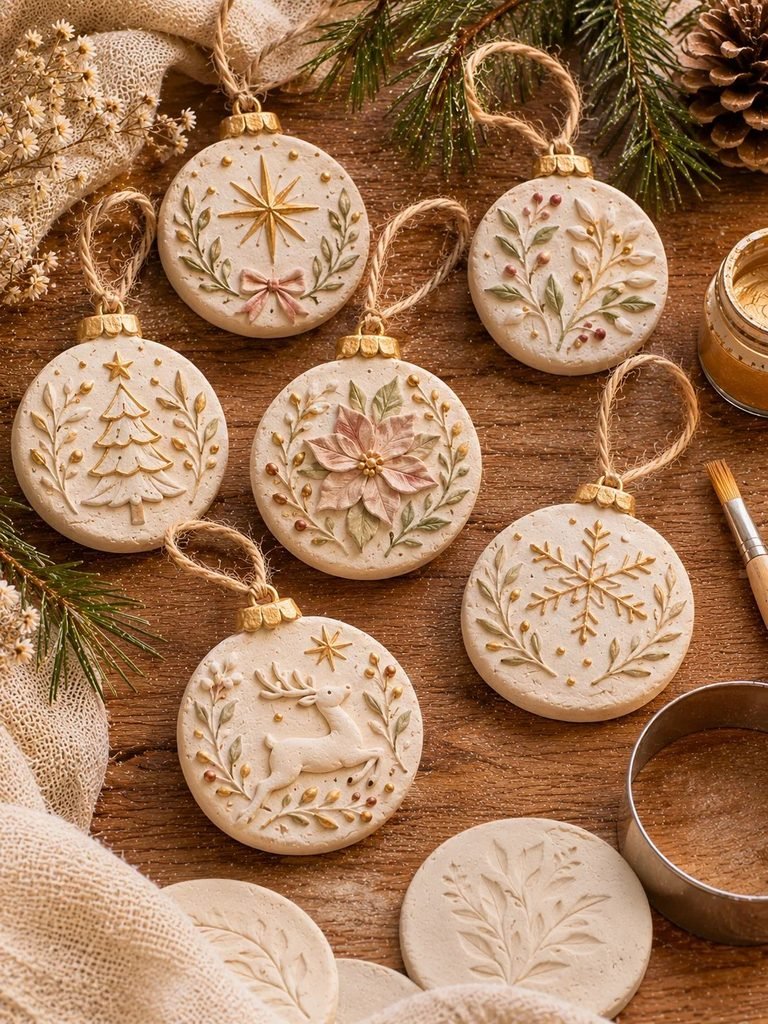
Traditional baubles are a Christmas favourite, but making your own from clay gives you the freedom to create designs that match your home perfectly.
What you need:
- Air-dry clay
- Round cookie cutter
- Rolling pin
- Drinking straw
- Acrylic paints
- Fine paintbrush
- Twine
How to make them:
- Roll the clay into a flat slab.
- Cut out circles using a round cookie cutter.
- Create a small hole near the top.
- Add patterns using stamps, toothpicks, or modelling tools.
- Allow the ornaments to dry completely.
- Paint them with stars, stripes, dots, or simple botanical patterns.
- Apply a suitable protective finish once the paint is dry.
- Attach twine to hang them.
My favourite look: Use warm ivory clay with tiny gold stars and muted blush details for a soft, elegant Christmas theme.
21. Clay Christmas Bell Garland
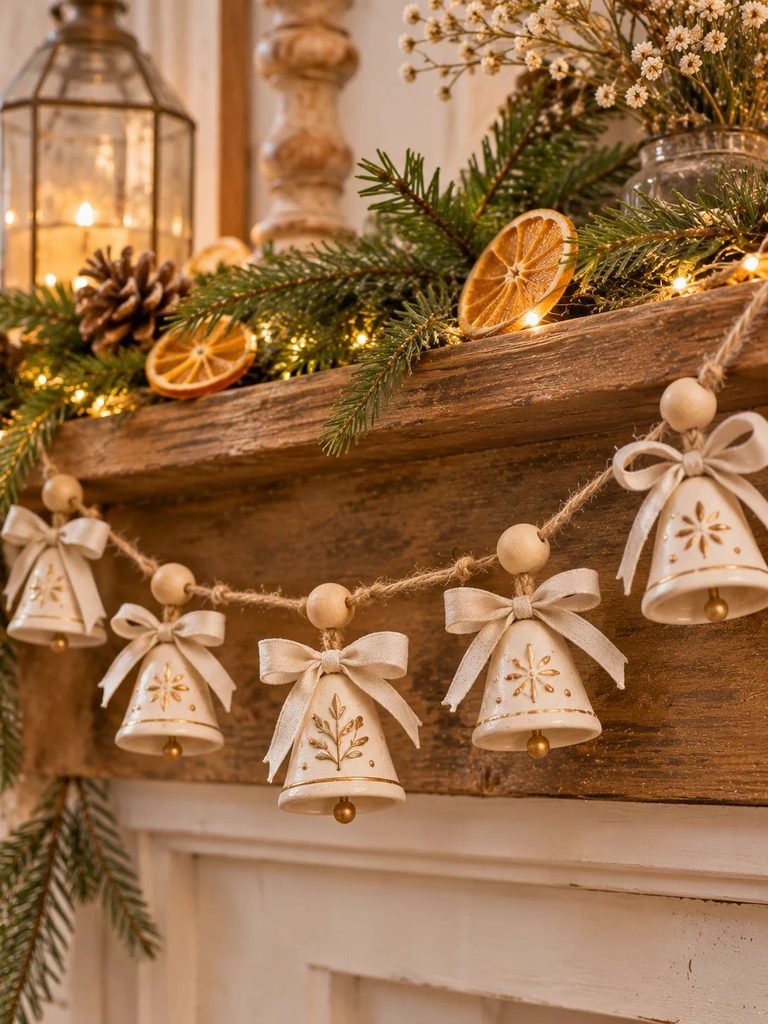
If you have made a few clay bells, why not turn them into a festive garland? This is a beautiful way to decorate a mantelpiece, shelf, doorway, or Christmas table.
What you need:
- Air-dry clay
- Small bell mould or modelling tools
- Rolling pin
- Acrylic paint
- Twine
- Wooden beads (optional)
How to make them:
- Create several small clay bells using the same basic technique described earlier.
- Make sure each bell has a secure hole for threading.
- Add simple dots, lines, or gold accents.
- Allow every piece to dry fully.
- Cut a long length of twine.
- Thread the bells onto the string, leaving even spaces between them.
- Add wooden beads between the bells if desired.
- Tie loops at both ends for hanging.
Helpful tip: Keep the spacing consistent and make sure the clay pieces are completely dry before threading them.
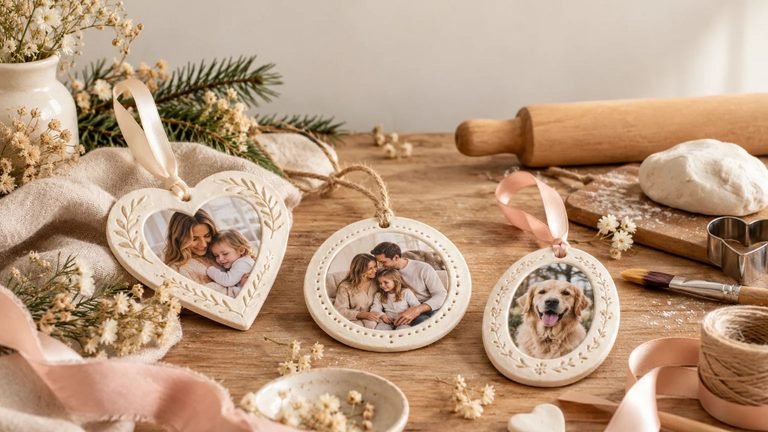
22. Personalised Family Christmas Keepsake Ornaments

These are some of the most meaningful clay decorations you can make. Instead of simply creating something pretty, you can turn a little piece of clay into a keepsake that celebrates a special family moment.
What you need:
- White air-dry clay
- Heart, circle, or star cookie cutters
- Letter stamps
- Rolling pin
- Straw
- Acrylic paint
- Ribbon or twine
How to make them:
- Roll the clay evenly.
- Cut out your chosen shapes.
- Press family names, initials, or the year into the surface.
- Add a small decorative pattern around the lettering.
- Make a hanging hole.
- Let the ornament dry completely.
- Gently sand the edges if necessary.
- Add a little paint to make the lettering stand out.
- Seal with a suitable product and attach a ribbon.
Gift idea: Make one for grandparents, new parents, newlyweds, or friends celebrating their first Christmas in a new home.
Tips for Getting the Best Results When Making Clay Ornaments
Making Christmas decorations with clay is fairly simple, but a few little techniques can make a big difference to the finished result. Here are some helpful tips to keep in mind, especially if this is your first time working with air-dry clay.
1. Keep Your Clay at an Even Thickness
One of the most important things is rolling your clay evenly. If some areas are much thinner than others, your ornaments may dry unevenly or become more fragile.
I recommend aiming for approximately ¼ inch (6 mm) for most flat decorations. This gives them enough strength without making them too heavy to hang.
2. Avoid Using Too Much Water
A little water can help smooth the edges of air-dry clay, but too much can make the surface sticky and weaken delicate details.
Use a slightly damp fingertip or a small sponge rather than soaking the clay.
3. Make Hanging Holes Before Drying
If you are making flat ornaments, remember to create the hanging holes while the clay is still soft.
A drinking straw works wonderfully for this. Make the hole slightly larger than your twine because some clay may shrink a little as it dries.
Also, leave enough space between the hole and the edge to prevent breakage.
4. Allow Enough Drying Time
Patience is important when working with air-dry clay. Although some products may feel dry within 24 hours, thicker pieces can take longer to dry completely.
Turn flat ornaments occasionally if recommended by the clay manufacturer, and avoid placing them directly beside heaters or in strong sunlight to speed up drying.
5. Sand Before Painting
Once your ornaments are completely dry, gently sand any rough edges using fine-grit sandpaper.
This gives your decorations a smoother, more professional finish and makes painting easier.
Remember to avoid breathing in clay dust. Work carefully, preferably in a well-ventilated area, and wipe away dust with a damp cloth.
6. Choose the Right Paint and Sealer
Acrylic paint is a popular choice for decorating air-dry clay ornaments because it comes in so many colours and is easy to work with.
Once the paint has dried, you can apply a clear protective coating that is compatible with your clay and paint.
Keep in mind that sealing air-dry clay does not automatically make it waterproof. These ornaments are best kept indoors and away from moisture.
How to Make Your Christmas Clay Ornaments Look More Expensive
You don’t need expensive materials to create beautiful Christmas decorations. Sometimes, the simplest details make handmade ornaments look especially lovely.
Here are a few finishing ideas worth trying.
- Use a neutral colour palette: Cream, ivory, beige, soft blush, and sage green create a beautiful coordinated collection.
- Add metallic details: A little gold or champagne-coloured paint can make simple ornaments look more elegant.
- Include natural textures: Try pressing pine sprigs, fern leaves, lace, or textured fabric into your clay.
- Use beautiful ribbons: Replace ordinary string with velvet ribbon, satin bows, or natural linen cord.
- Keep your designs simple: You don’t need to decorate every inch. A few carefully placed details often look more sophisticated.
- Mix different shapes: Combine stars, hearts, trees, and circles to create a more interesting Christmas tree display.
My favourite approach is to keep most of the ornaments in soft neutral shades and introduce just a few traditional red and green decorations. This creates a festive look without making everything feel too busy.
Common Mistakes to Avoid When Making Christmas Clay Ornaments
If you want your handmade decorations to last beyond one Christmas, there are a few mistakes worth avoiding.
| Common mistake | How to avoid it |
|---|---|
| Rolling the clay too thin | Keep the thickness consistent, around 6 mm for flat ornaments |
| Making holes too close to the edge | Leave enough clay around each hole |
| Painting before the clay is dry | Allow the clay to dry or cure completely first |
| Using too much water | Smooth with only a little water |
| Drying ornaments too quickly | Follow the clay manufacturer’s drying instructions |
| Adding heavy decorations | Keep embellishments lightweight |
| Using the wrong sealer | Choose a finish compatible with your clay and paint |
| Hanging ornaments before they are ready | Check that they are completely dry and sturdy |
One more important tip: Don’t assume that an ornament is completely dry just because the outside feels hard. Thicker pieces may still contain moisture inside. Give them enough time before painting or sealing.
Air-Dry Clay vs Polymer Clay: Which Is Better for Christmas Ornaments?
If you are wondering which type of clay to use, the good news is that both can work beautifully. The best option depends on the design you want to make and the tools you already have.
Air-dry clay
- No oven required.
- Great for flat ornaments and gift tags.
- Easy to use for beginners.
- Can be sanded and painted.
- Best kept away from moisture.
Polymer clay
- Requires baking according to the product instructions.
- Great for miniature characters and detailed shapes.
- Available in many colours.
- Suitable for small decorative pieces.
- Requires careful temperature control.
For most of the flat Christmas ornaments in this collection, I would recommend air-dry clay because it is simple to work with and doesn’t require baking.
However, polymer clay is an excellent choice for detailed designs such as miniature Santas, reindeer, mushrooms, and candy canes.
Always use an oven thermometer if recommended by the polymer clay manufacturer, and never exceed the specified curing temperature. Do not use food-preparation equipment for clay unless the manufacturer confirms it is suitable.
Frequently Asked Questions About Christmas Clay Ornaments
1. Can you make Christmas ornaments with air-dry clay?
Absolutely! Air-dry clay is one of the easiest materials for making homemade Christmas ornaments. You can use it to create stars, trees, snowflakes, hearts, gift tags, and many other festive decorations. Simply shape your designs, allow them to dry completely, and decorate them with paint.
2. How thick should clay Christmas ornaments be?
For most flat ornaments, approximately ¼ inch (6 mm) is a good starting point. This provides enough thickness to make them sturdy without making them unnecessarily heavy. Always consider the design and the recommendations for your particular clay.
3. How long do air-dry clay Christmas ornaments take to dry?
Drying time depends on the clay brand, thickness, room temperature, and humidity. Many small, flat pieces may take around 24–72 hours, but thicker decorations can take longer. Follow the manufacturer’s instructions and make sure the ornaments are completely dry before painting or sealing.
4. Do I need to seal air-dry clay Christmas ornaments?
You don’t necessarily have to seal them, but applying a compatible clear finish can help protect the painted surface from everyday handling and dust. It is especially useful if you want to keep your decorations for several Christmas seasons.
However, a clear sealer does not guarantee that air-dry clay will become waterproof.
5. Can I paint air-dry clay ornaments?
Yes! Acrylic paint is a great option for decorating dry air-dry clay. You can use it to create traditional Christmas patterns, botanical designs, snowflakes, tiny berries, and personalised lettering.
Allow the paint to dry before adding a compatible clear finish.
6. Can children make Christmas clay ornaments?
Yes, many of these projects are suitable for family crafting. Simple stars, hearts, Christmas trees, and snowflakes are particularly good beginner projects.
Younger children should always be supervised by an adult, especially when using cutting tools, small embellishments, paint, and sealers. Choose age-appropriate, non-toxic craft materials and follow their safety instructions.
7. How do I stop air-dry clay ornaments from cracking?
Start by kneading the clay until it is smooth and roll it to an even thickness. Avoid adding excessive water and allow the pieces to dry gradually according to the product instructions.
If a small crack appears, you may be able to repair it with a little fresh clay mixed with water to create a paste. Allow the repair to dry completely before sanding and painting.
8. Can I add essential oils to Christmas clay ornaments?
You can experiment with adding a small amount of fragrance to suitable clay, but always check the clay manufacturer’s recommendations first. Fragrance and essential oils can affect some clay formulations and painted finishes.
For a simpler scented decoration, consider adding a few drops of essential oil to a separate absorbent material rather than assuming a sealed clay ornament will retain fragrance.
9. How do I store handmade Christmas clay ornaments?
Make sure your ornaments are completely dry and cured before storing them. Wrap each piece individually in tissue paper and place them in a sturdy storage box.
Keep the box somewhere cool and dry, away from direct sunlight and damp conditions. Avoid placing heavy decorations on top of delicate clay pieces.
10. Can I use homemade clay ornaments outdoors?
Air-dry clay ornaments are generally best suited to indoor decorating because moisture can damage them. Even sealed pieces may deteriorate when exposed to rain, snow, and changing outdoor conditions.
If you want outdoor decorations, choose a material specifically designed and rated for outdoor use.
Final Thoughts
Making your own Christmas clay ornaments is such a lovely way to slow down and enjoy the creative side of the festive season. From little gingerbread people and snowflakes to personalised gift tags and botanical decorations, there are so many beautiful designs you can make with just a few simple supplies.
What I love most about these projects is that they don’t have to be perfect. Every little detail, handmade texture, and slightly different shape adds character to your decorations. You can even turn the process into a Christmas crafting afternoon with family or friends.
Start with a few simple designs, experiment with your favourite festive colours, and gradually build a collection of ornaments that feels personal to your home.
And don’t forget to make a few extras for gifts. A handmade clay ornament tied with a pretty ribbon can be such a thoughtful little surprise for someone you love.
Happy Christmas crafting!