Mason Jar Oil Lamp: How to Make a Beautiful DIY Oil Lamp at Home
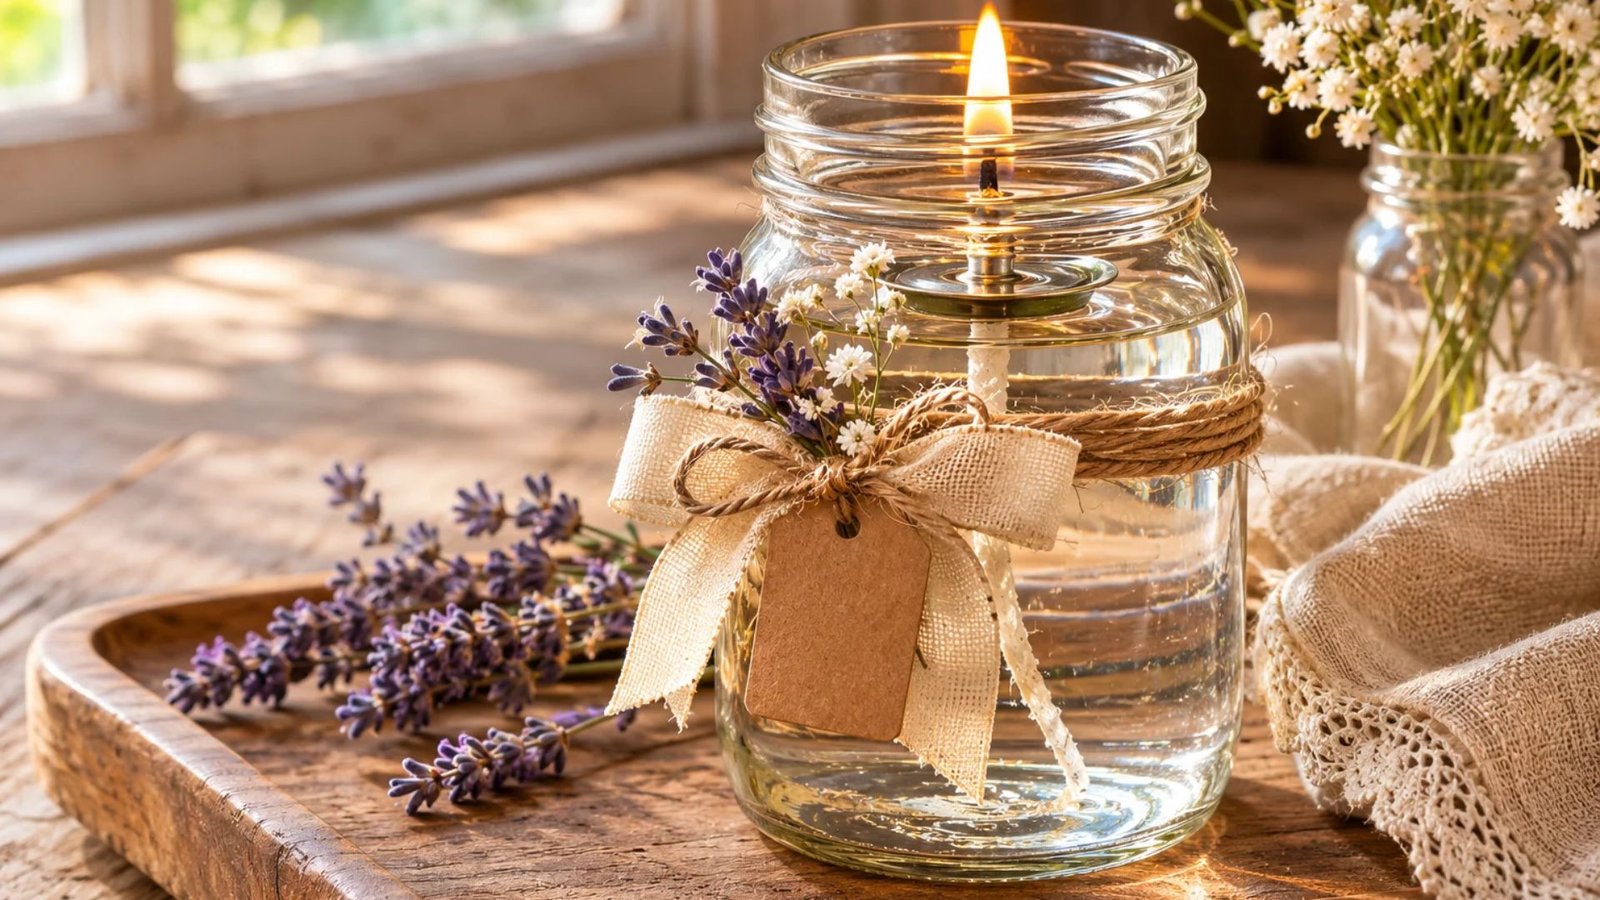
A mason jar oil lamp is such a lovely way to add a little warmth and charm to your home. I love how something as simple as a glass jar can be turned into a beautiful handmade lamp with just a few basic supplies.
Whether you are decorating a cosy outdoor table, creating a rustic centrepiece, or looking for a thoughtful handmade gift, this little project is both practical and pretty.
In this tutorial, I’ll walk you through everything you need to know, from choosing the right materials to assembling and safely using your finished oil lamp.
What Is a Mason Jar Oil Lamp?

A mason jar oil lamp is a simple homemade lighting decoration that uses liquid fuel and a wick to create a small, steady flame. It combines the rustic charm of a traditional mason jar with the warm glow of an oil lamp.
What makes this DIY project especially lovely is how easy it is to customise. You can choose a clear or vintage-style mason jar, add a decorative touch to the outside, and finish it with a suitable oil-lamp wick assembly.
Unlike traditional wax candles, which burn down as the wax melts, an oil lamp uses liquid fuel that travels towards the flame through a wick. This means you can replenish the fuel when necessary, provided you follow the manufacturer’s instructions for your particular wick and lamp.
For this tutorial, we’ll focus on a decorative mason jar design that looks beautiful on a covered patio, outdoor dining table, or seasonal display.
Why You’ll Love This DIY Mason Jar Oil Lamp
If you enjoy simple DIY projects that look beautiful without requiring lots of complicated supplies, this is a lovely one to try.
Here are a few reasons to make one:
- Budget-friendly: You can use a mason jar you already have at home and purchase only the specialist lamp components you need.
- Easy to customise: Change the jar, ribbon, colours, and exterior decorations to suit your home.
- Beautiful handmade decoration: The soft glow creates a warm, welcoming atmosphere.
- Lovely handmade gift: A finished, unfilled decorative lamp can make a thoughtful gift when accompanied by clear safety and fuel instructions.
- Suitable for seasonal decorating: You can create different looks for Christmas, autumn, summer evenings, and other occasions.
I particularly love the idea of making a few matching lamps for an outdoor dinner or garden gathering. They look pretty grouped together and add a little extra charm to an otherwise simple table setting.
Materials You’ll Need

Before starting, gather your materials. You won’t need a long shopping list, but choosing the right components is important because this project involves an open flame and liquid fuel.
Here is what you’ll need:
- Mason jar: A clean, undamaged glass mason jar. A pint-sized jar is a good starting point.
- Purpose-made oil lamp wick assembly: Choose a floating wick designed for oil lamps or a compatible manufactured wick holder and burner assembly.
- Approved lamp fuel: Use only the fuel specified by the wick or lamp manufacturer. Do not assume that cooking oil, essential oils, liquid potpourri, or fragranced oils are suitable substitutes.
- Decorative ribbon or twine: Optional, for decorating the outside of the jar.
- Decorative tag: Optional, especially if you are making one as a gift.
- Heat-resistant, stable base: A ceramic or other suitable non-combustible surface on which to place the finished lamp.
- Cleaning cloth: For wiping the jar and removing fingerprints before decorating.
A little note about the wick: A regular piece of cotton string is not automatically suitable for an oil lamp. Use a purpose-made wick and holder that are compatible with your selected fuel. This helps avoid problems with the flame, wick stability, and fuel delivery.
Read
Choosing the Right Mason Jar

The jar is one of the most important parts of this project because it holds the liquid fuel and provides the decorative appearance.
I recommend starting with a simple, clear pint-sized mason jar. Clear glass allows you to see the contents and fuel level, while the classic shape gives the finished lamp a lovely rustic appearance.
When choosing your jar, keep these things in mind:
- Make sure the glass is completely free from cracks, chips, and damage.
- Choose a jar with a flat bottom so it can stand securely.
- Avoid jars with narrow openings if your selected wick assembly is not designed to fit them.
- Make sure the jar is compatible with the lamp insert you intend to use.
- Avoid decorative glass that is not suitable for use with an oil-lamp flame.
You don’t need an expensive jar for this project. A basic, good-quality mason jar will work beautifully when paired with the correct lamp components.
How to Make a Mason Jar Oil Lamp
Now for the fun part! Once you have gathered your supplies, you can begin assembling your lamp.
For this version, I recommend using a purpose-made floating oil-lamp wick or a complete compatible lamp insert rather than improvising a burner from an ordinary jar lid.
This gives you a more reliable setup and makes it easier to follow the manufacturer’s safety instructions.
Step 1: Clean and Prepare Your Mason Jar
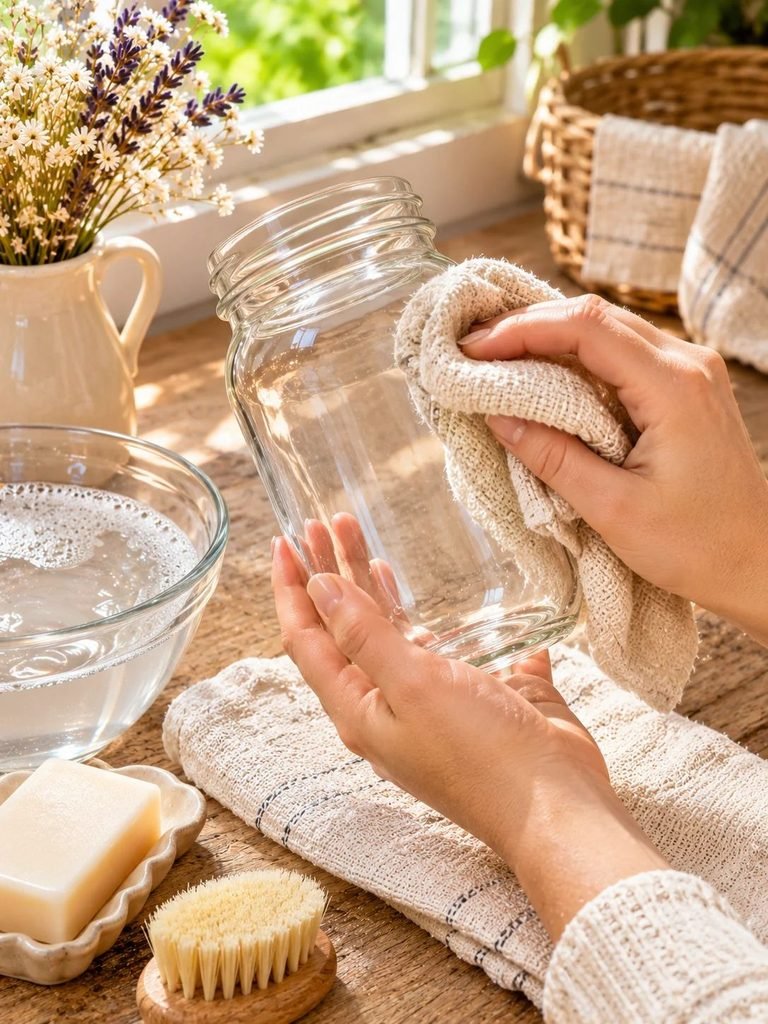
Start by washing your mason jar with warm soapy water.
Remove any dust, labels, or sticky residue, then rinse it thoroughly and allow it to dry completely.
Take a moment to inspect the glass carefully. Even a small crack or chip can make the jar unsuitable for this project.
Once the jar is clean and dry, place it on a flat work surface where you have enough room to assemble everything.
Step 2: Prepare Your Decorative Design

One of the nicest things about mason jar oil lamps is that you can create different decorative styles.
For a cosy, rustic look, you might choose a simple cream ribbon around the outside of the jar, a small kraft paper tag, or a little natural twine.
You can also create a seasonal appearance using decorative elements placed around the outside of the jar.
If you want the appearance of botanicals inside the glass, remember that dried flowers, pinecones, cinnamon sticks, berries, and greenery are combustible. They should not be placed where they can reach the wick or flame, and they should not be allowed to interfere with the burner.
For a functional burning lamp, I prefer keeping the fuel reservoir and wick area free of decorative fillers. You can achieve a beautiful natural look without putting flammable materials inside the burning assembly.
Step 3: Prepare the Wick Assembly
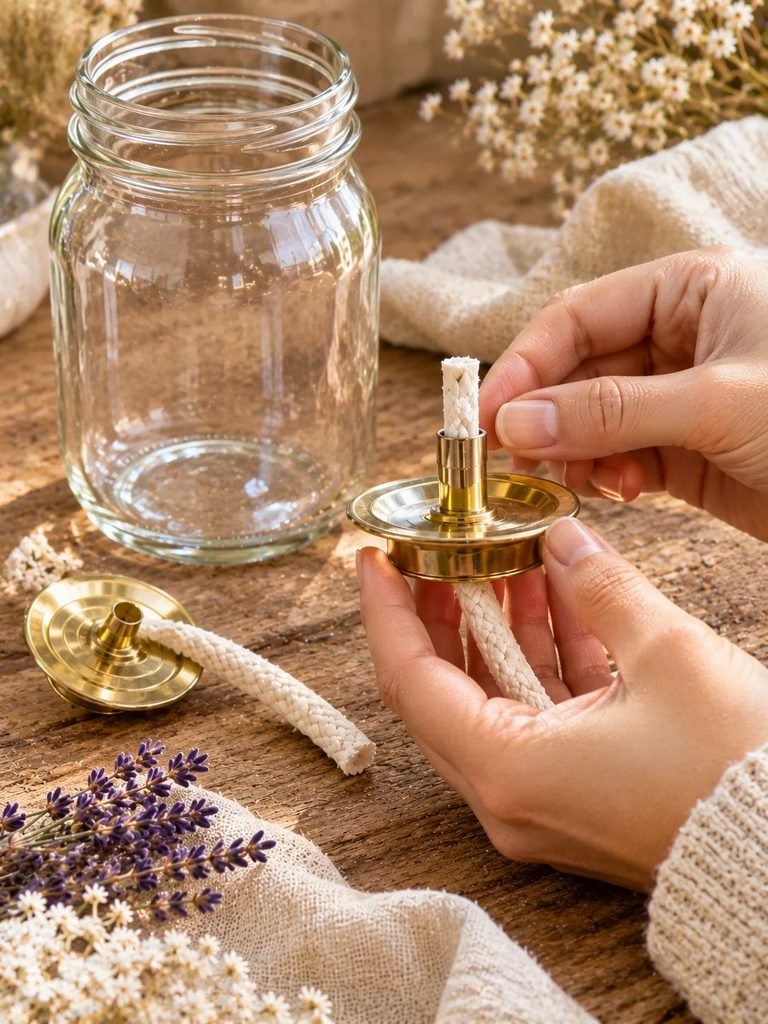
Take your purpose-made floating wick or compatible lamp insert and read the manufacturer’s instructions.
Check that the wick is designed for the fuel you have chosen.
If you are using a floating wick, make sure it is designed to float in the particular type of oil specified by its manufacturer. If you are using a wick holder, check that it fits securely and is intended for the jar you selected.
Do not make a hole in an ordinary mason jar lid and push an improvised wick through it unless you are using a properly designed and compatible burner assembly. A simple hole does not provide the same stability or safety features as a purpose-made lamp insert.
Step 4: Add the Approved Lamp Fuel

Once your jar and wick assembly are ready, carefully add the approved lamp fuel.
Follow the manufacturer’s instructions for the correct fuel level and quantity. Never fill the jar beyond its recommended capacity, and leave the clearance required by the wick assembly.
Wipe away any accidental spills immediately before proceeding.
This is an important step because oil on the outside of the jar, lid, or surrounding surface can create an additional fire hazard.
Important: Never mix different fuels or add essential oils, perfume, alcohol, or liquid potpourri to the lamp fuel. A pleasant fragrance does not necessarily mean a liquid is safe to burn.
Step 5: Position the Wick

Now position the wick according to the instructions supplied with your lamp assembly.
If you are using a floating wick, allow it to sit flat on the surface of the fuel. It should remain stable rather than tipping or drifting into the side of the jar.
If your assembly has a wick holder, make sure it is properly secured and that the wick is positioned at the manufacturer’s recommended height.
Allow the wick to absorb fuel for the time recommended by the manufacturer before lighting.
Do not leave an exposed wick longer than recommended. An excessively long wick can produce an unnecessarily large flame and increase soot and fire risk.
Step 6: Check Everything Before Lighting
Before lighting your mason jar oil lamp, take a few minutes to inspect the entire setup.
Check that:
- The jar is standing on a flat, stable surface.
- The glass is not cracked or damaged.
- The wick is correctly positioned.
- There is no spilled fuel around the jar.
- No ribbons, dried flowers, twine, paper tags, or other flammable decorations are close to the flame.
- The lamp is away from curtains, furniture, decorations, and other combustible materials.
- Children and pets cannot reach or knock over the lamp.
Only proceed if everything is correctly assembled and the lamp manufacturer’s instructions permit its use.
Step 7: Light Your Finished Oil Lamp

Once you have completed all the checks, you can light the wick using a long-reach lighter, following the manufacturer’s lighting instructions.
The flame should be small and controlled.
If the flame is unusually large, produces excessive smoke, flickers uncontrollably, or behaves differently from what the manufacturer describes, extinguish it safely and allow the lamp to cool before investigating the problem.
Never attempt to adjust or refill a burning or hot oil lamp.
And remember, an oil lamp should never be left burning unattended, even for a short time.
Beautiful Ways to Decorate Your Mason Jar Oil Lamp
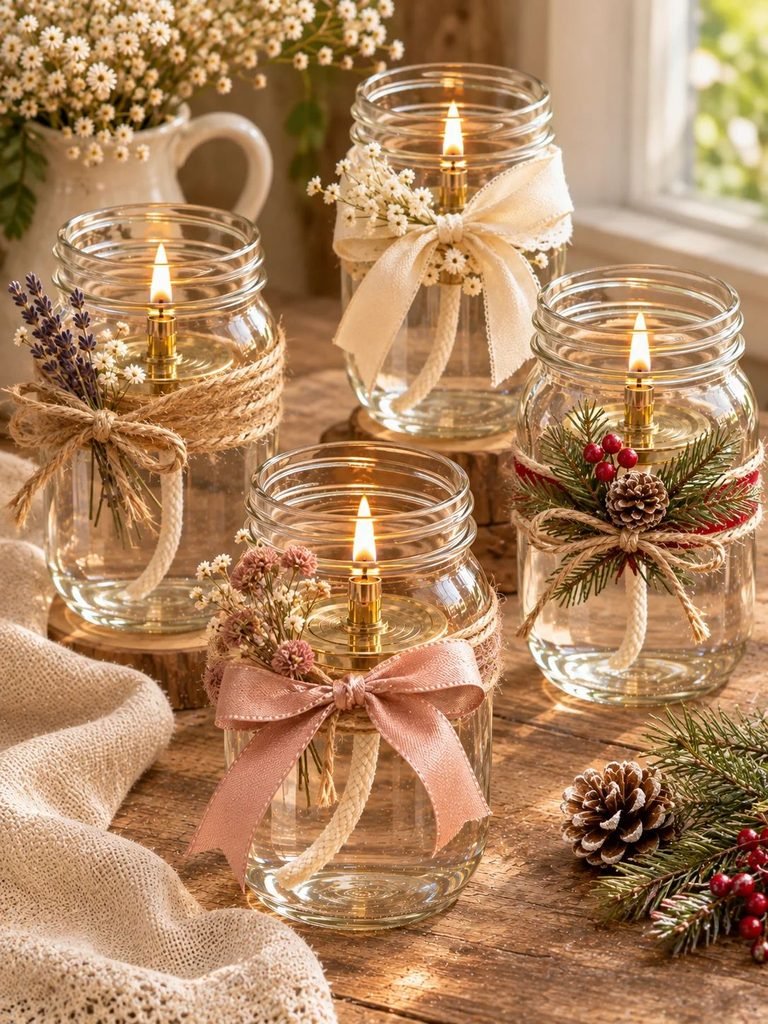
The finished lamp can be quite simple, but a little thoughtful decoration can make it look much more special.
Here are a few ideas I love.
1. Rustic Farmhouse Style
Wrap a little natural jute twine around the outside of the jar and finish with a small bow.
This simple design looks lovely with neutral home décor, wooden furniture, and natural textures.
2. Christmas Mason Jar Oil Lamp
For a festive look, decorate the outside of the jar with a small evergreen sprig attached securely away from the flame.
You can also use a cream ribbon or a decorative gift tag to create a beautiful Christmas-inspired finish.
Keep all decorations well away from the flame and any part of the lamp that becomes hot.
3. Autumn-Inspired Oil Lamp
For autumn, choose warm colours such as burnt orange, beige, brown, and muted gold.
A small decorative ribbon or seasonal tag can give the jar a lovely autumn appearance without interfering with the burning area.
4. Elegant Feminine Design
If you prefer something softer, use a dusty blush ribbon, delicate cream twine, or a simple botanical gift tag.
I love this style because it looks understated, pretty, and easy to incorporate into different decorating themes.
How to Make Your Mason Jar Oil Lamp Last Longer

With the right materials and proper care, a mason jar oil lamp can be reused rather than thrown away after one use.
Here are a few simple ways to look after yours.
1. Use the correct fuel. Always choose a fuel recommended for your specific lamp and wick. Using an unsuitable oil can affect how well the wick burns.
2. Keep the wick in good condition. Follow the manufacturer’s instructions for trimming or replacing the wick. A damaged, excessively long, or heavily charred wick can cause an uneven flame.
3. Keep the jar clean. Wipe away dust and dirt from the outside of the glass. Allow the lamp to cool completely before cleaning or handling its components.
4. Check the glass regularly. Never continue using a jar that has developed cracks, chips, or other damage.
5. Store it properly. When the lamp is not being used, extinguish it completely, allow it to cool, and store it upright in a secure place away from children, pets, and heat sources.
Important Safety Tips for Using a Mason Jar Oil Lamp
Because this DIY involves liquid fuel and an open flame, safety needs to come before decoration.
I know it’s tempting to make a beautiful lamp filled with dried flowers, pinecones, berries, and other natural decorations, but these materials can be combustible. A pretty arrangement should never compromise the safety of the finished project.
Here are some important precautions to follow.
- Never leave the flame unattended. Extinguish the lamp whenever you leave the room.
- Keep it away from children and pets. Lamp fuel can be dangerous if swallowed or inhaled, and the open flame can cause burns.
- Use a stable surface. Place the lamp on a sturdy, non-combustible surface where it cannot easily be knocked over.
- Keep flammable materials away. Curtains, paper, dried flowers, ribbons, clothing, and other combustible materials should be kept well away from the flame.
- Never refill a burning lamp. Always extinguish it and allow it to cool completely before handling or refilling.
- Use the correct fuel. Follow the fuel and wick manufacturer’s instructions rather than experimenting with different household oils.
- Never use damaged glass. A cracked or chipped jar should not be used as an oil lamp.
- Keep spare fuel safely stored. Store it in its original labelled container, away from children and heat sources.
Health Canada also warns that liquid lamp fuels can cause serious harm if children accidentally swallow or inhale them. Its guidance recommends keeping oil lamps and fuel out of children’s reach and never leaving a burning lamp unattended. Canada
The National Fire Protection Association also recommends keeping candles and other open flames away from combustible materials and extinguishing them before leaving a room or going to bed. NFPA
If you have young children or curious pets at home, consider using a battery-operated flameless candle instead. You can still enjoy the beautiful mason jar decoration without introducing an open flame.
Common Mason Jar Oil Lamp Problems and How to Fix Them
Sometimes a homemade oil lamp doesn’t work quite as expected. The wick might refuse to stay lit, the flame might be too large, or you might notice smoke coming from the top.
Here are some common problems and what to check.
Why Does My Mason Jar Oil Lamp Keep Going Out?
A wick that repeatedly goes out may not be compatible with the fuel, may not be absorbing enough fuel, or may be incorrectly positioned.
Check that you are using the correct wick for your particular lamp and fuel combination.
If the wick is a floating type, make sure it is sitting properly on the fuel surface. If it uses a holder, check that the wick is installed correctly.
Allow the wick to soak for the recommended time before attempting to light it again.
Why Is My Oil Lamp Producing Too Much Smoke?
Excessive smoke can be caused by an unsuitable wick, an excessively long wick, or incompatible fuel.
Extinguish the lamp and allow it to cool before checking the wick.
Do not continue burning a lamp that produces persistent smoke or an unusually large flame. Check the manufacturer’s instructions and replace incompatible or damaged components.
Why Won’t My Floating Wick Stay in Place?
A floating wick needs to be designed for the type of oil and container you are using.
If it keeps tipping over or moving towards the side of the jar, check its size and compatibility.
Never try to hold it in place with paper, cotton, dried flowers, or other makeshift materials.
Why Does My Mason Jar Oil Lamp Have a Weak Flame?
A weak flame may indicate that the wick is not drawing up fuel properly.
Check whether the wick is correctly installed, whether it has been allowed to absorb enough fuel, and whether the fuel is suitable.
If the problem continues, replace the wick with the correct manufacturer-approved component rather than trying to modify the burner.
Frequently Asked Questions
1. Can I Use Olive Oil in a Mason Jar Oil Lamp?
Not every oil lamp wick is designed to burn olive oil. Some traditional oil lamps are designed for particular vegetable oils, while other wick systems require specially formulated lamp fuel.
Always check the manufacturer’s recommendations before choosing your fuel. Do not assume that an oil suitable for cooking is automatically suitable for your lamp.
2. Can I Use Vegetable Oil Instead of Lamp Oil?
It depends on the wick and lamp design. Vegetable oil may work with certain oil-lamp systems, but it is not a universal substitute for lamp oil.
For a beginner-friendly project, I recommend choosing a compatible wick and using the fuel specifically recommended for it.
3. Can I Add Essential Oils to My Mason Jar Oil Lamp?
I wouldn’t recommend adding essential oils unless the lamp and fuel manufacturer explicitly confirms that the particular combination is suitable.
Essential oils are not automatically safe lamp fragrances, and adding them can change how the fuel burns.
If you want a lovely fragrance in your home, consider using a separate reed diffuser or an appropriate home fragrance product instead.
4. Can I Put Dried Flowers Inside My Mason Jar Oil Lamp?
You can use dried flowers as part of a decorative arrangement around an unlit jar, but I would avoid putting them inside the active fuel reservoir.
Dried flowers are combustible and can create a fire hazard if they come into contact with the wick or flame.
For a safer decorative appearance, keep natural materials outside the burning assembly and well away from the flame.
5. How Long Does a Mason Jar Oil Lamp Burn?
There isn’t one guaranteed burn time for every mason jar oil lamp.
The burning time depends on the type of fuel, the wick, the amount of fuel, and the lamp’s design.
Follow the manufacturer’s guidance for your particular lamp and never leave it burning just to use up the remaining fuel.
6. Can I Use a Regular Mason Jar Lid?
An ordinary mason jar lid is not automatically a suitable oil-lamp burner.
A purpose-made, compatible wick holder or lamp insert is a better choice than simply punching a hole in a lid and inserting a piece of string.
This is particularly important because the wick needs to remain stable and deliver fuel correctly.
7. Can I Make Mason Jar Oil Lamps as Christmas Gifts?
Yes! They can make lovely handmade gifts, especially when decorated with seasonal colours and simple rustic details.
However, because liquid lamp fuel can be hazardous, I recommend gifting an unfilled decorative lamp with the correct manufacturer’s instructions rather than supplying an improvised, ready-to-burn lamp.
You can finish the jar with a cream ribbon, a little twine, and a personalised gift tag for a thoughtful presentation.
8. Are Mason Jar Oil Lamps Suitable for Outdoor Use?
They may be suitable for an appropriate outdoor setting if the lamp manufacturer permits outdoor use and the location is protected from wind, rain, and accidental tipping.
Never use an indoor-only lamp outdoors, and keep the flame away from dry leaves, wooden decorations, and other combustible materials.
Final Thoughts on Making a Mason Jar Oil Lamp
Making a mason jar oil lamp is a lovely way to turn a simple glass jar into something decorative and useful. I especially love how easily you can change the appearance with different ribbons, seasonal colours, and rustic details.
The best part is that you don’t need to be an experienced DIY enthusiast to enjoy this project. With a suitable jar, a compatible wick assembly, and the correct lamp fuel, you can create a beautiful homemade decoration that suits your personal style.
Just remember that the most important part of this project is choosing the right components and using them responsibly. Keep the flame away from decorations, never leave it unattended, and always follow the manufacturer’s safety instructions.
I hope this tutorial inspires you to try your own mason jar oil lamp and create something beautiful for your home!