DIY Crochet Hat: How to Make a Beautiful Jenna Beanie
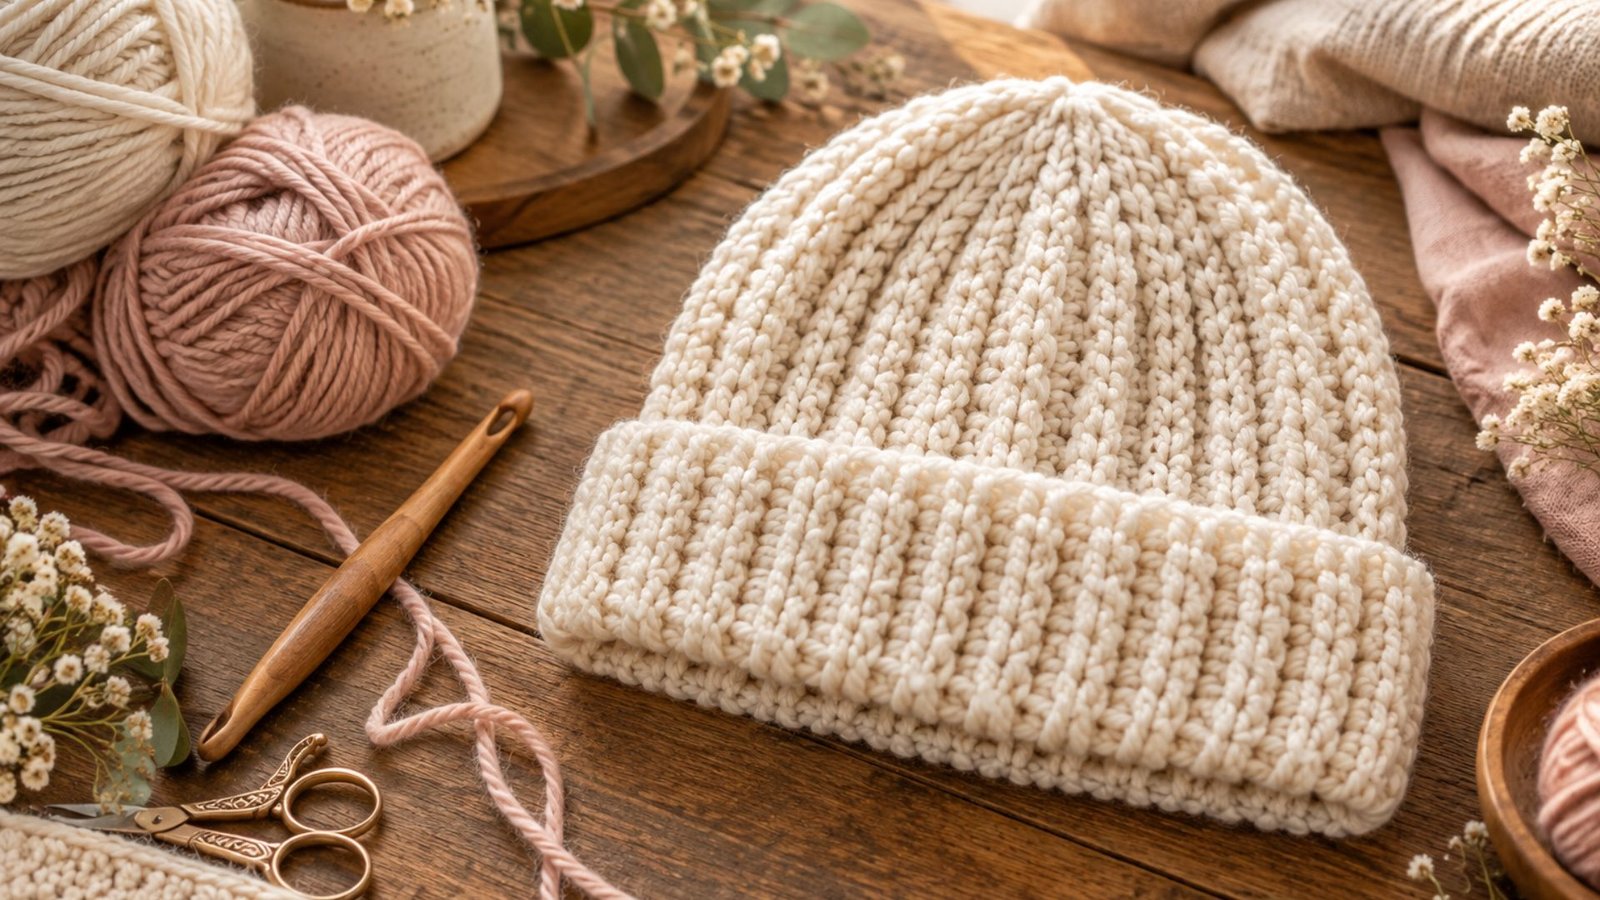
There is something so special about making a cozy crochet hat with your own hands, especially when the weather turns chilly and you want something both beautiful and practical to wear.
I love how a simple ball of yarn can become a handmade accessory that feels personal, thoughtful, and full of charm.
The Jenna Beanie is a lovely project for anyone who enjoys creating stylish crochet pieces without needing an overly complicated pattern. Whether you are making one for yourself, preparing a sweet handmade gift, or adding a new accessory to your wardrobe, this project is a wonderful place to begin.
What Is a Jenna Beanie?
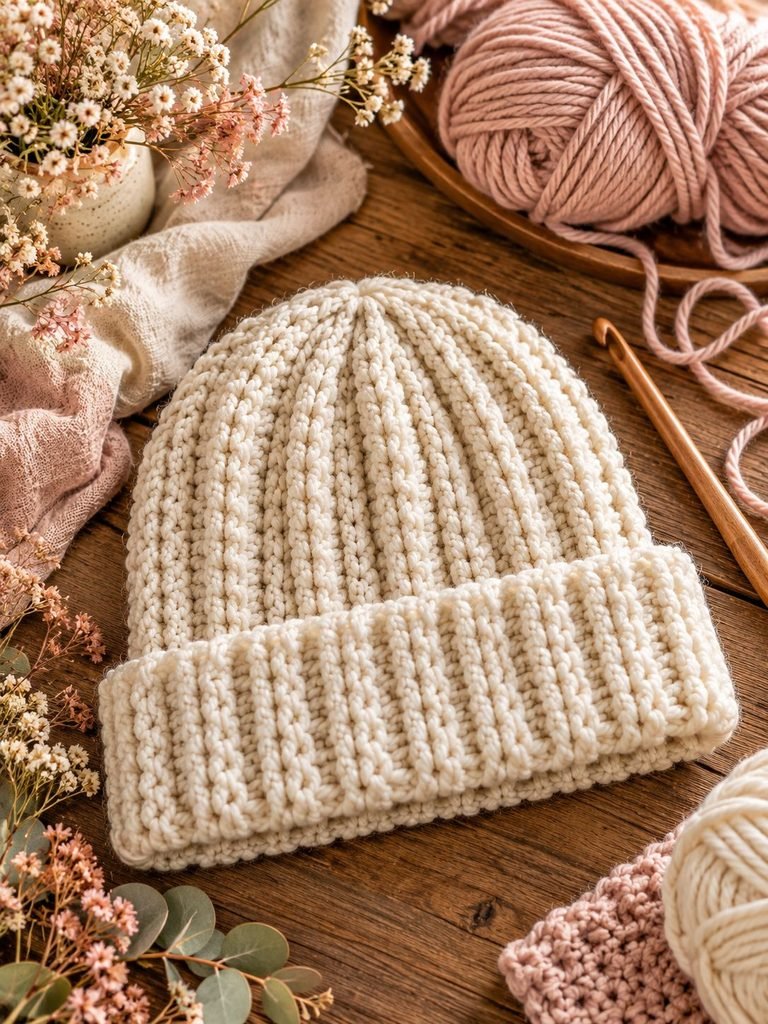
A Jenna Beanie is a cozy, handmade crochet hat designed to sit comfortably on the head while adding a touch of personal style to an everyday outfit. Its simple shape makes it a versatile accessory that can be customized with different yarn colors, textures, and decorative details.
One of the best things about crocheting your own beanie is that you can adjust the fit, choose your favorite yarn, and create something that reflects your personality. A neutral-colored Jenna Beanie looks beautiful with a winter coat, while a soft blush, dusty rose, or sage green version can add a feminine touch to a casual outfit.
This tutorial explains a practical way to make a Jenna-inspired beanie using basic crochet techniques. Because crochet patterns can vary, these instructions are not an official designer pattern. If you are following a specific Jenna Beanie pattern, use its original stitch counts and shaping instructions alongside the general tips provided here.
Why You Will Love This DIY Crochet Hat
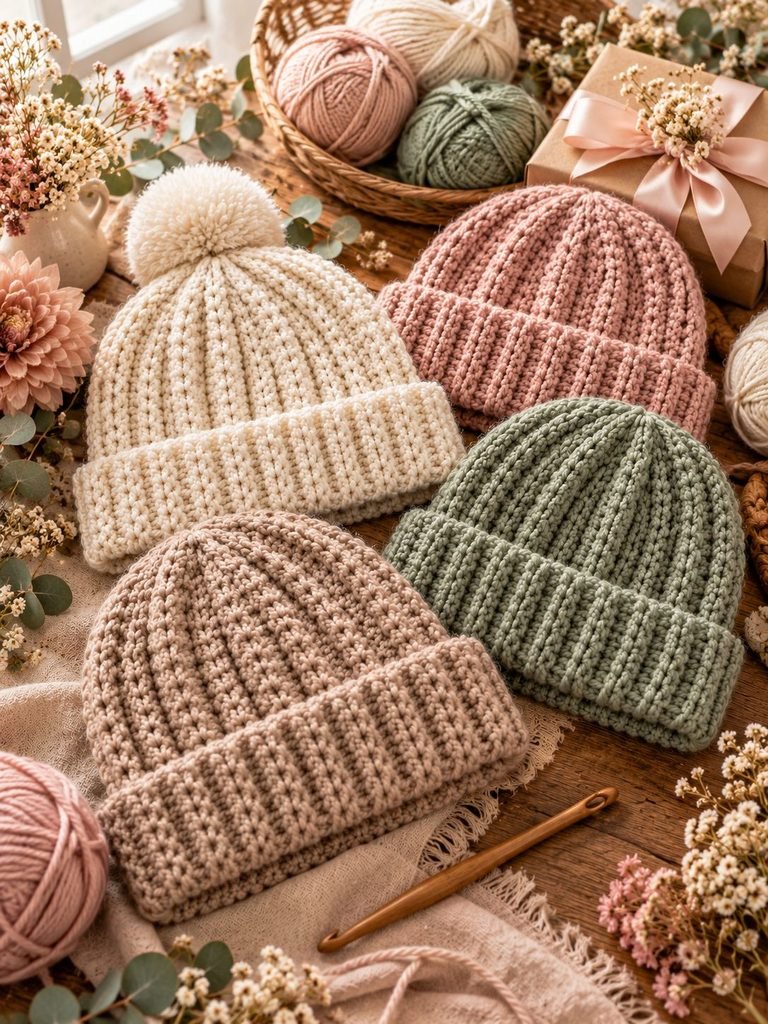
If you enjoy handmade accessories, this crochet beanie is a rewarding project to add to your collection.
1. It is customizable. You can choose a color that complements your wardrobe, experiment with different yarn textures, and adjust the length to create your preferred style.
2. It makes a thoughtful gift. A handmade beanie is a lovely present for birthdays, Christmas, Mother’s Day, or simply as a little surprise for someone special.
3. It is portable. Crochet projects are easy to carry around. You can work on your hat during a quiet evening, while traveling, or whenever you have a little free time.
4. It helps you practice your skills. Depending on the pattern you choose, you can practice chain stitches, single crochet, half double crochet, working in rows, and joining seams.
5. It can be made to suit different styles. Wear it with a folded brim for a classic look or leave the brim unfolded for a more relaxed appearance.
Materials You Will Need
Before you begin, gather your supplies so you can work comfortably without interrupting your progress.
- Yarn: Approximately 150–200 yards of medium-weight yarn is a reasonable starting estimate for many adult beanies. Check the requirements of your chosen pattern, as yarn usage varies.
- Crochet hook: A 5 mm hook is a useful starting point for many medium-weight yarns, but follow the yarn label and pattern recommendations.
- Yarn needle: Use this to sew the seam and weave in loose ends.
- Stitch markers: These help you identify important stitches and keep track of rounds or rows.
- Scissors: Keep a small pair nearby for trimming yarn.
- Measuring tape: This helps you measure the head circumference and hat length.
- Optional pom-pom: Add a yarn or faux-fur pom-pom if you enjoy that classic beanie style.
Choosing the Right Yarn
For a soft, comfortable hat, look for yarn that feels pleasant against your skin. Acrylic yarn is often affordable, easy to find, and simple to care for. Wool can provide excellent warmth, while wool blends offer a balance of softness, warmth, and durability.
If you are making a gift, consider whether the recipient has a preference for natural fibers or needs a machine-washable option.
I particularly love the idea of choosing cream, oatmeal, dusty pink, caramel, or soft sage for a feminine, timeless look. However, bright colors and rich jewel tones can be just as beautiful if you prefer something more playful.
Before starting, check the yarn label for the recommended hook size and washing instructions.
Step 1: Measure Your Head
Taking a few measurements before crocheting can help you create a beanie that fits comfortably instead of being too tight or slipping over your eyes.
Use a flexible measuring tape to measure around the widest part of your head, just above your eyebrows and ears. Write down the measurement so you can refer to it while working.
Next, decide how long you want the finished hat to be. A classic beanie usually covers the ears or sits just above them, while a slouchy style has extra length at the crown.
Remember that crochet fabric may stretch, particularly when made with ribbing. For this reason, the finished hat is often designed slightly smaller than the wearer’s head circumference. The exact amount depends on the yarn, stitch pattern, and desired fit.
If your chosen pattern includes a sizing chart, follow its recommendations rather than relying on a general measurement.
Step 2: Make a Crochet Gauge Swatch
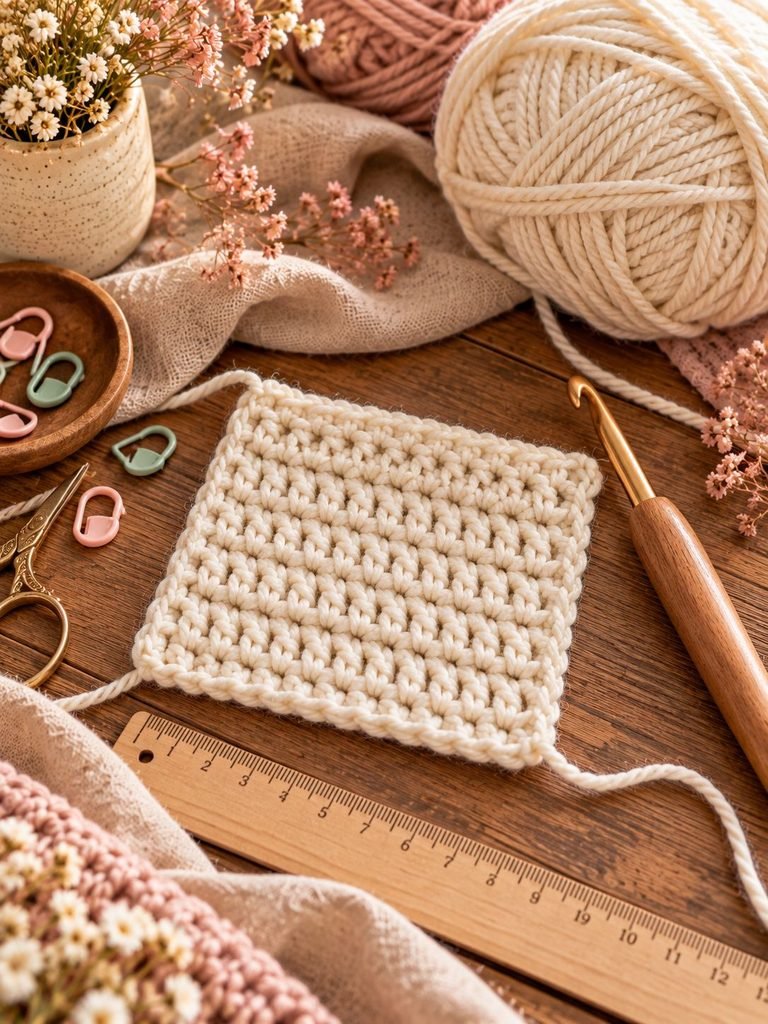
A gauge swatch may feel like an extra step, but it can save you from finishing a hat that turns out too large or too small.
Create a small sample using the yarn, hook, and stitch pattern specified in your chosen design. Measure the number of stitches and rows within a 10 cm section, or follow the gauge measurement given by the pattern.
If your stitches are too tight and your sample is smaller than the stated gauge, try a larger hook. If your stitches are too loose and your sample is larger, try a smaller hook.
For a stretchy beanie, pay attention to both the width and the feel of your sample. A fabric that is too stiff may not sit comfortably around the head, while a very loose fabric may lose its shape.
Once you are happy with your gauge, you can begin the actual hat with greater confidence.
Step 3: Create the Foundation
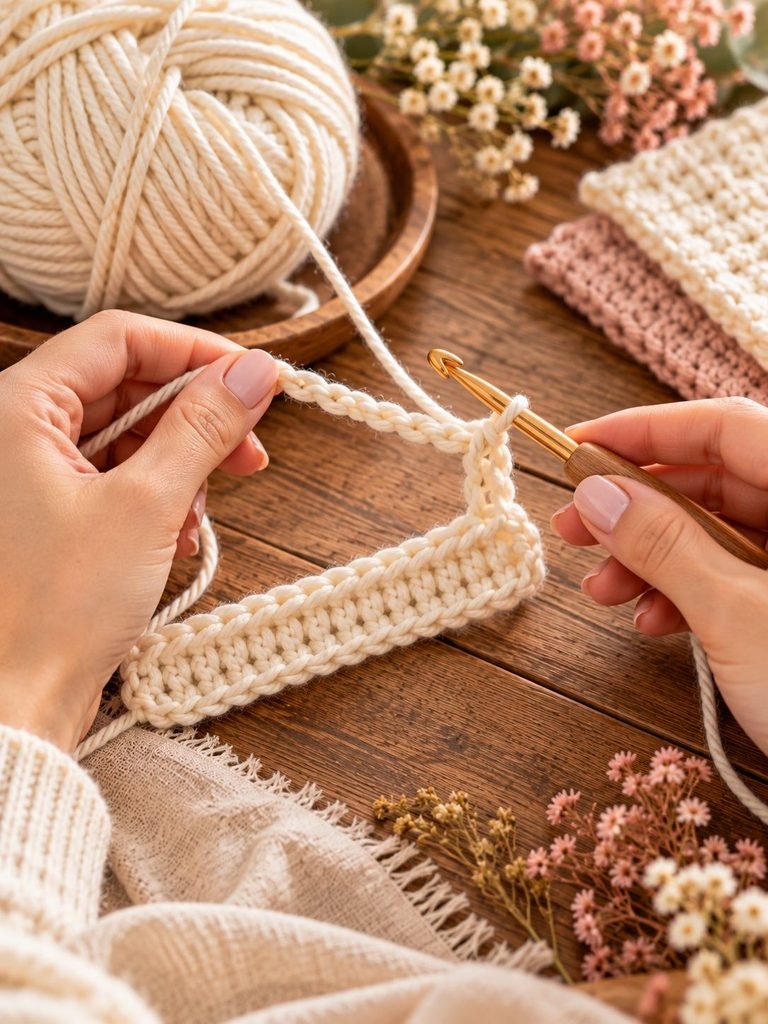
The foundation of your Jenna-inspired beanie depends on the construction method used by your chosen pattern.
A common beginner-friendly option is to work a rectangular piece of crochet fabric that will later be folded and seamed into a hat. This method works particularly well with ribbed stitches because the fabric can stretch around the head.
To begin, make a slip knot and place it on your hook. Chain enough stitches to achieve the desired height of the hat, including any extra length needed for a folded brim.
For a more fitted design, you may use a shorter foundation. For a slouchier hat, you can make the foundation longer.
Work the stitch pattern specified in your design across the row. If the pattern uses a turning chain, follow its instructions before turning your work.
Keep your foundation chain relaxed. If it is too tight, the lower edge of your hat may pull inward and feel uncomfortable.
Helpful tip: If you are following a pattern that starts at the crown and works in rounds, use that pattern’s foundation instructions instead. The rectangular construction described here is an alternative approach, not a replacement for the original Jenna Beanie stitch counts.
Step 4: Crochet the Main Body of the Beanie
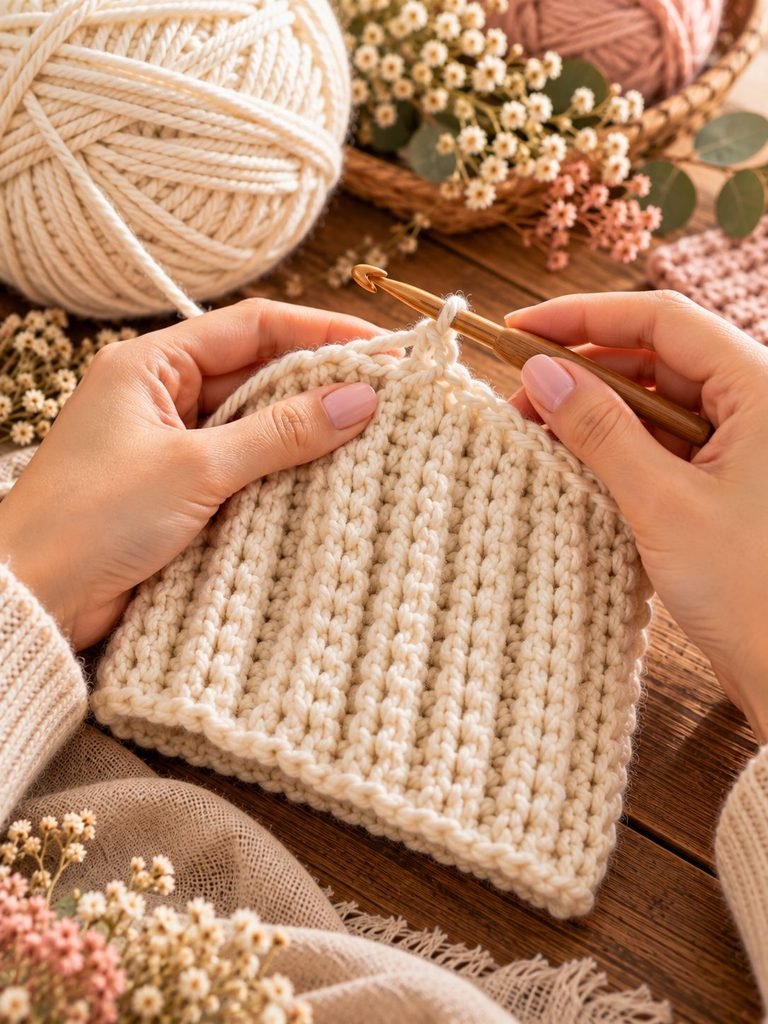
Now comes the enjoyable part: watching your hat gradually take shape.
For a simple ribbed beanie, you can use half double crochet stitches worked through the back loop only, provided this stitch pattern suits your chosen construction.
To do this, yarn over, insert your hook into the specified stitch, yarn over again, and pull up a loop. Yarn over once more and pull through all three loops on the hook to complete a half double crochet.
When working through the back loop only, insert your hook beneath the back loop of the stitch rather than both loops. This creates a series of raised ridges that give the fabric a ribbed appearance.
Continue across the row, following your pattern’s turning-chain instructions. Turn your work and repeat the stitch pattern for each row.
As you crochet, pause occasionally to check that your rows are even. Try not to pull your working yarn too tightly, as tight stitches can make the fabric stiff and difficult to stretch.
If your chosen Jenna Beanie design uses a different stitch, such as single crochet ribbing or a textured stitch pattern, use the designer’s instructions instead.
Step 5: Check the Fit as You Work
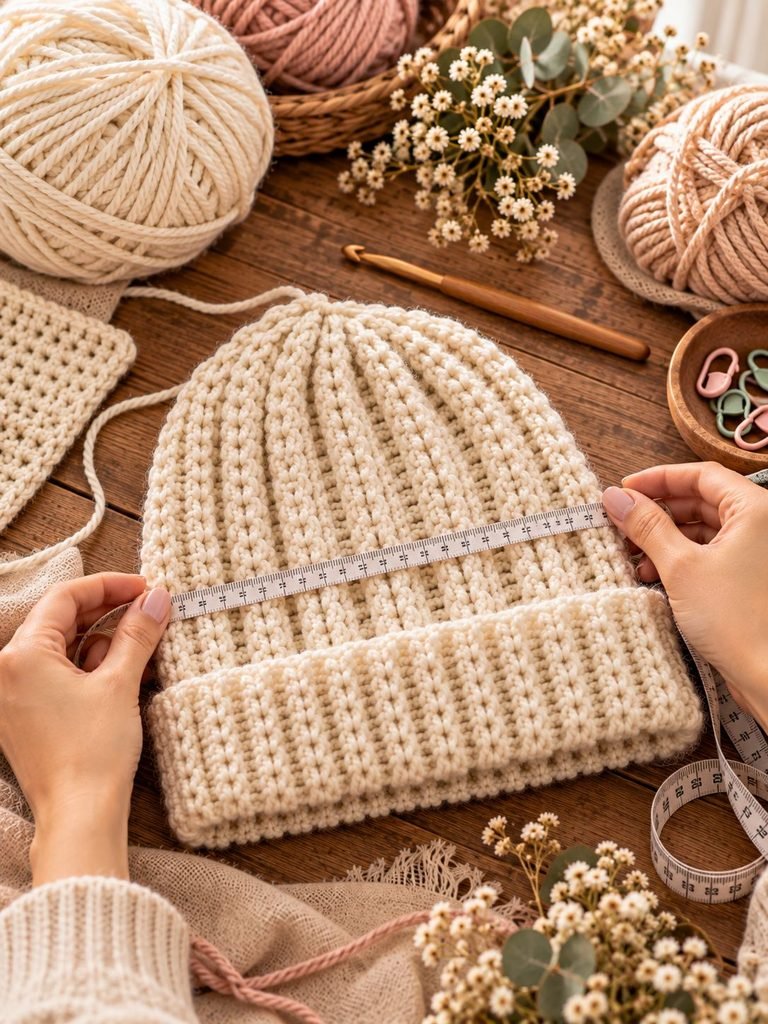
One of the advantages of making your own hat is that you can check its measurements before finishing it.
If you are making a rectangular beanie, the length of the rectangle determines how much fabric will wrap around the head, while its height determines the overall depth of the hat.
For a fitted adult beanie, compare the rectangle’s length with your head measurement and the stretch of your crochet fabric. The exact finished measurement will depend on the stitch pattern and how much negative ease the design requires.
If the piece seems too short, continue crocheting additional rows. If it is becoming too long, check your pattern and measurements before proceeding.
Do not rely only on how the hat looks when laid flat. Crochet fabric can behave differently when stretched around the head.
For the most accurate fit, compare your work with the sizing guidance in your chosen pattern.
Step 6: Shape and Seam the Hat
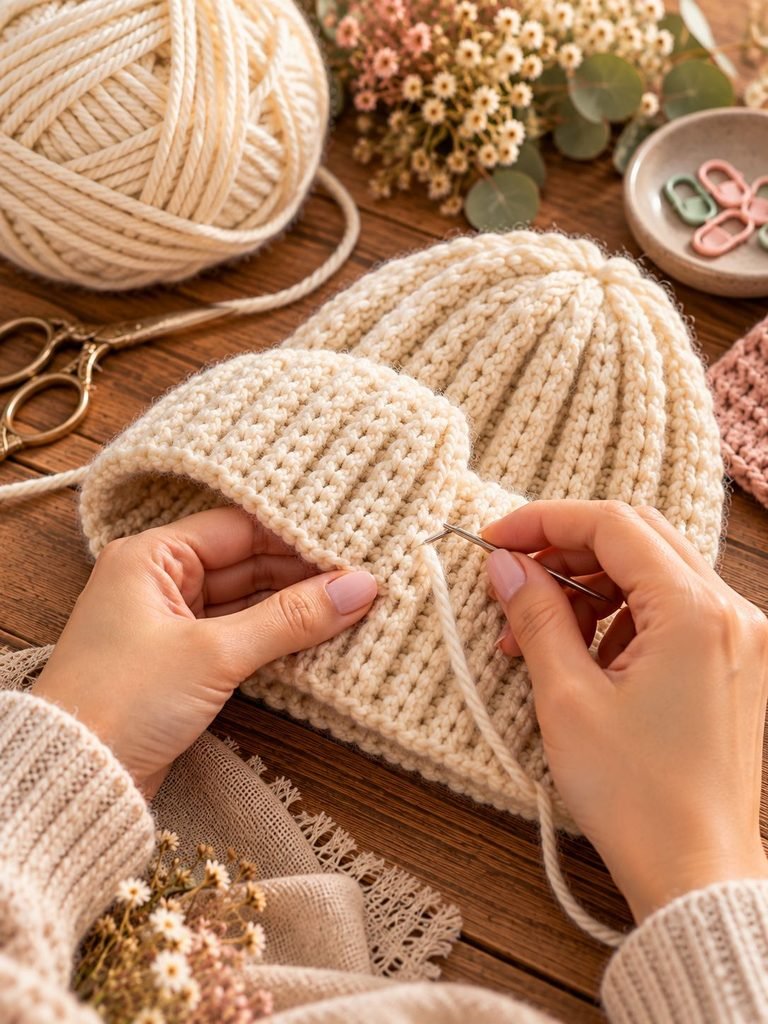
Once the main piece reaches the required measurements, it is time to shape the beanie.
For a rectangular design, fold the piece in half so the two shorter edges meet. Use a yarn needle and a length of matching yarn to sew these edges together.
You can use a mattress stitch for a neat seam or another joining method recommended by your pattern. Try to keep the stitches even so the seam does not become bulky.
Next, close the top of the hat. Thread your yarn needle with a long strand of yarn and weave it in and out along the upper edge. Gently pull the yarn to gather the opening.
Continue adjusting the gathered edge until the crown closes neatly. Secure the yarn carefully on the inside of the hat, taking care not to pull so tightly that the fabric puckers unevenly.
If you are following a pattern that works in joined rounds or uses decreases to shape the crown, follow its crown instructions instead. That construction will generally produce a different shape from a seamed rectangle.
Step 7: Create a Comfortable Brim
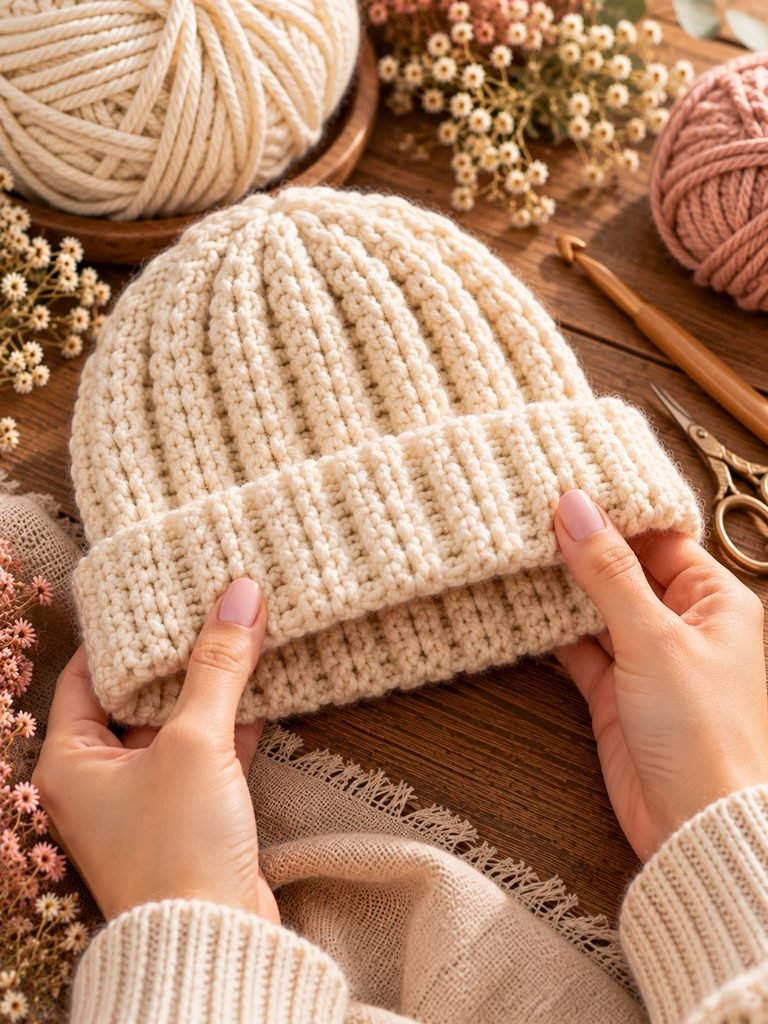
The brim is one of the details that gives a beanie its finished look.
If your design includes a folded brim, fold the lower edge upward to the desired depth. Try the hat on to check whether the fold covers your ears comfortably without making the hat feel too tight.
For a more structured appearance, use a ribbed stitch pattern that provides gentle stretch. If your beanie is designed with a separate brim, attach it according to the pattern instructions.
You can also leave the brim unfolded for a relaxed, casual style.
Avoid making the brim excessively tight. A snug fit can help the hat stay in place, but too much tension may leave an uncomfortable line around your forehead.
Step 8: Weave in the Loose Ends
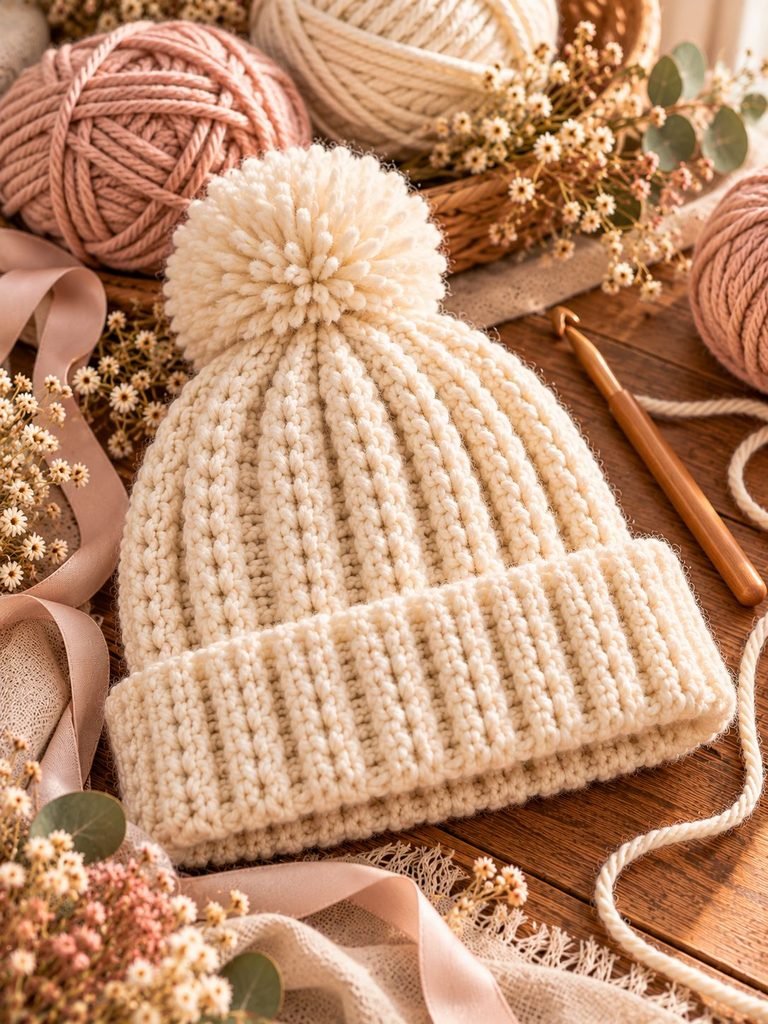
Finishing your yarn ends properly helps your handmade beanie look neat and last longer.
Thread each loose end onto your yarn needle and weave it through several stitches on the inside of the hat. Change direction at least once so the end is less likely to work itself loose.
Avoid pulling too firmly, as this can distort the fabric. Once the end is secure, trim the excess yarn carefully without cutting into the surrounding stitches.
Check the crown, seam, and brim for any remaining loose strands.
This small finishing step makes a noticeable difference, especially if you are preparing the beanie as a handmade gift.
Step 9: Add a Personal Finishing Touch
Your beanie is now ready for a little customization.
A matching yarn pom-pom creates a classic winter look, while a contrasting pom-pom adds a playful pop of color. You could also sew on a small fabric label or add a decorative button, provided it is securely attached and suitable for the intended wearer.
For a minimalist finish, leave the hat plain and allow the stitch texture to stand out.
If you are making a set of beanies for friends or family, experiment with different shades of the same color palette. Cream, taupe, blush, and dusty rose make a lovely coordinated collection.
Keep in mind that decorative elements should be securely attached, particularly if the hat will be worn by a young child.
Helpful Tips for a Beautiful Crochet Beanie
Keep Your Tension Consistent
Try to maintain a similar tension throughout the project. Uneven tension can cause the fabric to widen or narrow unexpectedly.
If your hands become tired, take a short break rather than forcing yourself to continue.
Use Stitch Markers When Needed
Stitch markers are especially useful when working in rounds or shaping the crown. They help you identify the beginning of a round and reduce the risk of losing track of your stitches.
Choose a Soft Yarn
A hat should feel comfortable against the forehead and ears. If the yarn feels scratchy against your skin, consider using a softer alternative.
Count Your Stitches
Counting your stitches at the end of each row can help you spot mistakes early. This is particularly useful if you are still learning how to recognize individual crochet stitches.
Test the Stretch
Before finishing the hat, gently stretch a section of the fabric. It should have enough give to fit comfortably without becoming so loose that it loses its shape.
Common Crochet Beanie Problems and How to Fix Them
My beanie is too tight.
Your stitch tension may be too firm, your hook may be too small, or the hat may need additional width. Check your gauge and the pattern’s finished measurements before making adjustments.
My beanie is too loose.
A larger-than-needed hook, loose tension, or excessive fabric width can create a loose fit. Try a smaller hook for your next attempt, or adjust the dimensions according to the pattern.
The crown looks uneven.
Check that the gathered edge has been distributed evenly. If you are using a round-based pattern, review the decrease instructions and confirm that you have the correct stitch count.
The seam feels bulky.
Try a flatter joining method, such as mattress stitch, and avoid pulling the joining yarn too tightly.
The brim curls or rolls.
Some stitch patterns naturally curl, particularly when the fabric has not been designed with a stable edge. Check whether your pattern calls for a ribbed brim, a different stitch, or a finishing round.
The hat feels stiff.
Your hook may be too small for the yarn, or your tension may be too tight. Make a gauge swatch with a slightly larger hook and compare the fabric before changing the entire project.
How to Care for Your Handmade Jenna Beanie
Proper care can help your crochet hat retain its shape and remain beautiful through repeated wear.
Always check the yarn label before washing. Many acrylic yarns can be machine-washed, while some wool yarns require gentle handwashing.
For handwashing, use cool or lukewarm water and a small amount of suitable detergent. Gently press the water through the fabric without twisting or wringing the hat.
Rinse carefully and remove excess water by pressing the beanie between clean towels. Reshape it while damp and allow it to dry flat.
Avoid hanging a wet crochet hat, as its weight may stretch the stitches. If the yarn label permits machine washing, placing the beanie in a mesh laundry bag can provide additional protection.
Store your finished hat in a clean, dry place away from excessive moisture.
Frequently Asked Questions
Is the Jenna Beanie suitable for beginners?
It can be a good project for beginners, especially if you choose a version that uses basic stitches and straightforward construction. However, the difficulty depends on the particular Jenna Beanie pattern you are following.
How long does it take to crochet a beanie?
Many simple beanies can be completed in a few hours, while textured designs or projects made by newer crocheters may take longer. Your yarn choice, stitch pattern, and experience will affect the total time.
How much yarn do I need?
A medium-weight adult beanie may use approximately 150–200 yards of yarn, although some designs require more or less. Check the original pattern’s yarn requirements before purchasing supplies.
Can I make a Jenna Beanie in different sizes?
Yes, provided your pattern includes adjustable sizing or you know how to modify the dimensions. Measure the intended wearer’s head and use the pattern’s gauge and ease recommendations to guide your adjustments.
Can I make this beanie without a pom-pom?
Absolutely. A plain beanie has a timeless appearance and is easy to coordinate with different outfits. You can leave the crown simple or add another decorative detail if you wish.
What is the best yarn for a crochet hat?
The best yarn depends on the intended use. Acrylic yarn is often affordable and easy to maintain, wool offers warmth, and soft blends can provide a comfortable balance. Choose a yarn that feels pleasant against the skin and suits the recipient’s care preferences.
Final Thoughts
Making a Jenna-inspired crochet beanie is a lovely way to turn a simple ball of yarn into something useful, beautiful, and personal. With the right materials, careful measurements, and a little patience, you can create a handmade accessory that reflects your style and keeps you cozy when the weather turns cold.
Do not worry if your first attempt is not perfectly even. Crochet is a skill that develops with practice, and every project teaches you something new. Experiment with colors, try different textures, and take your time with the finishing details.
Whether you keep your finished beanie for yourself or give it to someone you love, the best part is knowing that you made it by hand. Gather your yarn and hook, settle into your favorite crafting spot, and enjoy creating a cozy new addition to your handmade wardrobe.