Clay Sewn Ornaments: How to Make Beautiful Handmade Clay Ornaments with a Sewn Finish
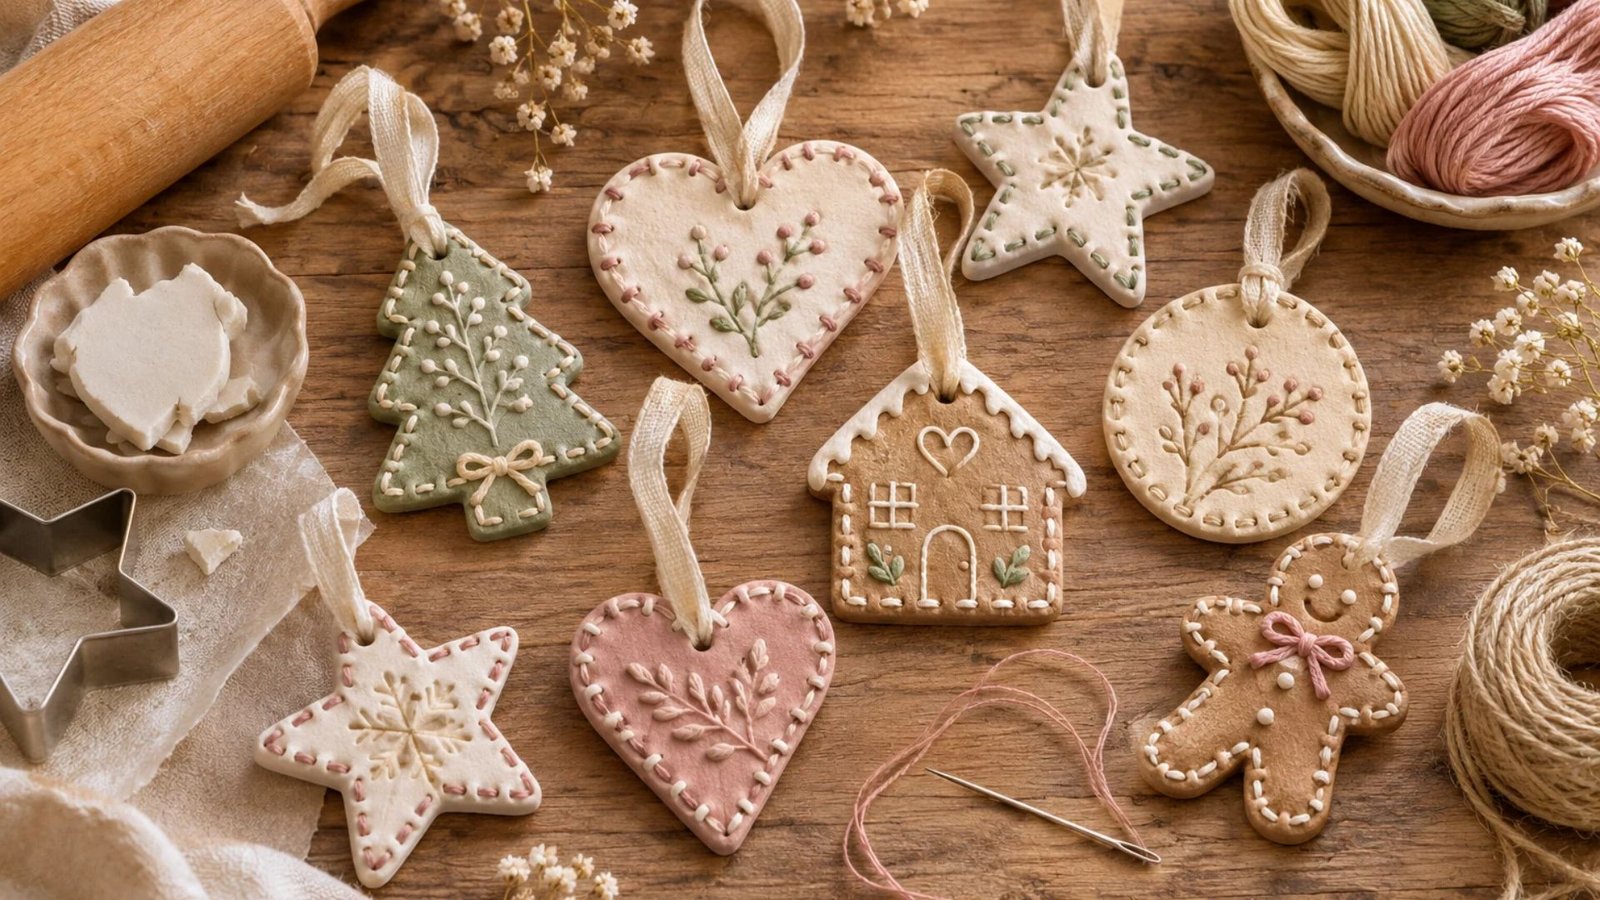
There is something so special about handmade Christmas decorations, especially the little pieces that bring warmth and personality to a home.
I love how a simple piece of clay can become something beautiful with just a little creativity and patience. Clay sewn ornaments are one of those projects that look delicate and thoughtfully made but are surprisingly simple to create.
With soft neutral colours, pretty stitched details, and a few finishing touches, you can make ornaments that feel timeless and personal. Whether you’re decorating your Christmas tree, preparing handmade gifts, or adding a cosy touch to your home, these ornaments are a lovely craft to try.
What Are Clay Sewn Ornaments?
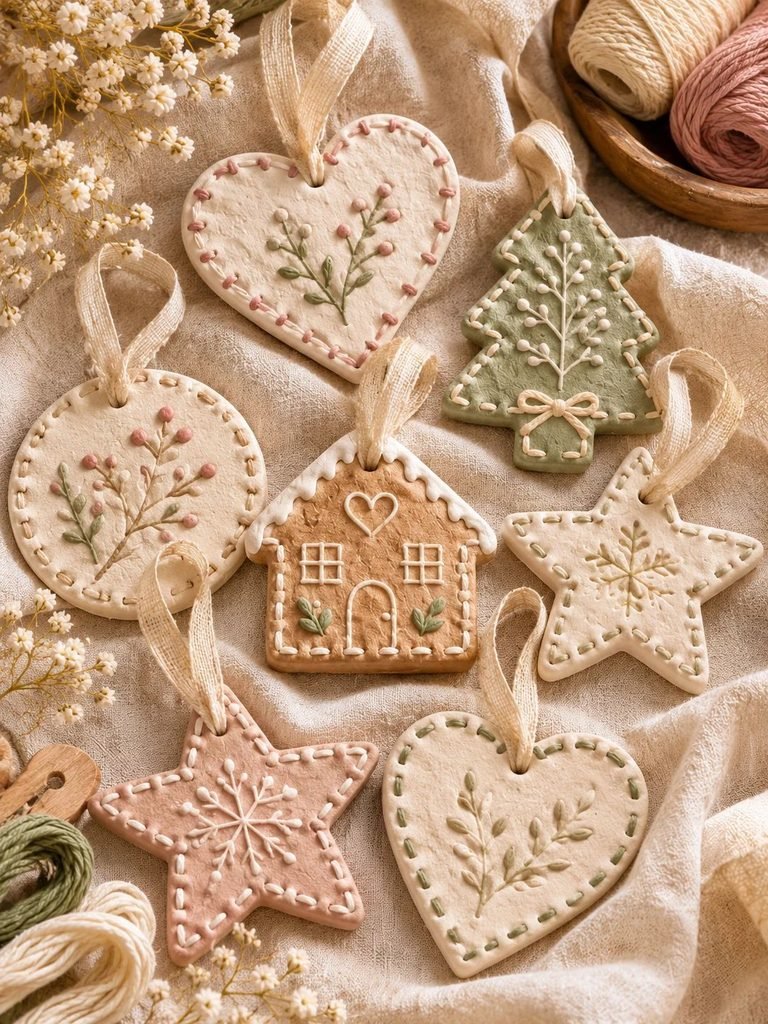
Clay sewn ornaments are decorative ornaments made from clay, usually air-dry clay, with small holes placed around their edges so that thread, embroidery floss, or thin cord can be woven or stitched through them.
The result is a beautiful handmade decoration that combines the natural texture of clay with the delicate appearance of sewing.
Unlike traditional clay ornaments that are simply painted or decorated with stamps, sewn clay ornaments have an extra layer of detail. The stitching can outline the shape, create decorative patterns, or add a charming handmade finish.
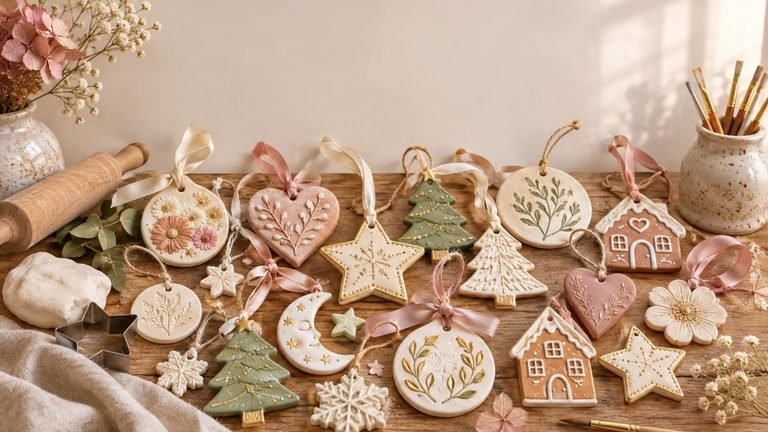
You can make them in different shapes, including:
- Hearts
- Stars
- Christmas trees
- Snowflakes
- Bells
- Gingerbread-inspired shapes
- Little houses
- Round botanical ornaments
One of the best things about this project is that you don’t need advanced crafting or sewing skills. If you can thread a needle and work with simple clay shapes, you can make these beautiful decorations at home.
Why You’ll Love Making Clay Sewn Ornaments
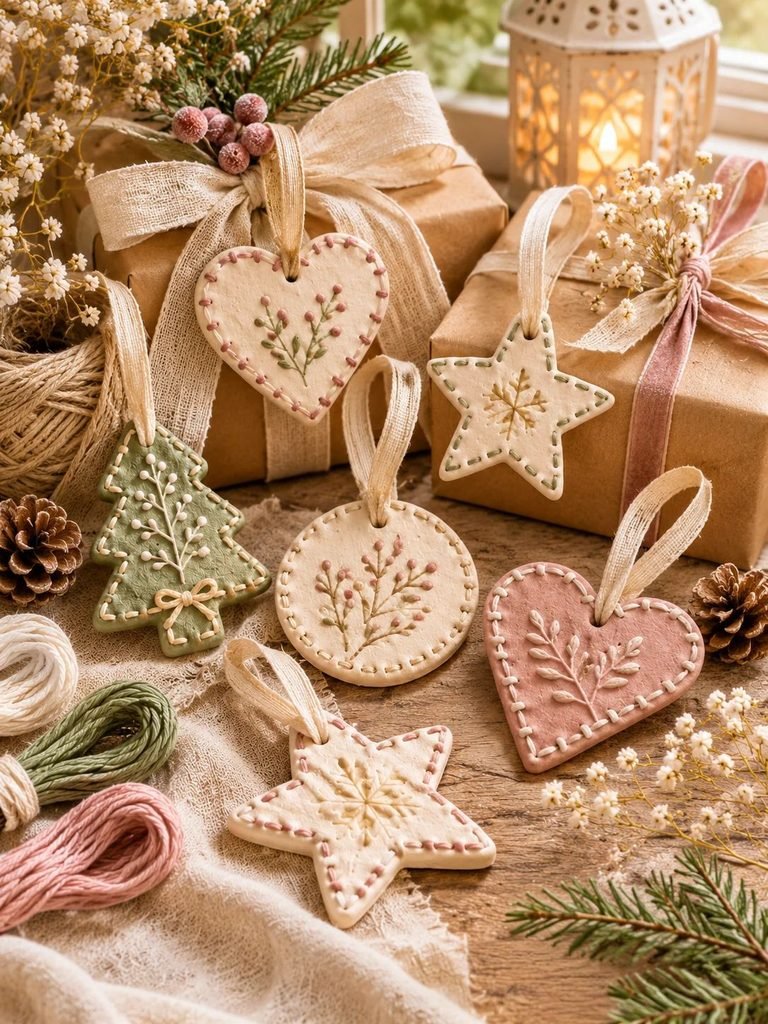
If you enjoy simple DIY projects that produce beautiful results, this is definitely one to add to your crafting list.
Here are a few reasons why I love this idea.
1. They’re budget-friendly. Air-dry clay, thread, and a few basic tools are all you need. You can make several ornaments from one package of clay.
2. They’re easy to personalise. Choose your favourite colours, shapes, stitching patterns, and decorative details to make each ornament unique.
3. They’re wonderful handmade gifts. These ornaments make thoughtful Christmas presents, stocking fillers, gift toppers, and keepsakes.
4. They suit different decorating styles. Whether you love farmhouse, cottagecore, Scandinavian, rustic, or minimalist Christmas decorations, you can easily adapt the design.
5. They’re beginner-friendly. You don’t need a pottery wheel, kiln, or expensive equipment. Air-dry clay makes the process much easier.
Supplies You’ll Need to Make Clay Sewn Ornaments
Before getting started, gather your supplies and prepare a clean crafting surface.
| Supply | Purpose |
|---|---|
| Air-dry clay | Creates the ornaments |
| Rolling pin | Rolls clay evenly |
| Cookie cutters | Creates decorative shapes |
| Embroidery floss | Adds stitched details |
| Large-eye needle | Helps thread through holes |
| Wooden skewer | Makes stitching holes |
| Parchment paper | Protects your work surface |
| Craft knife | Trims uneven edges |
| Fine sandpaper | Smooths dry edges |
| Acrylic paint | Adds colour |
| Paintbrush | Applies paint and finishes |
| Clear acrylic sealer | Helps protect finished ornaments |
| Ribbon or twine | Creates hanging loops |
A little tip: Choose a good-quality air-dry clay that holds its shape well. Very soft or sticky clay can be difficult to cut neatly and may lose its shape while you’re making the holes.
For the thread, embroidery floss is a lovely choice because it comes in many colours and is easy to work with. You can use cream, white, dusty pink, sage green, burgundy, or gold for a beautiful decorative finish.
How to Make Clay Sewn Ornaments Step by Step
Now for the fun part! Making these ornaments is a simple process, but taking your time with each step will help you achieve a neat, professional-looking result.
Step 1: Prepare Your Clay
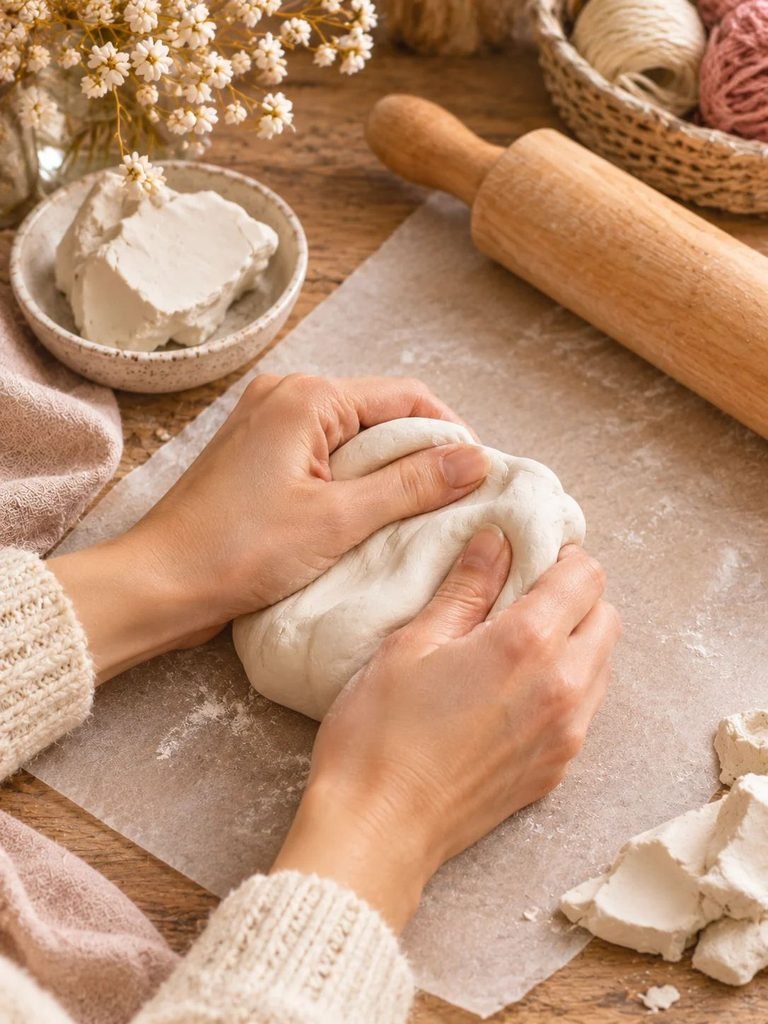
Start by placing your air-dry clay on a clean surface or a sheet of parchment paper.
Knead the clay gently with your hands until it becomes soft and smooth. This helps remove small air pockets and makes the clay easier to work with.
If the clay feels slightly dry, follow the manufacturer’s instructions for conditioning it. Avoid adding too much water, as excess moisture can make the clay sticky and increase drying time.
Once your clay is ready, shape it into a smooth ball.
Step 2: Roll Out the Clay
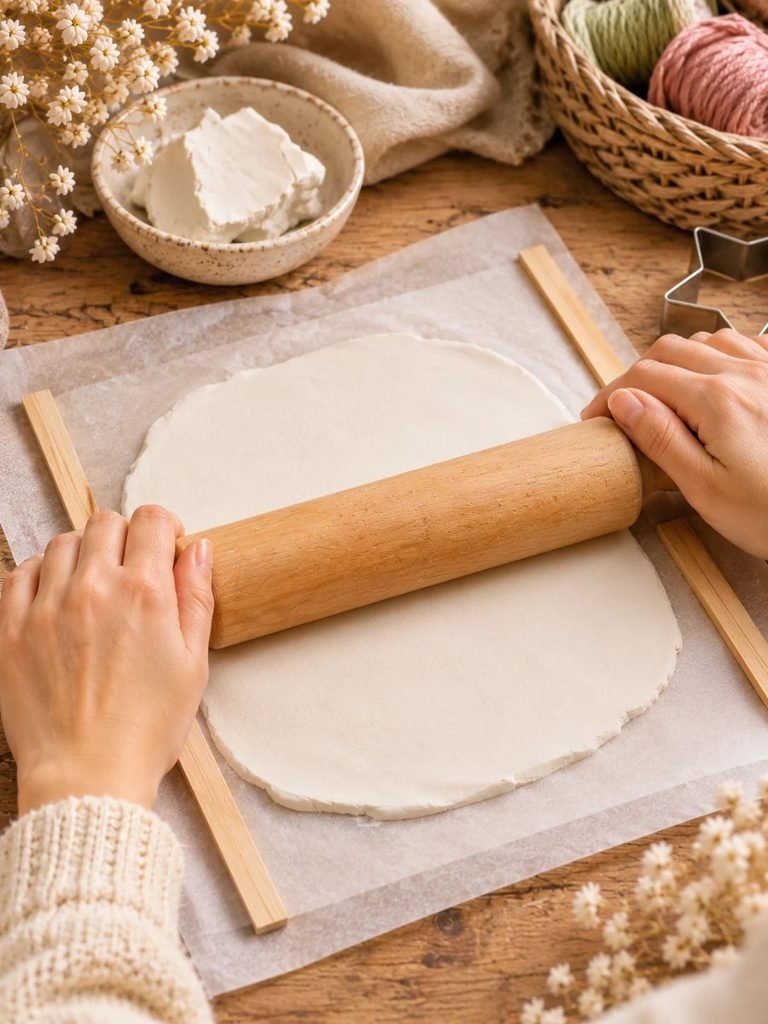
Place your clay between two sheets of parchment paper and gently roll it out.
Aim for a thickness of approximately 5–7 mm. This gives the ornaments enough strength to hold their shape while leaving room for stitching holes.
Try to keep the thickness consistent throughout the clay.
If some areas are much thinner than others, the ornaments may dry unevenly or become more fragile.
Helpful tip: Use two thin wooden guides or rolling-pin thickness rings to keep your clay at an even thickness.
Read DIY Clay Paintbrush Holder: How to Make a Beautiful Handmade Ceramic-Style Brush Organizer
Step 3: Cut Out Your Ornament Shapes
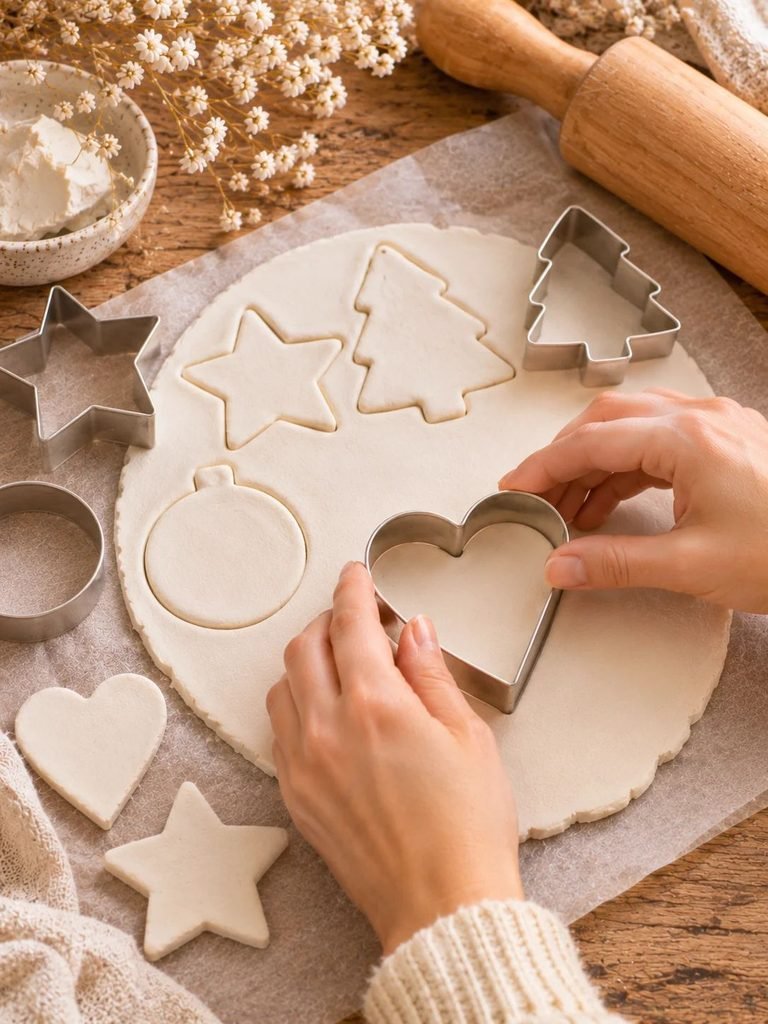
Choose your favourite cookie cutters and begin cutting out your shapes.
For a beautiful collection, I recommend making a mixture of:
- Small and large hearts
- Classic five-point stars
- Christmas trees
- Round ornaments
- Little decorative houses
Press each cutter firmly into the clay and gently remove the excess.
Carefully lift the shapes and place them on a flat piece of parchment paper.
If the edges look rough, smooth them gently with a slightly damp fingertip or a soft modelling tool.
Try not to use too much water because this can soften the clay and affect the finished shape.
Read How to Make a Clay Photo Ornament: An Easy DIY Keepsake
Step 4: Create the Stitching Holes
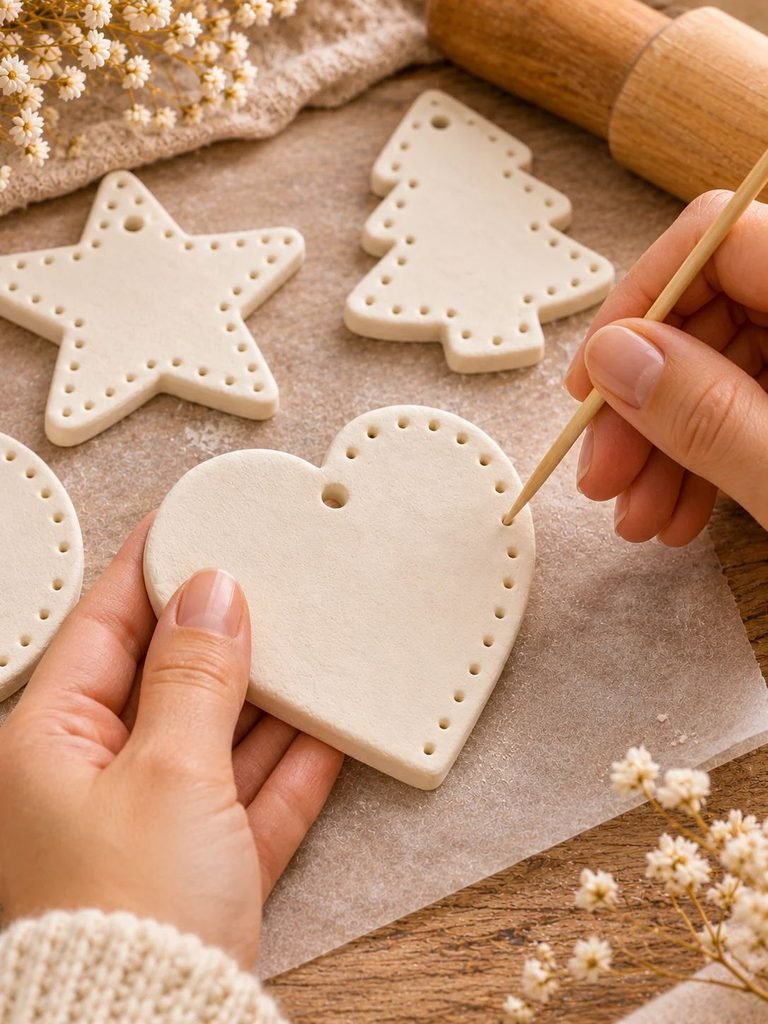
This is the step that makes these ornaments special.
Using a wooden skewer, toothpick, or small clay hole-making tool, carefully create tiny holes around the edges of each ornament.
Keep the holes approximately 5–7 mm from the outer edge and space them around 8–10 mm apart.
The exact spacing will depend on the size of your ornament and the thread you plan to use.
Make sure the holes go completely through the clay.
You should also create one slightly larger hole near the top of each ornament for the hanging ribbon or twine.
Important: Don’t make the holes too close to the edges. Thin sections of clay between the holes and the outer edge can break easily, especially after drying.
If you want a more decorative appearance, you can make two rows of smaller holes or create a simple pattern around the shape.
Step 5: Add Decorative Details
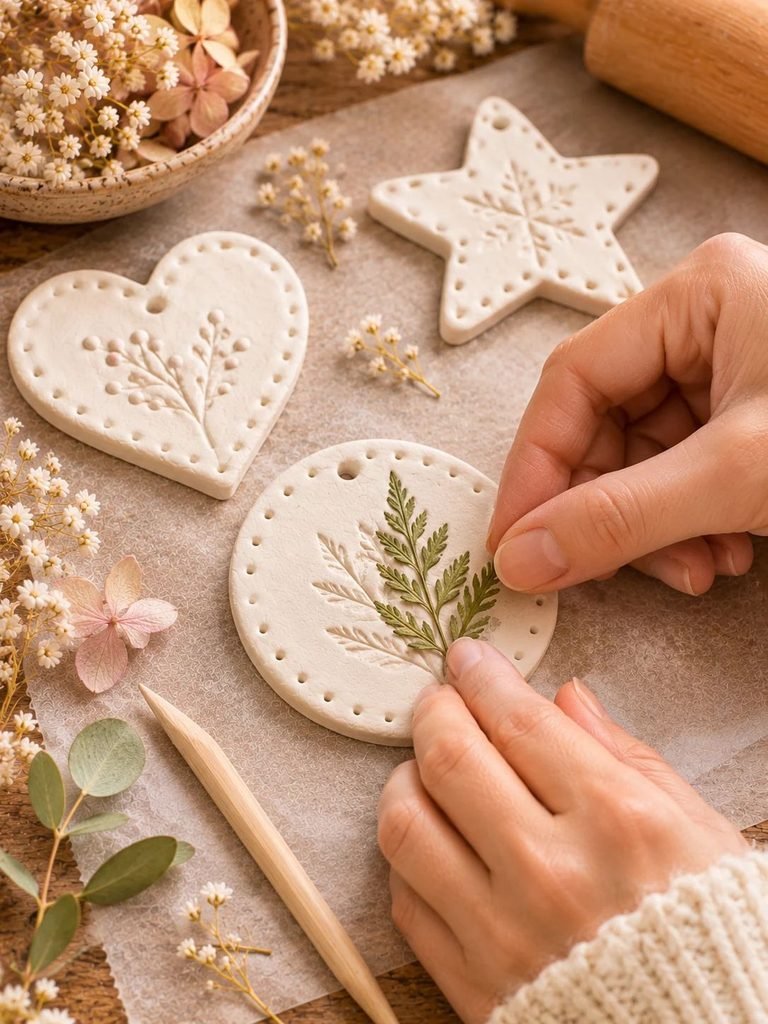
Before allowing your ornaments to dry, consider adding a few extra details.
You could:
- Press small botanical leaves into the clay.
- Add delicate floral impressions.
- Stamp initials or a special year.
- Create tiny dots using a toothpick.
- Add a simple snowflake design.
- Press a piece of lace gently into the surface.
I particularly love botanical impressions because they give plain clay ornaments a natural, cottage-inspired appearance.
Keep your designs relatively simple so that the stitching remains the main decorative feature.
Step 6: Allow the Clay to Dry Completely
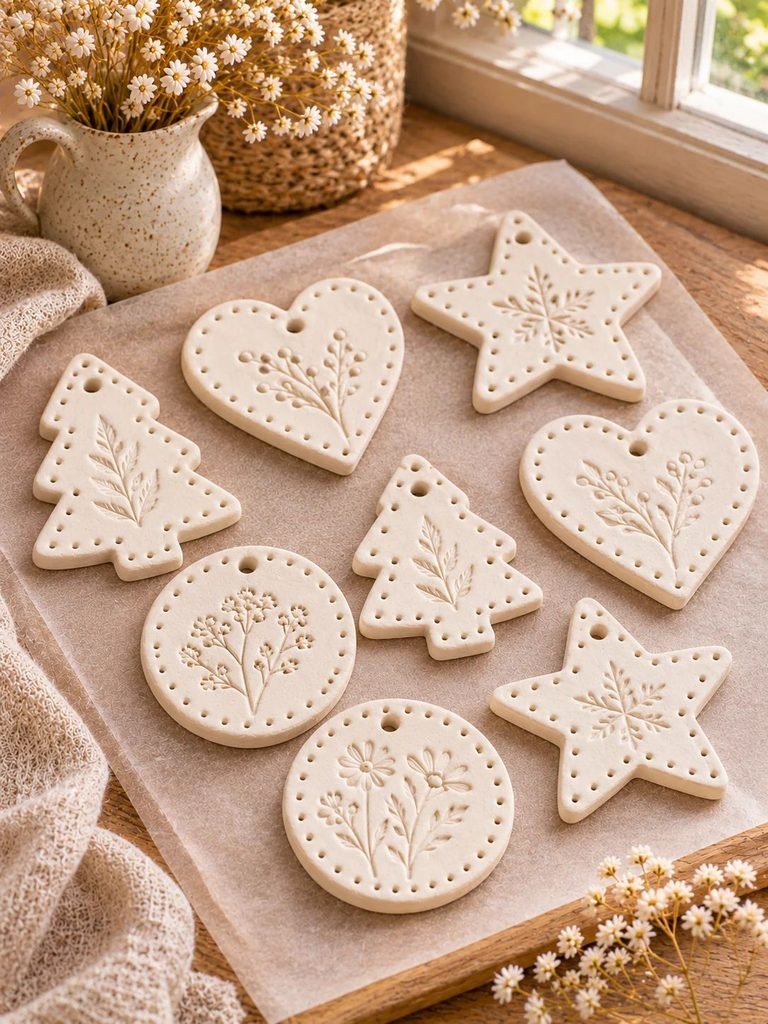
Place your ornaments on a flat drying surface in a well-ventilated room.
Allow them to dry according to the manufacturer’s instructions. Depending on their thickness, the clay type, and the humidity in your room, this may take 24–72 hours or longer.
Turn the ornaments carefully during drying if the clay manufacturer’s instructions recommend it. This can help them dry more evenly.
Avoid placing them directly beside radiators, heaters, or in strong sunlight because rapid drying can encourage cracking and warping.
Make sure the ornaments are completely dry before moving on to painting and stitching.
Step 7: Smooth and Paint Your Ornaments
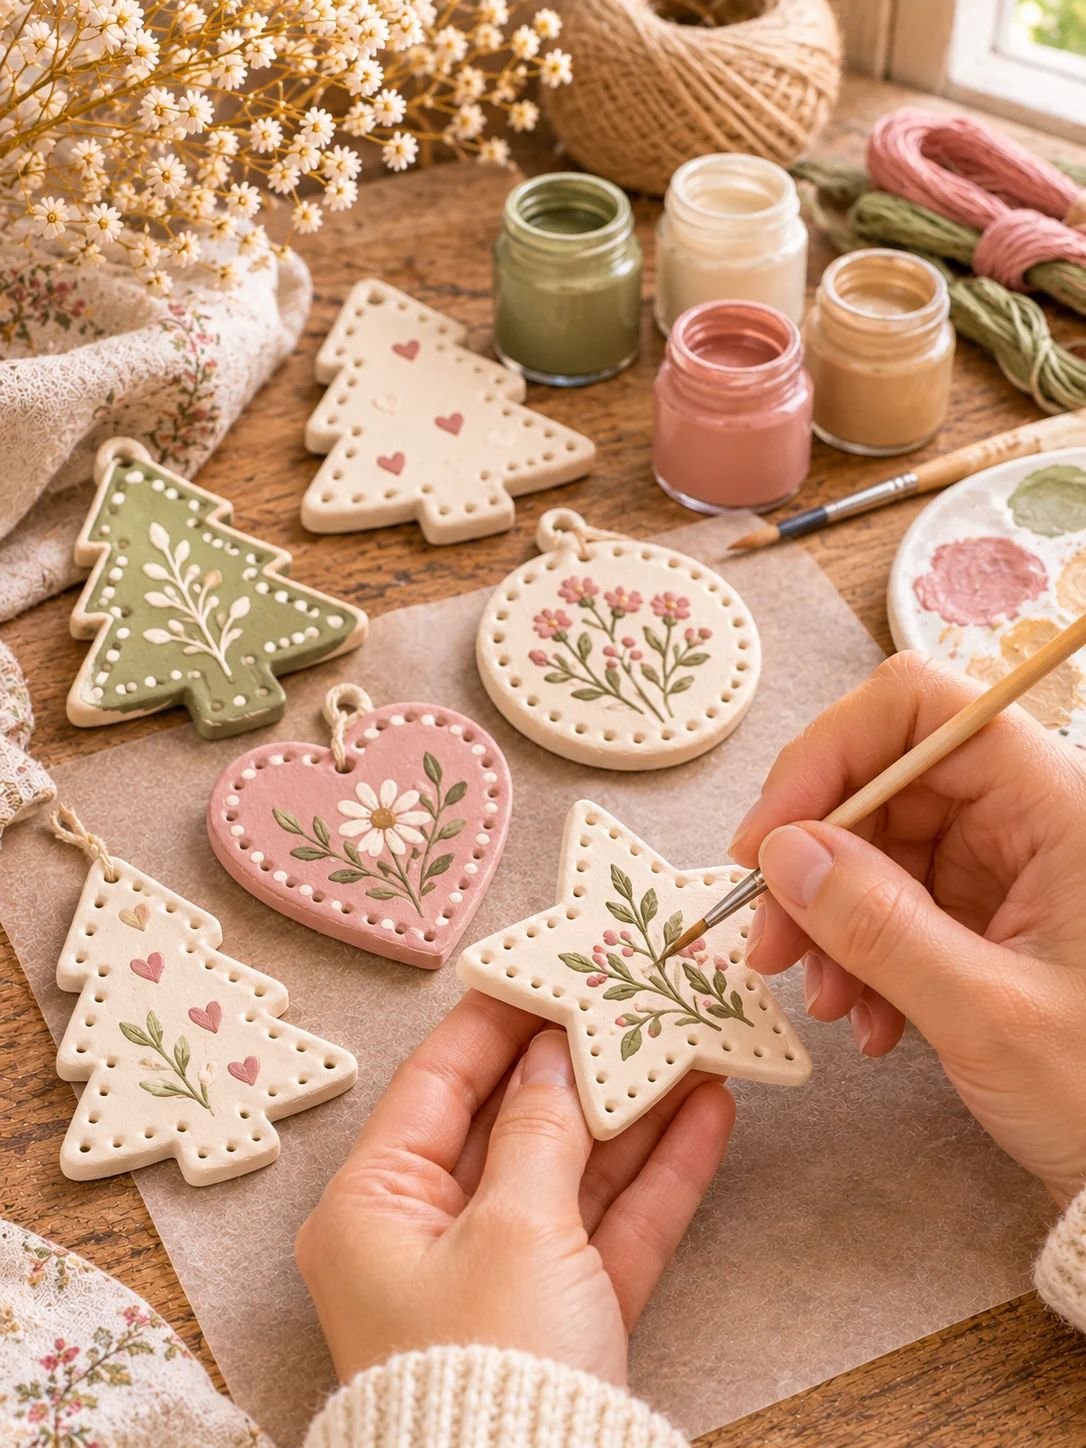
Once the ornaments are completely dry, gently smooth any rough edges using fine-grit sandpaper.
Wipe away the dust with a dry soft cloth.
You can leave your ornaments in their natural clay colour for a minimalist appearance or add a little acrylic paint.
Some beautiful colour combinations include:
- Warm ivory and champagne gold
- Cream and dusty blush
- White and sage green
- Beige and soft brown
- Muted terracotta and natural linen
Apply thin, even coats of paint and allow each coat to dry before adding another.
For a more natural finish, you can paint only the front surface and leave the edges in their original clay colour.
Step 8: Stitch Around the Ornaments
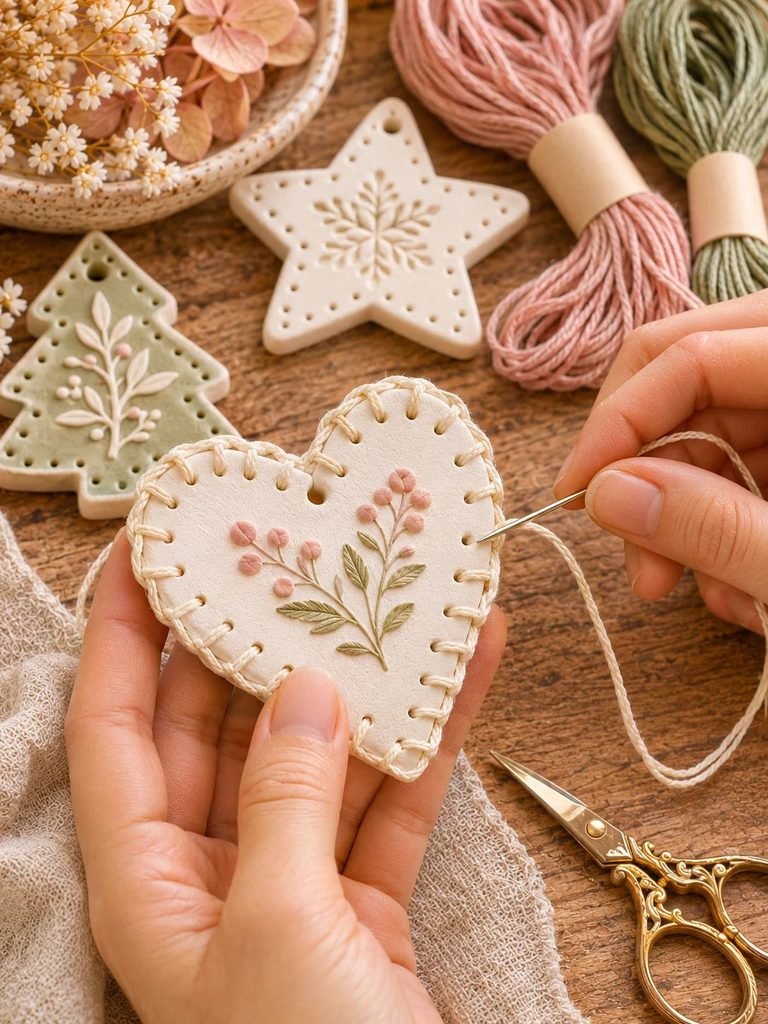
Now it’s time to add the beautiful sewn finish!
Cut a comfortable length of embroidery floss, approximately 40–50 cm. This makes it easier to work without creating too many tangles.
Thread your needle and tie a small knot at the end.
Start from the back of the ornament and bring the needle through the first hole.
You can use a simple running stitch or blanket-style stitch, depending on the appearance you want.
Simple running stitch:
- Bring the needle through the first hole.
- Pass it through the next hole.
- Continue working around the ornament.
- Keep your stitches evenly spaced.
- Finish by securing the thread at the back.
Blanket-style decorative stitch:
- Bring the thread through the first hole.
- Move the needle through the next hole.
- Before pulling the thread completely tight, pass the needle through the thread loop.
- Gently tighten the loop to create a decorative edge.
- Repeat around the ornament.
Be gentle when pulling the thread. Avoid pulling too tightly because the clay can crack or the thread can put unnecessary pressure on the holes.
For a delicate look, choose embroidery floss in a contrasting colour. Cream stitching on blush clay or white stitching on sage green looks especially pretty.
Step 9: Add a Hanging Loop
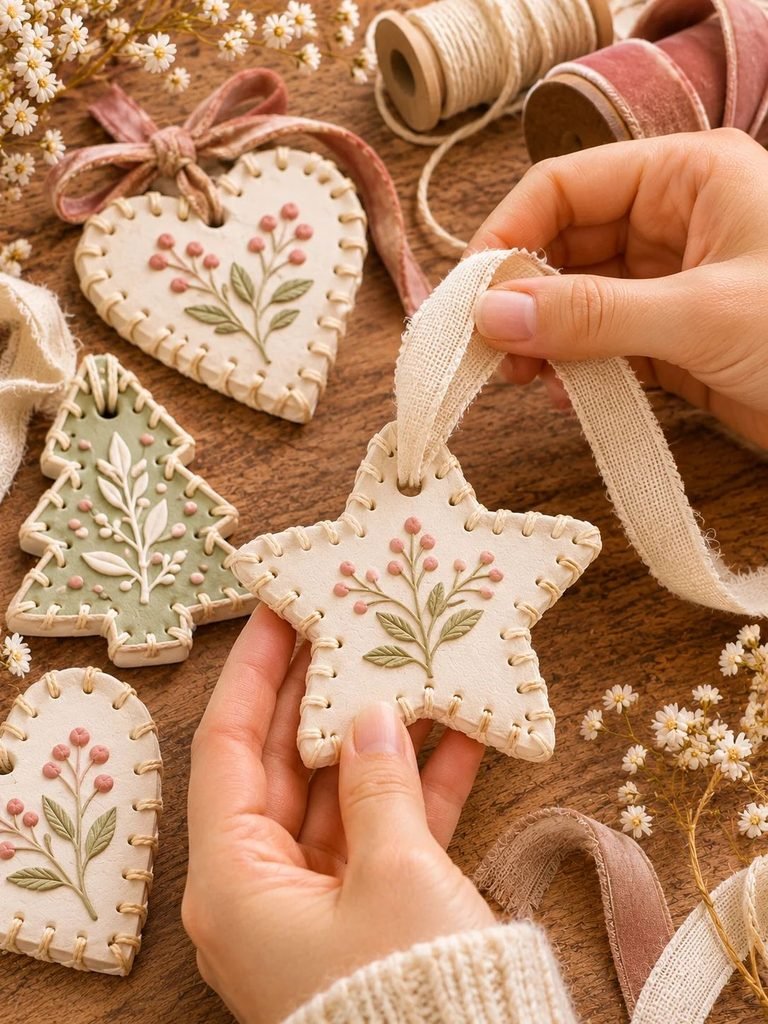
Once you’ve finished stitching, add a small hanging loop.
Thread a piece of ribbon, cotton cord, or jute twine through the larger hole at the top of the ornament.
Tie a secure knot or small bow.
For a feminine, elegant finish, I love using:
- Thin cream satin ribbon
- Natural cotton cord
- Dusty pink velvet ribbon
- Delicate beige linen string
- Champagne-coloured ribbon
Keep the hanging loop proportional to the ornament so it doesn’t overwhelm the finished design.
Step 10: Seal Your Finished Ornaments
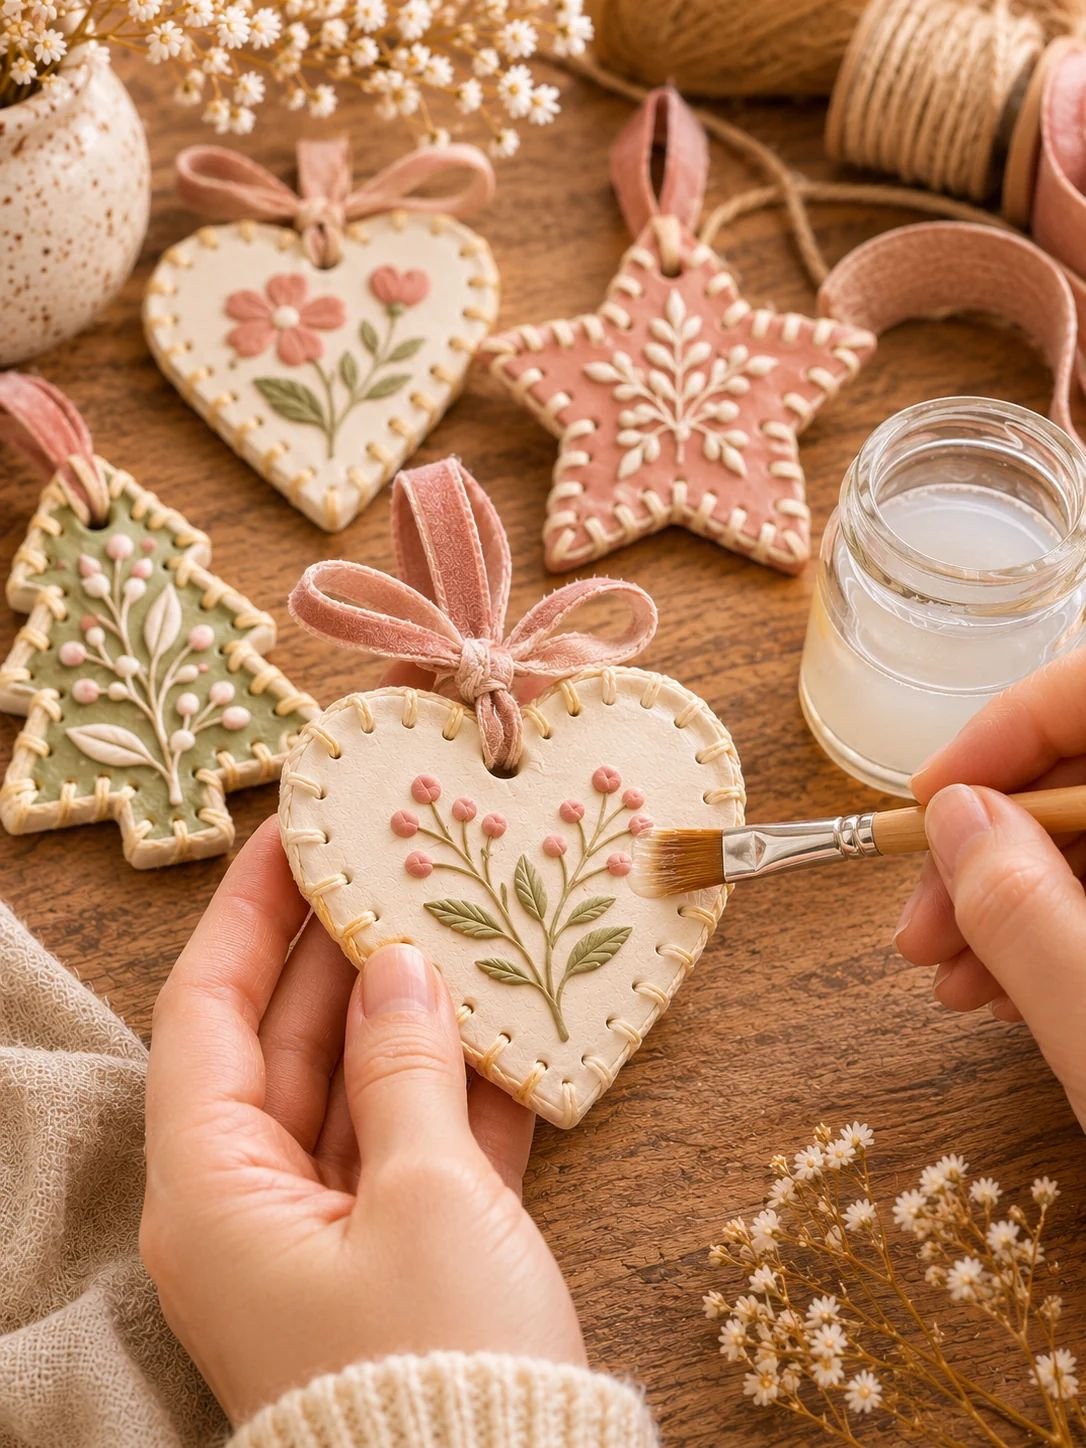
If you want to protect painted surfaces, apply a compatible clear acrylic sealer according to the manufacturer’s instructions.
A matte finish is lovely for rustic and minimalist decorations, while a satin finish gives the ornaments a subtle sheen.
Make sure the sealer is suitable for your particular clay and paint.
Allow it to dry completely before hanging your ornaments.
Avoid soaking the ornaments or treating them as waterproof. Air-dry clay is generally not waterproof, even when sealed.
7 Beautiful Clay Sewn Ornament Ideas to Try
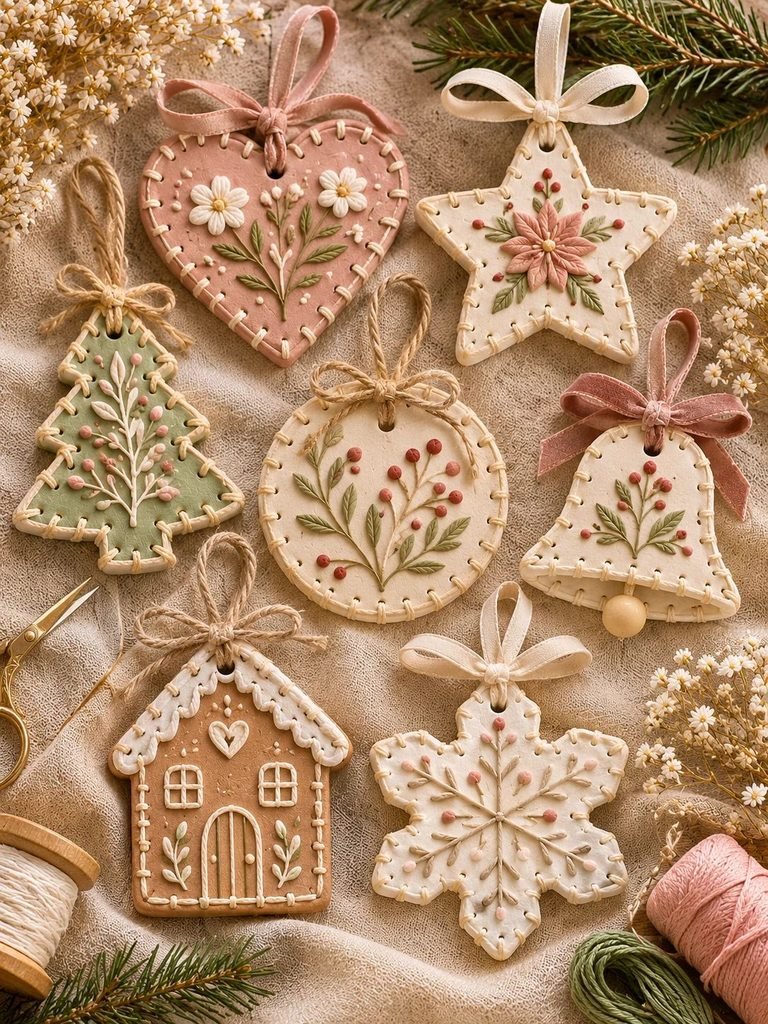
Once you’ve mastered the basic technique, you can experiment with different shapes, colours, and stitching styles.
Here are seven lovely ideas to inspire your next crafting session.
1. Clay Heart Sewn Ornaments
Heart ornaments are perfect for Christmas trees, Valentine’s Day decorations, and thoughtful handmade gifts.
Make them in blush pink, cream, or warm beige and add white or champagne embroidery floss around the edges.
You can also stamp a name or special date into the centre.
2. Minimalist Clay Star Ornaments
Star-shaped ornaments are timeless and work beautifully with neutral Christmas decorations.
Keep the clay natural white and use cream thread for a subtle, elegant finish.
For extra detail, add a small stamped star pattern in the centre.
3. Sage Green Christmas Tree Ornaments
Create small Christmas tree shapes using a cutter or a simple handmade template.
Paint them sage green and add cream stitching around the edges.
You can even add tiny stamped dots to represent Christmas lights.
4. Botanical Clay Ornaments
If you love cottagecore decorations, botanical ornaments are a beautiful option.
Press small leaves or dried botanical textures into the clay before drying.
Once dry, use natural brown or cream thread around the edges.
5. Clay Bell Ornaments
Bell-shaped ornaments look especially pretty with delicate stitching and small ribbon bows.
Choose soft ivory clay and add champagne or dusty pink thread.
These are lovely for decorating Christmas trees or adding to handmade gift packages.
6. Gingerbread-Inspired Clay Ornaments
Create gingerbread-house or gingerbread-person shapes using air-dry clay.
Paint them warm brown and add white stitching around the edges to recreate the appearance of traditional gingerbread icing.
You can also add tiny painted hearts, buttons, and decorative dots.
7. Snowflake Clay Ornaments
Snowflakes are perfect for a winter-inspired decorating theme.
Cut out simple snowflake shapes, make small stitching holes, and use white or silver embroidery floss.
Keep the design light and delicate for a beautiful handmade finish.
Tips for Making Strong and Beautiful Clay Sewn Ornaments
A few small details can make a big difference in how your finished ornaments look and last.
Keep the clay thickness consistent. Uneven clay can dry unevenly and become more likely to warp.
Don’t make holes too close to the edges. Leave enough clay around each hole to prevent breakage.
Avoid rushing the drying process. Allow the ornaments to dry naturally and completely.
Use a suitable needle. A large-eye embroidery needle makes threading easier, but make sure it fits comfortably through the holes.
Choose thread that complements the clay. You don’t always need contrasting colours. Matching thread creates a subtle, sophisticated look.
Don’t pull stitches too tightly. Gentle tension helps protect the clay.
Handle ornaments carefully. Even completely dry air-dry clay can be fragile, particularly around narrow points and edges.
Seal before stitching when appropriate. If you’re using a liquid sealer, applying it before adding thread can help prevent the thread from becoming coated or stiff. Allow the sealer to cure fully first.
Common Mistakes to Avoid
If you’re making clay sewn ornaments for the first time, there are a few mistakes worth watching out for.
| Common mistake | How to avoid it |
|---|---|
| Making the clay too thin | Aim for approximately 5–7 mm |
| Creating holes too close to the edge | Leave enough space around every hole |
| Making holes too small | Test the needle and thread before drying |
| Drying ornaments too quickly | Allow natural, gradual drying |
| Pulling thread too tightly | Use gentle, even tension |
| Painting before the clay dries | Wait until the clay is completely dry |
| Using too much water | Smooth edges with minimal moisture |
| Hanging ornaments before sealing cures | Follow the sealer’s curing instructions |
One particularly important tip is to make sure your stitching holes are large enough before the clay dries. Trying to enlarge them afterwards can cause cracking or damage.
How to Decorate With Clay Sewn Ornaments
One of my favourite things about handmade decorations is finding different ways to use them around the home.
These ornaments aren’t just for Christmas trees. Their simple, timeless appearance makes them suitable for several decorating ideas.
On your Christmas tree: Mix them with wooden beads, dried orange slices, linen bows, and warm white lights.
As gift decorations: Tie a small clay ornament onto wrapped kraft paper presents. It makes the gift feel extra thoughtful.
On decorative branches: Place a few ornaments on a collection of dried branches in a vase for a simple winter display.
As handmade keepsakes: Add a stamped name, year, or short message to create personalised decorations.
As table decorations: Arrange a few ornaments around a festive centrepiece or use them as decorative place settings.
On seasonal garlands: Attach smaller ornaments to a handmade fabric or twine garland.
How to Store Your Clay Sewn Ornaments
With a little care, you can enjoy your handmade ornaments for many seasons.
Because air-dry clay can be fragile and sensitive to moisture, proper storage is important.
Here are a few simple suggestions:
- Make sure every ornament is completely dry before storing it.
- Wrap individual ornaments in tissue paper.
- Place them in a sturdy storage box.
- Use soft padding between delicate shapes.
- Store the box in a cool, dry location.
- Avoid placing heavy decorations on top of them.
Try to keep the ornaments away from damp areas, as moisture can damage air-dry clay over time.
If you notice a small crack, handle the ornament gently rather than pulling on the stitching.
Frequently Asked Questions
Can you sew air-dry clay ornaments?
Yes! You can sew air-dry clay ornaments by making small holes around the edges before the clay dries. Once completely dry, embroidery floss or thin decorative cord can be threaded through the holes to create beautiful stitched patterns.
How thick should clay sewn ornaments be?
A thickness of approximately 5–7 mm is a good starting point. This provides enough material for stitching holes while keeping the ornaments lightweight.
What thread is best for clay ornaments?
Embroidery floss is an excellent option because it’s available in many colours and is easy to work with. Cotton thread and thin decorative cord can also work, provided they fit comfortably through the holes.
Can I use polymer clay instead of air-dry clay?
Yes. Polymer clay can also be used for sewn ornaments. However, it needs to be baked according to the manufacturer’s instructions rather than air-dried. Make the stitching holes before baking and allow the ornaments to cool completely before sewing.
How long do clay sewn ornaments take to dry?
Most air-dry clay ornaments take approximately 24–72 hours to dry, although thicker pieces or humid environments may require additional time. Always follow the clay manufacturer’s instructions and make sure the ornaments are completely dry before decorating.
Are clay sewn ornaments waterproof?
No. Air-dry clay is naturally porous, and applying a sealer does not necessarily make it waterproof. These decorations are best kept indoors and away from moisture.
Can I make clay sewn ornaments with children?
Yes, this can be a lovely supervised crafting activity. Children can help roll the clay, cut shapes, and choose colours. Adults should handle sharp tools and supervise needlework, especially with younger children.
Final Thoughts
Clay sewn ornaments are such a lovely way to bring a little handmade charm into your home. I especially love how something as simple as air-dry clay and embroidery thread can create decorations that look thoughtful, delicate, and completely unique.
You can experiment with different shapes, colours, and stitching patterns until you find a style you love.
Whether you make a collection for your Christmas tree, create personalised gifts for friends, or simply enjoy a relaxing afternoon of crafting, these ornaments are a wonderful project to try. Gather your supplies, take your time, and enjoy making something beautiful with your own hands.