How to Make Polymer Clay Beads That Look Professional
DIY Jewellery Making · Polymer Clay Crafts · Beginner-Friendly Tutorial
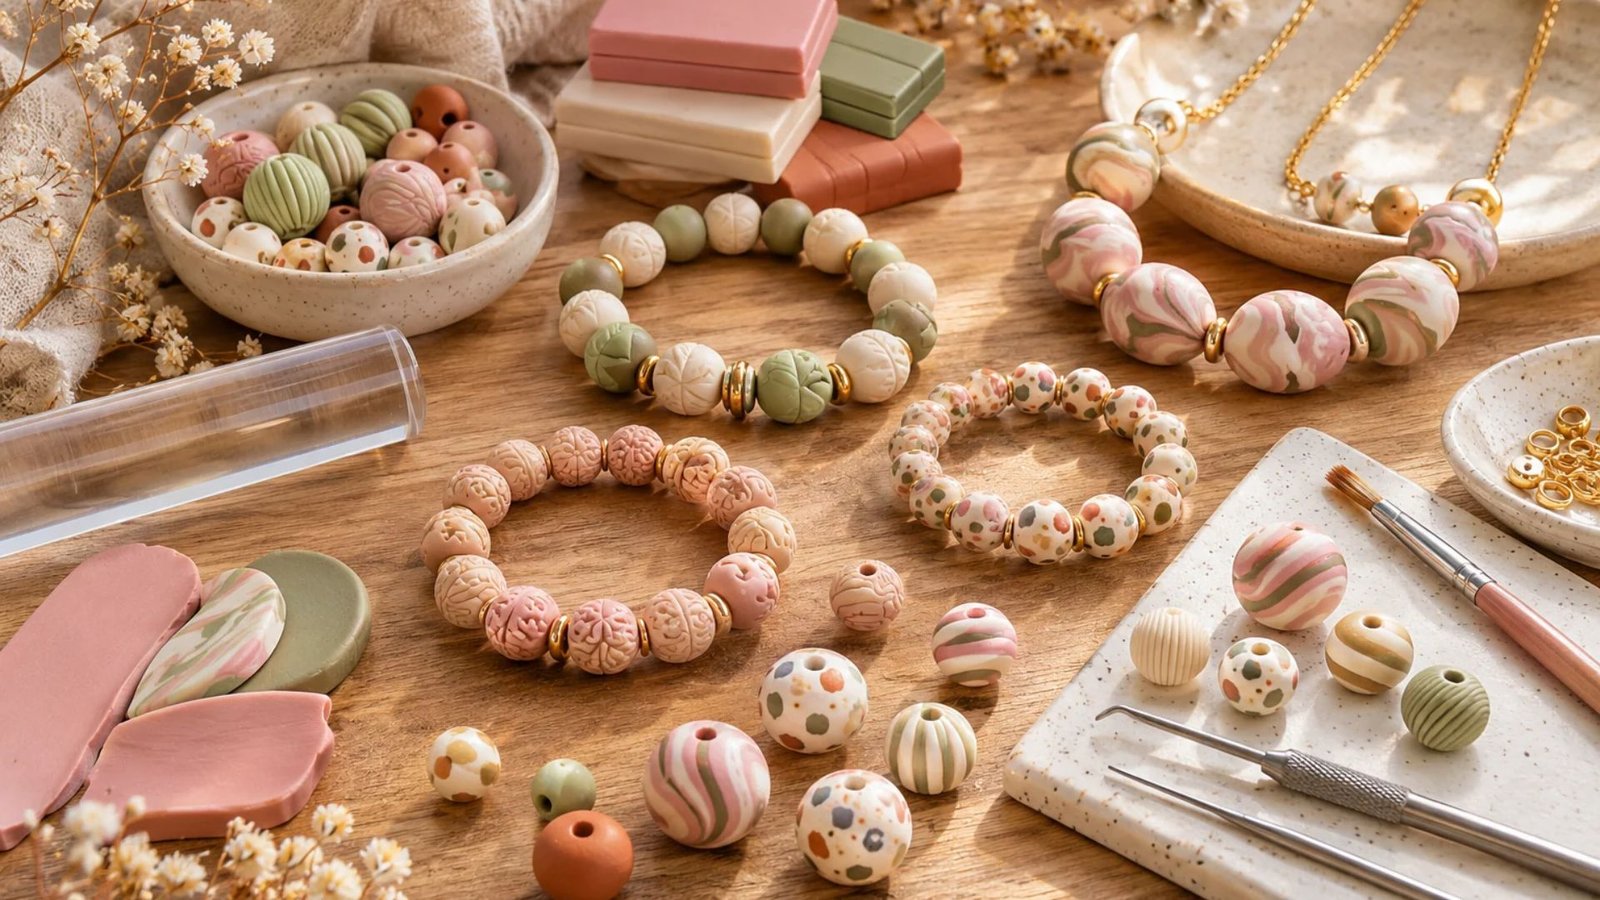
Creating your own polymer clay beads is such a lovely way to add a personal touch to handmade jewellery. I especially love how a few simple blocks of clay can be transformed into beautiful, colourful beads that look like something you would find in a little boutique.
Whether you are making delicate bracelets, statement necklaces, earrings, or thoughtful handmade gifts, polymer clay gives you so much room to experiment.
The secret is learning a few simple techniques that help your beads look smooth, evenly shaped, beautifully finished, and professionally made.
In this guide, I’ll walk you through everything you need to know, from choosing your clay and preparing your workspace to shaping, baking, sanding, and finishing your beads. You don’t need expensive equipment or previous jewellery-making experience to get lovely results.
What You Will Need to Make Polymer Clay Beads
One of the things I love about making polymer clay beads is that you don’t need a huge collection of supplies to get started. Most of the materials are affordable, and you can use the same tools for several different jewellery projects.
Here is everything I recommend having ready before you begin.
| Supplies | What they are used for |
|---|---|
| Polymer clay | The main material for making your beads |
| Acrylic clay roller | Rolling clay into smooth, even sheets |
| Clay conditioning machine | Softening and preparing clay |
| Craft blade | Cutting clay into equal portions |
| Bead piercing tool | Making holes for threading |
| Toothpick or skewer | An alternative for piercing beads |
| Ruler | Measuring consistent bead sizes |
| Ceramic tile | Providing a smooth working surface |
| Baking tray | Holding beads during baking |
| Oven thermometer | Checking the actual oven temperature |
| Fine sandpaper | Smoothing rough edges after baking |
| Polymer clay glaze | Adding a glossy or satin finish when desired |
| Jewellery findings | Turning finished beads into jewellery |
A little tip: You don’t need to purchase everything immediately. An acrylic roller, a needle tool, a smooth work surface, and a few colours of polymer clay are enough to make your first collection.
Choosing the Best Polymer Clay for Bead Making

The type of polymer clay you choose can make a difference in how easy your beads are to shape and how well they hold up after baking.
For jewellery-making projects, look for a polymer clay that is designed to produce durable finished pieces. Some clays are softer and easier to manipulate, while others are firmer and better suited to detailed patterns.
Here are a few options worth considering:
- Sculpey Premo: A versatile option for jewellery, detailed designs, and colourful beads.
- Sculpey Soufflé: A lightweight clay that works beautifully for decorative jewellery and patterned beads.
- FIMO Soft: A beginner-friendly option that is relatively easy to condition and shape.
- FIMO Professional: A firmer option for more controlled shaping and intricate designs.
I would recommend starting with three or four complementary colours rather than purchasing lots of different shades. Cream, blush pink, terracotta, and sage green make a beautiful combination for a soft, feminine jewellery collection.
If you are working with several colours, clean your hands and tools between colours to prevent darker pigments from transferring onto lighter clay.
How to Make Polymer Clay Beads That Look Professional
Now for the fun part! Making professional-looking beads is all about taking your time with preparation, shaping, and finishing. Follow these steps carefully, especially if this is your first time working with polymer clay.
Step 1: Prepare Your Workspace
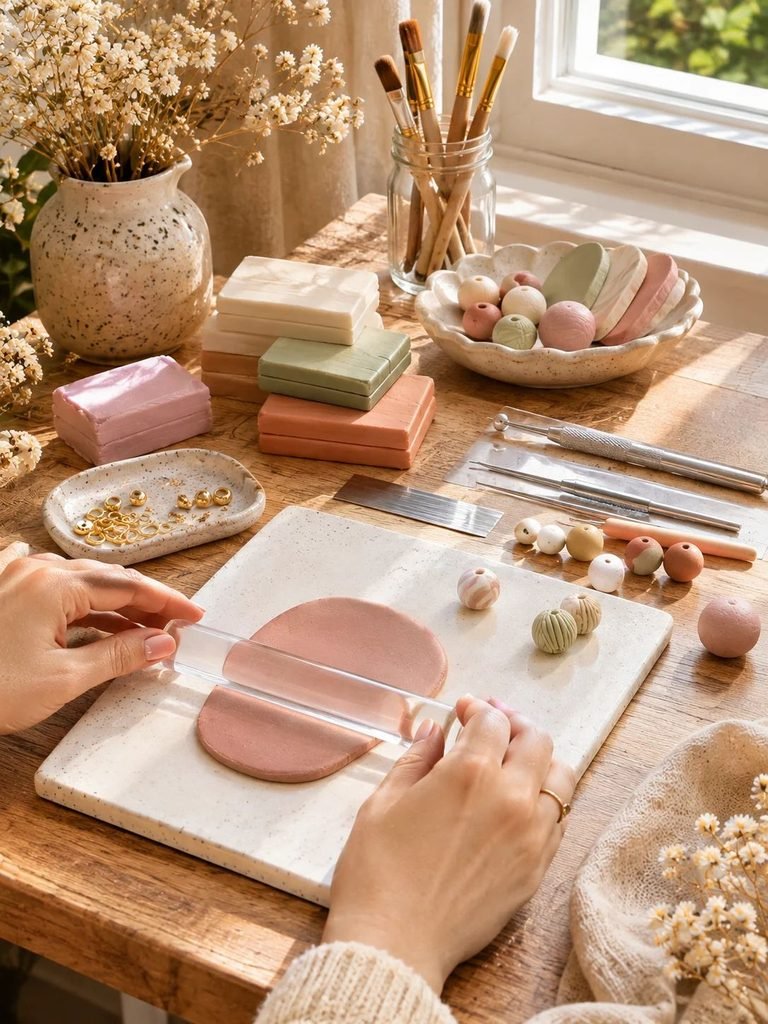
Start by choosing a clean, flat surface where you can comfortably work with your clay.
Polymer clay can pick up tiny pieces of dust, hair, fabric fibres, and other debris, which can become very noticeable once you start shaping your beads.
I recommend using a smooth ceramic tile, glass surface, or another suitable non-porous work surface. Make sure your hands are clean and dry before handling the clay.
Arrange your tools nearby so you don’t have to keep stopping halfway through the process.
It is also helpful to work with lighter colours first, followed by darker colours. This reduces the chance of accidentally transferring darker pigments onto your cream, white, or pastel beads.
Read DIY Clay Lighters: How to Make Cute and Creative Clay Lighter Covers
Step 2: Condition Your Polymer Clay
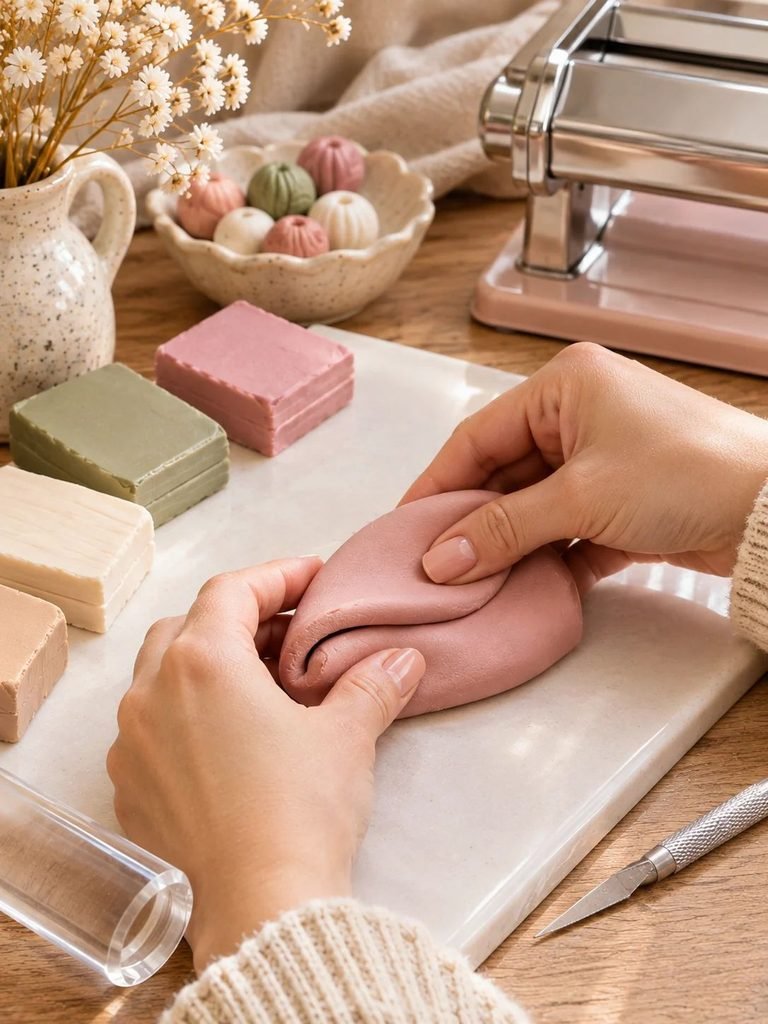
Conditioning is one of the most important steps in making beautiful polymer clay beads.
Fresh polymer clay can sometimes feel stiff, crumbly, or difficult to manipulate. Conditioning helps make it softer, more flexible, and easier to shape.
To condition your clay:
- Cut off a manageable piece from your clay block.
- Knead it gently between your fingers and palms.
- Roll it into a short sausage shape.
- Fold it in half and repeat the process.
- Continue kneading until the clay feels smooth, flexible, and easy to work with.
If you have a clay conditioning machine, you can use it to make the process quicker. Feed the clay through the rollers, fold it, and repeat until it becomes workable.
Avoid adding too much oil or other softening products without checking that they are compatible with your clay.
Proper conditioning helps reduce problems such as cracking during shaping and contributes to a stronger finished piece. Sculpey+1
Read DIY Clay Paintbrush Holder: How to Make a Beautiful Handmade Ceramic-Style Brush Organizer
Step 3: Choose Your Bead Shapes and Sizes
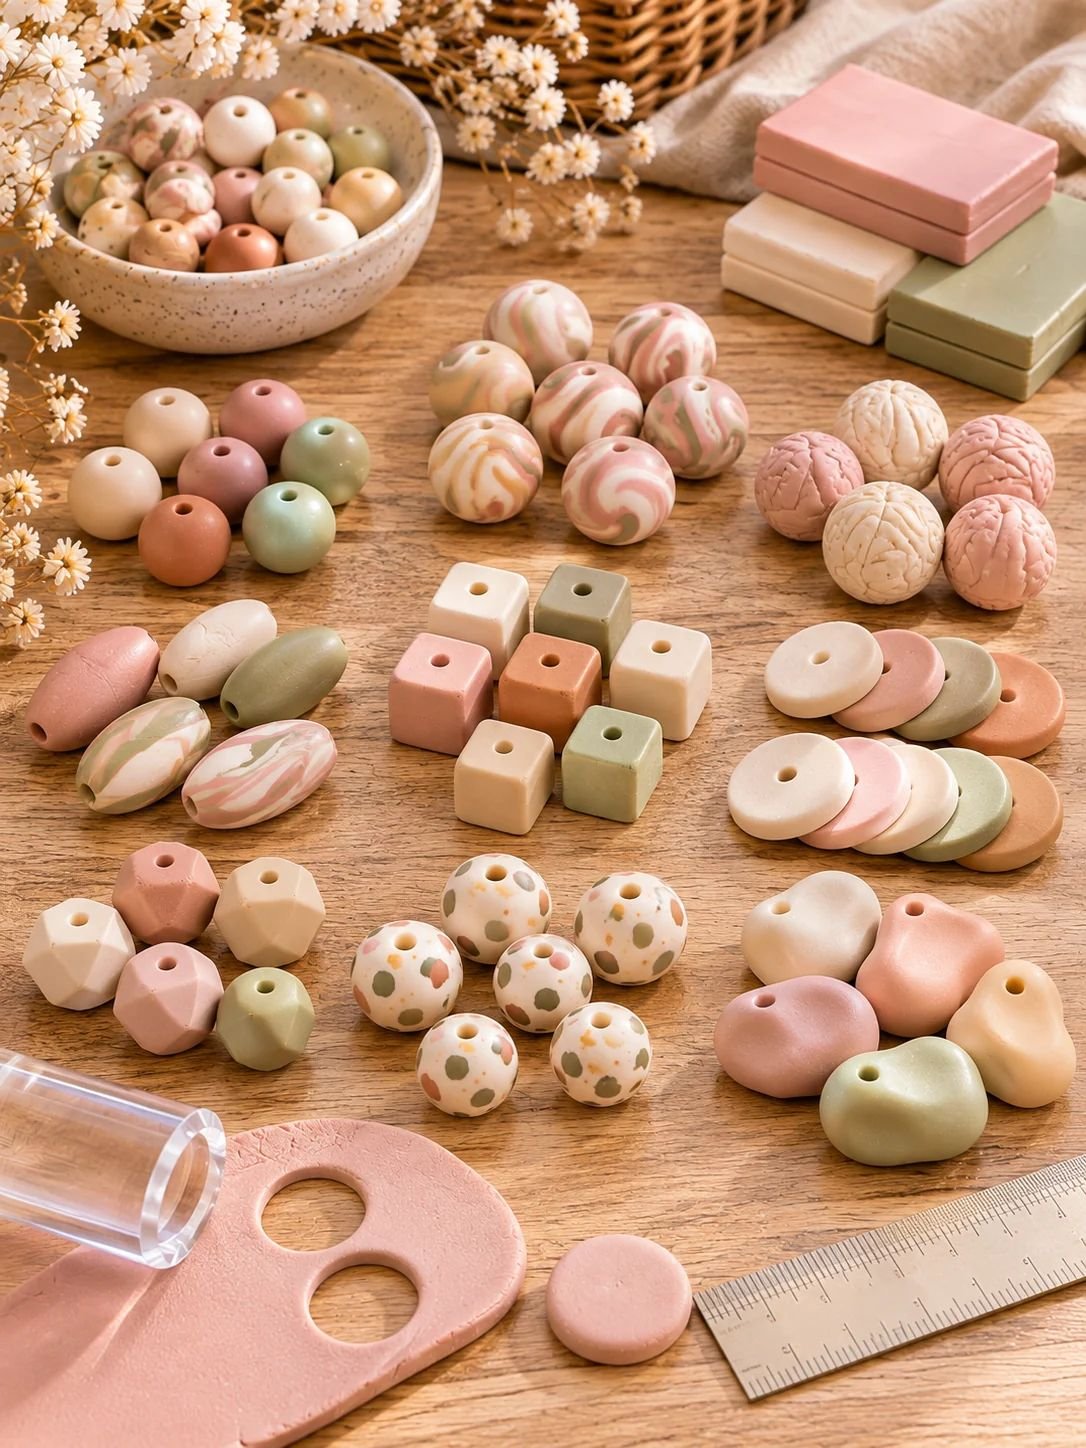
Before shaping your beads, decide what kind of jewellery you want to make.
You can create several different bead shapes using polymer clay, and each one gives your finished jewellery a slightly different appearance.
Some lovely options include:
- Round beads: Classic, versatile, and perfect for bracelets and necklaces.
- Oval beads: Beautiful for elegant jewellery designs.
- Cube beads: Give jewellery a modern, geometric appearance.
- Flat disc beads: Perfect for colourful, layered bracelets.
- Irregular beads: Create a relaxed handmade, organic look.
For a professional finish, try to keep beads within each collection consistent in size. You can use a ruler or small measuring guide to help.
If you are making a bracelet, for example, having beads that are approximately the same diameter will make the finished piece look much more balanced.
Step 4: Shape Your Polymer Clay Beads
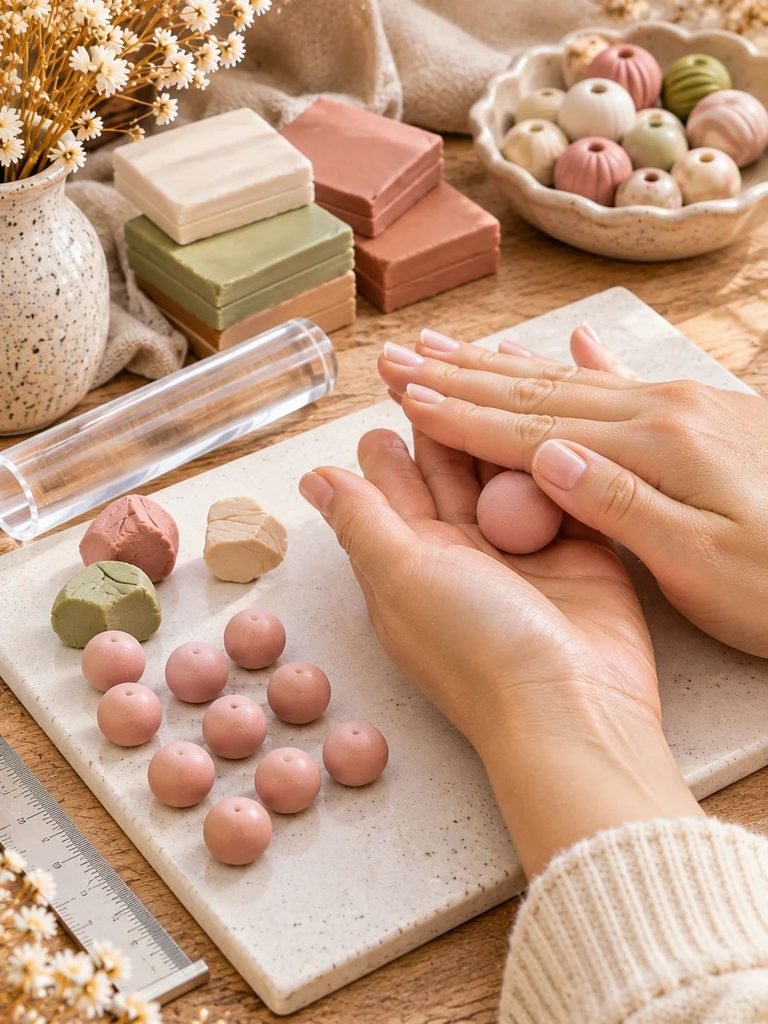
Once your clay is conditioned, you can begin shaping your beads.
For simple round beads, follow these steps:
- Cut your conditioned clay into several small, equal-sized pieces.
- Roll each piece gently between your palms.
- Use light, even pressure to form a smooth ball.
- Place each finished ball on your work surface.
- Compare the sizes and adjust any beads that look noticeably different.
Try not to press too hard while rolling. Excessive pressure can create flat spots and uneven shapes.
For an even more professional result, make a small batch of beads at a time instead of creating them individually throughout the day. This makes it easier to maintain a consistent size and appearance.
My favourite tip: If you notice fingerprints appearing on your beads, smooth the surface gently with a clean fingertip or an appropriate soft tool before making the holes.
Read How to Make Air-Dry Clay Waterproof: Easy Ways to Protect Your Clay Projects
Step 5: Create Beautiful Colour Combinations
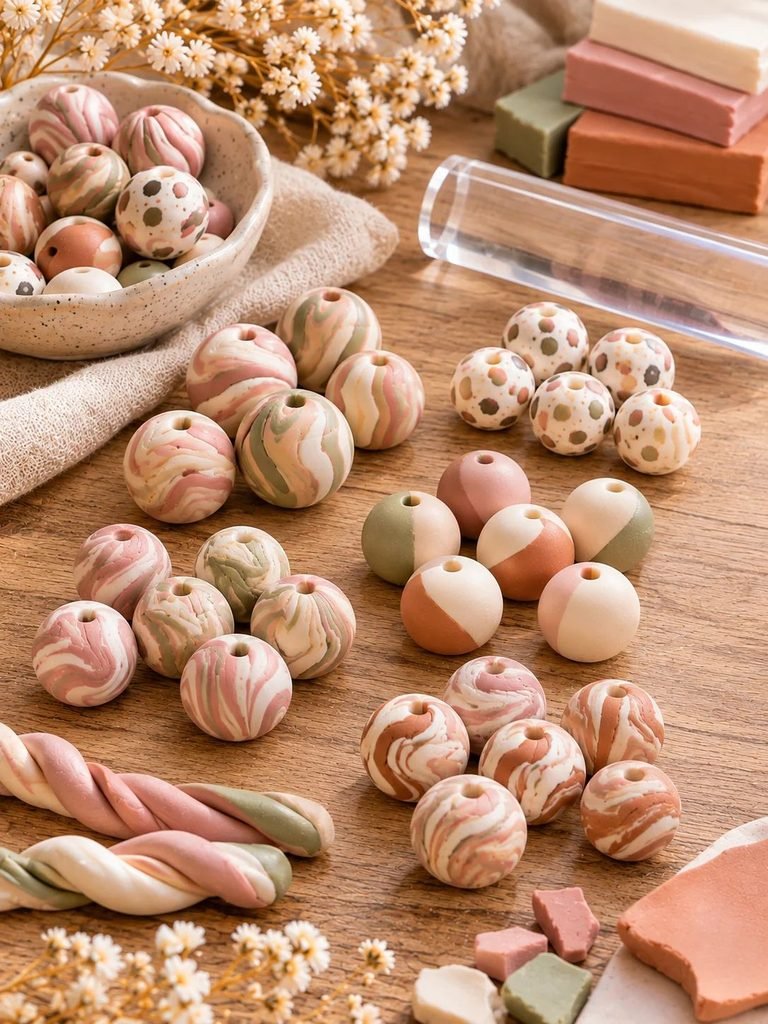
This is where you can really let your creativity shine.
Instead of using just one colour, experiment with combining two or three complementary shades to create beads that look more decorative and unique.
Here are three simple techniques to try.
Marbled beads
Choose two or three colours and condition each separately. Roll them into thin strands, gently twist the strands together, and fold them a few times.
Cut small portions from the mixture and roll them into beads.
Avoid overmixing the colours. You want to see the individual shades rather than blending everything into one solid colour.
Speckled beads
Choose a base colour, such as cream or beige. Add tiny pieces of contrasting clay and gently press them into the surface.
Roll carefully to secure the little pieces without completely blending them into the base.
This creates a lovely handmade terrazzo effect.
Colour-blocked beads
Take two different colours and shape them into small sections. Press them together gently to create a two-tone bead.
You can use contrasting colours or subtle combinations such as ivory and blush pink.
These designs are particularly pretty for modern bracelets and statement necklaces.
Step 6: Make the Holes for Threading

Every jewellery bead needs a hole so that you can thread it onto elastic, jewellery wire, or cord.
This step requires a little patience because making the holes incorrectly can distort your carefully shaped beads.
Here is how to do it:
- Place your bead on a clean, smooth surface.
- Hold it gently between your fingers.
- Position a bead-piercing needle or thin skewer in the centre.
- Slowly twist the tool through the bead.
- Continue until it comes out through the opposite side.
- Carefully remove the tool without squeezing the bead.
- Check that the hole is large enough for your chosen jewellery cord.
For round beads, try to make the holes pass through the centre. This helps them sit evenly when threaded.
If the clay feels too soft to pierce without distorting, chill the shaped beads briefly before making the holes. Keep them supported while handling them.
Another option is to drill the holes after baking and cooling, using a suitable fine drill bit.
Step 7: Bake Your Polymer Clay Beads
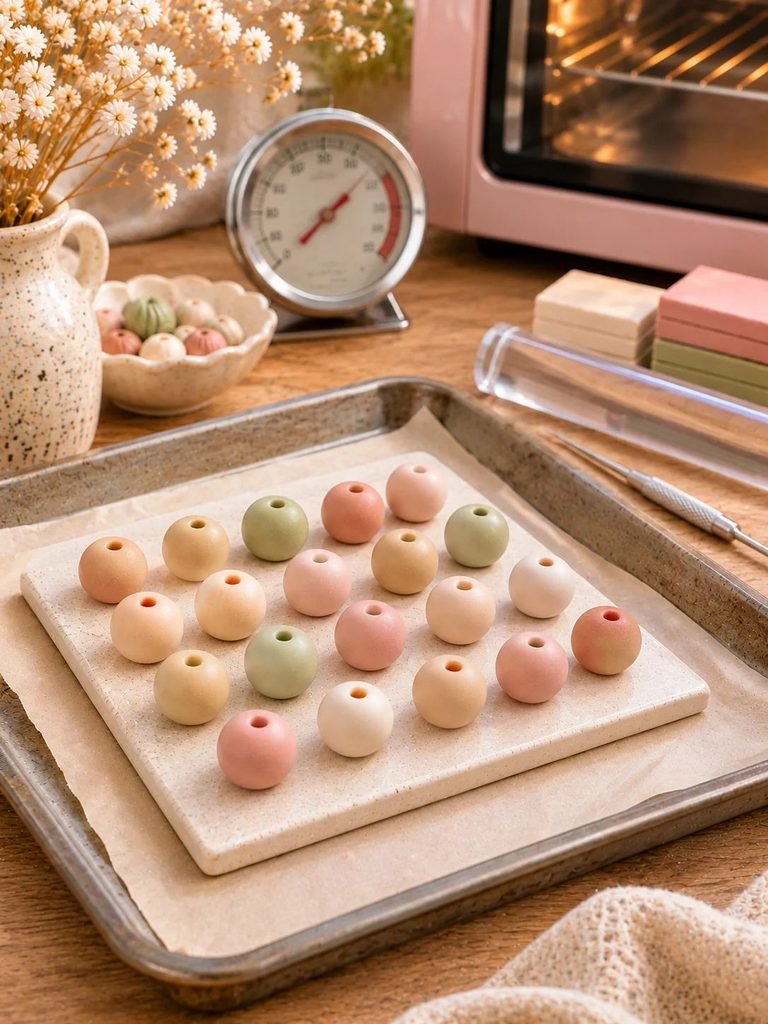
Baking is the stage that transforms your soft polymer clay into durable beads.
However, this is also where you need to be especially careful. Different polymer clay brands and product ranges have different baking requirements, so always check the instructions on your specific packaging.
Here is what to do:
- Preheat your oven to the temperature recommended by the manufacturer.
- Check the temperature using an oven thermometer.
- Arrange your beads on an appropriate oven-safe surface.
- Make sure the beads are not touching one another.
- Bake for the recommended time according to the clay type and thickness.
- Carefully remove the tray once baking is complete.
- Allow the beads to cool completely before handling them further.
Do not guess the baking temperature or shorten the recommended baking time. Underbaked polymer clay may be weaker than properly cured clay.
Also, avoid placing polymer clay in a microwave. Use a conventional oven or another manufacturer-approved baking appliance.
For additional safety, maintain good ventilation, avoid overheating the clay, and use baking equipment dedicated to crafting rather than food preparation where possible. Sculpey Clay+1
Step 8: Sand and Smooth Your Beads
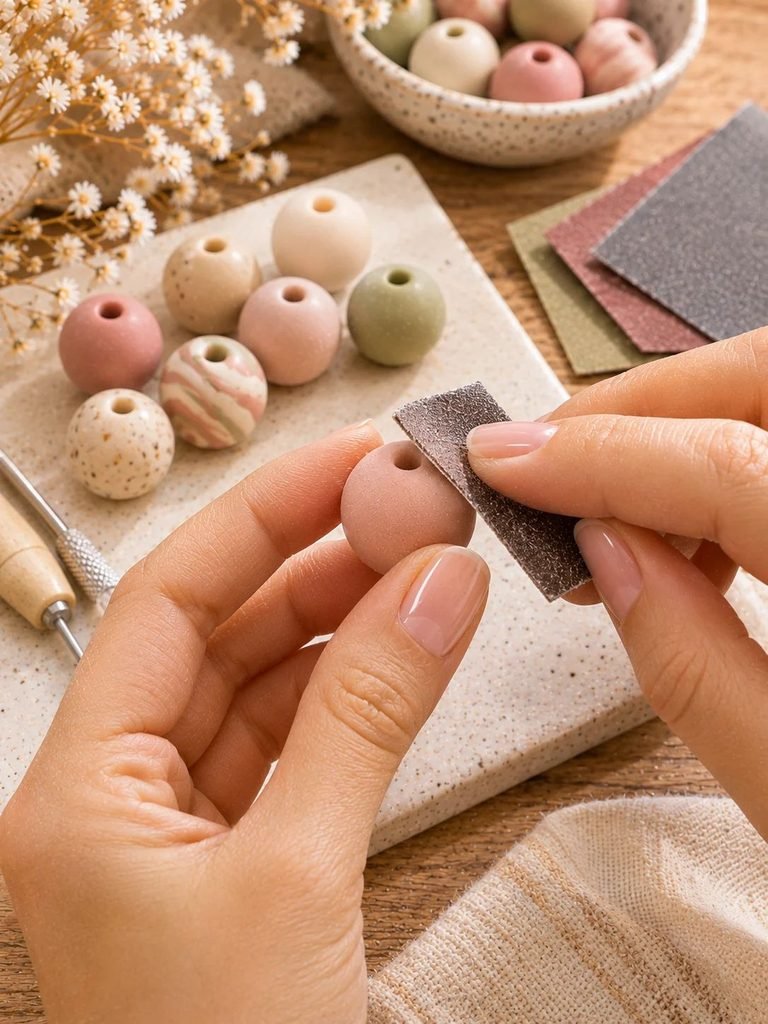
If you want your beads to look professionally made, don’t skip the finishing stage.
Once the beads have cooled completely, inspect each one for rough edges, small imperfections, or uneven surfaces.
You can use fine wet/dry sandpaper suitable for polymer clay to smooth the surface.
Start with a suitable finer grade for light imperfections and gradually move to finer grits if you want a smoother finish.
A few things to remember:
- Use gentle pressure rather than aggressively rubbing the surface.
- Pay attention to the edges around the bead holes.
- Avoid sanding through decorative patterns or surface details.
- Use wet sanding where appropriate to minimise airborne dust.
- Clean the beads afterwards with a soft, damp, lint-free cloth.
Wear suitable dust protection if your finishing process could create dust, and never sand uncured clay.
The goal is to create a smooth surface that feels pleasant to touch and looks beautifully finished.
Step 9: Add a Professional Finish

You can leave polymer clay beads with their natural finish, or add a compatible coating depending on the look you want.
Some lovely finishing options include:
Gloss finish: A compatible gloss glaze creates a shiny surface that can make colours and decorative details stand out.
Satin finish: This gives your beads a soft sheen without making them look overly shiny.
Matte finish: Perfect for minimalist jewellery and a more natural, understated appearance.
One important thing to remember is that polymer clay does not automatically need a sealant to be durable. A coating is mainly an aesthetic choice or a way to protect compatible surface decorations.
Always choose a finish specifically designed for polymer clay and follow its application instructions. Avoid using random household varnishes, as some coatings can become sticky or react poorly with the clay. Sculpey+1
7 Beautiful Polymer Clay Bead Designs to Try
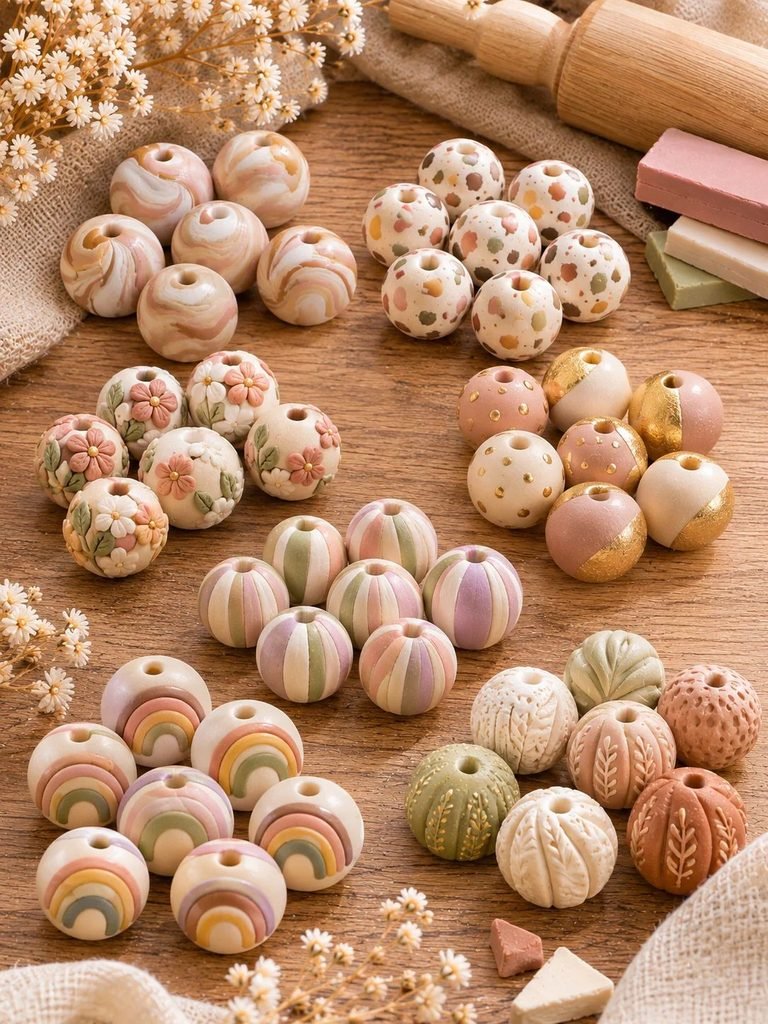
Once you are comfortable making basic beads, you can start experimenting with different styles.
Here are some pretty designs that would look lovely in a handmade jewellery collection.
- Neutral marble beads: Mix cream, beige, and white for an elegant stone-inspired appearance.
- Terrazzo beads: Add tiny colourful clay pieces to a neutral base for a playful decorative effect.
- Floral cane beads: Use patterned clay slices to create delicate floral designs.
- Gold-accent beads: Add small pieces of compatible metallic-effect clay for a touch of elegance.
- Striped beads: Combine contrasting colours to create simple, modern stripes.
- Pastel rainbow beads: Use soft pink, lavender, mint, and butter yellow for cheerful jewellery.
- Textured beads: Experiment with texture stamps and other suitable tools to create interesting surfaces.
You can make an entire jewellery collection using just a few of these techniques.
Tips for Making Polymer Clay Beads Look More Professional
A few small details can make a surprisingly big difference to the appearance of your finished beads.
Here are some of my favourite tips to keep in mind:
1. Keep your bead sizes consistent. If you are making a matching bracelet or necklace, try to keep your beads as close to the same size as possible.
2. Work on a clean surface. Dust, fibres, and fingerprints can make even beautifully coloured beads look untidy.
3. Don’t rush the conditioning process. Properly conditioned clay is easier to shape and helps you achieve a smoother finish.
4. Avoid making holes too close to the edges. This can weaken the bead and increase the chance of cracking.
5. Use complementary colours. Choosing a coordinated colour palette gives your jewellery a more polished, boutique-style appearance.
6. Allow your beads to cool completely. Avoid handling or finishing them while they are still hot.
7. Pay attention to the little details. Smooth edges, centred holes, and consistent finishes are what make handmade jewellery look thoughtfully made.
Common Polymer Clay Bead Making Mistakes to Avoid
Even if you follow every step carefully, you might encounter a few little problems along the way. Thankfully, most are easy to prevent.
| Common mistake | How to avoid it |
|---|---|
| Cracked beads | Condition your clay properly before shaping. |
| Uneven bead sizes | Measure and cut equal portions of clay. |
| Fingerprint marks | Handle the clay gently and smooth surfaces before baking. |
| Crooked holes | Pierce slowly through the centre of each bead. |
| Flat spots | Use an appropriate bead-baking support. |
| Burnt or discoloured clay | Monitor your oven temperature carefully. |
| Rough edges | Sand carefully after baking and cooling. |
| Sticky glaze | Use a compatible polymer clay finish and follow its instructions. |
| Weak beads | Follow the manufacturer’s curing instructions carefully. |
One mistake I would particularly encourage beginners to avoid is rushing the baking stage. Beautifully shaped beads can still turn out disappointing if they aren’t properly cured.
How to Store Your Finished Polymer Clay Beads
After putting so much effort into making your beads, you will want to keep them looking beautiful until you are ready to turn them into jewellery.
Store finished beads in a clean, dry container, away from excessive heat and direct sunlight.
I recommend using small compartment organisers so that different colours and designs stay separated.
If you have made delicate decorative beads, consider wrapping them individually in soft tissue paper to prevent them from rubbing against one another.
For unfinished polymer clay, use suitable airtight containers or bags made from compatible materials, such as polypropylene plastic. Keep uncured clay away from materials that may react with its plasticisers.
How to Turn Your Polymer Clay Beads into Jewellery
Once your beads are finished, you can use them to create so many lovely accessories.
Here are a few ideas to inspire your next project.
Polymer clay bead bracelets
Combine round, marbled, and speckled beads with elastic jewellery cord to create beautiful everyday bracelets. You can also add a few metallic spacer beads for extra detail.
Handmade polymer clay necklaces
Thread your beads onto jewellery wire or a suitable necklace cord. Experiment with different bead sizes to create a balanced statement necklace.
Polymer clay earrings
Use smaller beads with earring findings to make delicate drop earrings. You can combine your clay beads with metal charms for an interesting mixed-material design.
Personalised jewellery gifts
Create matching sets of bracelets, necklaces, and earrings using the same colour palette. These make thoughtful handmade gifts for birthdays, Christmas, Mother’s Day, and other special occasions.
Frequently Asked Questions
1. Is polymer clay good for making beads?
Yes! Polymer clay is an excellent material for making jewellery beads because it comes in many colours, is easy to shape, and can be used to create different sizes, patterns, and textures. Once properly baked according to the manufacturer’s instructions, it becomes a durable material for handmade jewellery.
2. Do polymer clay beads need to be sealed?
No, sealing is not essential. Properly cured polymer clay is already durable, so you can leave your beads with their natural finish. However, you can apply a compatible gloss, satin, or matte glaze if you want to change their appearance or protect certain surface decorations.
3. Why are my polymer clay beads cracking?
Cracking can happen for several reasons, including poorly conditioned clay, unsuitable shaping techniques, or incorrect baking. Make sure your clay is properly conditioned and follow the baking instructions for your specific product.
4. How do I make perfectly round polymer clay beads?
Start with equal-sized pieces of conditioned clay. Roll each piece between your palms using gentle, even pressure. Rotate the clay as you work to prevent flat spots and uneven edges.
You can also use a bead roller or bead-making tool if you want more consistent results.
5. Can I make polymer clay beads without a pasta machine?
Absolutely! A pasta machine is helpful, but it isn’t essential. You can condition your clay by hand and use an acrylic roller to flatten it when needed.
6. How long should polymer clay beads bake?
Baking time depends on the brand, product range, and thickness of your beads. Always follow the instructions on the clay packaging rather than relying on a general baking time. An oven thermometer is also helpful for checking temperature accuracy.
7. Can I paint polymer clay beads?
Yes. You can add compatible acrylic paint to fully baked and cooled polymer clay beads. Allow the paint to dry completely before applying a compatible protective finish if needed.
8. Are polymer clay beads waterproof?
Properly cured polymer clay is generally water-resistant and suitable for everyday jewellery. However, this does not mean that every added paint, coating, or jewellery component is waterproof. It is best to avoid prolonged exposure to water, perfumes, and harsh chemicals.
Final Thoughts
Making polymer clay beads that look professional is really about patience, practice, and paying attention to the little details. From conditioning your clay properly to creating even shapes and taking your time with the finishing process, every stage contributes to the final result.
I love how versatile this craft can be because you can start with simple round beads and gradually experiment with marbled patterns, delicate colour combinations, and more detailed designs.
You don’t need expensive equipment or years of experience to create something beautiful. Start with a few favourite colours, practise the basic techniques, and enjoy discovering your own style.
Before long, you could have a lovely collection of handmade beads ready to turn into bracelets, necklaces, earrings, or thoughtful gifts. Happy crafting!