No-Sew Sock Snowman DIY | Easy 10-Minute Christmas Craft for Holiday Decor
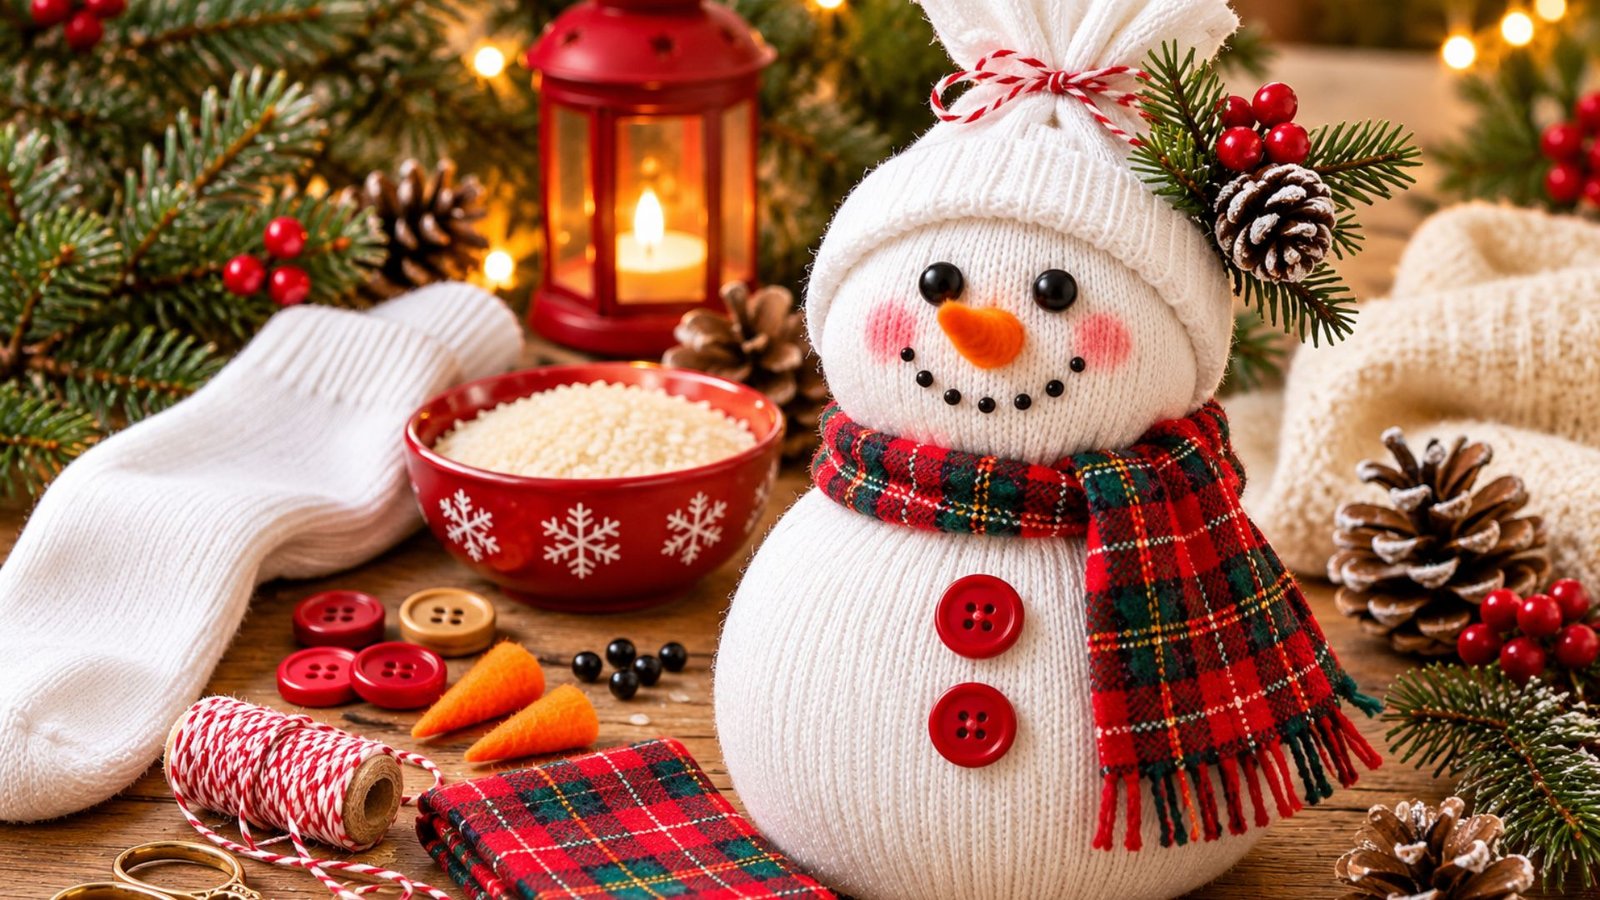
One of my favourite things about Christmas is finding simple ways to make the home feel extra cosy and festive without spending a fortune on decorations.
This adorable no-sew sock snowman is one of those little projects that makes me smile every time! Made with an ordinary white sock, a little rice, and a few simple craft supplies, you can create the sweetest snowman in just 10 minutes.
I love how easy it is to personalise with colourful scarves, tiny buttons, and festive decorations. It’s a lovely afternoon craft for the whole family to enjoy!
No-Sew Sock Snowman DIY: A Simple Christmas Craft
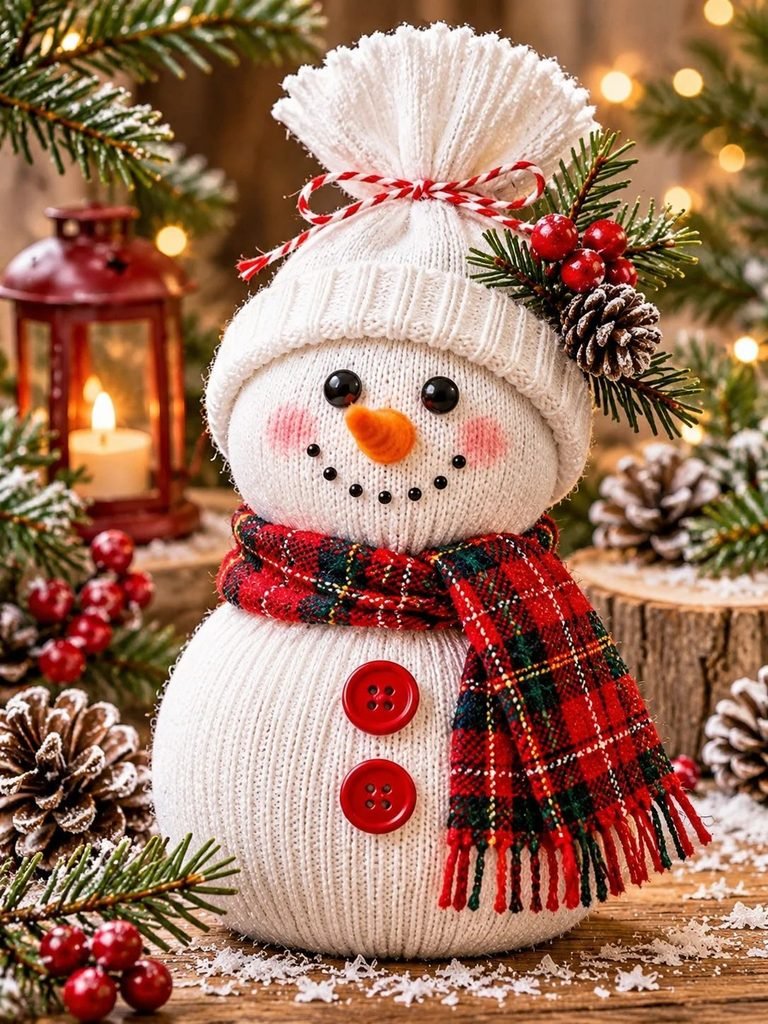
If you love handmade Christmas decorations but aren’t particularly interested in complicated sewing projects, this no-sew sock snowman is such a lovely craft to try.
The idea is wonderfully simple. You take a white sock, fill it with uncooked rice, and use elastic bands or string to create two rounded sections that form the snowman’s body and head. A little shaping transforms the ordinary sock into an adorable winter character.
What makes this project especially charming is how much personality you can add with just a few decorations.
For this tutorial, we’re creating a classic white sock snowman inspired by the image, complete with:
- A fluffy white sock hat with a gathered top.
- A sweet orange carrot-shaped nose.
- Small black eyes and a dotted smile.
- Soft pink rosy cheeks.
- Two red buttons down the front.
- A cosy red and green plaid scarf.
- A little festive greenery, berries, and pinecones for decoration.
The finished snowman looks beautiful displayed on a Christmas mantel, bookshelf, coffee table, or as part of a handmade holiday centrepiece.
And the best part? You don’t need a sewing machine, knitting skills, or expensive materials.
Materials You’ll Need

Before getting started, gather everything you need. Most of these supplies are inexpensive, and you may already have several of them tucked away in your craft cupboard.
| Material | Purpose |
|---|---|
| 1 clean white sock | Creates the snowman’s body |
| Uncooked rice | Fills and weighs down the snowman |
| 3–4 small elastic bands | Shapes the head and body |
| Red and green plaid fabric | Makes the winter scarf |
| White sock fabric or felt | Creates the hat |
| 2 red buttons | Decorates the body |
| Small black beads or felt | Creates the eyes and smile |
| Orange felt | Makes the carrot nose |
| Craft glue or fabric glue | Attaches decorations |
| Red and white baker’s twine | Ties the hat |
| Small faux greenery and berries | Adds festive decoration |
| Scissors | Cuts fabric and trims materials |
A few optional supplies:
- Small white pom-poms.
- Miniature pinecones.
- Pink blush or pink felt for rosy cheeks.
- Decorative ribbon.
- Small wooden beads.
- A tiny piece of patterned fabric for a different scarf design.
My tip: Choose a soft, white cotton or ribbed sock. A sock with a little stretch works particularly well because it accommodates the rice and creates a lovely rounded shape.
How to Make a No-Sew Sock Snowman in 10 Minutes
This project is beginner-friendly, and you don’t need any special crafting experience. Follow these simple steps to create your own adorable Christmas snowman.
Step 1: Prepare Your White Sock
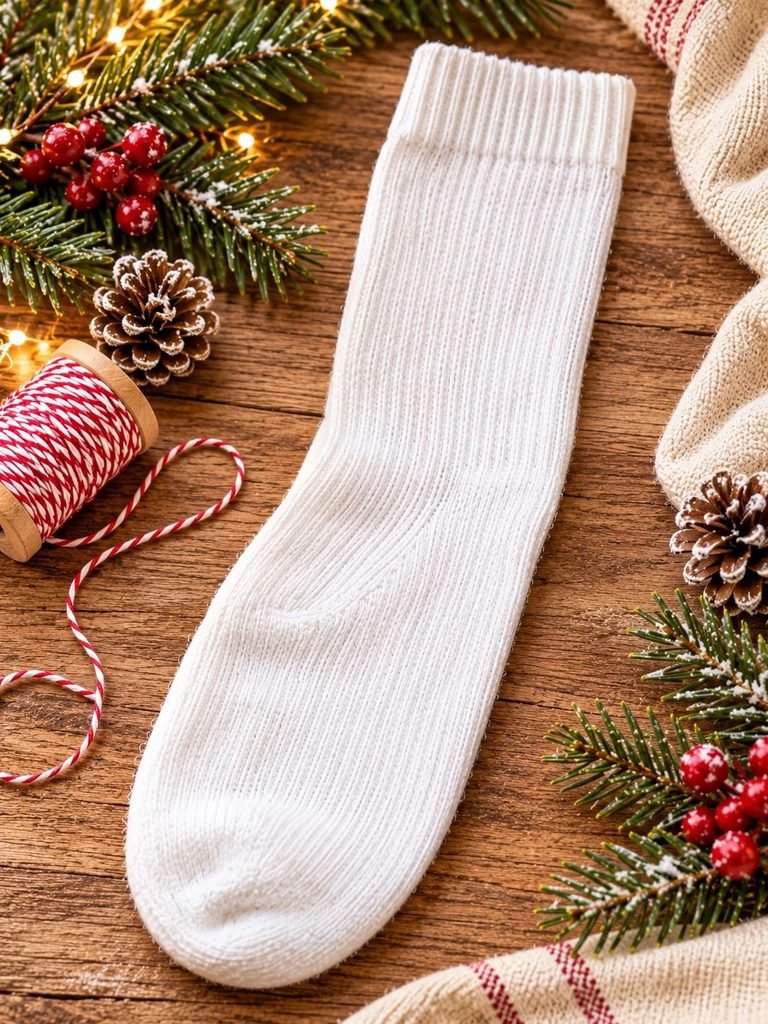
Start by choosing a clean white sock with a little stretch. A regular crew-length sock works beautifully because it provides enough fabric for both the snowman’s body and hat.
Lay the sock flat on your crafting surface and smooth out any wrinkles.
If your sock has a coloured logo or pattern, turn it inside out so the plain white side becomes visible.
Next, decide which part of the sock will become the snowman’s body. The closed toe will eventually form the bottom of the snowman, while the open cuff will be used to gather the top.
Make sure the sock is clean and completely dry before filling it.
Helpful tip: A thicker sock creates a fuller-looking snowman and helps hide the rice inside. Avoid socks with very loose stitching because the rice may escape through small gaps.
Read 15 DIY Christmas Ornament Ideas That Look Beautifully Handmade and Cozy
Step 2: Fill the Sock With Rice
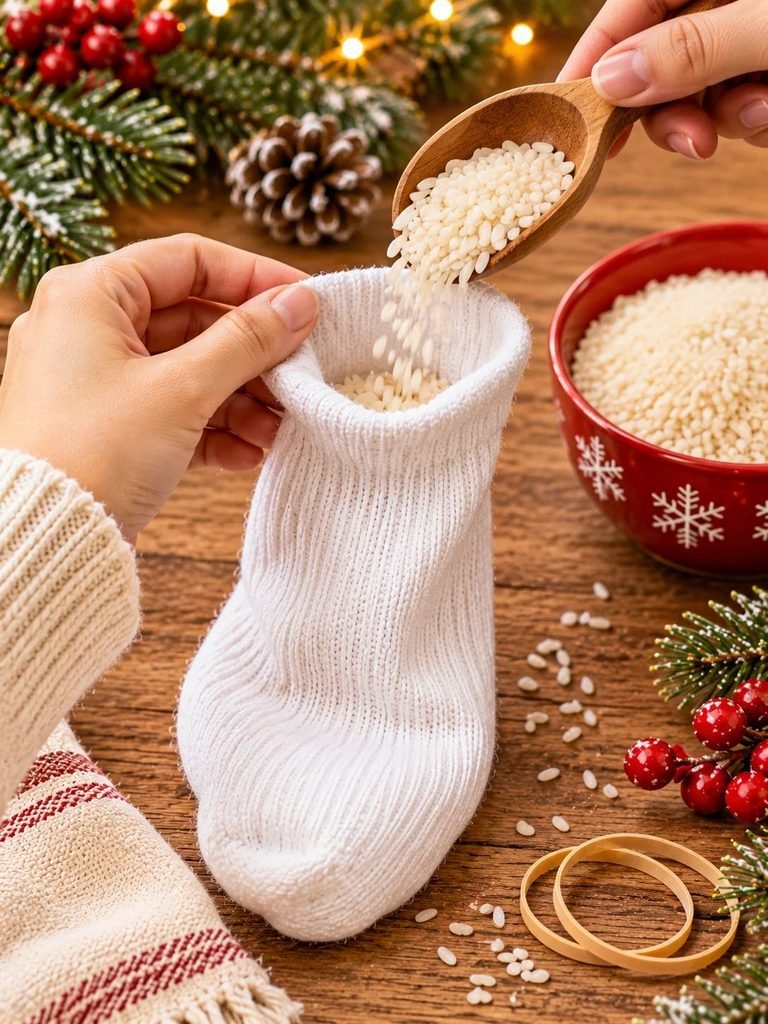
Now comes the fun part!
Open the sock and begin adding uncooked rice. You can use a small funnel, a spoon, or carefully pour the rice directly from a bowl.
Fill the sock gradually, gently shaking it as you go. This helps the rice settle evenly and prevents large empty spaces from forming.
Continue filling until you have a nice rounded shape with enough room at the top to tie the sock securely.
Don’t pack the rice too tightly. You want the snowman to feel firm enough to stand upright but still have enough flexibility to shape the head and body.
Once you’ve added enough rice, hold the open end together and gently adjust the filling until the bottom forms a rounded base.
Helpful tip: Use a little extra rice towards the bottom. This creates a heavier base and makes your snowman more stable when displayed.
Read DIY Mini Acorn Fairy Houses: The Cutest Cottagecore Craft
Step 3: Tie the Top of the Sock
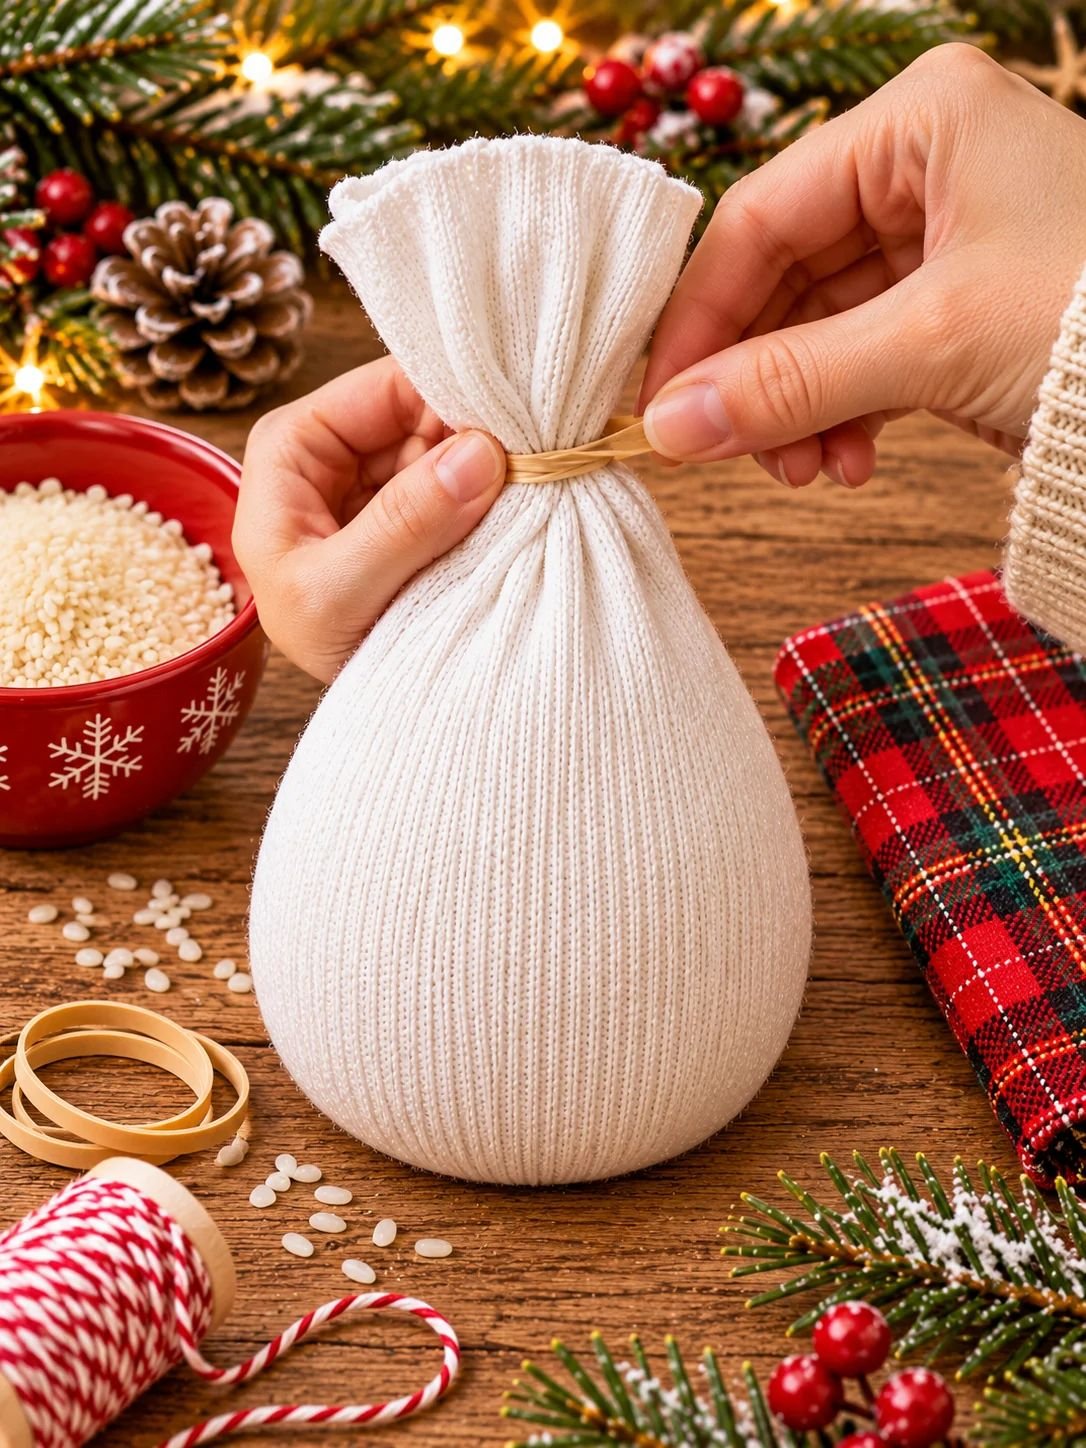
After filling the sock, gather the open end together and secure it with a strong elastic band or a piece of string.
Make sure the opening is tightly closed so that no rice can spill out.
You should now have one large rounded shape with a gathered section at the top.
Don’t worry if the gathered fabric looks a little untidy. We’ll cover most of this area when creating the snowman’s hat.
If you have extra sock fabric sticking out above the tie, leave it in place for now. It will help when we create the decorative hat.
Read 6 DIY Cottage Pen Holder Ideas to Make Your Desk Feel Cozy and Beautiful
Step 4: Shape the Snowman’s Head and Body

This is the step that transforms your filled sock into a proper little snowman!
Take another elastic band and wrap it around the upper portion of the rice-filled sock, approximately one-third of the way down from the gathered top.
Adjust the rice with your fingers until you have a smaller rounded head sitting above a larger rounded body.
The bottom section should be noticeably bigger than the head.
Gently move the rice around to make both sections smooth and rounded. You can lightly press the sides to create a more defined shape.
If your snowman looks slightly uneven, don’t worry. Simply redistribute the rice until you’re happy with the proportions.
My tip: Keep the head slightly smaller than the body. This creates the traditional snowman silhouette and gives your finished decoration a much sweeter appearance.
Step 5: Make the Snowman’s Hat
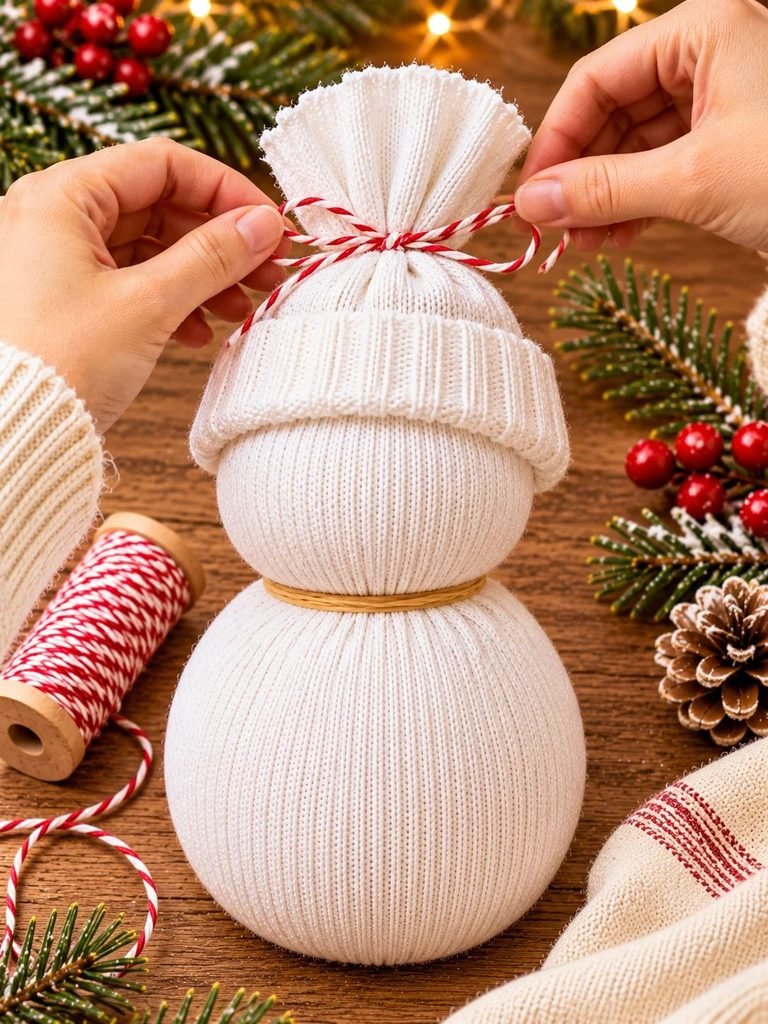
A little hat makes this snowman look extra adorable!
You can create the hat using the remaining white sock fabric.
Take another white sock or a suitable piece of stretchy white fabric and cut a section large enough to fit around the snowman’s head.
Fold the lower edge slightly to create a neat cuff. This gives the hat a cosy knitted appearance.
Place the hat over the top of the snowman’s head, making sure it covers the gathered opening.
Gather the fabric at the top and tie it securely with red and white baker’s twine.
Trim any excess fabric above the tie to create a fluffy little top.
For the look shown in the inspiration image, gently spread the gathered fabric into a soft fan shape rather than cutting it into a tiny pom-pom.
You can also add a small sprig of faux greenery, a few red berries, or a miniature pinecone to one side of the hat.
Helpful tip: Make sure the hat fits snugly without squeezing the snowman’s head out of shape.
Step 6: Add the Snowman’s Face
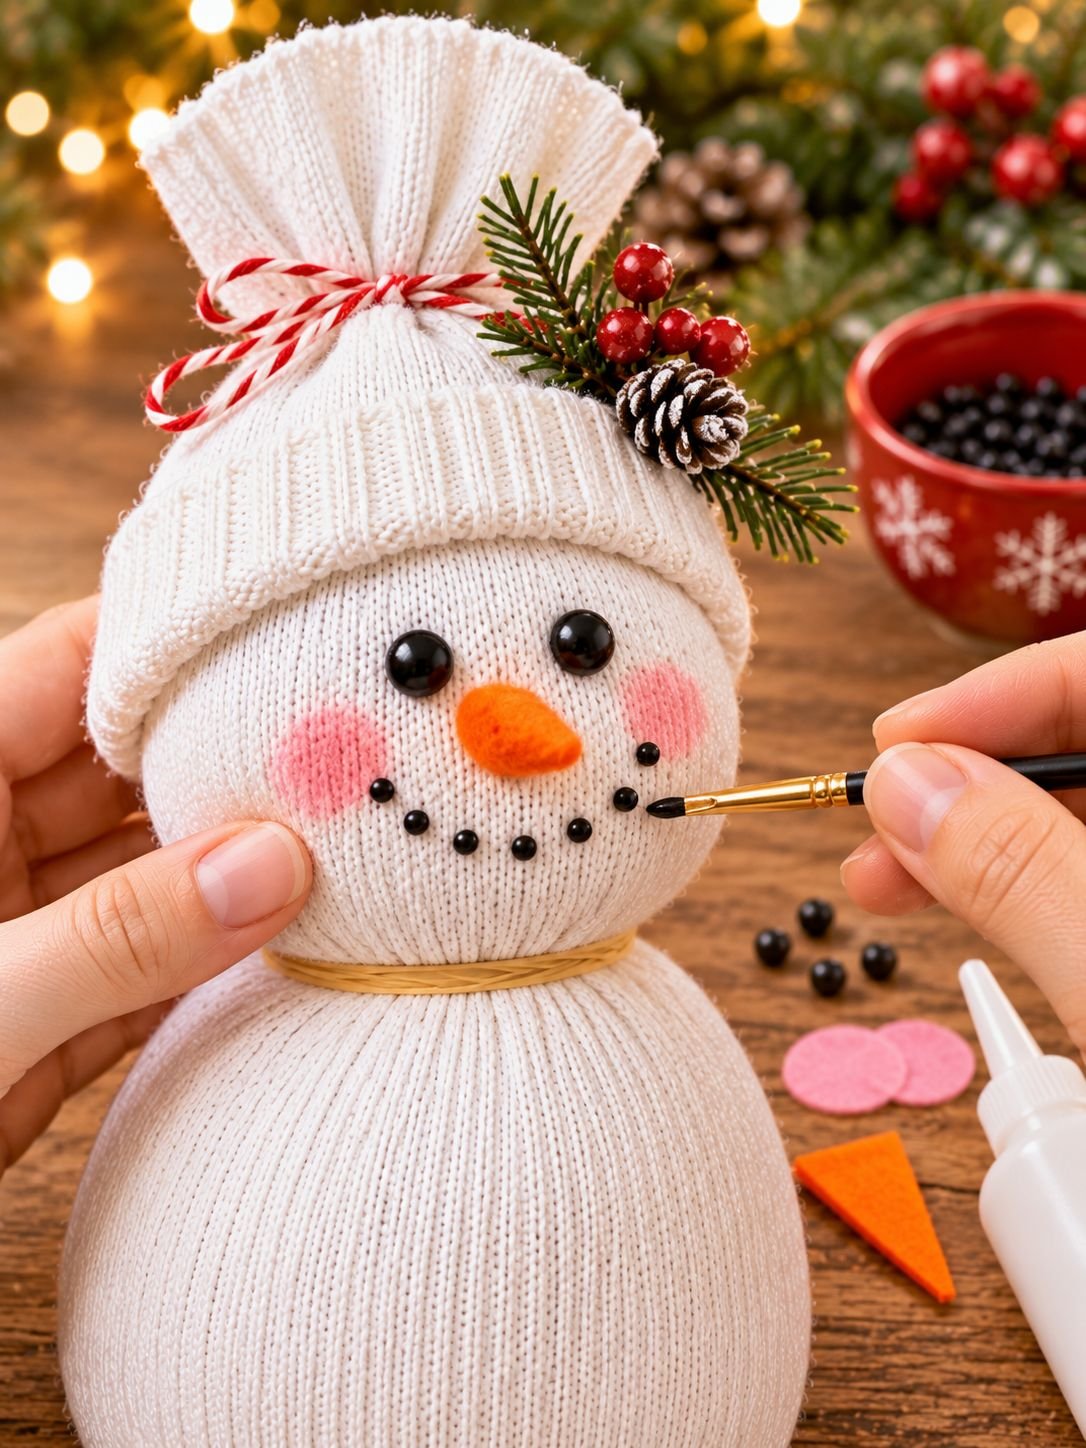
Now it’s time to give your little snowman some personality!
Start by deciding where you want the eyes, nose, and mouth to sit.
Attach two small black beads or black felt circles near the upper middle section of the head to create the eyes.
For the nose, cut a small triangle from orange felt. Roll or fold it slightly to give it a carrot-like appearance, then secure it between the eyes and mouth using fabric glue.
Next, create the smile using tiny black felt circles or small black craft beads.
Arrange them in a gentle curved line underneath the nose.
To finish the face, add two soft rosy cheeks using small circles of pink felt or a little blush applied carefully to the fabric.
The combination of black eyes, an orange nose, and rosy cheeks gives the snowman that traditional sweet winter character.
Important: If you’re making this craft with young children, use felt shapes and fabric glue instead of small beads or loose buttons. Small decorations can be choking hazards.
Step 7: Make a Cosy Christmas Scarf
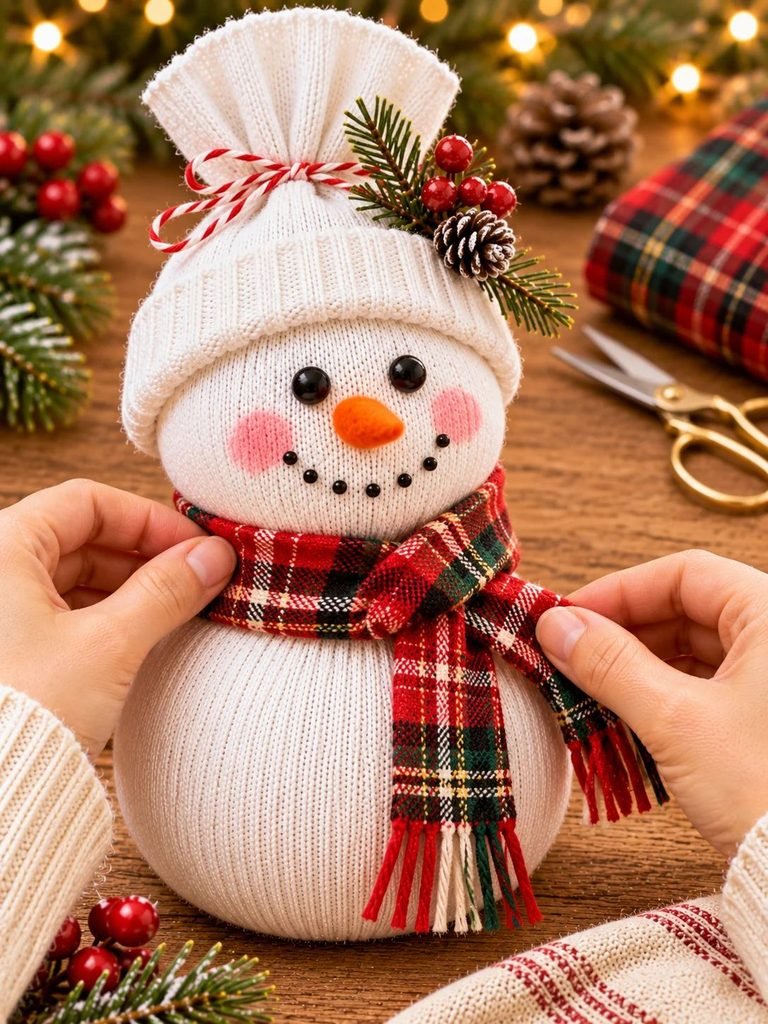
I think the scarf is one of the prettiest details of this project!
For the classic Christmas look, use red and green plaid fabric, just like the inspiration image.
Cut a long strip of fabric approximately 2–3 cm wide and long enough to wrap comfortably around the snowman’s neck.
You don’t need to sew the edges. If you like, carefully cut small fringes at both ends to create a traditional winter scarf.
Wrap the fabric around the narrow section between the head and body.
Cross the ends over each other and allow one end to hang down the front of the snowman.
You can secure the scarf with a small amount of fabric glue at the back if it keeps slipping.
For a softer appearance, use fleece, felt, or an old flannel shirt.
Other lovely colour combinations include:
- Cream and beige for a neutral farmhouse look.
- Red and white for a traditional Christmas theme.
- Sage green and ivory for a cottage-inspired decoration.
- Blush pink and cream for a softer feminine style.
Step 8: Add Buttons and Final Decorations
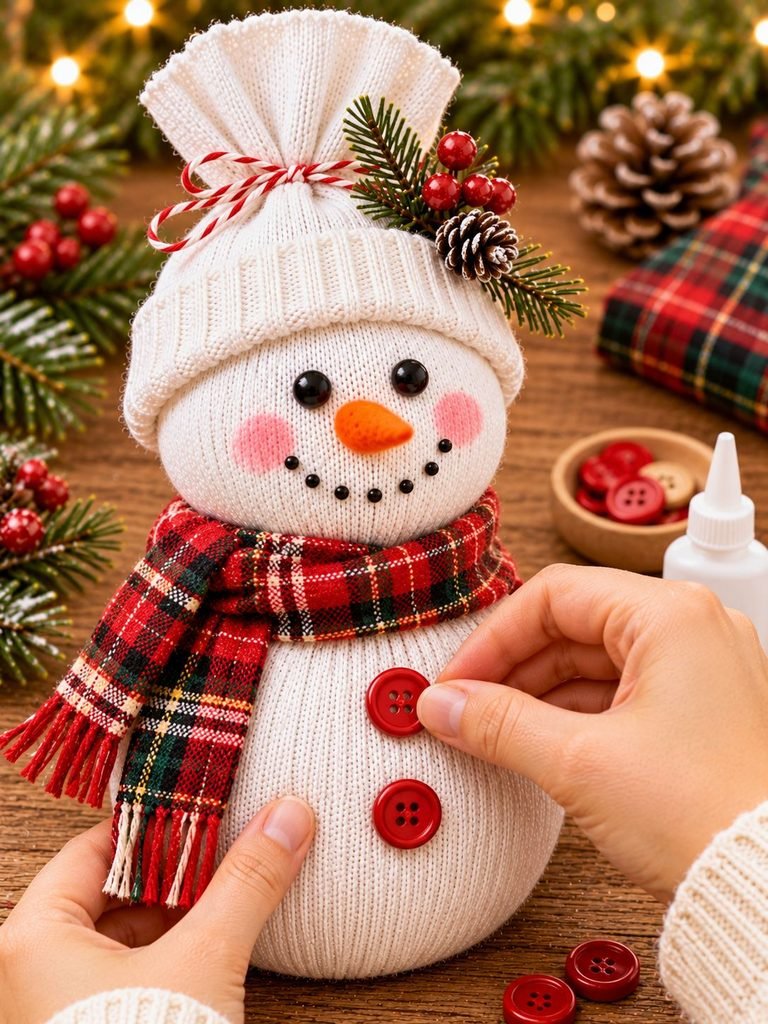
Your snowman is almost finished!
Take two matching red buttons and attach them vertically down the front of the body using strong fabric glue.
Allow enough space between them so that both buttons are clearly visible.
You can also use small wooden buttons, black buttons, or decorative snowflake buttons if you prefer a different appearance.
Next, add a little greenery to the side of the hat. A tiny faux pine sprig with red berries and a miniature pinecone looks especially pretty.
Take a moment to adjust the scarf, smooth the sock fabric, and check that the snowman stands upright.
If necessary, gently redistribute the rice inside the bottom section to improve its balance.
And that’s it! Your adorable no-sew sock snowman is ready to become part of your Christmas decorations.
Creative Ways to Personalise Your Sock Snowman
One of my favourite things about handmade decorations is that you can change little details to create something that feels completely your own.
Here are a few ideas worth trying.
1. Make a Farmhouse Sock Snowman
Choose a cream or oatmeal-coloured scarf, wooden buttons, and natural twine. Add a small pinecone to the hat for a rustic farmhouse appearance.
2. Create a Blush Pink Snowman
Use a blush pink scarf, matching ribbon, and tiny white buttons. This is a lovely option if you prefer soft, feminine Christmas decorations.
3. Make a Snowman Family
Create three snowmen in different sizes. Use smaller socks for miniature snowmen and larger socks for a taller decoration.
Arrange them together on a mantel or shelf to create an adorable winter display.
4. Try Different Hat Styles
Instead of a gathered sock hat, create a simple folded beanie using leftover fabric. You could also add a small pom-pom or decorative ribbon.
5. Give Your Snowman a Different Expression
Experiment with different mouth shapes, cheek colours, and nose sizes. A slightly crooked smile or oversized carrot nose can make your snowman even more charming.
Tips for Making the Perfect No-Sew Sock Snowman
Although this is a very simple project, a few small details can make a big difference to the finished result.
- Choose the right sock: Thick white socks help create a fuller snowman and hide the rice underneath.
- Use uncooked rice: Dry rice provides weight and helps the snowman maintain its rounded shape.
- Don’t overfill: Leaving enough flexibility makes it easier to create the head and body.
- Secure the opening properly: Always check that the gathered sock is tightly closed before decorating.
- Use a heavy base: A slightly wider bottom helps your snowman stand upright.
- Keep the decorations balanced: Avoid placing too many heavy decorations on one side of the hat.
- Allow glue to dry: Give all glued decorations enough time to set before moving or displaying your snowman.
- Choose complementary colours: Red, green, cream, and white create a beautiful traditional Christmas colour palette.
Common Mistakes to Avoid
Here are a few things to watch out for when making your sock snowman.
Using too little rice
If you don’t add enough rice, the snowman may look flat or floppy. Add enough filling to create a firm, rounded body.
Making the head too large
A large head can make the snowman look unbalanced. Keep the upper section smaller than the bottom.
Leaving the top unsecured
An opening that isn’t tied tightly can allow rice to spill out. Use a strong elastic band and check that the sock is completely closed.
Adding decorations before shaping
It’s easier to shape the snowman before attaching the eyes, nose, buttons, and scarf. This prevents the decorations from becoming misplaced while you’re adjusting the rice.
Using too much glue
A little glue is usually enough for small felt pieces and buttons. Too much can seep through the sock fabric and leave visible marks.
How to Display Your Finished Sock Snowman
Once your snowman is complete, you’ll have plenty of lovely ways to display it around your home.
Here are some of my favourite ideas:
- Christmas mantel: Place your snowman beside pine branches, candles, and fairy lights for a cosy seasonal display.
- Coffee table: Add it to a decorative tray with pinecones, miniature trees, and Christmas ornaments.
- Bookshelf: Display it between festive books and small holiday decorations.
- Entryway table: Let your handmade snowman welcome guests as they arrive.
- Christmas centrepiece: Arrange several sock snowmen of different sizes with faux greenery for a charming winter centrepiece.
- Children’s bedroom: Place a larger sock snowman on a high shelf as a cute seasonal decoration.
Because this snowman is lightweight and soft, it also works beautifully as part of a larger collection of handmade Christmas decorations.
How to Store Your Sock Snowman After Christmas
If you want your snowman to look lovely next Christmas, it’s worth taking a little care when storing it.
First, remove any loose decorative pieces that might become damaged during storage.
Make sure the snowman is completely dry and free from dust before putting it away.
Place it inside a clean, dry storage container or fabric bag. Keep it somewhere cool and dry, away from moisture and direct sunlight.
Because the snowman contains uncooked rice, moisture is particularly important to avoid. Rice can absorb humidity, which may eventually lead to unpleasant smells or spoilage.
For this reason, don’t wash the finished snowman or leave it in damp storage.
If you notice any moisture, unusual smell, or signs of mould, discard it rather than keeping it for another season.
I also recommend storing it away from pets and small children, especially if you’ve used buttons, beads, or other small decorations.
Frequently Asked Questions
1. Can I make a sock snowman without rice?
Yes! You can use other dry fillings, such as dried beans or polyester stuffing combined with a small weighted pouch at the bottom. However, uncooked rice is particularly convenient because it creates a lovely rounded shape and gives the snowman enough weight to stand.
2. What kind of sock works best for this project?
A thick white crew sock or tube sock is ideal. Choose one with a little stretch so it can accommodate the rice without becoming too tight.
3. How long does it take to make a no-sew sock snowman?
The basic snowman can be assembled in approximately 10 minutes if your materials are ready. Decorating may take a little longer, especially if you’re using glue that needs time to dry.
4. Can children make this Christmas craft?
Absolutely! Children can help fill the sock, arrange the scarf, and choose the decorations. However, an adult should handle scissors and any hot glue. Avoid small beads, buttons, and other choking hazards when crafting with young children.
5. How do I make my sock snowman stand upright?
Use enough rice to create a firm, rounded bottom. Distribute more filling towards the base and gently flatten the bottom so it has a stable surface.
6. Can I use glue instead of sewing?
Yes! Fabric glue or strong craft glue works well for attaching the scarf, buttons, felt nose, and other decorative pieces. Just make sure the glue is suitable for fabric.
7. Can I make different-sized sock snowmen?
Of course! Use different sock sizes and adjust the amount of rice to create a collection of miniature and larger snowmen.
Final Thoughts
I hope you love making this little no-sew sock snowman as much as I enjoyed putting this tutorial together. It’s such a simple way to turn an ordinary white sock into something special, and I love how a few little details can give each snowman its own personality.
Whether you make one for your Christmas mantel, create a whole family of snowmen, or enjoy this project with the children, it’s a lovely way to add handmade charm to your holiday decorations.
Don’t be afraid to experiment with different scarves, buttons, and hat styles. Sometimes the sweetest Christmas decorations are the ones we make ourselves!
Happy crafting, and have a wonderfully cosy Christmas!