Gingerbread House Crochet Jar Lantern: Free Christmas Pattern
Christmas is one of my favorite times to slow down, bring out my yarn, and make little handmade decorations that make the home feel extra special.
I especially love crochet projects that are both pretty and practical, and this adorable gingerbread house jar lantern is such a lovely example.
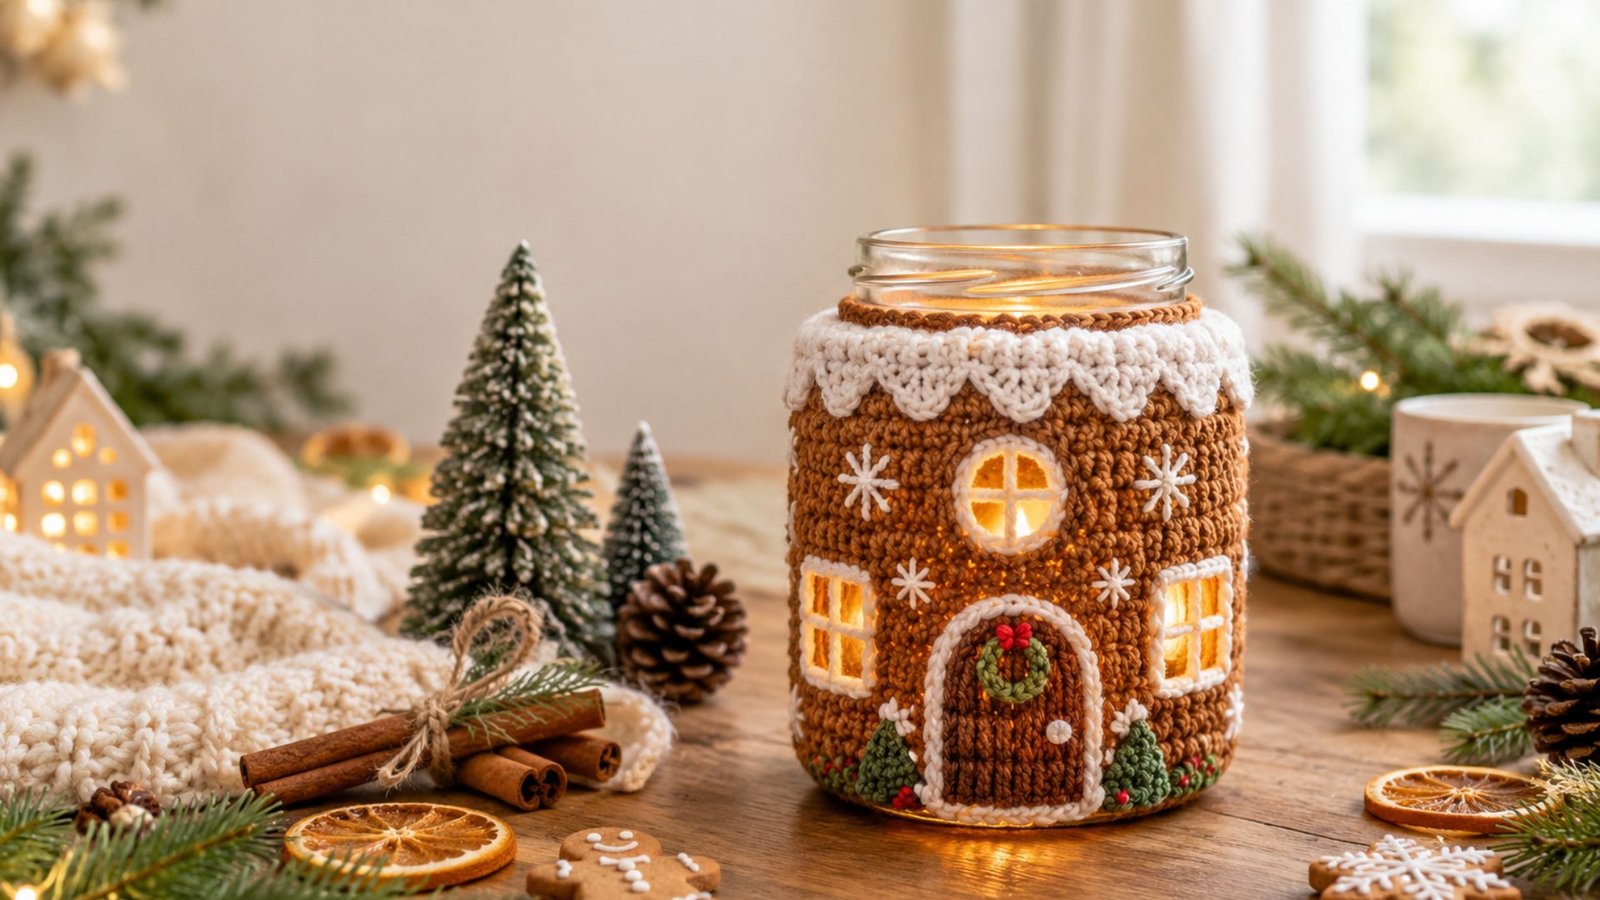
With its warm brown stitches, snowy white icing, and glowing windows, it brings all the sweetness of a little Christmas village into one simple project.
If you enjoy cozy holiday crafts as much as I do, I think you will have so much fun making this charming crochet lantern for your home or as a thoughtful handmade gift.
What Is a Gingerbread House Crochet Jar Lantern?
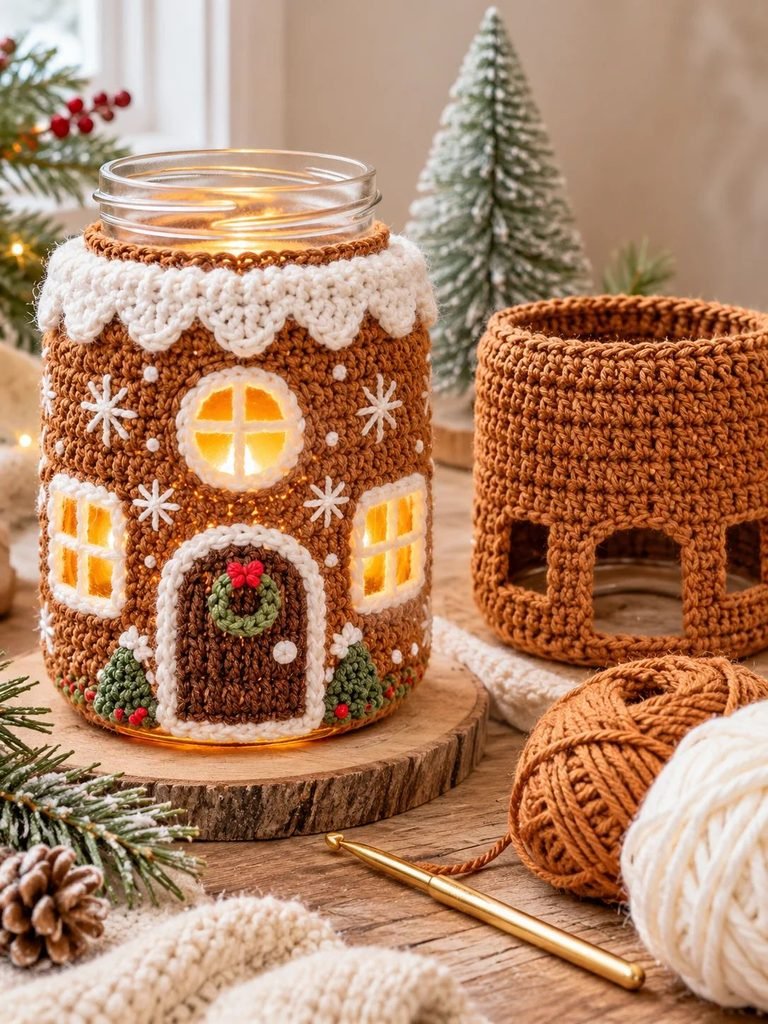
A gingerbread house crochet jar lantern is a decorative crochet cover designed to fit around a glass mason jar. It transforms an ordinary jar into a miniature gingerbread cottage, complete with little windows, a door, and a pretty white icing-inspired border.
The main body is crocheted using warm caramel or gingerbread-brown yarn. Small openings are incorporated into the crochet work to represent the windows and doorway, allowing the light from a battery-operated LED candle inside the jar to shine through.
The finishing touches are what make this project especially sweet. White scalloped crochet edging creates the appearance of piped icing along the roofline, while embroidered details give the little house its own personality.
It is a lovely way to combine crochet and seasonal decorating without needing complicated supplies or expensive materials.
You can display your finished lantern on a Christmas mantel, dining table, bookshelf, kitchen counter, or alongside other handmade Christmas decorations.
Why You Will Love This Crochet Christmas Project
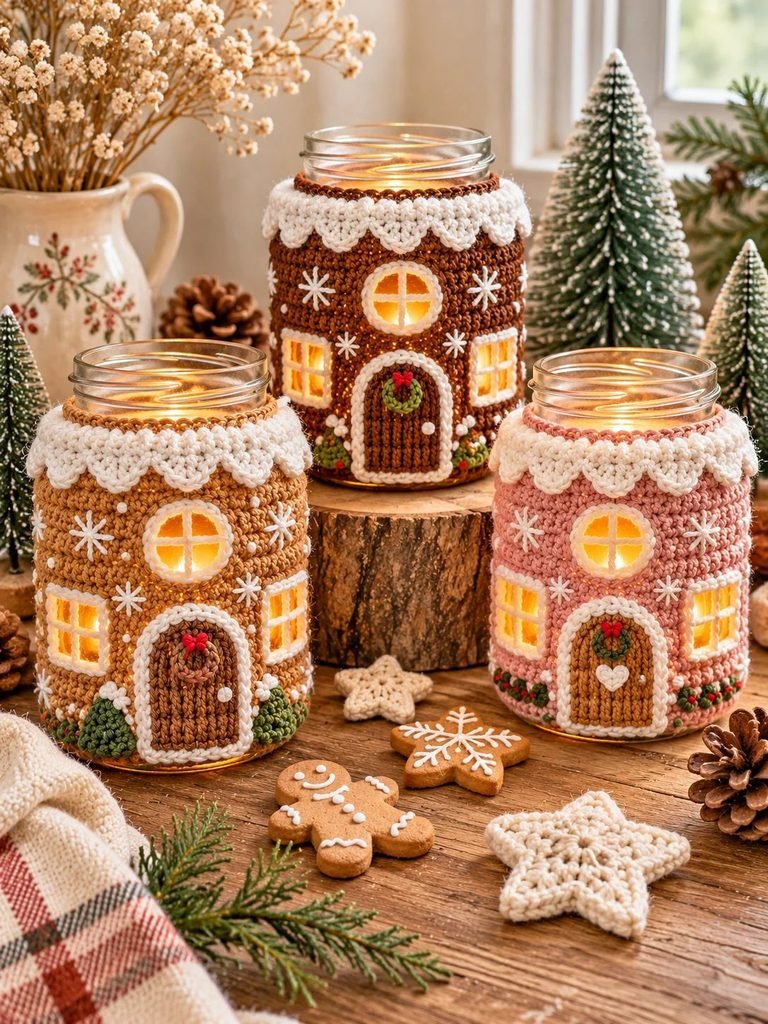
If you are looking for a festive crochet project that feels a little different from traditional Christmas ornaments, this gingerbread house lantern is worth adding to your holiday crafting list.
Here are a few reasons I think you will love making it.
1. It makes a beautiful Christmas decoration
The gingerbread-inspired design has a lovely nostalgic feel. The warm brown yarn and white icing details create the appearance of a miniature gingerbread house, making it perfect for cozy Christmas displays.
2. It combines crochet with soft lighting
Unlike ordinary crochet decorations, this project can also function as a little lantern. When you place a battery-operated LED tealight inside the glass jar, the light shines through the decorative openings.
3. It is a wonderful handmade gift
A finished gingerbread lantern makes a thoughtful Christmas gift for friends, family members, teachers, or anyone who appreciates handmade decorations.
4. You can customize the colors
Although traditional gingerbread brown and white are beautiful together, you can experiment with other festive shades. Think soft blush pink, cream, sage green, or even a little red.
5. It is a satisfying seasonal project
The project combines basic crochet stitches with a few decorative techniques. You can enjoy working on the jar cover and then have fun adding the little details that bring the gingerbread house to life.
Skill Level and Finished Measurements
This project is best suited to intermediate crocheters or confident beginners who already understand basic crochet stitches.
You will need to know how to work in continuous rounds, increase stitches, create chain spaces, and add simple embroidered details.
Finished measurements:
- Diameter: Approximately 3.25 inches (8.5 cm).
- Height: Approximately 5 inches (12.7 cm).
- Recommended jar: Standard 16 oz (pint) mason jar.
- Estimated working time: 2–3 hours, depending on your crochet speed.
Keep in mind that your finished measurements may vary slightly depending on your yarn, hook size, and personal tension.
Materials You Will Need
Before starting, gather all your supplies so you can work comfortably without constantly stopping to look for something.
| Material | Suggested choice |
|---|---|
| Main yarn | Worsted weight #4 caramel or gingerbread brown |
| Decorative yarn | Worsted weight #4 white |
| Crochet hook | 4.0 mm crochet hook |
| Jar | 16 oz glass mason jar |
| Lighting | Battery-operated LED tealight |
| Tapestry needle | For weaving in ends and embroidery |
| Scissors | For cutting yarn |
| Stitch markers | For marking the beginning of rounds |
You will need approximately 60 yards of brown yarn and 20 yards of white yarn, although having a little extra is always helpful.
Choosing the Right Yarn
Yarn selection makes a difference in how your finished lantern looks.
For the main gingerbread body, choose a smooth worsted-weight yarn in caramel, cinnamon, or warm gingerbread brown. Acrylic yarn is affordable and available in plenty of colors, while cotton yarn gives you excellent stitch definition and a slightly firmer finish.
For the icing, choose a clean white or soft ivory yarn.
I recommend avoiding very fluffy, fuzzy, or novelty yarns. They can hide the little stitches and make the window openings less defined.
Crochet Abbreviations
The following abbreviations are used throughout the pattern.
- ch: Chain
- sc: Single crochet
- hdc: Half double crochet
- dc: Double crochet
- sl st: Slip stitch
- st: Stitch
- sts: Stitches
- sk: Skip
- inc: Increase (work two stitches into the same stitch)
- BLO: Back loop only
- rnd: Round
- rep: Repeat
- FO: Fasten off
Note: These instructions use US crochet terminology.
Special Crochet Techniques
Before starting the pattern, it helps to understand a couple of techniques you will use.
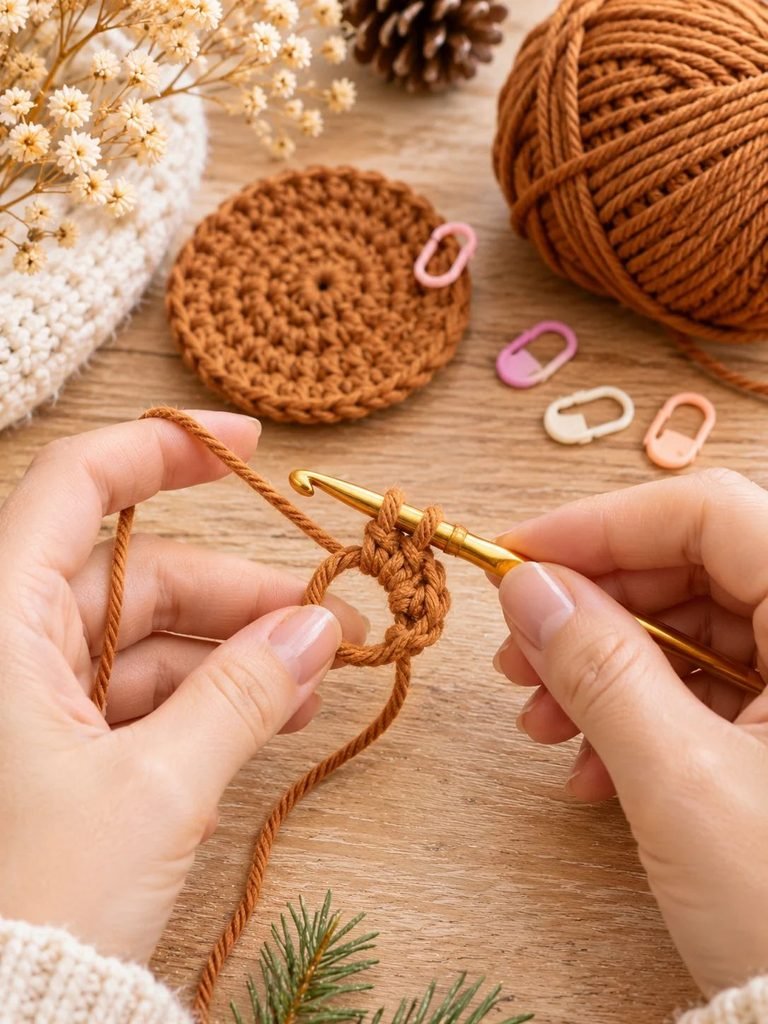
Magic Ring
A magic ring creates a small adjustable loop that allows you to crochet a neat, closed circle.
Wrap your yarn around your fingers to create a loop, insert your crochet hook through the loop, pull up a loop of yarn, and begin working your stitches into the center.
Once your stitches are complete, pull the yarn tail to close the center tightly.
Working in Continuous Rounds
The gingerbread jar cover is worked in a spiral rather than joining every round with a slip stitch.
Place a stitch marker in the first stitch of each round. When you reach the marker again, move it into the new first stitch.
This makes it easier to keep track of your rounds and prevents accidentally adding or losing stitches.
Creating Chain-Space Windows
The little windows and doorway are made by replacing a section of regular stitches with chain stitches.
When you chain and skip the corresponding stitches, an opening is created. In the following round, crochet into the chain space to strengthen and frame the opening.
These gaps allow the LED light to shine through the gingerbread house.
Gingerbread House Crochet Jar Lantern Pattern
Now comes the fun part! We will start with the circular base, build the gingerbread house body, and finish with the decorative white icing and embroidered details.
Step 1: Crochet the Circular Base
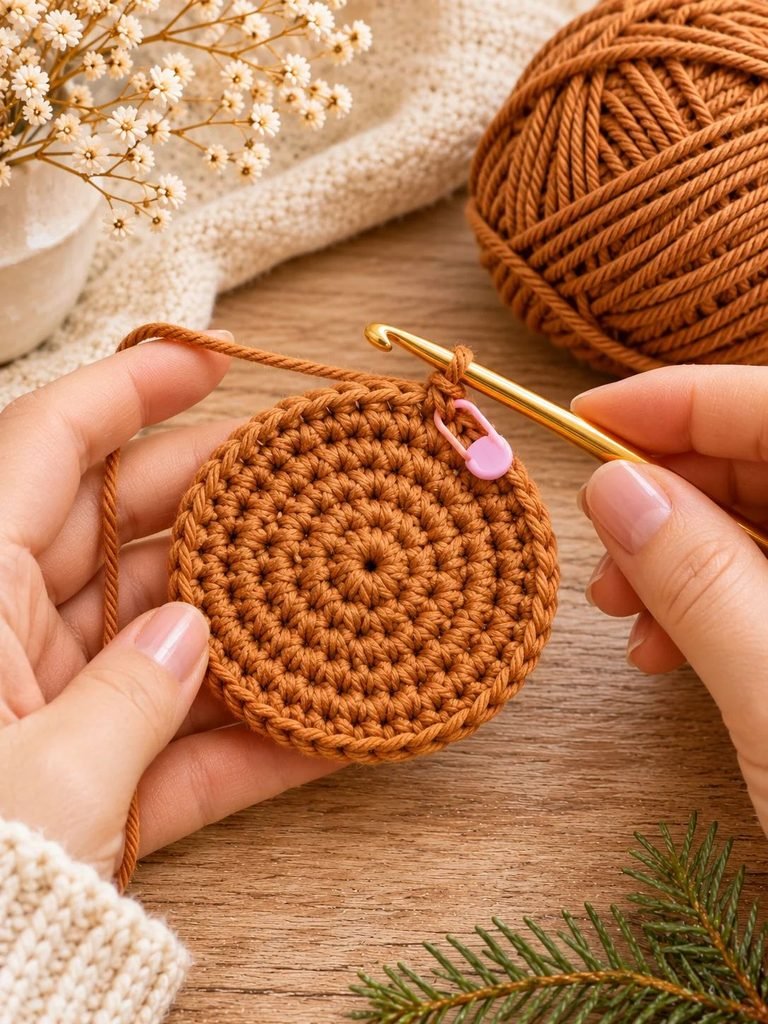
Start with your caramel or gingerbread-brown yarn and a 4.0 mm crochet hook.
The base is worked in continuous rounds, gradually increasing to create a circle that fits the bottom of your mason jar.
Round 1: Make a magic ring and crochet 6 sc into the ring. (6 stitches)
Round 2: Work 2 sc into every stitch around. (12 stitches)
Round 3: Repeat 1 sc, 2 sc in the next stitch around. (18 stitches)
Round 4: Repeat 2 sc, increase in the next stitch around. (24 stitches)
Round 5: Repeat 3 sc, increase in the next stitch around. (30 stitches)
Round 6: Repeat 4 sc, increase in the next stitch around. (36 stitches)
Round 7: Repeat 5 sc, increase in the next stitch around. (42 stitches)
Round 8: Repeat 6 sc, increase in the next stitch around. (48 stitches)
Your circular base should now be approximately 3.25 inches across.
Take a moment to compare it with the bottom of your jar. If the circle is noticeably too small or too large, you may need to adjust your hook size or tension.
Step 2: Create the Sides of the Gingerbread House
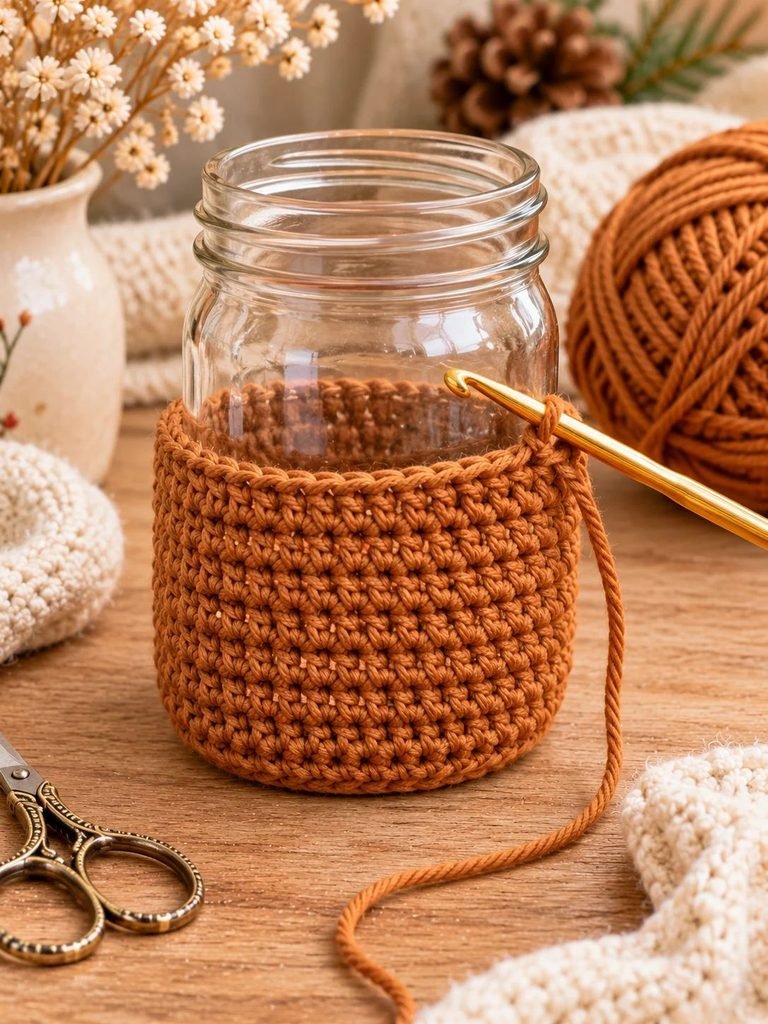
Once the base is complete, it is time to start building the sides.
Round 9: Crochet 1 sc into the back loop only of every stitch around. (48 stitches)
Working into the back loops creates a small ridge that helps the crochet fabric turn upward, forming the sides of the jar cover.
Rounds 10–12: Crochet 1 sc into every stitch around. (48 stitches)
Continue working evenly without increasing.
At this stage, the crochet should begin to resemble a little cup. Keep your stitches consistent so the fabric sits neatly around the jar.
Step 3: Create the Door and Lower Windows
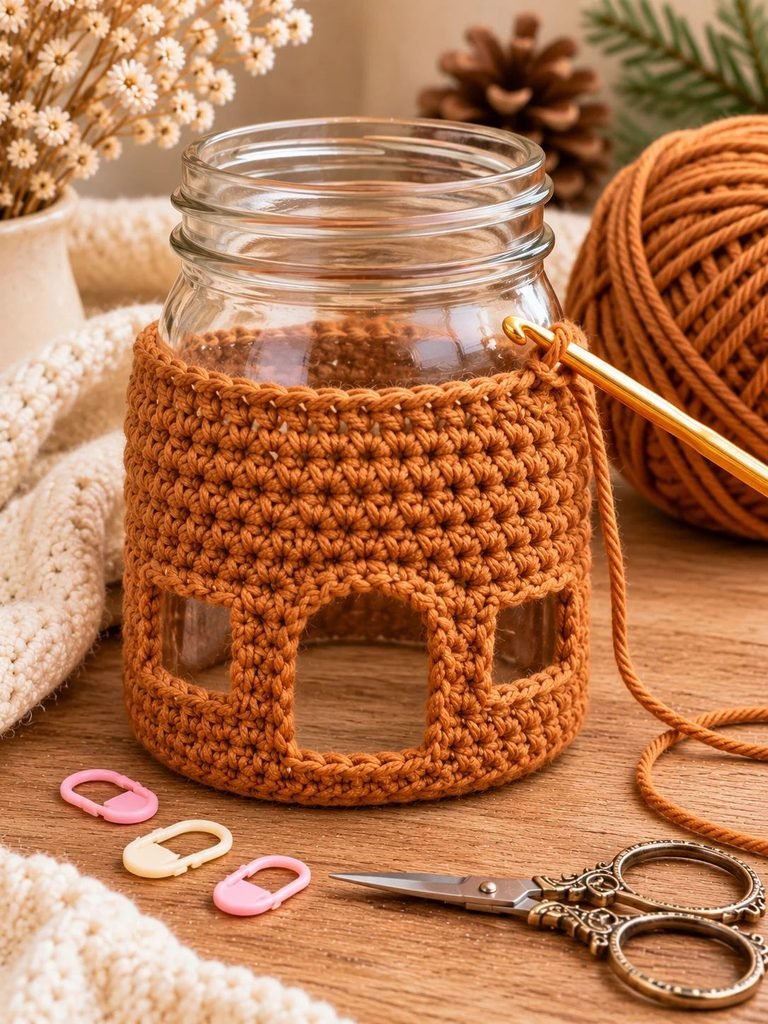
Now we can begin adding the little architectural details that make this look like a gingerbread cottage.
In Round 13, you will create two openings using chain spaces.
Round 13:
- Crochet 16 sc.
- Chain 4.
- Skip the next 4 stitches.
- Crochet 8 sc.
- Chain 4.
- Skip the next 4 stitches.
- Crochet 16 sc.
You should have 48 stitch positions when counting the chain spaces.
These two openings will become the lower decorative openings of your gingerbread house.
Rounds 14–15: Crochet 1 sc into each stitch and work 4 sc into each chain space.
This helps reinforce the openings while maintaining the overall stitch count.
Read The All-Purpose Waffle Stitch Crochet Dishcloth Pattern
Step 4: Create the Upper Window
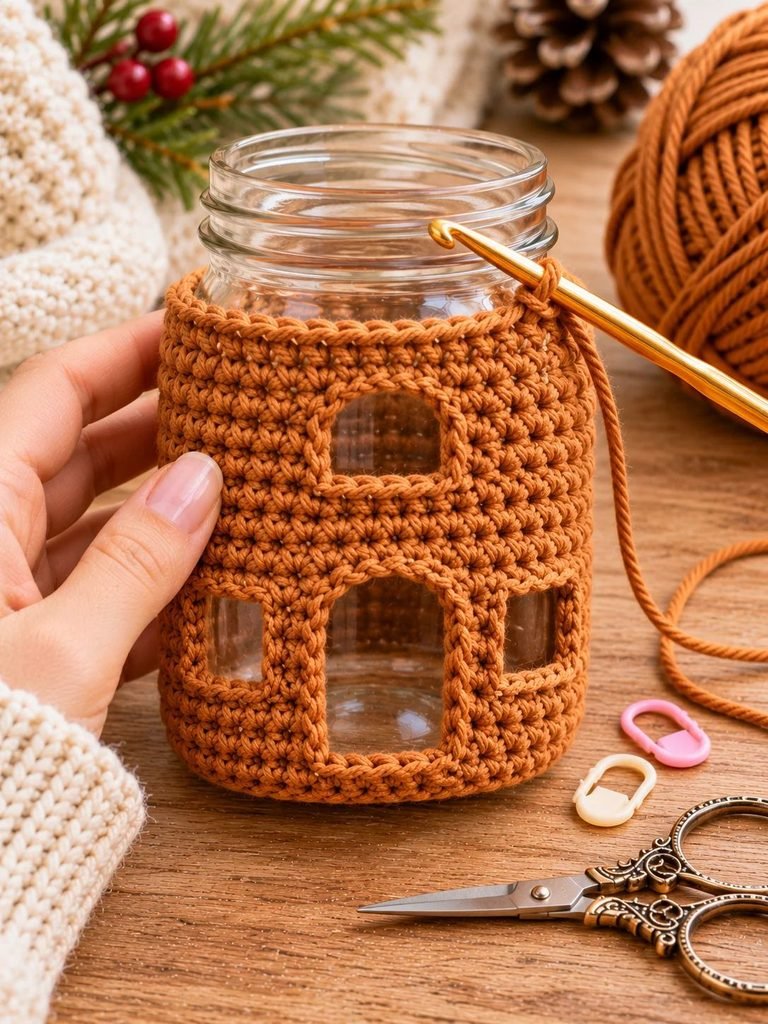
A gingerbread house looks even sweeter with another little window above the doorway.
Round 16:
- Crochet 20 sc.
- Chain 4.
- Skip the next 4 stitches.
- Crochet 24 sc.
This creates another opening for the upper window.
Rounds 17–18: Crochet 1 sc into every stitch around, including 4 sc into the chain space.
Keep your tension consistent, especially around the window opening, so the fabric does not become too loose.
Round 19: Crochet 1 sc into each stitch around. Slip stitch into the next stitch and fasten off.
You should now have a cylindrical gingerbread-brown cover with decorative openings.
Before continuing, gently slide it over your mason jar to check the fit.
Step 5: Crochet the White Icing Border
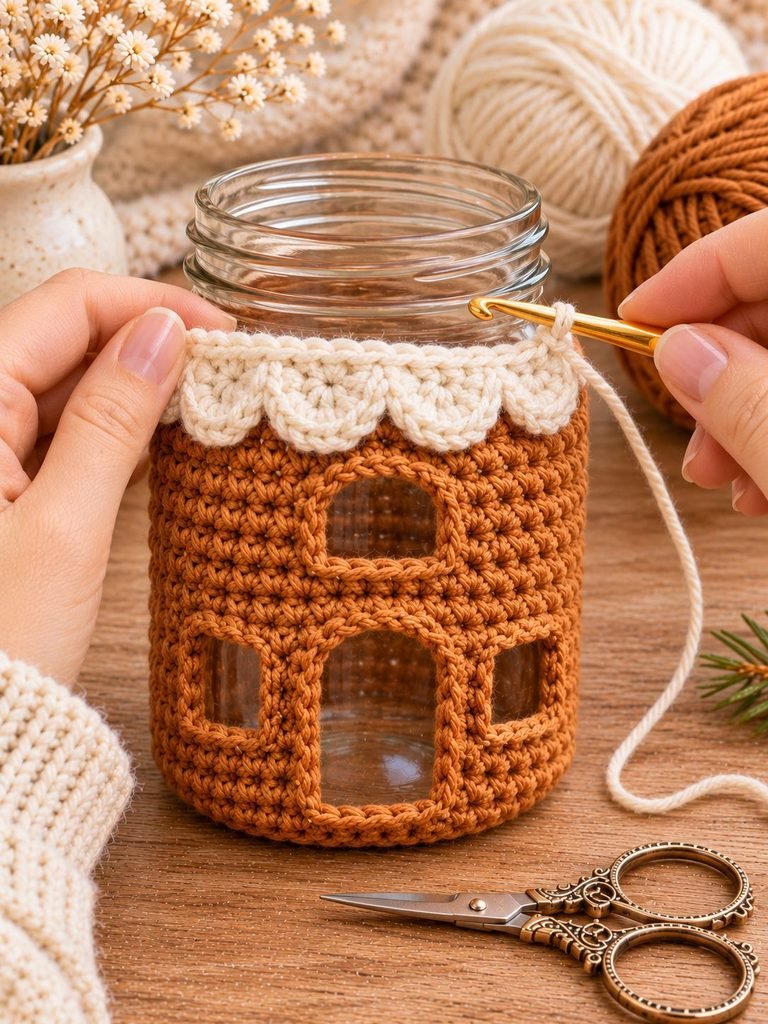
This is one of my favorite parts of the project because the white edging gives the lantern its classic gingerbread-house appearance.
Attach your white yarn to any stitch along the top edge of the brown crochet cover.
Work the following sequence into the same stitch:
- 1 slip stitch.
- 1 half double crochet.
- 1 double crochet.
- 1 half double crochet.
Skip the next two stitches and repeat the sequence around the top edge.
Continue until you have completed the decorative scallops around the entire opening. Join with a slip stitch and fasten off.
The little raised scallops resemble piped royal icing on a freshly decorated gingerbread cottage.
For a softer, more delicate appearance, use ivory yarn instead of bright white.
Step 6: Add the Gingerbread House Details
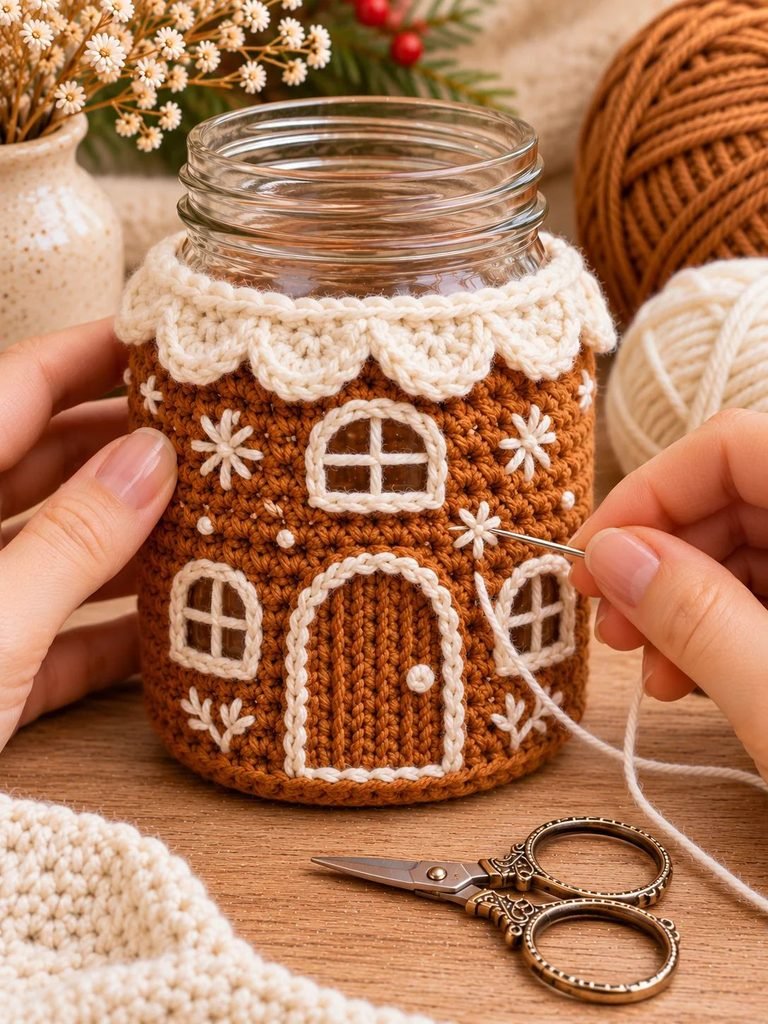
Your crochet cover should now look like a little house, but the decorative details will make it even more special.
Thread your white yarn into a tapestry needle.
Decorate the doorway
Use simple embroidery stitches to outline the lower doorway. You can create a neat frame using small straight stitches or chain stitches.
Add a tiny French knot to represent the doorknob.
Add window frames
Use white yarn to create a border around the window openings.
Next, work one vertical and one horizontal straight stitch across each window to create the appearance of little window panes.
Create snowy decorations
Add tiny French knots, small straight stitches, or little white dots across the brown body.
These details can represent falling snow, icing decorations, or little sugar decorations on a gingerbread house.
Try not to overcrowd the design. A few carefully placed details will keep the lantern looking neat and charming.
Step 7: Assemble Your Gingerbread Jar Lantern
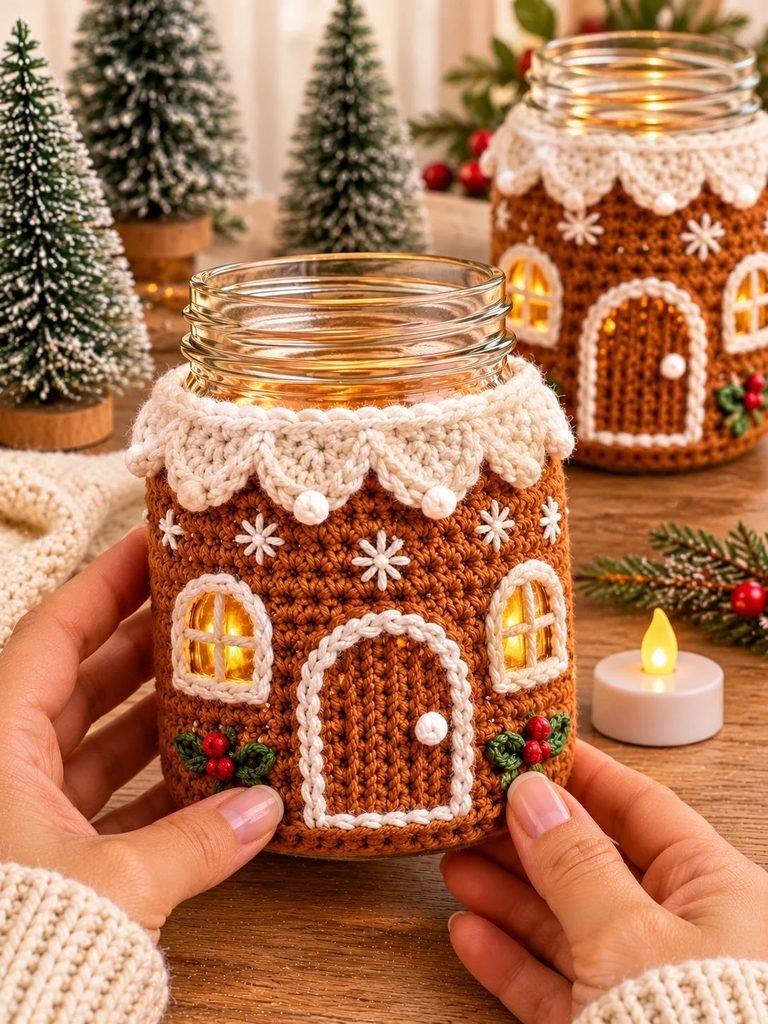
Once all the crochet work is complete, weave in any loose yarn ends using your tapestry needle.
Gently stretch and shape the cover with your hands, checking that the windows and decorative border look even.
Slide the crochet cover over your clean, dry 16 oz mason jar.
The circular base should sit neatly against the bottom of the jar, while the sides should fit snugly without stretching the stitches too much.
Place a battery-operated LED tealight inside the glass jar.
Turn on the light and watch the warm glow shine through the little windows.
Important safety reminder: Never place a real candle, open flame, or hot-burning light inside this crochet lantern. Yarn is combustible, and a glass jar covered with crochet is not a safe enclosure for a real flame. Use a battery-operated LED tealight only.
Tips for Making Your Gingerbread House Lantern Beautiful
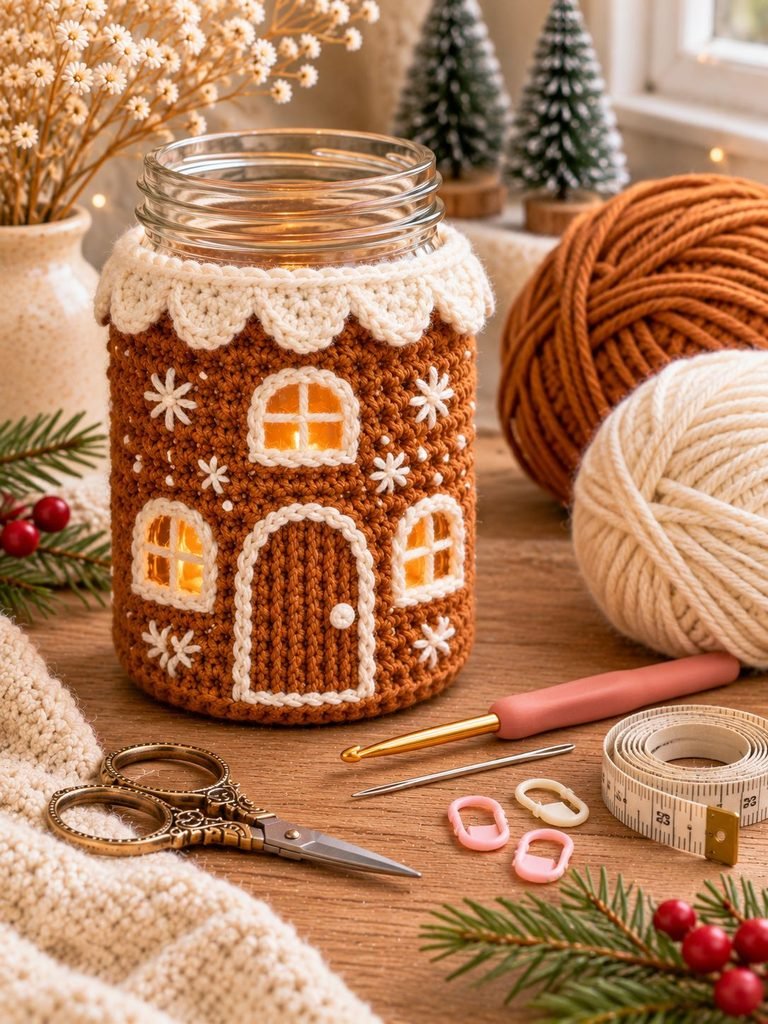
A few small details can make a big difference in the finished appearance of your crochet lantern.
Keep your tension consistent. Uneven tension can make the cover look wavy or cause it to fit poorly around the jar. Try to maintain the same tension throughout the project.
Choose contrasting yarn colors. Warm gingerbread brown and crisp white create a lovely contrast. The white details stand out beautifully against the darker background.
Use smooth yarn. Smooth yarn makes the windows, stitches, and embroidery easier to see.
Check the fit regularly. Do not wait until the final round to discover that your cover is too tight or too loose. Try it on the jar after completing the base and again before finishing the decorative edging.
Take your time with embroidery. The windows, door, and snowy details give the lantern its personality. Small, neat stitches will make your finished piece look more polished.
How to Customize Your Crochet Gingerbread Lantern
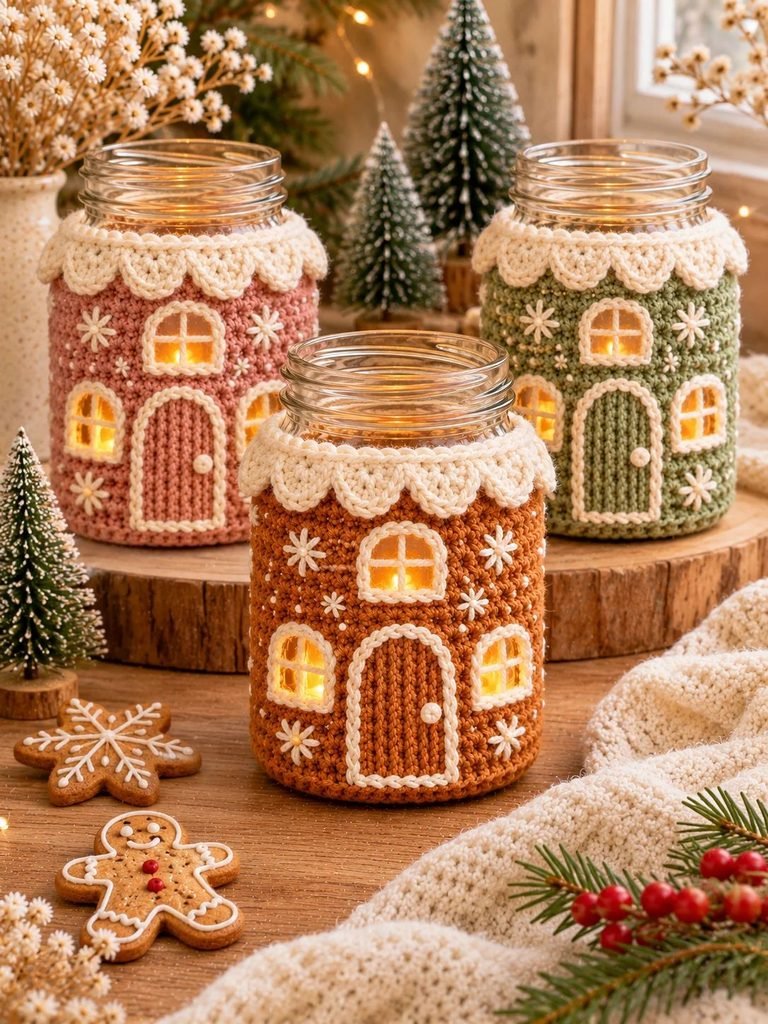
One of the best things about handmade decorations is that you can change little details to suit your home.
Here are some ideas to try.
1. Make a Pink Gingerbread House
For a softer, more feminine Christmas decoration, use dusty blush pink as your main yarn and white for the icing.
You can add a few tiny pink or pearl-colored decorative details to make the house look extra sweet.
2. Try a Traditional Christmas Color Combination
Use deep red or forest green instead of caramel brown for a festive variation.
Keep the white scalloped border and add small embroidered snowflakes to create a traditional holiday look.
3. Add Tiny Crochet Decorations
If you enjoy making small crochet embellishments, you can sew little hearts, stars, or flowers onto the outside of the lantern.
These extra details make each finished piece unique.
4. Make a Little Gingerbread Village
Why stop at one?
Crochet several jar lanterns in slightly different colors and arrange them together to create a miniature Christmas village.
You could use different-sized glass jars, provided you adjust the crochet base and body measurements to suit each one.
Troubleshooting Common Crochet Problems
Even experienced crocheters occasionally run into little problems. Here are a few things to look out for while making your lantern.
Why Is My Crochet Jar Cover Too Tight?
Your tension may be too tight, or your crochet hook may be too small.
Try using a slightly larger hook and check that your circular base matches the width of your jar.
Why Does My Crochet Base Curl?
A base that curls upward may need more room or a tension adjustment.
Check your stitch count carefully and make sure you have completed all the increase rounds correctly.
Why Are My Windows Uneven?
Uneven window openings can happen when you accidentally skip too many or too few stitches.
Use stitch markers to identify where each chain space should begin and end.
Why Does My Lantern Look Too Loose?
Loose crochet stitches can make the cover sag around the glass jar.
Try using a smaller hook or maintaining slightly firmer tension. Your finished cover should fit securely without being stretched.
Why Does My Icing Border Look Uneven?
Check that you are repeating the same stitch combination and skipping the correct number of stitches throughout the round.
If your scallops are crowded or spread too far apart, check your placement before finishing the border.
How to Display Your Finished Christmas Crochet Lantern
Once your gingerbread house lantern is finished, you can have so much fun styling it around your home.
Here are a few cozy decorating ideas.
- Christmas mantel: Place your lantern alongside miniature Christmas trees, pinecones, and little wooden houses.
- Dining table: Use it as part of a festive centerpiece with greenery and other handmade decorations.
- Kitchen shelf: Display it near your favorite Christmas mugs and seasonal baking accessories.
- Bookshelf: Arrange it with Christmas books, small ornaments, and warm neutral decorations.
- Christmas gift basket: Pair the finished lantern with a handmade coaster, a festive mug, and some Christmas treats.
I especially love the idea of displaying several little lanterns together. They create a beautiful miniature Christmas village without taking up too much space.
How to Care for Your Crochet Jar Lantern
With a little care, your gingerbread house lantern can be enjoyed for many Christmas seasons.
Always remove the crochet cover from the glass jar before cleaning.
If the yarn needs freshening up, gently hand wash it in cold water using a mild detergent suitable for the yarn.
Avoid twisting or wringing the crochet fabric, as this can stretch the stitches and distort the shape.
Lay it flat on a clean towel and allow it to air dry completely before putting it back on the jar.
Do not tumble dry, iron, or place the crochet cover near an open flame or direct heat source.
Store it in a clean, dry container when the Christmas season is over.
Frequently Asked Questions
Can beginners make a gingerbread house crochet jar lantern?
Confident beginners can certainly give this project a try. You should already be comfortable with single crochet, working in rounds, and basic increases. The window openings and embroidered decorations may take a little practice, but they are manageable when worked slowly.
What size mason jar should I use?
A standard 16 oz mason jar is recommended for the measurements in this pattern. If you use a different jar, measure its diameter and height before adjusting the crochet cover.
Can I use cotton yarn?
Yes! Worsted-weight cotton yarn is a lovely option. It provides excellent stitch definition and creates a neat, structured finish.
Can I use a real tealight candle?
No. Never use a real candle inside this crochet-covered jar. Yarn can catch fire, even when it is not directly touching the flame. Always choose a battery-operated LED tealight.
How long does this project take?
You can expect to spend approximately two to three hours crocheting the cover, although your time will depend on your experience and how much embroidery you add.
Can I make the lantern in different colors?
Absolutely! You can use traditional gingerbread brown and white, or experiment with blush pink, cream, sage green, and red. Just make sure the decorative details contrast nicely with the main color.
Can I sell finished gingerbread house lanterns?
You should check the terms of the original pattern designer before selling finished items. Also, always credit the designer where required and never claim someone else’s pattern as your own.
Final Thoughts
I hope you have enjoyed making this sweet gingerbread house crochet jar lantern as much as I have enjoyed sharing the idea. It is such a lovely little Christmas project, especially if you enjoy creating handmade decorations that bring warmth and personality into your home.
I love how a simple glass jar and a little bit of yarn can become something so charming with just a few stitches and thoughtful details. Whether you make one for your Christmas mantel, create a whole gingerbread village, or gift one to someone special, this project is a beautiful way to add a handmade touch to the holidays.
If you make your own gingerbread house lantern, I would love to hear about the colors you chose!
Happy crocheting, and have a beautiful Christmas crafting season!