DIY Clay Paintbrush Holder: How to Make a Beautiful Handmade Ceramic-Style Brush Organizer
I have always loved handmade pieces that are just as beautiful as they are useful, especially when they bring a little extra charm to my crafting space.
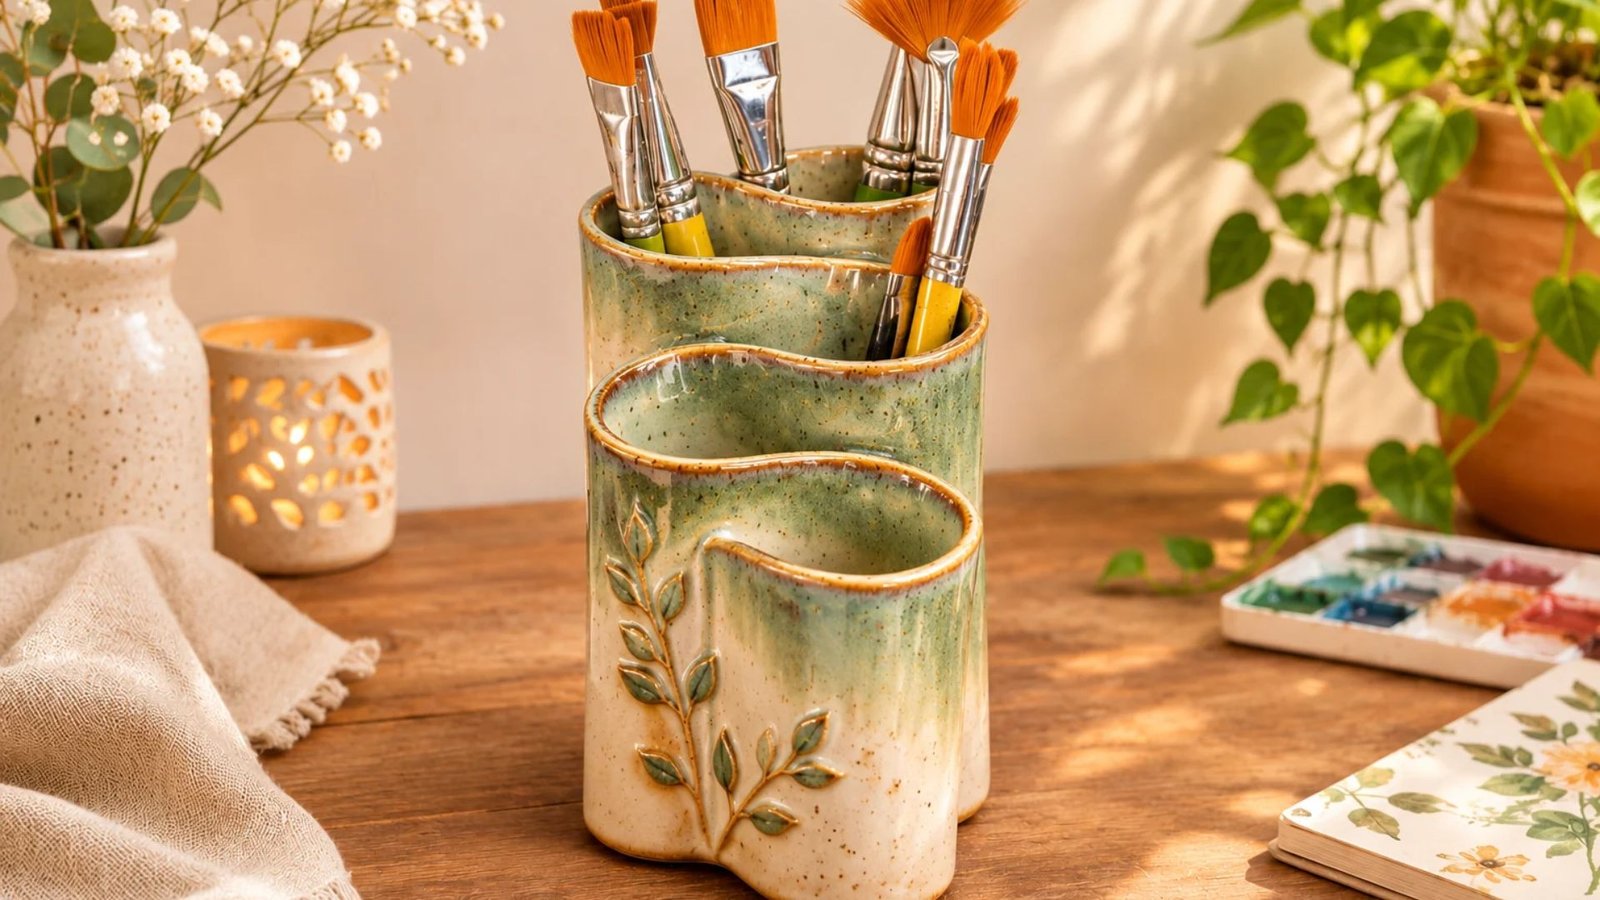
One project I absolutely adore is a sculptural clay paintbrush holder. It has such a lovely organic shape, with soft wavy compartments that make even ordinary paintbrushes look like part of the decor.
Instead of keeping brushes scattered across my table, I love the idea of creating something personal, practical, and beautiful. The best part is that you can customize the shape, colors, and compartments to suit your workspace perfectly.
What Is a DIY Clay Paintbrush Holder?
A DIY clay paintbrush holder is a handmade organizer designed to keep paintbrushes upright, separated, and easy to reach whenever you need them. Rather than using an ordinary plastic cup or store-bought brush container, you can create a decorative clay piece that adds personality to your crafting table.
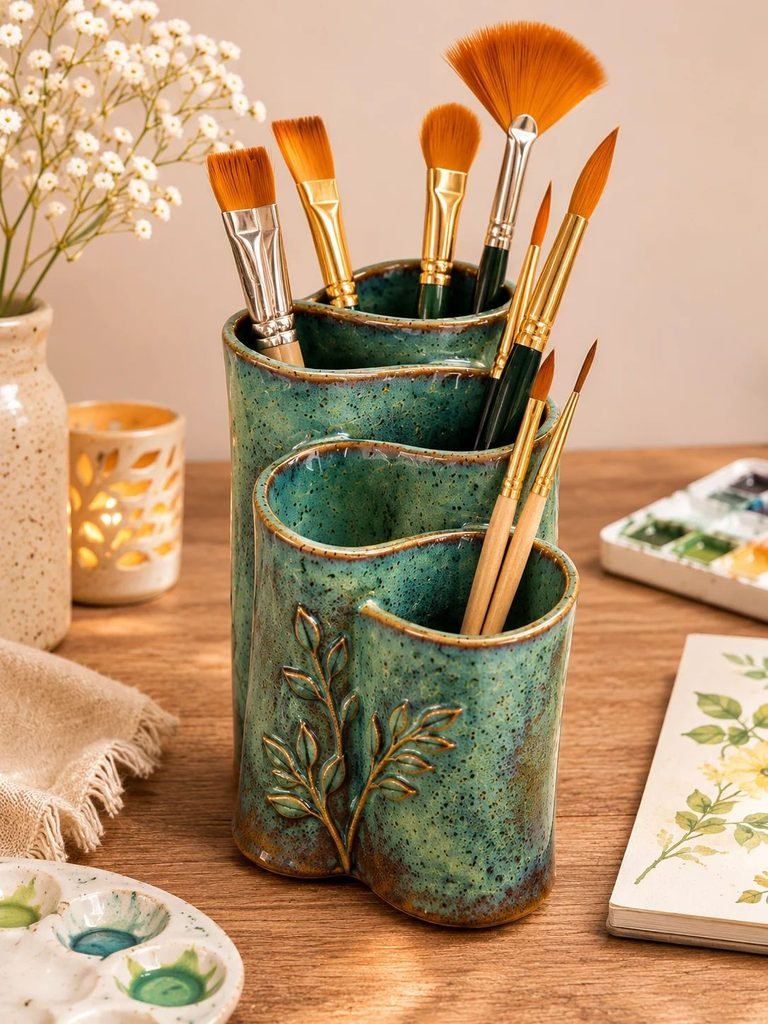
The inspiration for this project is a beautiful sculptural holder with several connected compartments. Instead of having a simple round opening, it features flowing, wavy edges and different sections that can accommodate brushes of various sizes.
I particularly love this design because it combines functionality with an artistic appearance. The compartments give each brush its own little space, while the irregular shape makes the finished piece look like a small handmade pottery sculpture.
You can make yours in different colors, including:
- Soft sage green for a natural, earthy appearance.
- Muted turquoise for a beautiful pottery-inspired finish.
- Warm terracotta for a rustic handmade look.
- Cream and beige for a simple minimalist aesthetic.
- Dusty blue for a calm and sophisticated craft room.
- Speckled olive green for a traditional ceramic-inspired appearance.
This project is suitable for anyone who enjoys working with clay, whether you are a beginner or already have experience making handmade decorations.
A quick material note: This tutorial focuses on making a decorative brush organizer using air-dry clay. The finished piece is intended for storing dry paintbrushes. If you want a genuinely water-resistant, washable pottery holder like a professionally fired ceramic piece, use suitable ceramic clay, glaze, and a kiln instead. Ordinary air-dry clay is not waterproof.
Why You Will Love Making This Clay Paintbrush Holder
There are so many reasons to try this project, especially if you enjoy creating useful decorations for your home or craft room.
1. It is both decorative and practical
One of my favorite things about handmade organizers is that they do more than simply store supplies. They also make a workspace feel more personal. This clay holder can sit beautifully on your desk, craft table, or painting station.
2. You can customize the compartments
Unlike ordinary brush cups, this design allows you to create different-sized sections. You can make wider compartments for chunky brushes and smaller ones for fine detail brushes.
3. It is a lovely beginner-friendly clay project
You do not need a pottery wheel or complicated equipment to create the sculptural shape. With basic hand-building techniques, you can create something beautiful using air-dry clay.
4. Every finished piece can look different
You can experiment with wavy edges, curved walls, different heights, and beautiful glaze-inspired paint finishes. No two handmade holders need to look exactly alike.
5. It makes a thoughtful handmade gift
A finished brush holder would make a lovely gift for someone who enjoys painting, drawing, journaling, or other creative hobbies.
Materials You Will Need
Before getting started, gather everything you need. Having your materials ready will make the process much easier and help you work without unnecessary interruptions.
Here is what I recommend:
| Material | Purpose |
|---|---|
| Air-dry clay | Main material for building the holder |
| Acrylic roller or rolling pin | Flattening the clay |
| Craft knife | Cutting clay pieces |
| Sculpting tools | Shaping and smoothing edges |
| Small bowl of water | Slightly dampening clay during construction |
| Clay slip | Joining separate clay sections |
| Sandpaper | Smoothing dried imperfections |
| Acrylic paints | Adding your chosen color |
| Paintbrushes | Applying paint and decorative details |
| Water-based acrylic varnish | Finishing the dry decorative surface |
| Plastic wrap | Keeping unused clay from drying out |
| Baking paper | Protecting your work surface |
| Cardboard or temporary supports | Helping maintain the shape while drying |
Optional materials:
- Small sponge for smoothing the clay.
- Texture stamps for decorative details.
- A ruler for measuring the compartments.
- A small amount of dark brown paint for an aged pottery effect.
- Fine brushes for adding speckles.
Read 16 Elegant Clay Candle Holder Ideas for a Handmade Luxury Look
Choosing the Right Clay for Your Project
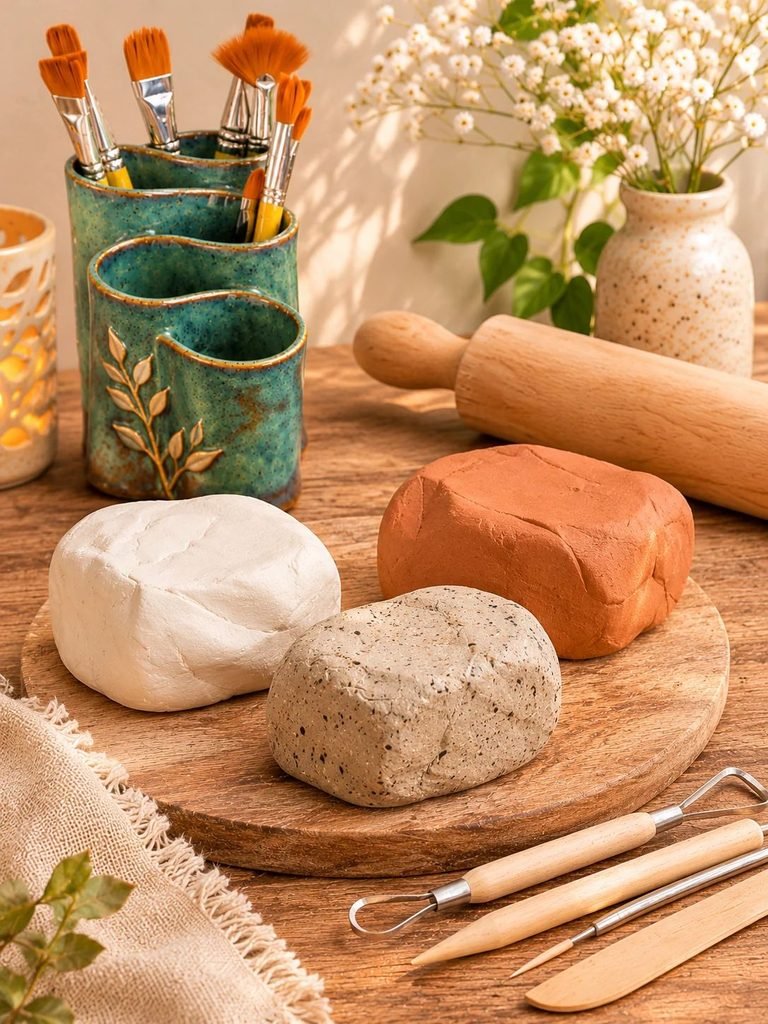
Choosing the right clay is important because it affects how your finished brush holder looks, feels, and performs.
For this beginner-friendly version, I recommend a good-quality air-dry clay.
Air-dry clay is easy to work with, does not require a kiln, and is suitable for creating decorative organizers. It is also relatively affordable, making it a good choice if you are experimenting with sculptural clay projects for the first time.
When selecting your clay, consider the following:
White air-dry clay: This is a lovely option if you want to create a soft, neutral finish. It is also easy to paint once completely dry.
Natural terracotta air-dry clay: This gives your project a warm, earthy appearance and can look beautiful with a matte finish.
Stone-effect air-dry clay: Some varieties contain particles that create a more natural, textured appearance. These can be particularly beautiful for pottery-inspired designs.
Avoid adding too much water while working. Excess moisture can weaken the clay, make it difficult to maintain its shape, and increase drying problems.
Read How to Make Air-Dry Clay Christmas Ornaments by Embossing Them
How to Make a DIY Clay Paintbrush Holder
Now comes the fun part! We are going to build a sculptural organizer inspired by the beautiful wavy design in the reference image.
Rather than making one ordinary cylindrical container, we will create several connected compartments with different heights and gently curved openings.
Step 1: Plan Your Paintbrush Holder Design
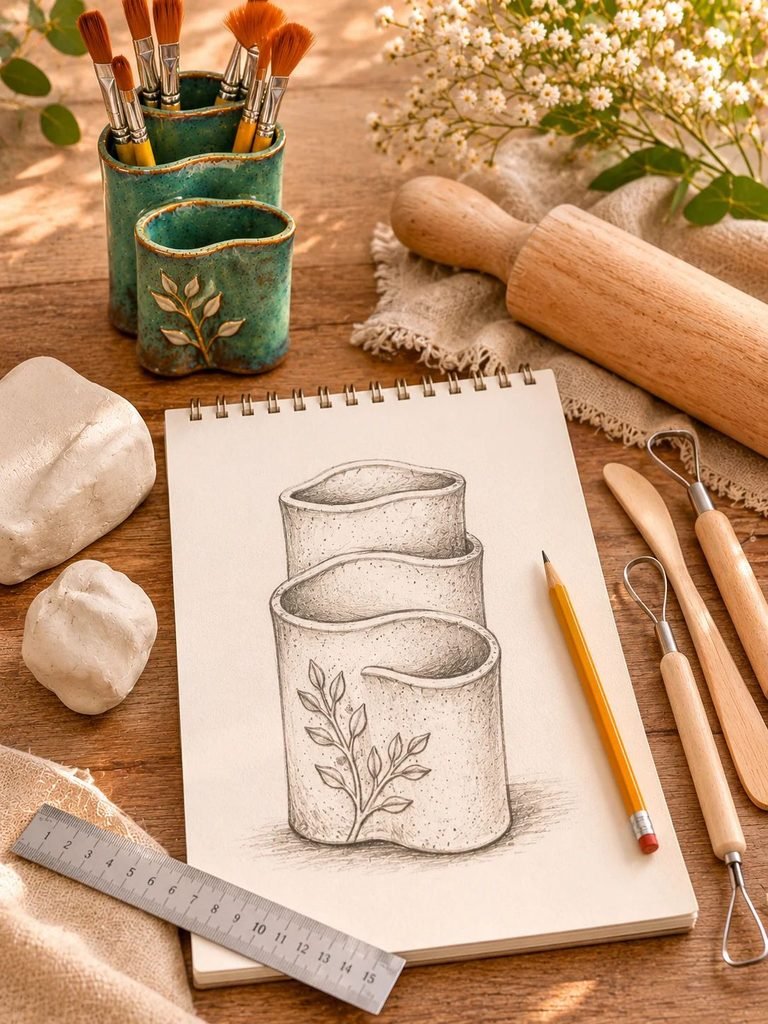
Before touching the clay, take a few minutes to plan the shape you want to create.
Look closely at the inspiration design. It has several compartments that appear to flow into one another, creating an organic, wavy silhouette.
For your own version, I recommend starting with three connected sections:
- One tall compartment at the back for long paintbrushes.
- One medium-height compartment in the middle for everyday brushes.
- One shorter compartment at the front for smaller brushes and detail tools.
You can make the sections different widths depending on the brushes you use most often.
A good starting size for a medium tabletop organizer is approximately:
| Section | Suggested height |
|---|---|
| Back compartment | 14–16 cm |
| Middle compartment | 11–13 cm |
| Front compartment | 8–10 cm |
These measurements are suggestions, not strict requirements. Adjust them to suit your brushes and available workspace.
Remember that the compartments should be wide enough to hold brushes comfortably without making the entire organizer unnecessarily bulky.
Step 2: Prepare Your Clay
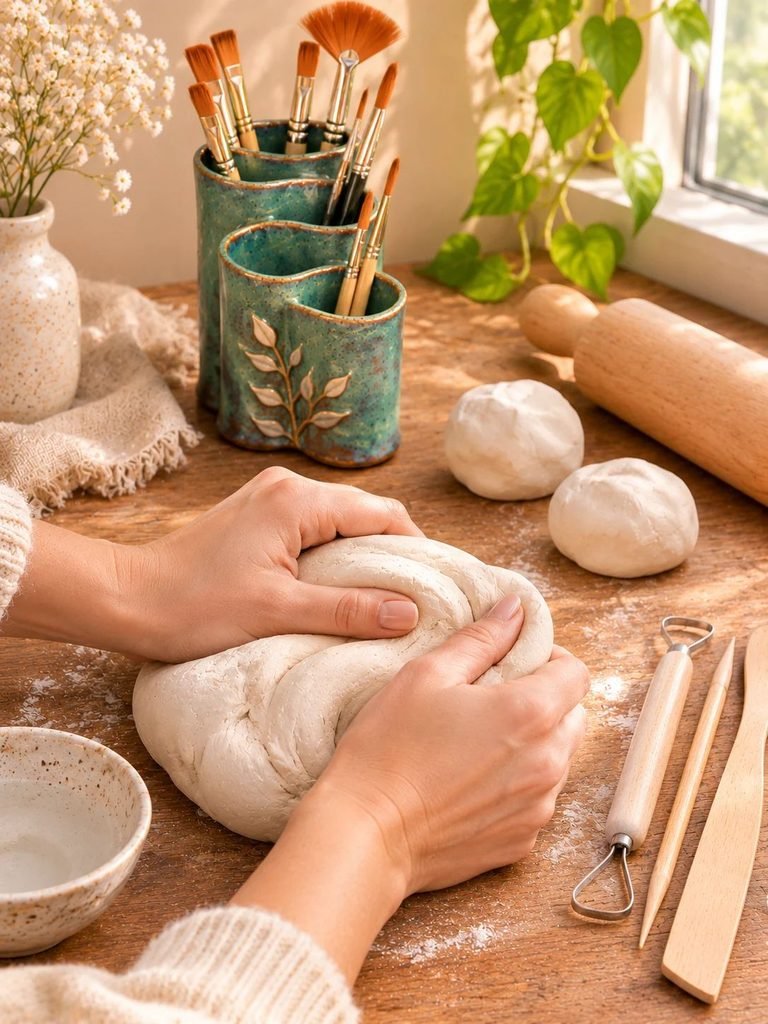
Take a manageable amount of air-dry clay and begin kneading it gently between your hands.
This helps soften the material and makes it easier to shape.
If your clay feels slightly stiff, follow the manufacturer’s instructions for conditioning it. Avoid pouring in too much water because overly wet clay can become sticky and difficult to control.
Divide your clay into separate portions for:
- The base.
- The compartment walls.
- The connecting sections.
- Additional clay for reinforcing the joints.
Keep any clay you are not currently using covered with plastic wrap.
This is particularly important because air-dry clay begins losing moisture once exposed to the air.
Step 3: Create the Base of Your Holder

Roll out a portion of clay to create the base.
Aim for an even thickness of approximately 7–10 mm. Keeping the base reasonably consistent helps reduce uneven drying and structural problems.
For this particular design, I recommend an elongated oval or softly irregular base rather than a perfectly round one.
You can gently shape the edges with your fingers to create a natural handmade appearance.
Make sure the base is large enough to accommodate all three compartments without making them feel crowded.
Smooth the surface using slightly damp fingers or a soft sponge.
Before moving on, check that the base sits reasonably flat on your work surface. An uneven base can cause the finished holder to wobble.
Step 4: Build the First Compartment
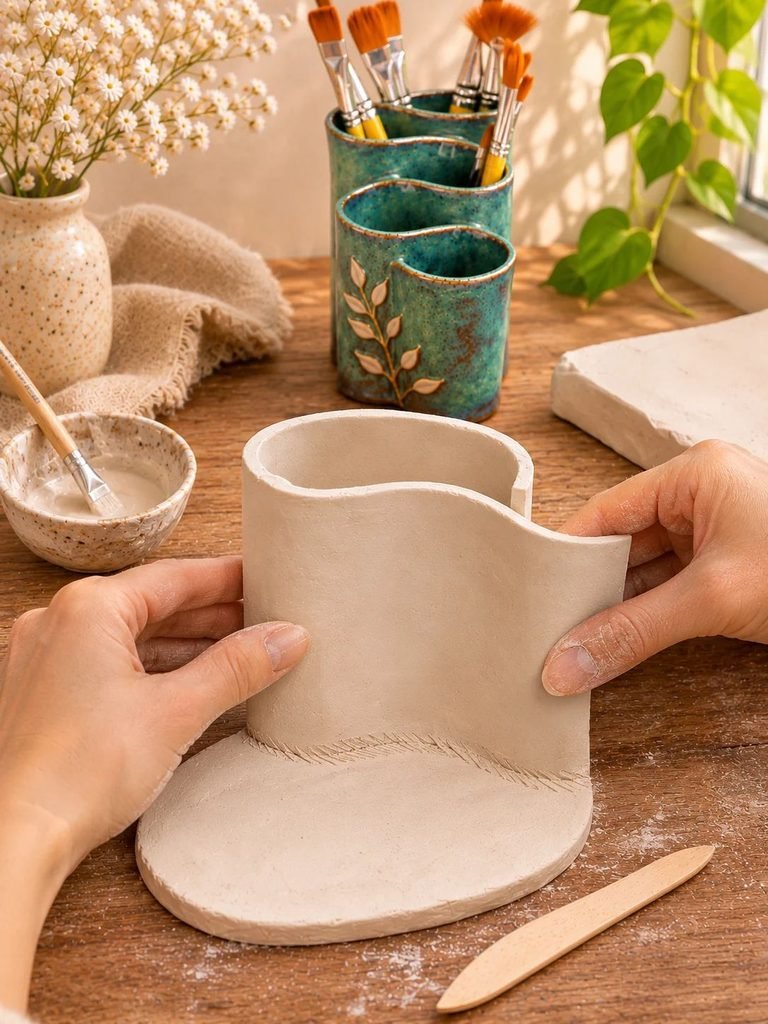
Start with the tallest compartment at the back.
Roll out a slab of clay with an even thickness of approximately 6–8 mm.
Cut a rectangular strip long enough to form a curved wall.
Gently bend the strip into a rounded or slightly oval shape. Do not force it into a perfect circle because the inspiration design has a more natural, organic silhouette.
To attach the wall to the base:
- Score the bottom edge of the clay wall using a sculpting tool.
- Score the area of the base where the wall will sit.
- Apply a small amount of clay slip to both surfaces.
- Position the wall carefully.
- Press the two surfaces together gently.
- Reinforce the inside joint with a thin coil of clay.
- Smooth the connection using your fingers or a suitable sculpting tool.
Clay slip and scoring help the separate pieces bond together.
Make sure the wall is secure before continuing.
Step 5: Create the Second Compartment

The second compartment should sit slightly in front of the first one.
Make it a little shorter and consider giving it a slightly wider opening.
Follow the same slab-building technique, shaping the wall into a soft curved form before attaching it.
The interesting thing about this design is that the compartments do not need to look identical.
In fact, slight differences in their shape and height help create the beautiful handmade appearance.
Position the second section so that it touches or slightly overlaps the visual outline of the first compartment.
Join it carefully using the scoring-and-slip technique.
Smooth the connection and check that the compartment walls remain upright.
Step 6: Add the Front Compartment
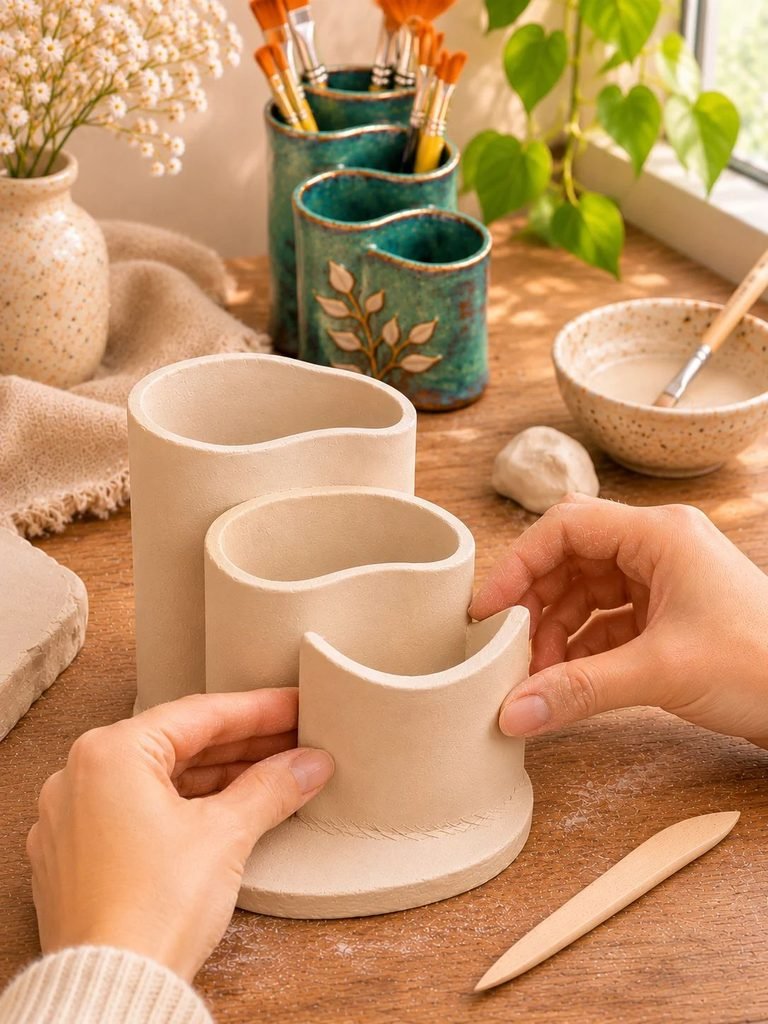
The front compartment is one of the most important parts of this design because it gives the holder its distinctive sculptural appearance.
Make this section shorter than the other two.
Instead of creating a simple circular opening, gently shape the upper edge into a flowing wave.
You can achieve this by carefully adjusting the height of the clay wall as you shape it.
Try making one side slightly higher than the other, then allow the rim to dip gently before rising again.
For an attractive result:
- Keep the curves soft and natural.
- Avoid making the waves too sharp.
- Maintain a reasonably even wall thickness.
- Smooth any rough or uneven edges.
- Make sure the opening is large enough for your smaller brushes.
Attach the front compartment to the base and carefully reinforce its joints.
Take your time with this step because the sculptural front edge is what makes the finished holder look special.
Step 7: Refine the Wavy Shape
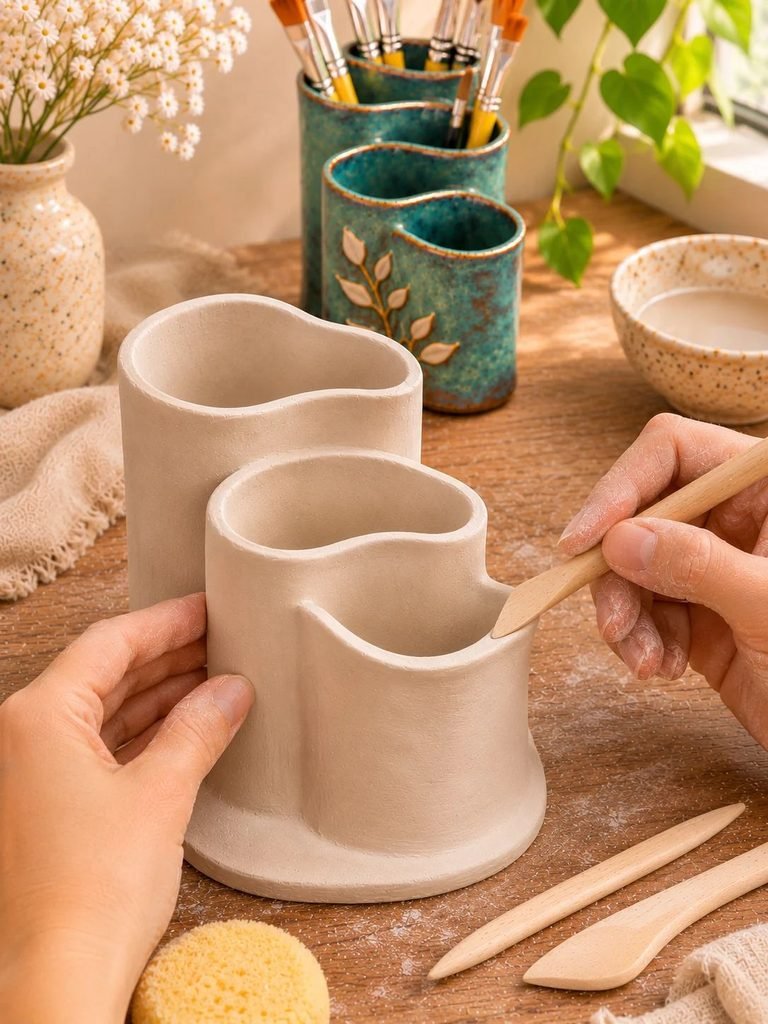
Once all three compartments are attached, step back and look at the overall shape.
This is your opportunity to refine the design.
Gently adjust the edges until the compartments flow together naturally.
You can use a wooden sculpting tool to smooth the joins and remove any unwanted marks.
If you notice small gaps between the sections, fill them with a little clay slip and fresh clay.
Do not make the walls too thin while smoothing them. Thin areas can become fragile, especially when the clay dries.
I also recommend checking the inside of each compartment. Since the holder will store paintbrushes, you want the openings to be smooth enough that brushes can be inserted and removed easily.
Step 8: Smooth the Entire Surface
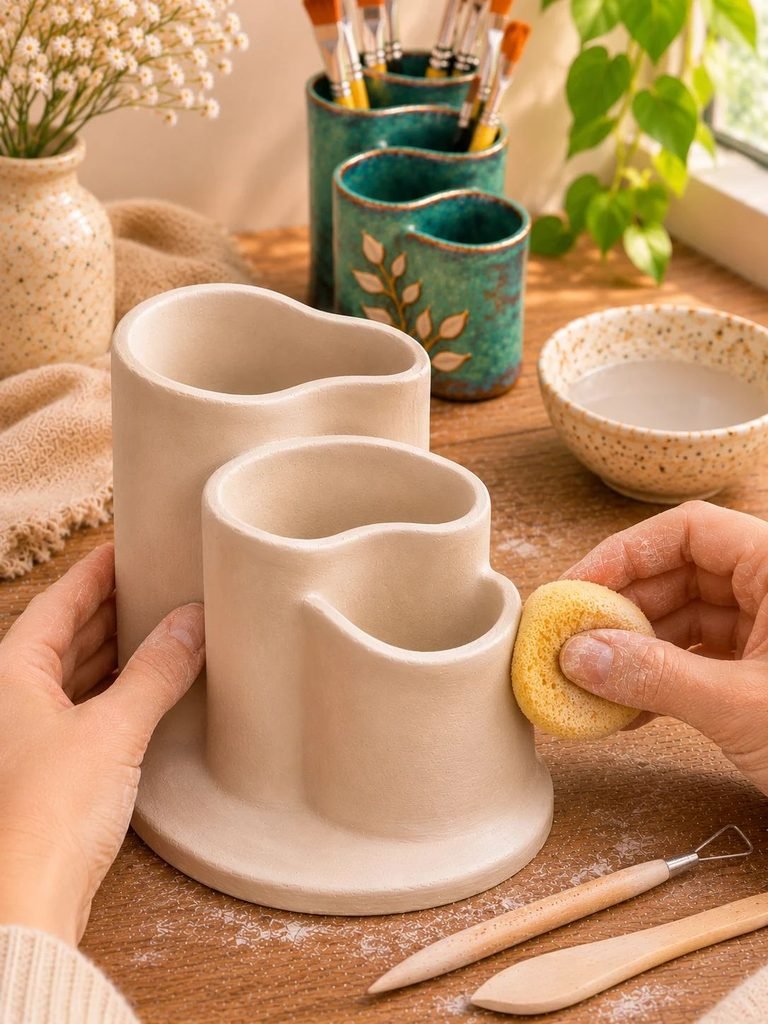
This step can make a big difference to the final appearance.
Use a soft sponge or slightly damp fingers to smooth the outside walls, inside surfaces, and edges.
Work gently, paying particular attention to the joins between the compartments.
If you want to recreate the textured appearance of the inspiration image, you do not need to make everything perfectly smooth.
A little natural texture can make the finished piece feel more handmade.
However, remove any loose clay pieces, sharp edges, or large imperfections.
Once you are happy with the shape, leave the holder undisturbed in a cool, well-ventilated area.
Step 9: Allow the Clay to Dry Completely
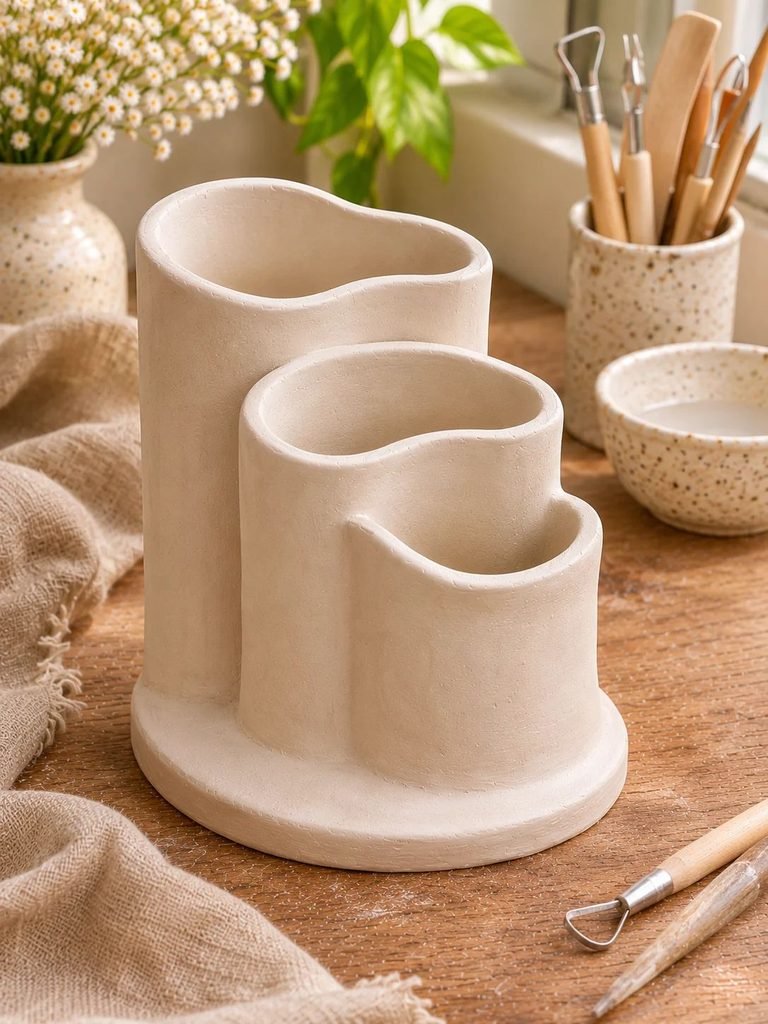
Drying is one of the most important parts of this project.
Air-dry clay needs enough time to lose moisture evenly throughout the entire structure.
Because this holder has several connected walls and a relatively thick base, it may take longer to dry than a small flat clay decoration.
Depending on the clay brand, thickness, and surrounding conditions, drying can take several days.
Here are some helpful tips:
- Keep the holder away from direct sunlight.
- Avoid placing it near heaters or strong heat sources.
- Allow air to circulate around the piece.
- Turn or reposition it carefully when the base and structure are firm enough.
- Do not rush the drying process.
If the outside dries much faster than the inside, cracks may develop.
Always follow the drying recommendations provided by your clay manufacturer.
Step 10: Sand and Refine the Dried Surface

Once the clay is completely dry, inspect the entire holder.
Look for rough areas, small bumps, and uneven edges.
Use fine-grit sandpaper to gently smooth any imperfections.
Pay special attention to the upper rims because these areas are highly visible.
Avoid sanding too aggressively, especially around the connecting sections.
If you create clay dust, work in a well-ventilated area and wear suitable respiratory protection. Do not blow the dust into the air.
After sanding, remove loose dust using a soft, dry brush or cloth.
Your holder should now have a clean, refined shape that is ready for decorating.
How to Give Your Clay Paintbrush Holder a Beautiful Ceramic Finish
One of my favorite things about this project is choosing the final color.
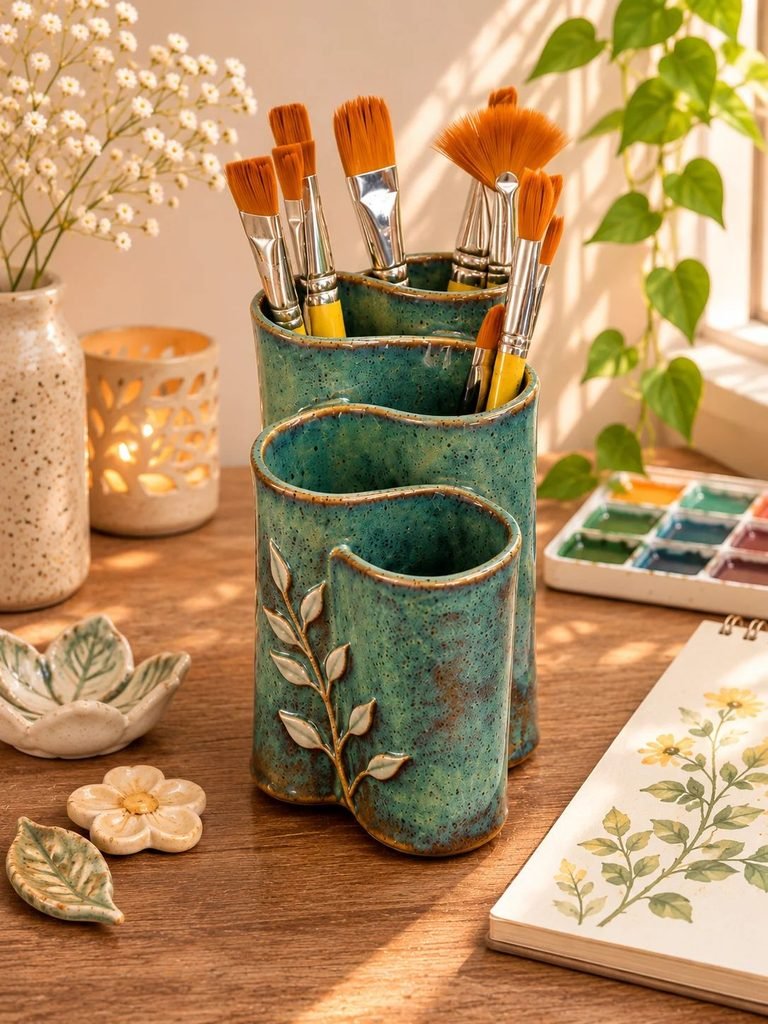
The inspiration image has a gorgeous deep teal-green finish with darker speckles and subtle earthy edges. It gives the holder a traditional handmade pottery appearance.
You can recreate a similar decorative look using acrylic paints.
Step 11: Apply Your Base Color
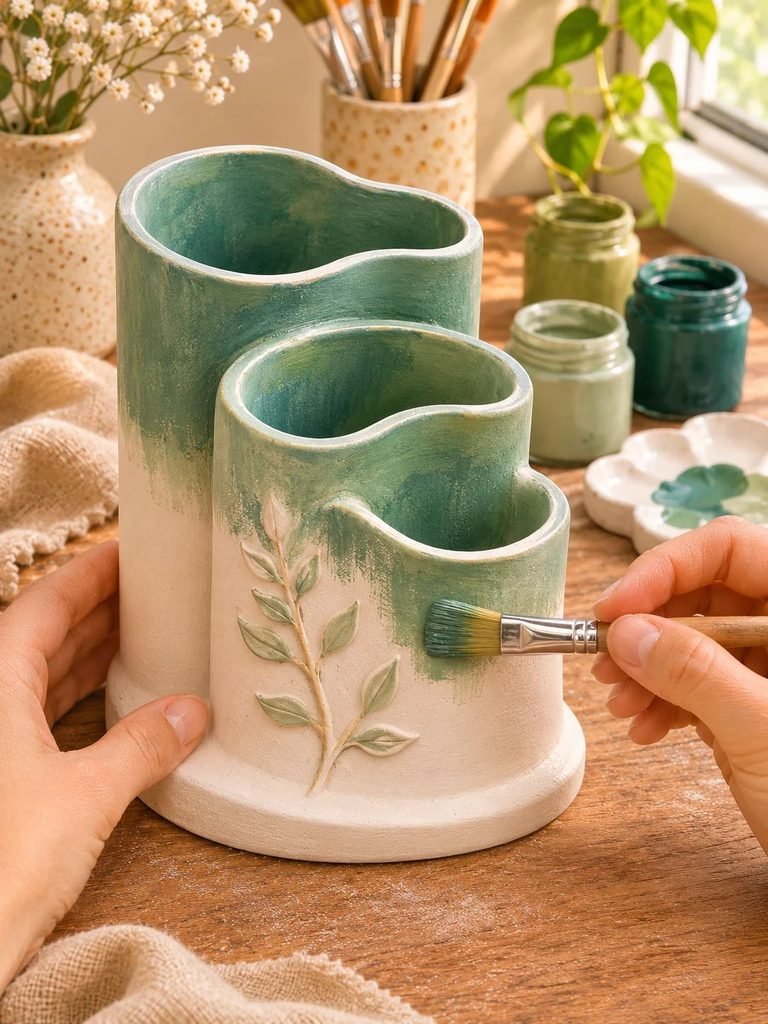
Choose an acrylic paint color that complements your workspace.
For a look inspired by the reference image, try mixing:
- Deep teal.
- Muted blue-green.
- A little forest green.
- A small amount of dark brown for depth.
Start by applying a thin, even coat of paint over the outside of the holder.
Use a smaller brush around the curved compartments and a larger brush for the wider surfaces.
Allow the first coat to dry before applying another.
Depending on the paint coverage, you may need two or three thin coats to achieve an even finish.
Step 12: Create a Speckled Pottery Effect
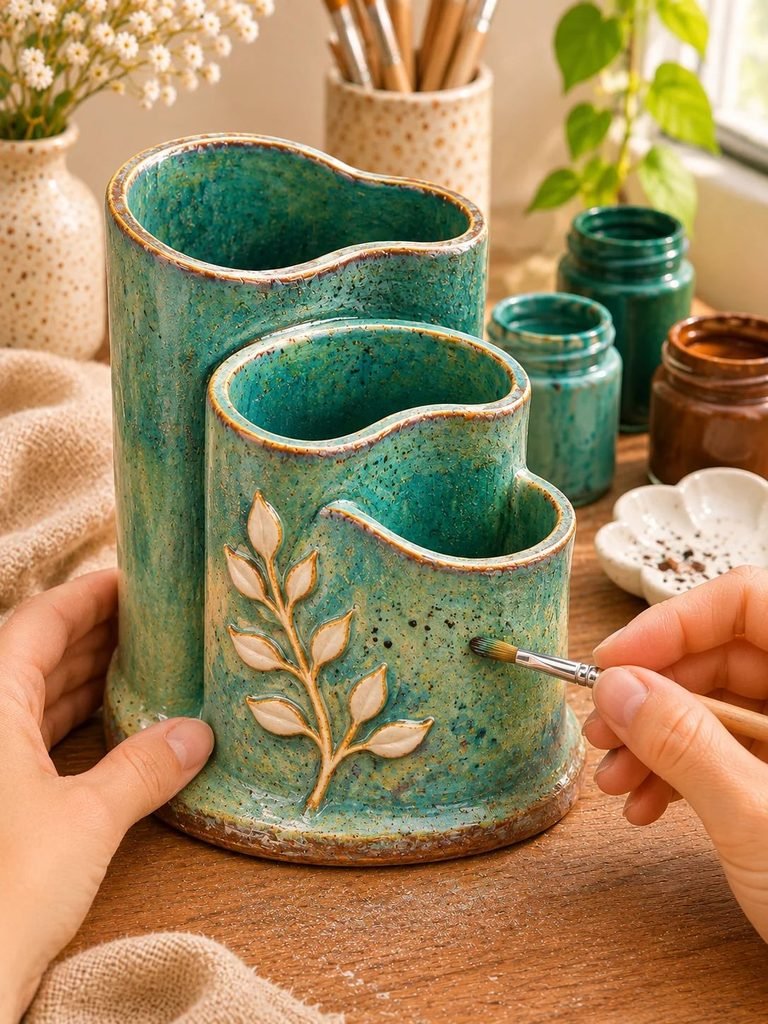
The beautiful speckled appearance is one of the details that makes the inspiration design so attractive.
Fortunately, you can create a similar decorative effect without using actual ceramic glaze.
Choose a slightly darker shade of teal, brown, or charcoal.
Dip a small stiff brush into the paint, remove excess paint, and gently flick the bristles over the surface.
This creates tiny scattered dots.
You can also use a small sponge to add subtle variations in color.
For a natural pottery-inspired appearance:
- Start with your main teal base.
- Add small patches of a darker green.
- Introduce a few subtle brown speckles.
- Allow the colors to blend softly.
- Avoid making the pattern too uniform.
The goal is to create a slightly imperfect, handmade finish.
Step 13: Add Subtle Rustic Details
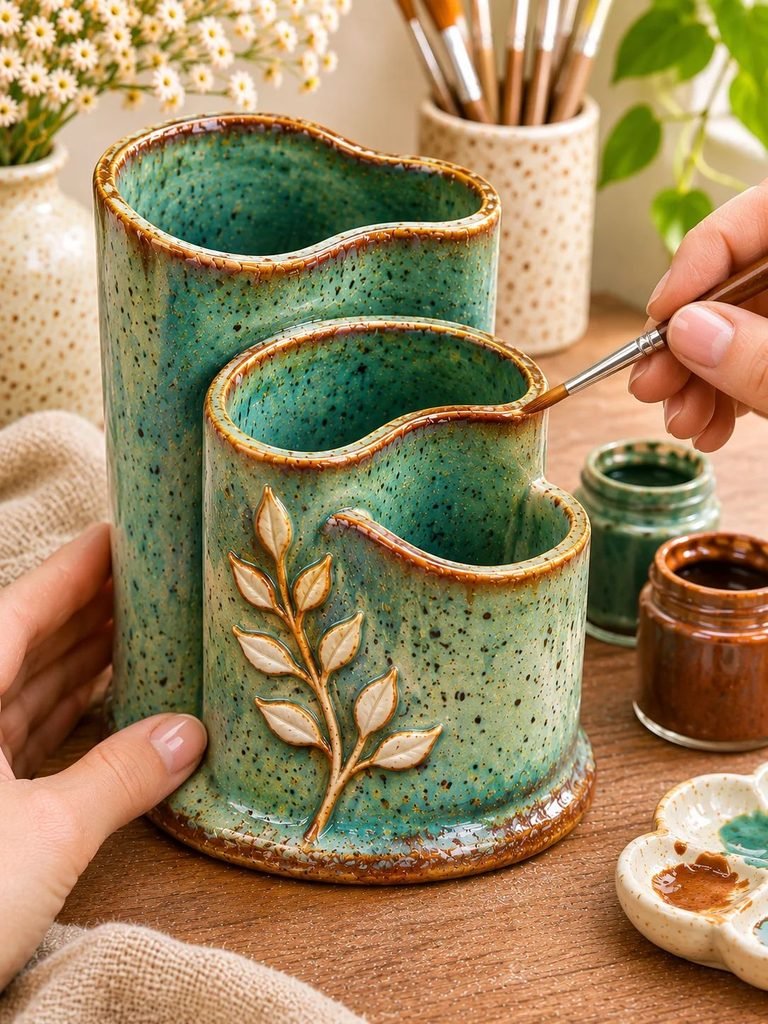
For a more sophisticated look, consider adding a little darker paint around selected edges.
Use a small brush to lightly apply a warm brown shade along the rims and lower edges.
Do not cover the entire surface.
A few carefully placed details can create the appearance of an aged, earthy pottery finish.
You can also leave the inside of the compartments slightly darker than the outside for extra visual depth.
Step 14: Seal the Finished Piece
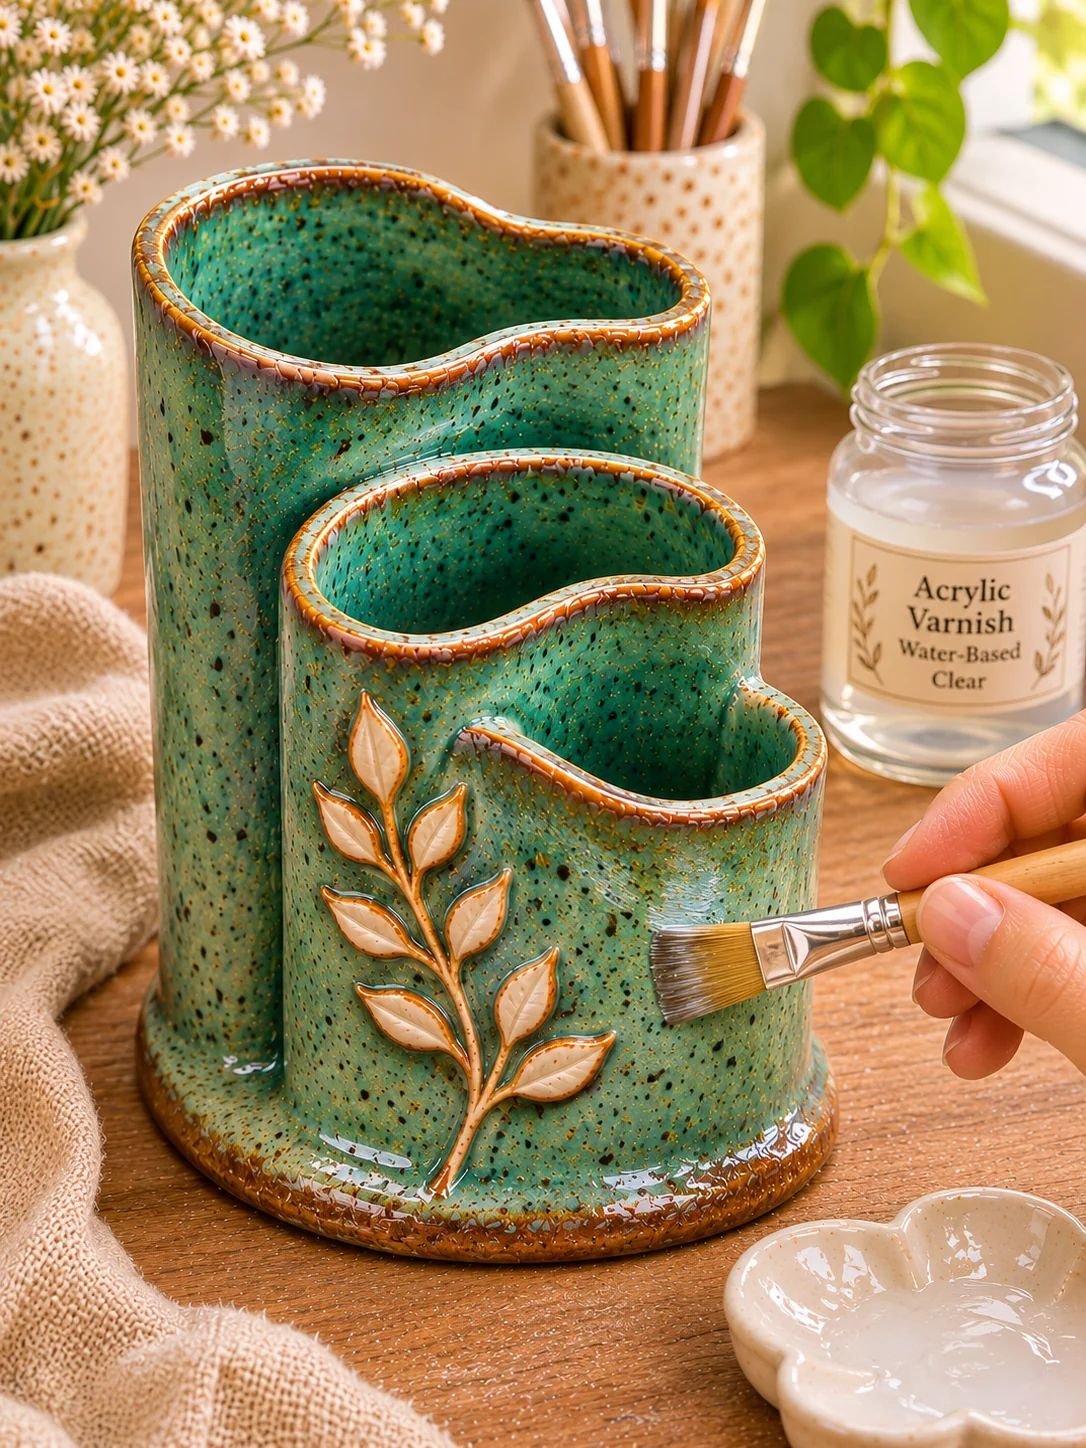
Once the paint has dried completely, apply a compatible water-based acrylic varnish according to the manufacturer’s instructions.
You can choose between matte, satin, and gloss finishes.
For this particular design, I would choose a satin finish because it gives the piece a subtle sheen without making it look overly shiny.
Remember that varnish does not turn ordinary air-dry clay into waterproof ceramic.
Keep the finished organizer dry, and do not use it for holding water or wet brushes.
Styling Your Finished Clay Paintbrush Holder
Once your holder is completely dry and finished, it is time to find the perfect place for it.
I love how a handmade clay organizer can become part of the decoration rather than simply being another storage container.
Here are a few lovely ways to style it.
On a wooden crafting table
A warm wooden surface works beautifully with teal, sage green, terracotta, and cream clay finishes.
Add a small sketchbook, a few paint tubes, and your favorite brushes for a cozy creative setup.
Beside your painting supplies
Place your holder near your watercolor palette, acrylic paints, or drawing materials.
Having your brushes organized in one place makes it easier to find what you need.
On a creative desk
If you enjoy journaling, illustration, or other creative hobbies, this holder can make your workspace feel more organized and inviting.
As part of a handmade gift collection
You can pair the finished holder with a sketchbook, a set of paintbrushes, and a small selection of paints to create a thoughtful gift.
Creative Ways to Customize Your Clay Brush Holder
One of the nicest things about working with clay is that you can change almost every part of the design.
Here are a few variations worth trying.
1. Sage Green Botanical Holder
Choose a muted sage-green finish and add tiny botanical impressions around the outside.
This is perfect for anyone who loves natural, cottage-inspired decor.
2. Minimalist Cream Brush Organizer
Use warm ivory or creamy beige paint and keep the surface simple.
This version looks beautiful in a neutral workspace.
3. Rustic Terracotta Holder
Choose a warm terracotta shade and add subtle brown details.
The finished piece will have a lovely earthy appearance.
4. Soft Blue Sculptural Holder
A muted dusty blue or blue-green finish gives the organizer a calm, elegant look.
You can keep the surface smooth or add delicate speckles.
5. Floral Decorative Holder
Use small clay flowers, leaves, or other botanical details to decorate the outside.
Keep the decorations relatively small so they do not interfere with the compartments.
Common Mistakes to Avoid When Making a Clay Paintbrush Holder
Although this is a fairly simple hand-building project, there are a few mistakes that can affect the final result.
Here is what to watch out for.
Making the walls too thin
Thin clay walls can become fragile, especially around the curves and connecting sections.
Try to maintain an even thickness throughout the structure.
Adding too much water
Excess water can weaken the clay and make the walls difficult to support.
Use only the amount recommended by your clay manufacturer.
Not joining the compartments properly
Simply pressing two pieces of clay together may not create a strong connection.
Score both surfaces and use suitable clay slip before joining them.
Drying the holder too quickly
Rapid drying can increase the risk of cracking and warping.
Allow your piece to dry slowly and evenly.
Making the compartments too small
Think about the actual brushes you intend to store before deciding on the measurements.
Leave enough room for brush handles to sit comfortably.
Applying paint before the clay is completely dry
Painting damp air-dry clay can trap moisture and affect the finish.
Always allow the clay to dry fully before decorating.
Using the holder for wet brushes
An acrylic-painted air-dry clay organizer is not a waterproof ceramic vessel.
Allow brushes to dry before placing them inside, and keep the holder away from standing water.
How to Care for Your Handmade Clay Paintbrush Holder
Once your project is finished, a little care will help it remain beautiful for longer.
Here are my recommendations:
- Keep it in a dry location.
- Avoid soaking or washing it under running water.
- Remove dust using a soft, dry cloth.
- Do not place heavy objects inside the compartments.
- Avoid dropping the holder because air-dry clay can break.
- Keep it away from excessive humidity.
- Check the finish occasionally for scratches or peeling.
If the holder becomes dusty, gently clean the surface with a dry, soft brush.
Avoid using harsh cleaning products because they may damage the painted finish.
Frequently Asked Questions
1. Can beginners make a clay paintbrush holder?
Absolutely! Beginners can make this project using basic hand-building techniques. You do not need a pottery wheel or previous pottery experience. Start with a simple three-compartment design and gradually experiment with more complicated shapes.
2. Can I make this paintbrush holder with air-dry clay?
Yes. Air-dry clay is suitable for making a decorative paintbrush organizer. However, it is not waterproof, so the finished piece should be used for storing dry brushes only.
3. How long does it take for the clay holder to dry?
Drying time depends on the clay brand, thickness, and environmental conditions. A multi-compartment holder may need several days to dry completely. Always follow the manufacturer’s instructions and make sure the inside is fully dry before painting.
4. Can I make the holder without a pottery wheel?
Yes! This design is made using hand-building techniques. You can roll out clay slabs, shape them into curved walls, and join the sections together without a pottery wheel.
5. What is the best paint to use on air-dry clay?
Acrylic paint is a popular choice because it provides good coverage and comes in many beautiful colors. Apply it only after the clay has dried completely.
6. Can I make the holder waterproof?
Ordinary air-dry clay cannot be made reliably waterproof simply by adding acrylic varnish or sealer. If you need a holder that can safely contain water, use suitable ceramic clay, kiln firing, and an appropriate glaze.
7. Can I use polymer clay instead?
Polymer clay can be used for certain decorative clay organizers, but you need to follow the manufacturer’s baking instructions and consider the size, weight, and structural stability of your design. A large multi-compartment holder may be better suited to a suitable ceramic clay or air-dry clay construction.
8. What can I store inside the holder besides paintbrushes?
You can use it to organize pencils, colored pencils, drawing tools, thin craft tools, paint markers, and other lightweight supplies. Just make sure the compartments are appropriately sized.
Final Thoughts
I absolutely love how this DIY clay paintbrush holder combines creativity, organization, and beautiful handmade details in one project. Its flowing compartments and organic shape make it feel more like a little piece of pottery than an ordinary desk organizer.
What makes this project even more special is how easily you can make it your own. You can experiment with different compartment sizes, soft earthy colors, speckled finishes, and decorative details until you create something that feels just right for your workspace.
Whether you are making one for your own craft table or creating a thoughtful handmade gift for someone who loves painting, this is a lovely project to add to your clay craft collection.
Take your time, enjoy the process, and do not worry about making every curve perfectly symmetrical. Sometimes, those little handmade imperfections are exactly what make a clay project beautiful.